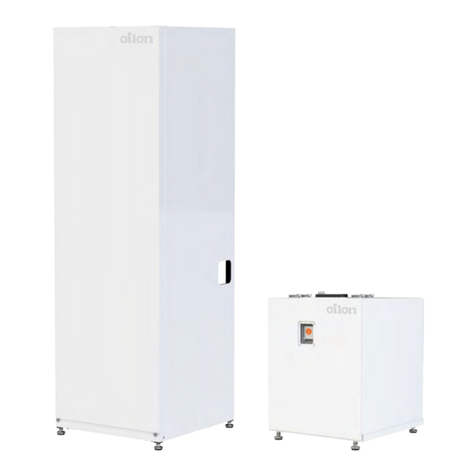
Oilon EasyAce User manual

M8004 2123EN
10 June 2021
Installation and operation manual
EasyAce
EasyAce
User Manual


Contents
1 Introduction
1.1 EasyAce heat pumps..................................................................................3
1.2 Instructions and diagrams...........................................................................3
2 Home view
2.1 Home view – Overview...............................................................................4
2.2 Heating........................................................................................................ 5
2.3 Domestic hot water and the boost function................................................ 7
2.4 Home or Away function and Schedules..................................................... 8
3 Settings and status information
3.1 Status view – Overview............................................................................ 13
3.2 Settings menus......................................................................................... 13
3.3 Heating...................................................................................................... 14
3.4 Domestic hot water................................................................................... 17
3.5 Other settings............................................................................................18
4 Service settings
4.1 Signing in as a service level user............................................................ 20
4.2 Service settings.........................................................................................20
5 Trends
5.1 Trends view – Overview........................................................................... 30
6 Troubleshooting
6.1 Alarms and alarm history..........................................................................31
M8004 2123EN 1 (31)

2 (31) M8004 2123EN

1 Introduction
1.1 EasyAce heat pumps
EasyAce heat pumps feature wireless connectivity, allowing you to manage and
monitor your heat pump both locally and remotely. In addition to the wireless touch
screen provided with the heat pump, you can connect to the EasyAce system by
downloading the simple-to use EasyAce app to your mobile device.
This manual provides comprehensive instructions for how to use your heat pump. The
instructions for setting up an EasyAce connection are provided as a separate guide.
Use the wireless touch screen provided with the unit only for operating
the unit’s automation system. Using the touch screen for any other
purpose may cause slowdowns or interference in the use of the unit’s
automation system, or prevent the system from being used altogether.
1.2 Instructions and diagrams
Document Designation
EasyAce
Quick guide
M8007
EasyAce
Installation and initial setup
M8005
EasyAce
User manual
M8004
M8004 2123EN 3 (31)

2 Home view
2.1 Home view – Overview
1 App settings
2 Home view
3Settings and
status view
4 Trends
5Outdoor
temperature
6
Selected heating
circuit’s flow water
temperature
7Estimated power
consumption
8Domestic hot
water boost
9 Schedules
10 Heat pump status
EasyAce Home view ver. 2
11
Contextual
setting (Room
temperature,
Increase or
decrease).
● Tap to access
the relevant
setting.
12
Selected heating
circuit.
Tap to open
circuit selection.
13 Estimated heating
capacity
14
Domestic hot
water tank
temperature
15 Home or Away
function.
Color codes for operating modes
Operating mode Color
Reduced Green
Normal Grey
Boost Red
4 (31) M8004 2123EN

Icons used in the Home view
Space heating Domestic hot water heating The unit is on standby
and ready to start
In-line heater on Increase or decrease heating Error condition
In case of an error, check the alarms by tapping the Error icon. If
necessary, contact a repair service or Oilon customer services.
2.2 Heating
Heating circuits and their temperature
To change the heating circuit displayed in the Home
view, tap the circuit’s number.
● In the figure, Circuit 2 is has been selected.
The Heating circuit window appears. Select
another circuit and tap OK.
● In the figure, Circuit 1 has been selected. The
window shows the circuits that were enabled
during the heat pump’s installation.
Circuit 1 is now displayed in the Home view. If the heating circuit has no room temperature
measurement available, the display shows the icon
for increasing and decreasing heating (see sub-
section Increase or decrease heating).
M8004 2123EN 5 (31)

If the heating circuit’s flow temperature
measurement is enabled, the flow water
temperature is displayed next to the circuit number.
● In the figure, flow water temperature is 32°C.
If the heating circuit’s room temperature
measurement is enabled, the relevant room
temperature is displayed instead.
● In the figure, room temperature is 22°C.
Increase or decrease heating
The Home view includes an icon for increasing or decreasing heating in the selected
circuit.
This icon will not be displayed, if the circuit has no room temperature measurement
available (or room temperature optimization has been disabled). A positive value will
increase room temperature, and a negative value will decrease the temperature.
As changes in room temperature are slow, you should change this setting by one or
two degrees at a time. Wait for one or two days for the change to become noticeable.
The increase or decrease heating setting changes the circuit’s heating curve by moving
each of the curve’s points up or down by the selected value. In practice, this has the
same effect as parallel displacement of the curve. If you change the curve manually,
the increase or decrease in heating will be reset.
Use cases
Too cold → Increase heating (+)
Too hot → Decrease heating (–)
Radiator heating, guideline values Floor heating, guideline values
Room temperature +1°C → Increase by 6 (+6)
Room temperature −1 °C → Decrease by 6 (−6)
Room temperature +1 °C → Increase by 3 (+3)
Room temperature −1 °C → Decrease by 3 (−3)
6 (31) M8004 2123EN

1. To change the setting, tap the icon in the middle
of the house.The change will apply only to the
selected heating circuit.
● In the figure, Circuit 1 has been selected.
2. Increase or decrease the setting, and tap OK.
● In the figure, an increase of +2°C has been
made.
Room temperature
The selected circuit’s room temperature setting will be displayed in the Home view,
if the selected heating circuit has room temperature measurement available. If room
temperature optimization is also enabled, you can change the Room temperature
setpoint (target value). This setting will change the circuit’s flow water temperature.
1. To change the temperature setting, tap the
temperature value in the middle of the house icon.
● The change will apply only to the selected
heating circuit.
2. Change the setting, and tap OK. In the figure, the
target temperature value has been set to +22°C.
● To only check the setting, simply open the
setting window but leave the setting unaltered.
If room temperature optimization is disabled (see
section Heating), the Increase or decrease heating
option will be displayed instead (see sub-section
Increase or decrease heating).
2.3 Domestic hot water and the boost function
The domestic hot water boost function will raise the domestic hot water temperature
to a predefined target temperature and keep it there for the specified time. The boost
function increases the supply of domestic hot water. Once the set time has elapsed,
the target temperature will return back to its original level.
M8004 2123EN 7 (31)

The value at the top of the water drop indicates the
domestic hot water tank’s measured temperature.
1. To activate the domestic hot water boost function,
tap the thermometer icon.
2. Change the setting, and tap OK.
● In the figure, hot water heating will be boosted
for two hours.
To check the remaining time, tap the boost function
icon. Here, the remaining time is one hour.
● Exit the setting window by tapping Cancel.
To stop the boost function before this time has
elapsed, set the time at 0 hours and tap OK.
When the boost function is active, the domestic hot
water icon will be marked with a red circle.
2.4 Home or Away function and Schedules
There are three operating modes for space heating and domestic hot water heating:
Normal, Boost, and Reduced.
8 (31) M8004 2123EN

The Home/Away function allows you to select between the Normal mode and the
Reduced mode. With the Schedule function, you can schedule the system to switch
between the Normal and the Reduced mode on different weekdays and at different
times.
You can change the settings for each operating mode from Settings (see chapter
Settings and status information).
Color codes for operating modes
Operating mode Color
Reduced Green
Normal Grey
Boost Red
The Home or Away function
Home Away
The normal settings selected for the schedule apply.
If no schedule has been set, the unit will operate in
Normal mode.
Space heating and domestic water heating operate
in Reduced mode. Schedules are disabled.
1. To change the setting, tap the house icon. 2. Select either Home or Away, and tap OK. In the
figure, Away has been selected.
Schedules
To access the schedule, tap the calendar icon in the Home view.
The schedule can also be accessed from the heating circuit or domestic hot water
settings (see chapter Settings and status information).
To create a schedule, add a new item in the schedule and select which mode is
enabled at that point in time. To add a new item, press and hold a time slot in the
schedule. To edit or remove an item, press and hold the item.
If there are no items in the schedule, the system will operate in Normal mode.
M8004 2123EN 9 (31)

Color codes for operating modes
Operating mode Color
Reduced Green
Normal Grey
Boost Red
Scheduling an event
1. Select the schedule for the heating circuit or
domestic hot water.
● In the figure, domestic hot water has been
selected.
2. Press and hold the desired time slot in the
schedule.
● In the image, Friday at 16:00 has been
selected.
3. Select the operating mode, and tap OK.
● In the figure, Boost has been selected.
Domestic hot water heating will now be boosted
starting from Friday at 16:00 until midnight.
10 (31) M8004 2123EN

4. To specify an end time for the scheduled event,
press and hold another time slot within the same
day.
● In the figure, the 22:00 slot has been selected.
5. Select the operating mode for the new slot, and
tap OK.
● In the figure, Normal has been selected.
Domestic hot water heating will now be boosted
between 16:00 and 22:00
6. To save the settings and finish the process, tap
Save.
● Days with unsaved schedule items are
highlighted in orange.
To discard the changes, tap the Cancel button in
the upper edge of the screen.
● Note that once the Cancel button is pressed,
the schedule will revert to the previously saved
version.
M8004 2123EN 11 (31)

Editing or deleting a scheduled event
1. Press and hold the item you wish to edit or delete.
● In the figure below, the 22:00 item was
selected.
2. Select a new operating mode, or select Remove
this point.
● In the image below, the Remove this point
option has been selected.
3. Confirm by pressing OK.
● The item scheduled for 22:00 has now been
removed. You can now remove the second item
(the end time) in the same way.
4. Finish by saving the changes.
12 (31) M8004 2123EN

3 Settings and status information
3.1 Status view – Overview
1 Heat pump status
2
2. Space heating,
flow and return
temperature
3
3. Domestic hot
water tank, heating
water temperature
4
Brine circuit,
flow and return
temperature
5
Estimated
performance
and power
consumption
6
Space heating,
target for flow
temperature
7
Domestic hot
water tank,
measured
temperature and
target temperature
8Brine circuit pump
speed
3.2 Settings menus
Settings can be accessed from anywhere regardless of the current view.
1. Open the main menu from the top left corner or
by swiping right from the left edge of the screen.
2. From the menu, select Device settings.
M8004 2123EN 13 (31)

Alternatively, tap the middle tab. From the bottom of
the page, select Device settings.
● To directly access heating or domestic hot
water settings and status information, tap the
relevant heading.
3. You can use the Device settings menu to access
any device settings you need.
3.3 Heating
If room temperature optimization is not in use, this view will indicate how different
operating modes will influence the flow water temperature (which is determined by the
heating curve).
If a direct connection is used, the heating water return temperature (condenser in)
will also be displayed. In a direct connection configuration, the heat pump heats the
heating circuit directly, which means that there is no buffer tank in the heating circuit.
Heating circuit views
1 Heating curve
2Current operating
mode
3
Circuit flow
temperature and
target temperature
4Schedule for
operating modes
5 Settings
6
The impact of
different operating
modes
7
Heating circuit
pump speed (if the
circuit has its own
pump).
14 (31) M8004 2123EN

If room temperature optimization is enabled, the view will show the current room
temperature as well as the room temperature target values for each operating mode.
1 Heating curve
2Current operating
mode
3
Circuit flow
temperature and
target temperature
4
Heating circuit
pump speed (if the
circuit has its own
pump)
5Schedule for
operating modes
6 Settings
7
The impact of
different operating
modes
8 Room temperature
DEVICE SETTINGS → HEATING CIRCUITS
STATUS VIEW → HEATING
Heating curve See sub-section Heating curve.
The impact of
different operating
modes
See sub-section The impact of different operating modes.
Schedule for
operating modes
See section Home or Away function and Schedules.
HEATING CIRCUIT 1 → SETTINGS
Stop heating
temperature
(summer break)
Heating will be stopped, when the long-term outdoor temperature average is higher
than this temperature. Heating will resume, when the long-term outdoor temperature
average is lower than this temperature.
● In most cases, the value should be set slightly below the desired room
temperature.
● Usually, the value should be set to +10...+15°C.
Outdoor
temperature, avg.
An automatically calculated long-term outdoor temperature average.
Max flow
temperature*
The maximum flow temperature when the outdoor temperature matches the
Design outdoor temperature setting. The system will keep the flow temperature
determined by the heating curve below this temperature value.
● For floor heating, the maximum flow temperature setpoint is usually around
35°C (concrete floors) or 45°C (wooden floors).
● Check the temperature value from the floor or floor heating supplier (or from the
applicable plans and specifications).
Min flow
temperature
The system will keep the flow temperature determined by the heating curve above
this temperature value.
In most cases, the minimum flow temperature should be set at or slightly above the
required room temperature. Usually, the value should be set to +20...+25°C.
*It is not advisable to use the heat pump to cure floor structures. If curing floors:
● Keep the temperature considerably lower than usual (typically no more than 20 °C) before the
concrete slab has cured and after the floor has been tiled.
● Increase the temperature gradually over a longer period of time.
● Keep the temperature as even as possible.
● Check the temperature values and curing times from the floor or floor heating supplier (or from plans
and specifications).
M8004 2123EN 15 (31)

Device settings → Heating Circuit 1 → Settings → Room temperature
Temperature optimization adjusts the flow water temperature value (determined by the heating curve)
based on room temperature measurements and a setpoint. An indoor temperature sensor is required, and
the heat pump’s automation must be able to control the indoor temperature
● In floor heating systems, this can be achieved only if the system’s heating manifold does not feature
its own independent zone control.
● In radiator heating systems, the heat pump will be able to control the indoor temperature as long as
radiator valves (thermostat or precontroller) do not limit radiator flow.
OFF
Temperature optimization is not in use.
Temperature
optimization Used
Temperature optimization is enabled.
Gain factor
The unit’s controller adjusts the flow temperature (determined by the heating curve)
based on the measured indoor temperature. The greater the gain factor, the greater
the change.
● Wait for at least two or three days to see if the change has made a difference,
then readjust accordingly.
The settings for Circuit 2 and 3 are identical to Circuit 1 settings.
Heating curve
The heating curve indicates the temperature of flow water pumped into the heating
circuit at different outdoor temperature points. Usually, the installation company takes
care of heating curve configuration. Curve values should be tuned in during the first few
heating seasons.
The flow water temperature can be adjusted using a six-point heating curve.
An example of typical adjustments
1. If the room temperature is too cold when the outdoor temperature is 0°C, slightly increase the flow
water setpoint at outdoor temperature points −2°C and +8°C.
2. Wait for at least two or three days to see if the change has made a difference.
3. Adjust the curve if necessary.
The impact of different operating modes
There are three operating modes for space heating: Normal, Boost, and Reduced
(see section Home or Away function and Schedules).
The Home/Away function allows you to select between the Normal mode and the
Reduced mode. With the Schedule function, you can schedule the system to switch
between the Normal and the Reduced mode on different weekdays and at different
times.
No room temperature measurement available or
temperature optimization disabled
Room temperature measurement active and
temperature optimization enabled
16 (31) M8004 2123EN

If room temperature optimization is disabled, the selected operating mode will either
increase (+) or decrease (–) the target temperature of flow water (determined based on
the heating curve) by the set temperature difference value. The setting for the Normal
operating mode is also shown in the Home view.
Wait for at least two or three days to see if the change has made a difference, then
adjust the values if necessary.
Radiator heating, guideline values Floor heating, guideline values
Room temperature +1°C → Increase by 6 (+6)
Room temperature −1 °C → Decrease by 6 (−6)
Room temperature +1 °C → Increase by 3 (+3)
Room temperature −1 °C → Decrease by 3 (−3)
For example, if the flow water temperature in the curve is +35 °C and the Reduced
setting is –3°C, the target temperature for flow water will be +32 °C.
If the system is equipped with an indoor temperature sensor and temperature
optimization is enabled, this setting will change the room temperature setpoint directly
instead. Correspondingly, changing the operating mode will directly increase or
decrease the room temperature setting. The room temperature setpoint changes the
flow water temperature through room temperature optimization.
Wait for at least two or three days to see if the change has made a difference, then
adjust the values if necessary.
3.4 Domestic hot water
Domestic hot water view
1Current operating
mode
2
Domestic hot water
tank’s heating
water flow and
return temperature
(condenser out and
condenser in)
3
Target temperature
for domestic hot
water tank and
condenser pump
speed
4 Settings
5
Target temperature
for each domestic
hot water tank
operating mode
6DHW storage tank
temperature
7Schedule for
operating modes
M8004 2123EN 17 (31)

Domestic hot water settings
DEVICE SETTINGS → HOT WATER
STATUS VIEW → HOT WATER
Setpoints for
operating modes
There are three operating modes for domestic hot water heating: Normal, Boost,
and Reduced.
The Home/Away function allows you to select between the Normal mode and the
Reduced mode. With the Schedule function, you can schedule the system to switch
between the Normal and the Reduced mode on different weekdays and at different
times.
● When the domestic hot water boost function is activated from the Home view,
the operating mode will switch to Boost (and the tank will be heated up to the
boost temperature).
● The Boost function can be used only if using the in-line heater for domestic hot
water heating has been enabled (i.e. the additional heater’s Mode for heating
setting is either After compressor or With compressor).
Schedule for
operating modes
See section Home or Away function and Schedules.
→ SETTINGS
Used
Domestic hot water heating is enabled.
Hot water heating Off
Domestic hot water heating is disabled.
SETTINGS → LEGIONELLA INHIBITION
This function heats up the domestic hot water to a high temperature to prevent bacterial growth.
Temperature is kept at a high level for a specific period of time (the clean-up period). To achieve sufficient
temperature levels, the domestic hot water in the tank can be heated up using both the compressor and
the unit’s electric immersion heater.
● If domestic hot water temperature remains mostly at or above +55 °C, this function is usually not
necessary.
● The boost function can be used only if using the electric immersion heater for heating domestic hot
water has been enabled (i.e. the additional heater’s Mode for heating setting is either Legionella
inhibition, After compressor or With compressor).
Off
Legionella inhibition is disabled.
Legionella inhibition Used
Legionella inhibition is enabled.
Time between starts
The interval between heating periods. This interval depends on the domestic hot
water temperature setting.
● If domestic hot water is usually kept only at a lukewarm temperature, use a
shorter interval.
● Usually, the interval should be set to 3–7 days.
Inhibit start time The time of day at which the function is activated. Select a time when domestic hot
water is not typically used, such as nighttime hours.
Time to next start The number of days (d) before the function is activated again.
3.5 Other settings
Device settings → Controller time
If the data hub is connected to the internet, the current time is retrieved automatically. If there is no
internet connection, set the time by hand.
Time zone The current time zone (UTC; 2h in Finland).
Day light saving No
The system does not adjust automatically for daylight saving time.
18 (31) M8004 2123EN
Other manuals for EasyAce
1
Table of contents
Other Oilon Heat Pump manuals
Popular Heat Pump manuals by other brands

Tivok
Tivok T-HP60AB Installation and operation manual

innovair
innovair Elite EIN13H2V32 manual

HKS lazar
HKS lazar HTi20 Installation & operation manual

Cornelius
Cornelius UC-40 Installation and service manual

Unitary products group
Unitary products group FF-07 installation manual

DeDietrich
DeDietrich ALEZIO S V200 user guide

Aquacal
Aquacal 100 Owner's manual and installation guide

Daikin
Daikin Altherma 3 H HT F installation manual

Lennox
Lennox HSXA16-024 installation instructions

Fujitsu
Fujitsu Waterstage WOYK150LJL installation manual

elco
elco AEROTOP T Series Planning Document

evoheat
evoheat EVO FLEX 10 Installation & operation manual