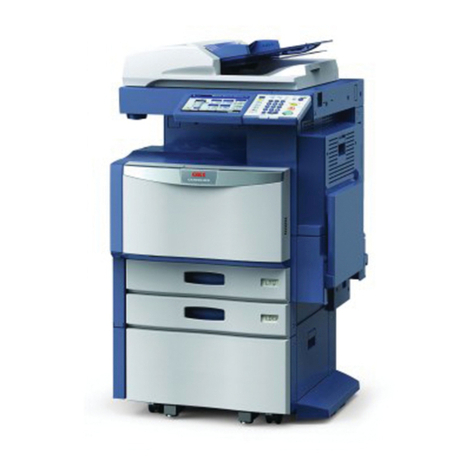
Oki CX 1145 MFP User manual

Operator's Manual for Basic Functions
CX1145 MFP
59315701, Rev. 1.0

2
CONTENTS
1. BEFORE USING EQUIPMENT...............................................................................................................6
1. Description of Each Component........................................................................................................7
• Main components ............................................................................................................................7
• Configuration of options...................................................................................................................8
• Control panel .................................................................................................................................11
• Adjustment of the angle of the control panel .................................................................................13
• Touch panel...................................................................................................................................15
2. Turning Power On / Shutdown.........................................................................................................19
• Turning power on...........................................................................................................................19
• When department or user management is used............................................................................20
• Turning power off (Shutdown) .......................................................................................................25
3. Energy Saving Mode........................................................................................................................28
4. Setting Copy Paper..........................................................................................................................29
• About the “width” and the “length” of the original and the copy paper...........................................29
• Acceptable copy paper..................................................................................................................30
• Setting copy paper (size change)..................................................................................................32
• Placing paper in the Large Capacity Feeder (optional) .................................................................37
• Drawer for special uses.................................................................................................................38
2. HOW TO MAKE COPIES......................................................................................................................42
1. Setting Originals...............................................................................................................................43
• Acceptable originals.......................................................................................................................43
• Placing originals on the glass........................................................................................................45
• Using the Reversing Automatic Document Feeder (optional)........................................................47
2. Making Copies.................................................................................................................................50
• Initial (Default) settings..................................................................................................................50
• Copying procedure ........................................................................................................................51
• Scanning the next originals during copying (Auto job start)...........................................................55
• Interrupt copying in progress and make other copies (Interrupt copying)......................................57
3. Bypass Copying...............................................................................................................................58
• Bypass copying..............................................................................................................................58
• Bypass copying on standard size paper........................................................................................59
• Bypass copying on non-standard size paper.................................................................................63
4. Proof Copy.......................................................................................................................................67
3. SETTING BASIC COPY MODES..........................................................................................................70
1. Paper Selection................................................................................................................................71
• Automatic Paper Selection (APS)..................................................................................................71
• Manual paper selection..................................................................................................................73
• Copying mixed-size originals in one go (mixed original size) .......................................................74
2. Switching Color Mode......................................................................................................................76
3. Enlargement and Reduction Copying..............................................................................................77
4. Selecting Finishing Modes...............................................................................................................83
• Type of finishing mode...................................................................................................................83
• Name of each part in the Finisher (optional)..................................................................................84
• Sort/Group copying........................................................................................................................85
• Rotate sort mode...........................................................................................................................87
• Staple sort mode............................................................................................................................88
• Magazine sort & saddle stitch mode (booklet mode).....................................................................90
• Hole punch mode (optional)...........................................................................................................93
• Manual stapling (MJ-1101 only).....................................................................................................95

3
CONTENTS (Cont.)
5. Duplex Copying................................................................................................................................97
6. Original Mode.................................................................................................................................106
7. Copy Density Adjustment...............................................................................................................108
4. IMAGE ADJUSTMENT .......................................................................................................................110
1. Color Balance (YMCK Adjustment)................................................................................................111
2. RGB Adjustment............................................................................................................................112
3. One-Touch Adjustment..................................................................................................................113
4. Background Adjustment.................................................................................................................114
5. Sharpness......................................................................................................................................115
6. Twin Color (2-Color) Copy.............................................................................................................116
5. USING THE EDITING FUNCTIONS....................................................................................................120
1. IMAGE SHIFT................................................................................................................................121
2. EDGE ERASE................................................................................................................................127
3. BOOK CENTER ERASE................................................................................................................129
4. DUAL PAGE ..................................................................................................................................131
5. 2IN1 / 4IN1.....................................................................................................................................133
6. MAGAZINE SORT.........................................................................................................................136
7. EDITING ........................................................................................................................................138
• Trimming / Masking .....................................................................................................................138
• Mirror image.................................................................................................................................141
• Negative/Positive reversal...........................................................................................................142
8. XY ZOOM ......................................................................................................................................143
9. COVER SHEET.............................................................................................................................145
10.SHEET INSERTION ......................................................................................................................148
11.TIME STAMP.................................................................................................................................151
12.PAGE NUMBER ............................................................................................................................152
13.JOB BUILD ....................................................................................................................................154
14.IMAGE DIRECTION.......................................................................................................................158
15.BOOK - TABLET............................................................................................................................160
16.ADF / SADF...................................................................................................................................161
6. e-FILING..............................................................................................................................................164
1. e-Filing...........................................................................................................................................165
2. Creating User Boxes......................................................................................................................167
3. Changing Data of User Boxes .......................................................................................................169
4. Deleting User Boxes......................................................................................................................172
5. Storing Documents in e-Filing........................................................................................................174
6. Printing Stored Documents............................................................................................................178
7. Deleting Folders or Documents .....................................................................................................183
8. Appendix........................................................................................................................................185
• Storing documents in the shared folder.......................................................................................185
7. TEMPLATE .........................................................................................................................................190
1. Template........................................................................................................................................191
2. Registering User Groups and Templates.......................................................................................193
3. Changing Data of User Groups and Templates.............................................................................205
4. Recalling Templates ......................................................................................................................213
5. Deleting User Groups or Templates ..............................................................................................218
8. JOB STATUS......................................................................................................................................222
1. Job Status......................................................................................................................................223
2. Confirming Print Job Status...........................................................................................................224
• Print jobs......................................................................................................................................225
• Proof print jobs.............................................................................................................................228
• Private print jobs..........................................................................................................................231
• When using department codes....................................................................................................234
3. Confirming Scan Job Status ..........................................................................................................237
4. Log List ..........................................................................................................................................238
• Confirming job history in log list...................................................................................................239
• Registering into address book from log lists................................................................................243
• Printing journals (send/receive log list)........................................................................................245
4
5. Print Status Display........................................................................................................................246
6. Error Code .....................................................................................................................................249
9. BLINKING GRAPHIC SYMBOLS ......................................................................................................260
1. Blinking Graphic Symbols..............................................................................................................261
2. Drawer Display on the Touch Panel ..............................................................................................262
3. Replace Toner Cartridge Symbol...................................................................................................263
4. Replace Toner Bag Symbol...........................................................................................................269
5. Jam Symbols .................................................................................................................................271
6. Call Service Symbol.......................................................................................................................291
10.WHEN THIS MESSAGE APPEARS...................................................................................................292
1. “Check staple cartridge”.................................................................................................................293
2. “Check staple cartridge in the Saddle Stitch Unit” .........................................................................297
3. “Examine stapler”...........................................................................................................................299
4. “READY (CHECK STAPLER)”.......................................................................................................303
5. “Examine stapler in the Saddle Stitch Unit” ..................................................................................304
6. “READY (CHECK SADDLE STITCH STAPLER)” .........................................................................307
7. “READY (HOLE PUNCH DUST BIN IS FULL)”.............................................................................308
8. “POWER FAILURE”.......................................................................................................................310
9. “Time for periodic maintenance”....................................................................................................311
10.“Check paper size setting on control panel for drawer N”..............................................................312
11.“Cannot print this paper size Select the other drawer”..................................................................319
12.“Reboot the machine” ....................................................................................................................320
11.MAINTENANCE..................................................................................................................................322
1. Daily Inspection..............................................................................................................................323
2. Simple Troubleshooting.................................................................................................................324
12.SPECIFICATIONS & OPTIONS .........................................................................................................328
1. OKI CX1145 MFP Specifications...................................................................................................329
2. Specifications of Options ...............................................................................................................332
3. Packing List....................................................................................................................................337
4. Copying Function Combination Matrix...........................................................................................338
• Combination Matrix 1/2................................................................................................................338
• Combination Matrix 2/2................................................................................................................339
5. Image Quality Adjustment Combination Matrix..............................................................................340

5
CONTENTS (Cont.)

6
1
1. BEFORE USING EQUIPMENT
1. Description of Each Component ............................................................................................7
• Main components................................................................................................................................7
• Configuration of options......................................................................................................................8
• Control panel.....................................................................................................................................11
• Adjustment of the angle of the control panel.....................................................................................13
• Touch panel.......................................................................................................................................15
2. Turning Power On / Shutdown.............................................................................................19
• Turning power on ..............................................................................................................................19
• When department or user management is used...............................................................................20
• Turning power off (Shutdown)...........................................................................................................25
3. Energy Saving Mode............................................................................................................28
4. Setting Copy Paper..............................................................................................................29
• About the “width” and the “length” of the original and the copy paper ..............................................29
• Acceptable copy paper......................................................................................................................30
• Setting copy paper (size change)......................................................................................................32
• Placing paper in the Large Capacity Feeder (optional).....................................................................37
• Drawer for special uses.....................................................................................................................38

71.BEFORE USING EQUIPMENT
1
1. Description of Each Component
Main components
1. Front cover 10. Receiving tray
2. Drawers 11. Color toner cartridge (Cyan/Magenta/Yellow)
3. Operator’s Manual pocket (Back side) 12. Original glass
4. Power switch 13. Touch panel
5. Automatic duplexing unit 14. Control panel
6. Bypass tray 15. Black toner cartridge
7. Paper size indicator 16. Toner bag
8. Original scale 17. Touch panel contrast adjustment dial
9. Scanning area A and B: Options
1
2
7
3
4
10
8
9
11 16
15
14
13
12
5
6
*A
*B
(17)

8
1
Configuration of options
1. Original Cover (KA-3511PC)
Holds an original.
2. Reversing Automatic Document Feeder (MR-3018)
Automatically feeds a placed stack of originals one by one to have them copied.
3. Bridge Unit (KN-3511A)
Acts as a relay for the finisher and this equipment.
4. Large Capacity Feeder (KD-1012)
This feeder enables you to feed up to 2500 sheets (20 lb. Bond) of LT paper.
5. Paper Feed Pedestal (KD-1011)
Adds one drawer to the equipment. This also enables you to install the Additional Drawer Module (MY-
1021) (optional).
6. Additional Drawer Module (MY-1021)
This drawer is for adding to the Paper Feed Pedestal (KD-1011). Combined with the 2 drawers in the
equipment, paper can be fed from 4 drawers in total.
7. Finisher (MJ-1101)
This finisher enables sort/group finishing and stapling. The Hole Punch Unit (optional, MJ-6101) can
be installed to this finisher. The Bridge Unit (optional, KN-3511A) is required for the installation of this
finisher.
7
9
8
3
4 5 6
1
10 11
2

91.BEFORE USING EQUIPMENT
1.Description of Each Component (Cont.)
18. Saddle Stitch Finisher (MJ-1024)
This finisher enables saddle stitching, in addition to sort/group finishing and stapling. The Hole Punch
Unit (optional, MJ-6004) can be installed to this finisher. The Bridge Unit (optional, KN-3511A) is
required for the installation of this finisher.
9. Multi Position Staple Finisher (MJ-1023)
This finisher enables sort/group finishing and stapling. The Hole Punch Unit (optional, MJ-6004) can
be installed to this finisher. The Bridge Unit (optional, KN-3511A) is required for the installation of this
finisher.
10.Hole Punch Unit (MJ-6101)
This unit enables you to punch holes on printouts. It can be used by installing it on the Finisher
(MJ-1101).
11. Hole Punch Unit (MJ-6004)
This unit enables you to punch holes on printouts. It can be used by installing it to the Saddle Stitch
Finisher (MJ-1024) and Multi Position Staple Finisher (MJ-1023).
Other options available are as follows. Contact your service technician or OKI product distributors for
details.
Work Table (KK-3511)
This is a small table for placing originals while the equipment is operated.
• Cannot be installed with e-BRIDGE ID Gate at the same time.
FAX Unit (GD-1201)
This is a unit for using the equipment as a Fax.
2nd Line for Fax Unit (GD-1260)
This unit enables to add a line to the Fax to make it 2nd line.
• The Fax Unit (GD-1201) is necessary.
Desk (MH-1700)
This is a desk for the equipment.
Data Overwrite Kit (GP-1060)
This is a kit to erase the data stored temporarily when copying, printing, scanning, Fax, internet Fax or net-
work Fax is performed. It overwrites temporarily stored data with random data.
Scrambler Board (GP-1040)
This board enhances the security of the equipment. Data are encrypted when they are written into the hard
disk of the equipment and decrypted when they are read.
Parallel Board (GF-1140)
This kit is used when the equipment is connected in parallel with a computer.
• The PCI slot (GO-1060) is necessary.
Expansion Memory (GC-1181, GC-1230)
GC-1181 is a page memory for storing data temporarily when scanning or printing.

10
1
GC-1230 is a main memory used for the equipment programs or operations. Both of them are necessary
for the memory expansion. High resolution scanning (Color/Auto color: 600/400 dpi, Image Smoothing:
600 dpi) and high resolution color printing (1201 dpi equiv. x 600 dpi) functions are enhanced.
Wireless LAN Module (GN-1041)
This module enables the equipment to be used in a wireless LAN environment.
• The Antenna (GN-3010) is necessary.
• The equipment cannot be connected to the wireless and wired LAN at the same time.
Bluetooth Module (GN-2010)
This module enables the Bluetooth printing.
• The Antenna (GN-3010) is necessary.
Antenna (GN-3010)
This is used when the Wireless LAN Module and Bluetooth Module are installed.
e-BRIDGE ID Gate (KP-2004, KP-2005)
Users can login and use the equipment simply by holding their IC card over the e-BRIDGE ID Gate.
• This cannot be installed with the Work Table at the same time.

11 1.BEFORE USING EQUIPMENT
1.Description of Each Component (Cont.)
1
Control panel
Use the buttons on the control panel for various operations and settings through the equipment.
1. [HELP] button
Use this button to display the description of the functions and the buttons on the touch panel.
2. [USER FUNCTIONS] button
Use this button for paper size or media type setting of drawers, and registration of the copy, scan and
FAX settings (including a default setting change.) See the User Functions Guide for the functions
enabled by this button.
3. [TEMPLATE] button
Use this button to register and recall frequently used copy, scan, and Fax settings as a template.
4. [EXTENSION] button
Any operation with this button is invalid at present. This button is to extend functions in the future.
5. [e-FILING] button
Use this button to access saved image data.
6. [SCAN] button
Use this button to use the scanning function.
7. [COPY] button
Use this button to use the copier function.
8. [FAX] button
Use this button to use the FAX / Internet FAX function.
9. PRINT DATA / MEMORY RX / FAX communication lamps
These lamps show the status of FAX data reception and FAX communication. The equipment can be
operated even while these lamps are lit.
10.[INTERRUPT] button
Use this button to interrupt the copy job in process and perform another one. The interrupted job is
resumed by your pressing this button again.

12
1
11. [JOB STATUS] button
Use this button to confirm each job status, printing status, and FAX transmission/reception status of a
print job, scan job and FAX job. (!P.223 “1.Job Status”)
12.[ACCESS] button
Use this button when the department code or user information has been set. If this button is pressed
after copying, the next user cannot use functions such as copying without keying in the department
code or user information. See the User Functions Guide for the department and user management.
13.[ENERGY SAVER] button
Use this button when you want to shut down the equipment or when you want the equipment enter into
the energy saving mode. When you press this button, the menu for the energy saving mode appears.
Press the [SLEEP] button on this menu to enter into the energy saving mode and press the [SHUT-
DOWN] button to shut down the equipment.
14.[FUNCTION CLEAR] button
When this button is pressed, all selected functions are cleared and returned to the default settings. If
the default setting is changed on the control panel, and copying, scanning, Fax or similar is performed,
the [FUNCTION CLEAR] button blinks.
15.[STOP] button
Use this button to stop any scanning and copying operations in progress.
16.[START] button
Use this button to start copying, scanning and FAX operations.
17.[CLEAR] button
Use this button to correct numbers keyed in, such as the copy quantity.
18.ERROR lamp
This lamp lights when an error occurs and the equipment needs some actions to be taken.
19.[MONITOR/PAUSE] button
Use this button only when a FAX Unit (optional) is installed. (See the Operator’s Manual for Facsimile
Function for details.)
20.Digital keys
Use these keys to enter any numbers such as the copy quantity.
21.Touch panel
Use this panel for the various settings of each function of the copier, scanner and FAX. This panel also
indicates the status of the equipment, such as when you run out of paper or there is a paper jam.

13 1.BEFORE USING EQUIPMENT
1.Description of Each Component (Cont.)
1
Adjustment of the angle of the control panel
When adjusting the angle of the control panel
The angle of the control panel is adjustable at any angle between 7 and 45 degrees from the horizontal
position.
When changing the angle of the control panel, be careful not to catch your hands in the gap between the
equipment and the control panel. This could injure you.
When fixing the angle of the control panel
The angle of the control panel can be fixed by using the stopper on the backside of the control panel (at 7
degrees from the horizontal position). The stopper is located on A when the equipment is set up. Move it
from the position A to B before fixing it.
A: The position where the angle is adjustable.
B: The position where the angle is fixed.
1
Slide the stopper (in the position A)
slightly to the right, and then pull it out.
A
B

14
1
2
Fit the latches of the stopper in the hole
of the position B and insert them turning
the stopper itself.
3
Shift the stopper to the left until it clicks.
• The angle of the control panel is fixed at 7 degrees.

15 1.BEFORE USING EQUIPMENT
1.Description of Each Component (Cont.)
1
Touch panel
When the power is turned on, the basic menu for the copier function appears on this touch panel. The sta-
tus of the equipment is also displayed on the touch panel with messages and illustrations.
* APS : Automatic paper selection , AMS : Automatic magnification selection
Message display
The following information appears at the top of the touch panel:
Equipment status, operational instructions, cautionary messages, reproduction ratios, number of copy
sets, paper size of a selected drawer, amount of paper in a selected drawer and date and time.
Touch-buttons
Press these buttons on the touch panel lightly to set various functions.
Index buttons
Press these buttons to switch menus. The type and number of the index buttons vary depending on the
function of the copier, scanner and e-Filing.
Function setting area
This area includes buttons for selecting and setting each function.
1. Message 10. Original mode button
2. Reproduction ratio 11. [PROOF COPY] button
3. Number of copy sets 12. Density adjustment buttons
4. APS/AMS* or currently selected paper size 13. Simplex / duplex button
5. Remaining paper level 14. Color mode button
6. Date and time 15. Paper source selection buttons
7. [SETTINGS] button 16. Equipment status indication area
8. Finisher button 17. Function setting area
9. Enlargement/Reduction ([Zoom...]) button 18. Index buttons
7
8
9
11
10
2 3 654
1
18
17
1416 15 13 12

16
1
[SETTINGS] button
Press this button to confirm currently set functions.
(An example is shown below.)
Buttons appearing on the various menus are as follows (some buttons may not appear on the menu):

17 1.BEFORE USING EQUIPMENT
1.Description of Each Component (Cont.)
1Clearing functions selected
When you press the selected button, the function which has been selected is cleared. Or the selected set-
ting is cleared automatically by the automatic function clear* when the equipment has been left inactive for
a specified period of time.
* Automatic function clear:
This function works when a specified period of time has passed since the last paper exit or the last entry of
any button. This function returns all the function settings to default without the need to press the [FUNC-
TION CLEAR] button. When the department or user management function is being used, the display
returns to the department code or user information input menu. When these functions are not being used,
the display returns to the basic menu of the copier function.
The period for the automatic function clear is set at 45 seconds by default at the time of installation of the
equipment. See the User Functions Guide for change of this setting.
Adjusting the contrast of the touch panel
Turn this adjustment dial on the left side of the control panel to adjust the contrast of the touch panel.

18
1
Setting letters
The following menu appears when any letter entry is required for the operations of scanning, e-Filing, tem-
plate and Internet FAX.
Use the buttons on the touch panel for letter entry and use the digital keys on the control panel for number
entry.
After entering the letters, press the [ENTER] button. The menu will be changed.
The following buttons are used for letter entry.
[Space]: Press this to enter a space.
[CANCEL]: Press this to cancel the entry of letters.
[ENTER]: Press this to fix all entered letters.
[Back Space]:Press this to delete the letter before the cursor.
: Press them to move the cursor.
[Clear]: Press this to delete all letters entered.
[Shift]: Press this to enter capital letters.
[Caps Lock]: Press this to switch capital letters and small letters.
[Next]: Press this to access the special keys.

19 1.BEFORE USING EQUIPMENT
1
2. Turning Power On / Shutdown
Turning power on
Open the switch cover, and then turn the power switch on.
• The equipment starts warming-up. “Wait Warming Up” appears during warming-up.
• While the equipment is warming up, you can use the auto job start function.
(!P.55 “Scanning the next originals during copying (Auto job start)”)
The equipment will be ready for copying after about 40 seconds and “READY” appears.
When you turn the power of the equipment OFF, do not simply turn the power switch to turn it off but be
sure to shut it down. (!P.25 “Turning power off (Shutdown)”)
When “ERASING DATA” appears
This message appears when the Data Overwrite Kit (optional) has been installed. It appears immediately
after the power is turned ON or after the equipment has been operated. You can operate the equipment
even if it is displayed.
• When the use of the equipment is managed under department management or user management
function, you need to enter the department code or user information before making a copy. For details,
see !P.20 “When department or user management is used”.

20
1
When department or user management is used
When the use of the equipment is managed under department management or user management func-
tion, each user needs to enter the department code or user information.
Department management
You can restrict users or manage copy volumes made by an individual group or department in your com-
pany using the department codes. When the copy volume is controlled under the department code, enter
the code after turning the power on. See the User Functions Guide for setting and registration of the
department codes.
When the power is turned on, the following menu appears.
• This menu also appears when the [ACCESS] button is pressed or the automatic function clear has
worked.
Key in a department code (5 digits) previously registered and press the [ENTER] button. The menu will
switch and the equipment will be ready to be used.
• If the department code keyed in is incorrect, the menu does not change. Key in the correct department
code.
When copying is finished
When you finish all operations, press the [ACCESS] button to prevent unauthorized use of the equipment.
The display returns to the department code input menu.
Other manuals for CX 1145 MFP
17
Table of contents
Other Oki All In One Printer manuals

Oki
Oki MB470 MFp User manual

Oki
Oki OKIOFFICE 84 Instruction Manual

Oki
Oki C3530n MFP Configuration guide

Oki
Oki ES6410 User manual

Oki
Oki MPS5500mb Series User manual

Oki
Oki CX4545 MFP Installation and maintenance instructions

Oki
Oki CX2033MFP User manual

Oki
Oki MB451wMFP User manual

Oki
Oki MB451wMFP User manual

Oki
Oki C9800hdn Firmware update