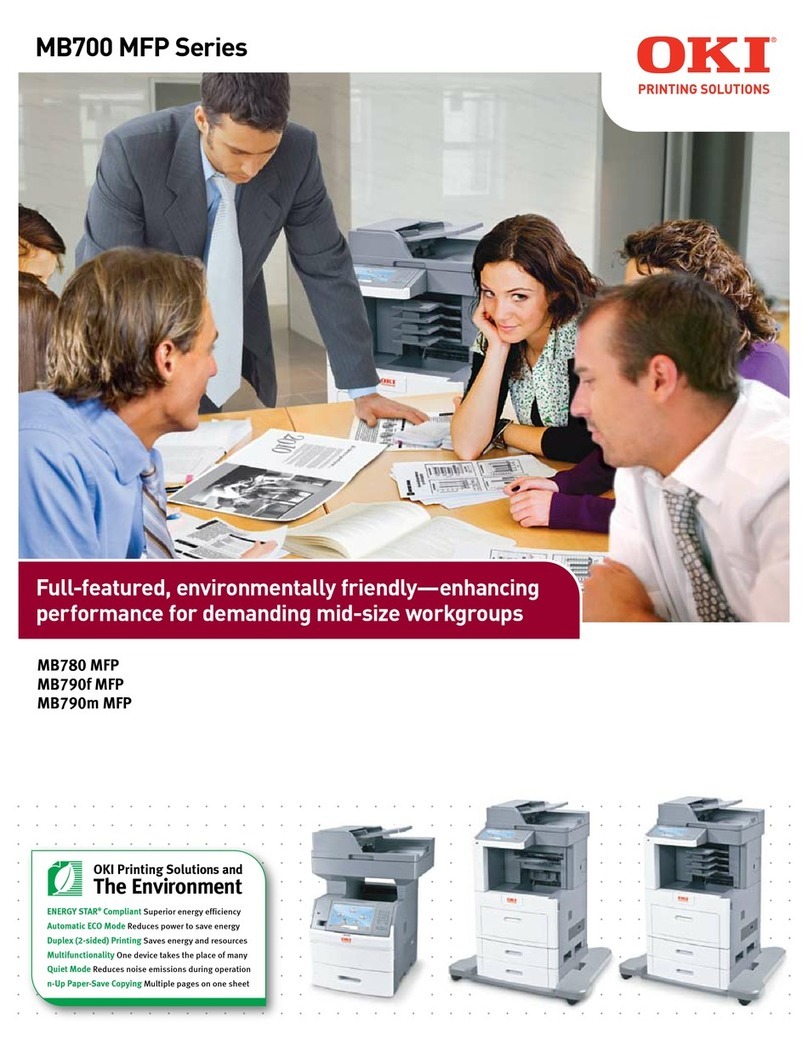
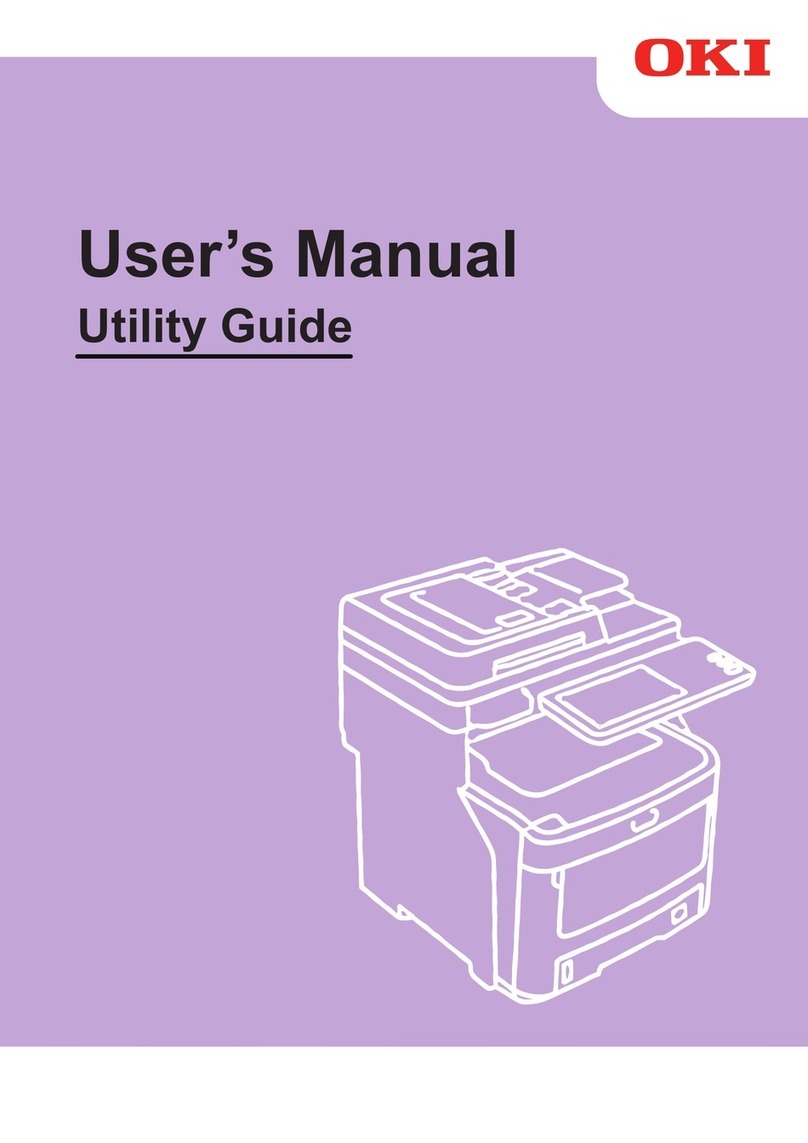
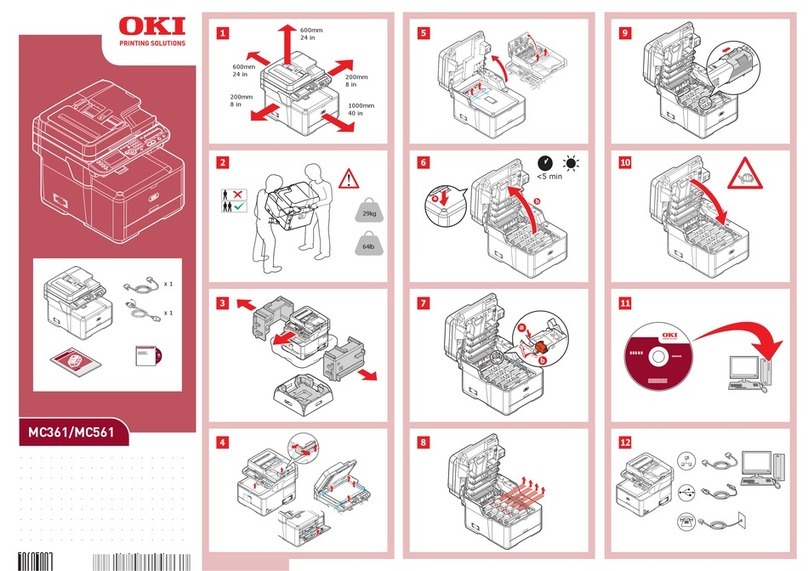
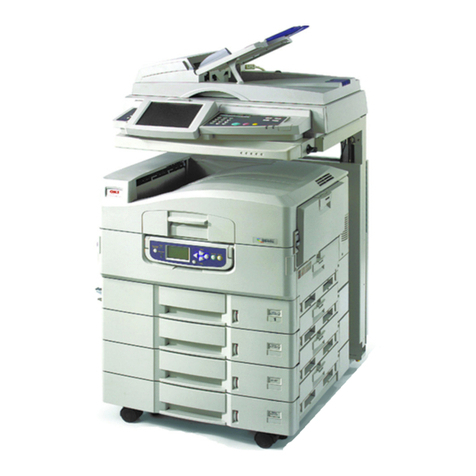
Oki MB492dn User manual

User’s Manual
MB492dn/MB562dnw/ES4192dn/ES5162dnw
2015.03
45822252EE03

Table of contents
Using the Copy Functions
Names and Functions of Screen Items for Copy
Copying
Cancelling Copying
Changing Settings before Copying
Changing the Number of Copies
Copying on Both Sides of Paper (Duplex Copy)
Combining Multiple Pages on One Sheet of Paper (N-in-1)
Specifying the Paper Feed Tray (Paper Feed)
Making Enlarged or Reduced Copies (Zoom)
Changing the Scan Size (Scan Size)
Sorting Each Set in Page Order (Sort)
Adjusting the Density (Density)
Selecting the Document Type (Document Type)
Specifying the Scan Resolution (Resolution)
Copying a Document with a Colored Background Clearly (Background Removal)
Adjusting the Contrast (Contrast)
Changing the Document Orientation (Direction)
Making Multiple Copies on a Sheet of Paper (Repeat)
Copying Both Sides of a Card to One Side (ID Card Copy)
Enabling Continuous Scan Mode (Continuous Scan)
Copying Different Size Documents (Mixed Size)
Setting Margins (Margin)
Erasing Edge Shadows (Edge Erase)
Initializing or Resetting Copy Setting
Resetting Copy Settings (Reset)
Cancelling a Setting
Checking the Menu Hierarchy (Menu Tree)
Using the Scan Functions
Sending Scanned Data as an E-mail Attachment (Scan to E-mail)
About Scan to E-mail
Using Scan to E-mail
Specifying a Destination
Using Direct Entry
Selecting from the Address Book or Group List
Using a One-touch Button
Selecting from the Transmission History
Specify a Destination by Searching the LDAP Server
Setting the Transmission and Reception Settings
Specifying a Sender and Reply Destination
Specifying a Subject and Body Text
Scanning Data to a Computer (Scan to PC)
About Scan to PC
Setting to Use Scan to PC
Sending Scanned Data to a Computer
Registering or Removing a Computer That is Connected for Scan to PC
Registering a Computer That is Connected
Deleting a Registered Computer
Saving Scanned Data in USB Memory (Scan to USB Memory)
About Scan to USB Memory
Using Scan to USB Memory
Saving Scanned Data in a Shared Folder (Scan to Shared Folder)
About Scan to Shared Folder
Using Scan to Shared Folder
1

Scanning from a Computer (Remote Scan)
About Remote Scan
Setting to Use Remote Scan
Selecting a Remote Scan Mode
Simple Scan Mode
For Windows
For Mac OS X
Manual Scan Mode
For Windows
For Mac OS X
Secure Scan Mode
Network Connection
USB Connection
Using WSD Scan
About WSD Scan
Setting to Use WSD Scan
Installing This Machine as a WSD Device to a Computer
Setting a Binding Position for Duplex Scanning
Scanning from the Operator Panel
Scanning from a Computer
Setting to Scan a Document
Specifying a Document Type
Specifying a Scan Resolution
Scanning Multiple Documents Continuously (Continuous Scan)
Adjusting the Density
Specifying a Scan Size
Scanning a Duplex Document (Duplex Scan)
Scanning a Document with a Colored Background Clearly (Background Removal)
Adjusting the Contrast
Adjusting the Hue
Adjusting the Saturation
Adjusting RGB
Specifying a File Name
Specifying a Color Mode
Specifying a File Format
Encrypting a PDF File
Setting a Document Open Password and Permission Password (Encryption Level: [Low])
Setting a Document Open Password and Permission Password (Encryption Level: [Medium] or [High])
Setting a Document Open Password Only
Registering the Default Password in this Machine
Specifying a File Compression Rate
Erasing Edge Shadows (Edge Erase)
Using the Scan Utility
Using the Oki Data Scan Tool, ActKey (Windows Only)
About ActKey
Installing ActKey
Scanning from ActKey
Sending Scanned Data by Fax
Setting to Start ActKey When Using Scan to PC
Changing the Setting of Each ActKey Button
Using Network Configuration (Windows Only)
Using the Network Scanner Setup Tool (Mac OS X Only)
About Network Scanner Setup Tool
Selecting a Device That is Connected for Network Scan
Using the TWAIN Driver
For Windows
For Mac OS X
Using the WIA Driver (Windows Only)
Using Image Capture (Mac OS X Only)
Cancelling Scanning
Cancelling Scanning from the Operator Panel
Cancelling Scanning from a Computer
2

Checking the Menu Hierarchy of the Scan Functions (Menu Tree)
Using the Print Functions
Names and Functions of Screen Items for Print
Printing from a Computer
Printing
For Windows PCL Printer Driver
For Windows XPS Printer Driver
For Windows PS Printer Driver
For Mac OS X PCL Printer Driver
For Mac OS X PS Printer Driver
Cancelling a Print Job
About Screens and Functions of Each Printer Driver
Windows PCL Printer Driver
Windows XPS Printer Driver
Windows PS Printer Driver
Mac OS X PCL Printer Driver
Mac OS X PS Printer Driver
Printing with Various Settings from a Computer
Printing on Envelopes
Printing on Labels
Printing on Long Paper
Printing on Custom Size Paper
Printing Manually One by One
Printing on Both Sides of Paper (Duplex Printing)
Combining Multiple Pages onto One Sheet of Paper
Collating a Multiple Page Document in Units of Copies
Enlarging or Reducing to Fit the Specified Paper Size
Printing from the Last Page of a Document
Printing Only the Cover from a Different Tray
Making a Booklet
Dividing a Document to Print on Some Sheets for Making a Poster
Adding Semi-transparent Text (Watermarks)
Overlaying Forms or Logos (Overlay)
Printing with a Specified Resolution
Emphasizing Fine Lines
Adjusting the Image Finished Quality
Selecting a Tray Automatically for the Specified Paper
Switching to Another Paper Feed Tray Automatically When a Tray Runs Out Of Paper
Registering Frequently-used Settings
Printing with Registered Settings
Changing the Default Settings with a Printer Driver
Saving Toner
Storing Print Data in This Machine before Printing
Specifying the Font to Use
Print Using the Printer Fonts
Print Using the Fonts of Computer
Printing Confidential Document Safely
Setting a Password to the Print Data (Authentication Print)
Setting a Password and Encrypting the Print Data (Encrypted Authentication Print)
Outputting a Document to a File Instead of Printing on Paper
Storing Frequently-printed Documents in the Printer
Printing without Opening a PDF File (PDF Print Direct)
Adjusting the Tone of Photographs for Printing (PS Gamma Adjuster)
For Windows PS Printer Driver
For Mac OS X PS Printer Driver
Printing E-mail Attachment Files
Printing Data in USB Memory (Basic Operation)
Printing Data in USB Memory
Cancelling a Print Job
Printing Data in USB Memory with Various Settings
3

Specifying the Paper Feed Tray (Paper Feed Tray)
Specifying the Number of Copies (Number of Copies)
Printing on Both Sides of Paper (Duplex Printing)
Printing to Fit the Paper Size (Fitting)
Printing with OKI LPR Utility
Sending a File to a Printer That is Registered in OKI LPR Utility
Deleting an Unnecessary Print Job
Using the Printer Offline
Checking the Menu Hierarchy of the Print Functions (Menu Tree)
Using Google Cloud Print
About Google Cloud Print
Setting Google Cloud Print
Printing with Google Cloud Print
Managing Google Cloud Print
Checking Google Cloud Print Registrations
Checking or Changing the Use of Cloud Service Settings
Deleting the Registered Information
Checking That Deletion is Complete
About Importing the CA Licenses of the Proxy Server
Using AirPrint (Print/Scan/FaxOut Service)
About AirPrint (Print/Scan/FaxOut Service)
Setting AirPrint (Print/Scan/FaxOut Service)
Registering the Machine in a Computer (Mac OS X)
Printing with AirPrint (Print)
Scanning with AirPrint (Scan)
Sending a Fax with AirPrint (FaxOut Service)
Using the Fax Functions
Names and Functions of Screen Items for Fax
Basic Procedure for Fax
Sending a Fax
Cancelling a Fax Transmission
Receiving a Fax
About Reception Modes
Printing a Received Fax
Checking the Communication Status/Transmission and Reception History
Checking the Communication Status
Checking the Transmission History and Reception History
Setting the Fax Functions
Specifying a Destination
Using Direct Entry
Selecting from the Phone Book
Using a One-touch Button
Selecting from the Transmission History and Reception History
Deleting a Specified Destination
Setting Scanning for Transmission
Scanning Multiple Documents Continuously on the Document Glass (Continuous Scan (Glass))
Scanning Multiple Documents Continuously with the ADF (Continuous Scan (ADF))
Scanning a Duplex Document (Duplex Scan)
Specifying a Scan Resolution (Resolution)
Sending a Fax to Multiple Destinations at the Same Time
Specifying a Scan Size (Scan Size)
Adjusting the Density (Density)
Erasing Edge Shadows When Sending (Edge Erase)
Disclosing a Sender Name (Originator) to the Recipient
Changing the Sender Name That is Printed on Faxes
Printing Transmission Results Automatically (Transmit Conf. Report)
Sending at a Specified Date and Time (Delayed Tx)
Sending While a Document is being Scanned (Memory Transmission/Real time Transmission)
Setting Transmission Behavior
4

Editing the Sender Name (Originator)
Adding a Prefix (Prefix)
Setting the Number of Redial Attempts and Redial Intervals
Sending a Fax after Calling (Manual Transmission)
Manual Sending (On-hook dial)
Setting for Receptions
Setting a Tray to Print Received Documents
Setting a Print Method for When a Received Image Exceeds Paper Size
Forwarding a Fax to Another Fax Number
Setting So That You Can Hear Line Monitor Sound
Setting the Waiting Time from When an Incoming Call Arrives to When Reception Starts (Response Waiting Time)
Setting Telephone Priority Mode
Setting Fax Detection Mode
Setting the T/F Timer
Setting TAD Mode
Instructing a Fax Reception from a Telephone Remotely (Remote Switchover Number)
Setting Secure Reception
Block Junk Fax
Performing Confidential Communication and Bulletin Board Communication (Fcode Communication)
About Fcode Communication
Registering an Fcode Box
Deleting a Registered Fcode Box
Sending a Fax to a Destination Confidential Box (Fcode Transmission)
Printing a Document That is Received in the Confidential Box of This Machine
Receiving a Document That is Saved in a Destination Bulletin Board Box by Fax (Fcode Polling)
Saving a Document in a Bulletin Board Box of This Machine
Deleting a Document in a Bulletin Board Box of This Machine
Names and Functions of Screen Items for Internet Fax
Basic Procedure for Internet Fax
About the Internet Fax Function
Sending an Internet Fax
Cancelling an Internet Fax Transmission
Receiving an Internet Fax
Checking the Transmission History and Reception History
Setting the Internet Fax Function
Specifying a Destination
Using Direct Entry
Selecting from the Address Book or Group List
Using a One-touch Button
Selecting from the Transmission History
Specify a Destination by Searching the LDAP Server
Checking, Deleting or Changing a Specified Destination
Setting Scanning for Transmission
Scanning Multiple Documents Continuously (Continuous Scan)
Adjusting the Density (Density)
Specifying a Scan Resolution (Resolution)
Specifying a Scan Size (Scan Size)
Scanning a Document with a Colored Background Clearly (Background Removal)
Setting a Reply Destination
Editing an E-mail
Specifying a File Name (File Name)
Scanning a Duplex Document (Duplex Scan)
Specifying a File Compression Rate (Compression Rate)
Forwarding Received Document Data to an E-mail Destination or Shared Folder (Auto Delivery)
Saving Sent and Received Data (Transmission Data Save)
Sending a Fax from a Computer (PC Fax) (Windows Only)
Sending a PC Fax
Sending a Fax from a Computer with a Cover Sheet
Sending a PC Fax to Multiple Destinations at the Same Time
Cancelling a PC Fax Transmission
Specifying a Destination
5

Using Direct Entry
Selecting from the Phone Book
Managing the PC Fax Phone Book
Registering a Destination Fax Number
Registering Multiple Destinations as a Group
Exporting the Phone Book Data to a CSV File (Export)
Importing the Phone Book Data That is Exported to a CSV File (Import)
Checking the Transmission History
Basic Procedure for Scan to Fax Server
Sending Data to the Fax Server
Enabling the Scan to Fax Server Function
Editing a Destination E-mail Address
Editing E-mail Body Text
Checking the Menu Hierarchy of the Fax Functions (Menu Tree)
Basic Information
Names of Components
Front of the Main Unit
Rear of the Main Unit
Inside the Main Unit
Basic Operations on the Operator Panel
Names and Functions
Name of Each Component on the Touch Panel and How to View the Screen
Entering Characters
Entering with the Touch Panel
Entering with the 10-key Pad
Checking the Device Information and Status
Setting or Checking by Opening the Web Page of This Machine
About the Web Page of This Machine
About Items That Can be Set or Checked
Loading Paper or Envelopes in a Tray
About Paper Types That Can be Loaded and Storage Methods
About Paper Sizes, Weight, and Number of Sheets That Can be Loaded
Loading Paper
Loading in Tray 1 or Tray 2
Loading in the MP Tray
Loading Envelopes
Registering the Loaded Paper Size or Other Information in the Machine
Registering the Paper Size, Type, or Weight
Registering a Custom Size
About Paper Output
Setting a Document
About Documents That Can be Set
Setting in the ADF
Setting on the Document Glass
Saving Power Consumption with the Power Save Function
Setting Power Save Mode
Opening the Web Page of This Machine from a Computer
Using Configuration Tool (Windows Only)
Using the Operator Panel
Setting Sleep Mode
Opening the Web Page of This Machine from a Computer
Using Configuration Tool (Windows Only)
Using the Operator Panel
About Restrictions in Sleep Mode and Deep Sleep Mode
6

Reducing Power Consumption by Automatically Turning the Machine Off
About the Auto Power Off Function Setting Items
Setting Auto Power Off
Opening the Web Page of This Machine from a Computer
Using Configuration Tool (Windows Only)
Using the Operator Panel
How to Customize the Touch Panel
Operating a Frequently-used Setting with a One-touch Button (JOB MACRO)
Registering a Frequently-used Setting as a Macro
Using a Registered Macro
Checking the Macro Content
Editing a Macro Title
Deleting a Registered Macro
Adjusting Volume
Adjusting the Key Touch Tone Volume on the Operator Panel
Adjusting the Fax Monitor Sound
Adjusting the Fax and Phone Ring Volume
Adjusting the Fax Completion Volume
Switching This Machine Online
Windows Operation
Displaying the Property Screen of the Printer Driver
Windows 8.1
Windows Vista
Windows Server 2012 R2
Windows Server 2008 R2
Windows Server 2008
Displaying the Print Setup Screen of the Printer Driver
Windows 8.1
Windows Vista
Windows Server 2012 R2
Windows Server 2008 R2
Windows Server 2008
Checking the Menu Hierarchy of This Machine (Menu Tree)
Troubleshooting
If an Error Message is Displayed on the Operator Panel
Checking an Error Message (Error Message Search)
If a "Paper jam" Message is Displayed
If the Error Code is "372"
If the Error Code is "380", "381", "382", "385" or "389"
If the Error Code is "390"
If the Error Code is "391" or "392"
If the "Document jam" Message is Displayed
If a Document is Visible in the Duplex Paper Path
If a Document Jams in the ADF (Automatic Document Feeder)
If the STATUS Button Lights Up or Flashes on the Operator Panel
If Paper in the Tray or the Set Document is not Fed Properly
If You Cannot Install a Printer Driver
If Configuration Tool has a Problem
If a Power Failure Occurs
About Problems of Each Function
Copy Problems
Scan Problems
Print Problems
Fax Problems
AirPrint Problems
Google Cloud Print Problems
About Problems with Printing Results
List of Examples of Problems
Vertical White Lines Appear
Printed Images are Fading Vertically
7

Printed Images are Light
White Spots and Lines Appear
Vertical Lines Appear
Horizontal Lines and Spots Appear Periodically
White Area on Paper is Lightly Stained
The Periphery of Characters is Smudged
The Entire Paper Area is Lightly Stained When Printing on Envelopes or Coated Paper
Toner Comes Off When Printed Paper is Rubbed
Uneven Gloss
Black or White Dots Appear
Dirt is Printed
The Entire Page is Printed Black
Nothing is Printed
White Patches Appear
The Entire Page is Dirty
The Peripheral Area of the Page is Dirty
The Printed Image is Skewed
Other Problems
About Restrictions on Each OS
Windows 8/Windows Server 2012/Windows 7/Windows Vista/Windows Server 2008 R2/Windows Server 2008
Windows Server 2003 Service Pack 1
Mac OS X 10.6.8
Checking and Changing the Settings of This Machine
Setting Menu Items and Functions of This Machine
Reports
Paper Setup
Address Book
Phone Book
Profile
Configure One Touch Button
Network Scan Destination
Store Document Settings
View Information
Easy Setup
AirPrint
Google Cloud Print
Wireless Setting
Enabling Wired Communications
Administrator Setup
Copy Setup
Fax Setup
FaxServer Function
Internet Fax Setup
Scanner Setup
Print From USB Memory Setup
Print Setup
Network Menu
Configure Home Screen
Management
User Install
Advanced
Setting Menu Hierarchy of This Machine (Menu Tree)
Reports
Paper Setup
Address Book
Phone Book
8

Profile
Configure One Touch Button
Network Scan Destination
Store Document Settings
View Information
Easy Setup
AirPrint
Google Cloud Print
Wireless Setting
Enabling Wired Communications
Administrator Setup
Copy Setup
Fax Setup
FaxServer Function
Internet Fax Setup
Scanner Setup
Print From USB Memory Setup
Print Setup
Network Menu
Configure Home Screen
Management
User Install
Changing the Basic Settings from the Operator Panel (Easy Setup)
Changing General Settings
Using the Web Page of This Machine
Using Configuration Tool (Windows only)
About Configuration Tool
Installing Configuration Tool
Registering and Removing This Machine
Importing and Exporting Destination E-mail Addresses
Importing and Exporting Speed Dials of Destinations
Setting Profiles
Setting a Network Scan
Setting the Device Setting Plug-in
Setting the Alert Info Plug-in
Setting the Network Setting Plug-in
Cloning Settings
Setting the Storage Manager Plug-in
Registering Forms (Form Overlay)
Checking the Free Space in Memory
Deleting Unnecessary Jobs from Memory
Changing from the Operator Panel
Using Network Extension (Windows only)
Changing the Detailed Settings of a Network
Network Setting Items
Device Information
TCP/IP
NBT
Mail Server Settings
E-mail Reception Settings
E-mail Alert Settings
SNMP
SNMP Trap
IPP
Windows Rally
IEEE802.1X
Secure Protocol Server Settings (Kerberos)
9

LDAP Server Settings
Security
IP Filtering
MAC Address Filtering
Encryption (SSL/TLS)
IPSec
Maintenance
Time Setup (SNTP Settings)
Direct Print
Opening the Web Page of This Machine from the Computer
Using Configuration Tool (Windows only)
Using Network Card Setup in Mac OS X
Setting the IP Address
Configuring Web Settings
Quitting Network Card Setup
Changing the Display Language on the Operator Panel
For Windows
For the Network Connection
For the USB Connection
For Mac OS X (Panel Language Setup)
Checking or Changing the Image Quality
Adjusting the Contrast (Contrast)
Adjusting the Contrast When Copying
Adjusting the Contrast When Scanning
Adjusting the Scan Color
Adjusting the Hue (Hue)
Adjusting the Saturation (Saturation)
Adjusting RGB (RGB)
Adjusting the Density
Adjusting the Density When Copying
Adjusting the Density When Scanning
Adjusting the Density When Printing
Adjusting the Density When Faxing
About the Included Utility Software
Installing Software
Installing from the "Software DVD-ROM"
List of Utility Software
Maintenance
Replacing Consumables
Cautions When Replacing
Replacing the Toner Cartridge
Replacing the Image Drum
Before Replacing
Replacing the Image Drum Only
Replacing the Image Drum and Toner Cartridge at the Same Time
Cleaning Each Part of the Machine
Cleaning the Surface of the Machine
Cleaning the Document Glass
Cleaning the Document Feed Roller
Cleaning the Paper Feed Rollers
Tray 1 and Tray 2 (Optional)
MP Tray
Cleaning the LED Head
Updating Installed Drivers
Updating Drivers (Windows)
Updating the Printer Driver
Updating the Fax Driver
Updating the Scanner Driver
Updating Drivers (Mac OS X)
Updating the Printer Driver
10

Updating the Scanner Driver
Removing Installed Drivers
Removing Drivers (Windows)
Removing the Printer Driver
Removing the Fax Driver
Removing the Scanner Driver
Removing Drivers (Mac OS X)
Removing the Printer Driver
Removing the Scanner Driver
Preparations Required
Installing This Machine
Installation Requirements
Checking the Accessories
Unpacking and Installing the Machine
Installing Options (Purchasers Only)
Installing the Second Tray Unit (Optional) to the Machine
Turning the Machine On or Off
About the Power Supply
Turning the Machine On
Turning the Machine Off
What You Should Do If You Do Not Use This Machine for an Extended Period of Time
Checking the Operations of This Machine
Performing a Test Print
Checking Copy Operation
Changing the Administrator Password
Connecting This Machine to a Network
Connecting to a Wireless LAN (Network Connection) (MB562dnw, ES5162dnw only)
Connecting with WPS
Selecting a Wireless LAN Access Point from the Operator Panel to Connect
Setting from the Operator Panel Manually to Connect
Checking That Connection is Established Correctly
Connecting with a LAN Cable (Network Connection)
Setting an IP Address from the Operator Panel on This Machine
Obtaining Automatically
Setting Manually
Using the Software DVD-ROM (For Windows)
Obtaining Automatically
Setting Manually
Connecting a Computer to This Machine via a USB Interface
Register the E-mail Address of the Machine and Server Information
Using Configuration Tool
Setting [From]
Setting the Reception Protocol to [POP3]
Setting the Reception Protocol to [SMTP]
Setting the Reception Protocol to [Disable]
Registering from the Web page
Setting the Reception Protocol to [POP3]
Setting the Reception Protocol to [SMTP]
Setting the Reception Protocol to [Disable]
Registering from the Operator Panel
Setting the Reception Protocol to [POP3]
Setting the Reception Protocol to [SMTP]
Setting the Reception Protocol to [Disable]
11

Using the Software DVD-ROM with Network Connection (For Windows)
Setting the Reception Protocol to [POP3]
Setting the Reception Protocol to [SMTP]
Setting the Reception Protocol to [None]
Using the Software DVD-ROM with USB Connection (For Windows)
Setting the Reception Protocol to [POP3]
Setting the Reception Protocol to [SMTP]
Setting the Reception Protocol to [None]
Registering or Deleting a Destination E-mail Address
Using Configuration Tool
Registering an E-mail Address
Registering Multiple Addresses as a Group (E-mail Group)
Deleting a Registered Destination
Registering or Deleting from the Operator Panel
Registering an Address by Entering Characters One by One
Registering a Specified Destination (History)
Registering Multiple Addresses as a Group (E-mail Group)
Deleting a Registered Destination
Using the Software DVD-ROM (For Windows)
For the Network Connection
For the USB Connection
Installing a Driver and Software to a Computer
For Windows
For the Network Connection
For the USB Connection
For Mac OS X
For the Network Connection
For the USB Connection
Setting to Use a Desired Function
Setting the Print Functions
Setting Scan to E-mail
Without Using the Software DVD-ROM
Using the Software DVD-ROM (For Windows)
Setting Scan to PC
Setting Scan to Shared Folder
Creating a Shared Folder in a Computer
For Windows 8.1/Windows Server 2012 R2/Windows Server 2008 R2/Windows Server 2008/Windows 7/Windows Vista
For Windows Server 2003
For Mac OS X 10.6.8 to 10.9
Registering a Destination (Profile)
Registering a Destination (Profile) from Configuration Tool
Registering a Destination (Profile) from the Web page
Registering a Destination (Profile) from the Operator Panel
Changing or Deleting a Registered Destination (Profile)
Changing or Deleting a Destination (Profile) from Configuration Tool
Registering or Deleting a Destination (Profile) from the Web page
Registering or Deleting a Destination (Profile) from the Operator Panel
Using the Software DVD-ROM (For Windows)
For the Network Connection
For the USB Connection
Setting Remote Scan
Setting the Fax Functions
About the Fax Functions
Setting the Country Code
Connecting a Telephone Line
Connecting to the Public Line (If Using Only for Faxes)
Connecting to the Public Line (If Connecting a Telephone to the Machine)
Connecting to the ADSL Environment
Connecting the Optical IP telephone
Connecting a CS Tuner or Digital Television
Connecting PBX, Home Telephone or Business Phone
Connecting as an Extension Telephone
12

Registering the Date and Time
Registering the Fax Numbers and Sender Name
Setting the Telephone Line Type to Use
Setting for Using a Private Branch Exchange (PBX)
Changing the Super G3 Setting
Setting a Reception Mode
Registering or Deleting a Fax Number
Using Configuration Tool
Registering or Deleting from the Operator Panel
Using the Software DVD-ROM (For Windows)
For the Network Connection
For the USB Connection
Setting Internet Fax
Without Using the Software DVD-ROM
Using the Software DVD-ROM (For Windows)
For the Network Connection
For the USB Connection
Setting PC Fax (Windows Only)
For Your Safety
Cautions Related to Safety
General Cautions
Operating Management Tips
Changing the Administrator Password
Changing from a Computer
Changing from This Machine
Checking the Status of This Machine
Checking the Remaining Amount of Consumables
Checking from a Computer
Checking from the Operator Panel
Check the Number of Scanned Pages and Number of Printed Pages
Checking from a Computer
Checking from the Operator Panel
Checking the Status of This Machine and Error by E-mail
Setting to Send an E-mail from This Machine
Setting to Send an E-mail from This Machine Regularly
Setting to Send an E-mail from This Machine Only if an Error Occurs
Checking the Network Setting Information
Checking from a Computer
Checking from the Operator Panel
Checking the Status of This Machine by Using SNMPv3
Checking the Print Status
Preventing Wrong Fax Transmissions
Matching the Number of the Destination and the Specified Number (ID Check Transmission)
Setting This Machine
Sending with ID Check Transmission
Checking the Specified Multiple Destinations (Checking Broadcast Destinations)
Setting This Machine
Checking Broadcast Destinations before Sending
Entering the Fax Number Twice (Confirm Dial)
Setting This Machine
Sending by Using Confirm Dial
Checking the Transmission and Reception Results
Checking the Scan Transmission History
Printing the Fax Communication Results (Communication Management Report)
Convenient Settings for Transmission and Reception
Checking the Delivery Status of the Transmitted Data
Notifying the Sender of the Processing Status of the Received Data
Changing the Basic Settings of This Machine
Changing the Initial Value of Each Function
13

Limiting the User by Using the PIN (Personal Identification Number)
About User Authentication
Registering a PIN from the Web Page of This Machine on a Computer
Registering a PIN from Configuration Tool (Windows Only)
Enabling the User Limit
About Operation If the PIN (Personal Identification Number) is Enabled
Logging In and Logging Out
Printing in the Windows Environment
Printing in the Mac OS X Environment
Faxing in the Windows Environment
Limiting Users with User Names and Passwords
About User Authentication
Registering a User name and Password from the Web Page of This Machine on a Computer
Registering a User Name and Password from Configuration Tool (Windows Only)
Enabling the User Limit
About Operation If the User Name and Password are Enabled
Logging In and Logging Out
Printing in the Windows Environment
Printing in the Mac OS X Environment
Faxing in the Windows Environment
Limiting Computers that can Access This Machine
Limiting by Using an IP Address (IP Filtering)
Limiting by Using a MAC Address (MAC Address Filtering)
Setting the User Name and Job Account ID to the Printer Driver (Print Job Accounting Client)
Setting in the Windows Environment
Setting in the Mac OS X Environment
Improving Security by Encrypting Communication over a Network
Encrypting Communication with SSL/TLS
Creating a Certificate
Importing a Certificate
Enabling Encryption Settings
Setting This Machine as the IPP Printer in a Windows Environment
Setting This Machine as the IPP Printer in a Mac OS X Environment
Encrypting Communication with IPSec
Setting This Machine
Setting a Computer
Connecting This Machine to the Authentication Network by Using IEEE802.1X
Setting by Using PEAP
Setting by Using EAP-TLS
Setting the Network According to the Usage Environment and Application
Setting the LDAP Server
Setting Secure Protocol
Using DHCP
Setting the DHCP Server
Setting This Machine
Using This Machine in the IPv6 Environment
About IPv6
Checking the IPv6 Address
Changing the Operation Mode of the Printer (Emulation)
Printing by Using OKI LPR Utility
Starting OKI LPR Utility
Registering a Printer to OKI LPR Utility
Adding a Comment to a Registered Printer
Checking the Status of a Registered Printer
Forwarding Print Jobs to a Registered Printer
Forwarding the Selected Print Jobs
Forwarding Print Jobs Automatically
Printing the Same Document from the Registered Multiple Printers
Opening the Web Page of the Registered Printer
Following the IP Address of the Registered Printer Automatically
Setting the OKI LPR Utility Port Number
Uninstalling OKI LPR Utility (Uninstall)
14

Moving or Transporting This Machine
Moving This Machine
Transporting This Machine
Initializing Memory and Settings
Initializing Flash Memory
Initializing the Equipment Settings
Initializing the Network Settings
Initializing the Job Macro and Fax Transmission and Reception Data
Specifications
General Specifications
Copier Specifications
Fax Specifications
PC Fax Specifications
Internet Fax Specifications
Scanner Specifications
Scan to E-mail Specifications
Scan to Network PC Specifications
Scan to USB Memory Specifications
Scan to Local PC Specifications
Printing Specifications
Printing from USB Memory Specifications
Network Specifications
Wireless LAN Specifications
Trademarks and Other Information
15

Using the Copy Functions
Names and Functions of Screen Items for Copy
This section describes the items of the screen.
Copying
This section describes the basic operations for copying.
Cancelling Copying
This section describes how to cancel copying.
Changing Settings before Copying
This section describes how to copy using various settings such as N-in-1 and Duplex Copy settings.
Initializing or Resetting Copy Setting
This section describes how to reset the copy functions you changed to their default settings.
Checking the Menu Hierarchy (Menu Tree)
This section shows the menu hierarchy (menu tree) of the copy function.
16

Names and Functions of Screen Items for Copy
This section describes the items of the screen.
[Copy] Tab
Item Description
1Stationary button area Displays buttons that appear on the screen at all times.
2Title and operation guide
area
Displays the title of the current screen and provides guide for possible operations.
3Tab labels Displays labels for tabs. Press a label to switch between tabs.
4Main area Displays a preview of copy output that will be produced with the current settings.
5Shortcut buttons Displays shortcut buttons for using certain copy functions.
The screen image shows the factory default setting. The setting can be changed by Administrator
Setting.
6Function Settings Displays the current settings.
The setting can be changed for certain functions.
7Device Settings Specifies various settings such as Administrator Setting.
8 RESET Returns the settings for the current copy job to their default settings.
9[?] Displays Help topics.
10 Copies Specifies the number of copies to make.
[Basic] Tab
Item Description
1Paper Feed Specifies the tray to set the copy paper.
2Duplex Copy Makes copies on both sides of paper.
3N-in-1 Combines multiple pages on one sheet of paper.
4 Zoom Specifies the zoom rate for making enlarged or reduced copies.
5 Direction Specifies the orientation according to the document, portrait or landscape.
6Scan Size Specifies the scan size according to the size of the document.
7Continuous Scan Scans multiple sets of documents as a single copy job.
8Register to Job Macro Registers current settings to Job Macro.
[Advanced] Tab
17

Item Description
1Mixed Size Scans multiple documents having the same width but different lengths in the ADF, so that they can be copied on their
respective paper sizes.
2 Sort Sorts multiple sets of copies in the same page order as the document.
3 Repeat Repeatedly copies the same document on one side of a sheet of paper (two or four times).
4 Margin Specifies top, bottom, right, or left margin on printed copy.
5Edge Erase Eliminates a black shadow that may appear around the edges on the printed copy when copying, for example, a book.
6ID Card
Copy
Copies both sides of an ID card, such as a driver's license, on one side of a sheet of paper.
7 Resolution Specifies the resolution to scan a document.
[Image Settings] Tab
Item Description
1Document Type Selects a document type to make copies at the most suitable quality.
2 Background
Removal
Adjusts a level of the document background removal.
3 Density Adjusts a level of copy density.
4 Contrast Adjusts differences between bright and dark sections on a document to make images and texts easier to view
and read.
[Function Settings] Screen
Item Description
1Setting display area 1 Displays the current settings for displayed items.
2Setting display area 2 Displays a list of settings that are not set by items displayed in setting display area 1.
18

Copying
1. Press [Copy] or the (COPY) button.
The touch panel display switches to the copy top screen.
Memo
To display the home screen, press the (HOME) button.
2. Set a document in the ADF or on the document glass.
3. Set the copy setting if necessary.
Changing Settings before Copying
4. Press the (START) button.
Copying starts. The progress status is displayed.
19
This manual suits for next models
3
Table of contents
Other Oki All In One Printer manuals