Okoia Pur Touch User manual

HUMIDIFIER
HUMIDIFICATEUR
LUCHTBEVOCHTIGER
HUMIDIFICADOR
HUMIDIFICADOR
Language of Introduction
English
French
Dutch
Spanish
Portuguese
EN1 - EN7
FR8 - FR15
NL
ES24 - ES31
PT32 - PT39
Page
16-NL23
Pur Touch
Downloaded from www.vandenborre.be

Read the instructions carefully before operating the
appliance and keep them for future reference.
WARNINGS
This appliance is intended for domestic household use only and should not be
used for any other purpose or in any other application, such as for
non-domestic use or in a commercial environment.
This appliance can be used by children aged from 8 years and above and
persons with reduced physical, sensory or mental capabilities or lack of
experience and knowledge if they have been given supervision or instruction
concerning use of the appliance in a safe way and understand the hazards
involved. Children shall not play with the appliance. Cleaning and user
maintenance shall not be made by children without supervision.
If the supply cord is damaged, it must be replaced by the manufacturer, its
service agent or similarly qualified persons in order to avoid a hazard.
Regarding the detailed information of filling, cleaning and descaling, refer to
the section“Operation, Cleaning and maintenance & descaling”on pages
EN4-EN
Unplug the appliance during filling and cleaning.
The battery must be removed from the appliance before it is scrapped.
The appliance must be disconnected from the supply mains when removing
the battery.
The battery is to be disposed of safely.
EN-1
6 of the manual
Downloaded from www.vandenborre.be

Batteries are to be inserted with the correct polarity.
Attention should be drawn to the environmental aspects of battery disposal.
Don’t throw used batteries in dustbin. Please contact your retailer in order to
protect the environment.
The batteries (batteries installed) shall not be exposed to excessive heat such
as sunshine, fire or the like.
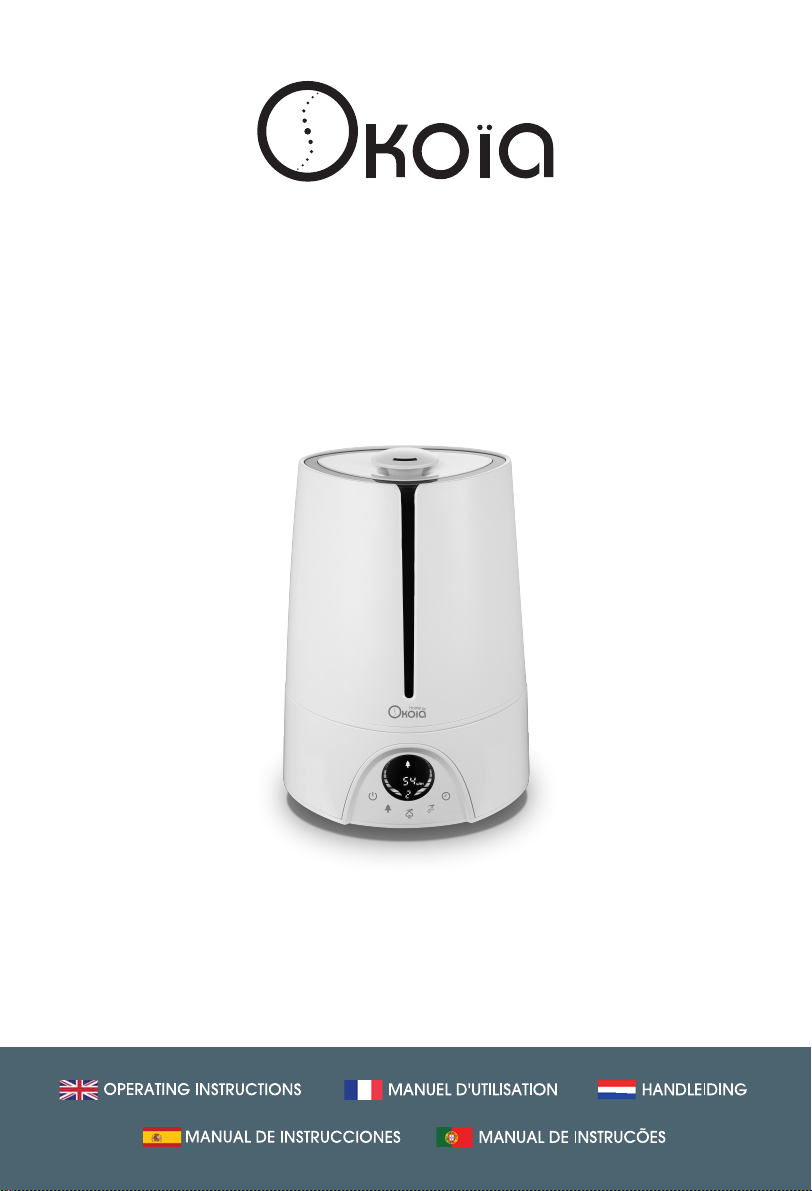
IMPORTANT SAFETY INSTRUCTIONS
•Do not tilt or attempt to move the humidifier while it is operating or filled with water. Turn off and unplug the
humidifier before moving.
•Do not let the power cord hang over the edge of a table or counter, or touch hot surfaces.
•Do not place the humidifier directly on wood furniture or other surfaces that could be damaged by water.
•Do not allow the moisture outlet to directly face the wall. Moisture could cause damage, particularly to
wallpaper.
•Do not operate the humidifier without water.
•In case that the humidifier is used in a closed or small room, check periodically for proper ventilation, as
excessive humidity could cause condensation on walls or furniture.
•In case that the moisture is noticed on the inside of windows, please turn the humidifier OFF.
•Do not refill the humidifier without first unplugging it from the mains socket. Failure to do this may cause
personal injury.
•Do not place anything over moisture outlet when the humidifier is operating.
•Never use this appliance in a room where aerosol products (sprays) are used or where oxygen is being
administered.
Battery handling and usage
Remote control battery (included):
The battery should only be replaced by adults. Do not allow children to use the remote control unless the battery
cover is attached.
Failure to properly align the battery polarity correctly can cause damage to the product and can cause a fire hazed.
Do not dispose of batteries in a fire as this constitutes an explosion hazard.
Replace the battery only with the same type. The batteries used in the remote control are one CR2025 type 3-volt
lithium battery which is accessible and can be replaced.
Removing the battery in the remote control
Pull out the battery holder as shown on the rear of the remote control and
then remove the battery from the remote control.
EN-2
Downloaded from www.vandenborre.be

PARTS
Front View
Top of water tank
Inside the base
Bottom of water tank
1. 360°rotating removable mist outlet
•With it you can easily change the direction of
the mist.
2. Water level window
3. Display
4. Power button
5. Ion button
6. Misting control button
7. Humidity adjustment button
8. Timer button
9. Water tank
10. Base
11.Water tank cover
12.Mist outlet (on the cover)
13.Water tank handle
•You can see the handle after removing the
water tank cover.
14.Air vent
15.Atomizer
16.Power indicator light
17.Water tank cap
18.Water filter (attached to the water tank cap)
•To soften the water
EN-3
Downloaded from www.vandenborre.be

Remote Control
Buttons:
Power
Misting control
Ion
Humidity adjustment
Timer
The remote control has all the same
functions as the buttons on the control
panel of the humidifier.
To use the remote control, make sure the
humidifier is plugged into the mains
socket, then point the remote to the
display panel and press the desired
button.
Make sure there is no obstacle between
the remote and the display.
OPERATION
1. Place the humidifier on a firm, flat and level surface, about 10 cm away from the wall.
2. Remove the water tank using the handle.
3. Turn the water tank upside down and unscrew the water tank cap.
4. Fill water tank with cold tap water.
•DO NOT fill with warm water as this may cause leaking.
•WARNING! DO NOT pour water directly into the base as water may
enter the air vent which will cause damage to the appliance.
5. Screw the tank cap back on the water tank.
6. Turn the water tank over and place on the base, making sure it fits in place.
7. Plug the humidifier into the mains socket.
8. Turn on the humidifier by pressing .
•The power indicator light will illuminate.
•The appliance will start producing cold mist at a medium level. The display will show the number“2” and
the current relative humidity (%RH).
•To turn off the humidifier, press again. The power indicator light will go out.
Misting Control
Repeatedly press to select the desired level of mist output.
Do not fill water tank with water
from the opening.
EN-4
Downloaded from www.vandenborre.be

The corresponding number 1,2 or 3 will appear on the display.
1: Low 2: Medium 3: High
Ion
The ion function is designed to purify the air by releasing negative ions to the air.
To activate this function, press . The symbol will appear on the display.
To deactivate this function, press again and the symbol will disappear from the display.
Automatic Humidity
1. Repeatedly press to select the desired humidity level.
•The text “AUTO” will flash on the display.
•The humidity range is between 45% RH to 90% RH with increments of 5% difference.
2. The desired humidity setting will be confirmed after about 5 seconds.
•The text “AUTO” will stop flashing.
•The display will alternately show the current humidity and desired humidity setting.
NOTE: If the room humidity is equal to or higher than the set humidity, the humidifier will stop producing
mist.
Timer
You can set the timer to turn off the humidifier after the set time has elapsed.
The timer allows the humidifier to operate from 1 to 12 hours.
To activate this function:
1. Repeatedly press to select the desired number of hours.
•The text “Timer” will flash on the display.
2. The desired timer setting will be confirmed after about 5 seconds.
•The text “Timer” will stop flashing.
To deactivate this function:
Repeatedly ress until the text “Timer” disappears from the display.
Auto Shut-Off
When the humidifier is empty, it will turn off automatically and the indicator light will flash.
Turn off and unplug the humidifier before removing and refilling the water tank.
CLEANING AND MAINTENANCE
Before cleaning, turn off and unplug the humidifier from the mains socket.
To maintenance the performance of the humidifier, it is important to clean it
on a regular basis.
EN-5
Downloaded from www.vandenborre.be

EN-6
Important:
DO NOT leave water in the water tank or the base when the appliance is not in
use as it may result in the build-up of mineral deposits and bacteria.
It is recommended to you perform water changes at least once a week.
Empty the water tank and the humidifier base.Wipe and dry with a clean, dry
cloth or paper towel.
Replace the water tank.
NOTE: Never allow water or any other liquid to come into contact with the
control panel.
Do not immerse the base in water.
Never use any abrasive or chemical cleaning agent.
Descaling
When the buildup of mineral deposits appears in the base, please follow
instructions below to descale the base.
Pour about 200ml white vinegar into the base. Let it stand for 15 minutes and
then empty. Wipe off the scale and clean the atomizer in the base with a soft
brush (not supplied).
NOTE: Never allow water or any other liquid to enter the air vent of the base.
Cleaning the water filter
Place the water filter attached to the water tank cap in white vinegar for
about 10 minutes.
Shake the water filter then clean it under running water.
Storage
Make sure the humidifier is dried completely before storing.
Store it in a cool dry place.
Downloaded from www.vandenborre.be

DISPOSAL
As a responsible retailer we care about the environment.
As such we urge you to follow the correct disposal procedure for the appliance and packaging materials and if
applicable, batteries. This will help conserve natural resources and ensure that it is recycled in a manner that
protects health and the environment.
You must dispose of this appliance and its packaging according to local laws and regulations.
Because this appliance contains electronic components and may contain batteries, the appliance and its
accessories must be disposed of separately from household waste when the appliance reaches its end of life.
Contact your local authority to learn about disposal and recycling.
The appliance and if applicable, batteries should be taken to your local collection point for recycling. Some
collection points accept appliance free of charge.
We apologise for any inconvenience caused by minor inconsistencies in these instructions, which may occur as a
result of product improvement and development.
Darty Holdings SAS © 14 route d’Aulnay 93140 Bondy, France 16 / 08 / 2017
EN-7
TROUBLESHOOTING
Problem Possible Cause Possible Solution
The appliance does not
operate.
The appliance is not
plugged in. Plug the appliance into the mains socket.
The power indicator light
illuminates but there is no
mist output.
No water in the
water tank. Fill the water tank with cold fresh water.
There is a strange odour.
New unit. Leave the water tank open for some time
without the cap in a cool place.
Dirty unit. Clean the tank with water and detergent and
rinse thoroughly under running water.
SPECIFICATIONS
Ratings: 220-240V~ 50/60Hz
30W
Downloaded from www.vandenborre.be

Lisez attentivement toutes les instructions avant
d’utiliser cet appareil et conservez-les pour toute
consultation ultérieure.
AVERTISSEMENTS
Cet appareil est destiné à un usage domestique uniquement. Toute utilisation
autre que celle prévue pour cet appareil, ou pour une autre application que
celle prévue, par exemple une application commerciale, est interdite.
Cet appareil peut être utilisé par des enfants âgés d'au moins 8 ans et par des
personnes ayant des capacités physiques, sensorielles ou mentales réduites
ou dénuées d’expérience ou de connaissance, s'ils (si elles) sont correctement
surveillé(e)s ou si des instructions relatives à l'utilisation de l'appareil en
toute sécurité leur ont été données et si les risques encourus ont été
appréhendés. Les enfants ne doivent pas jouer avec l’appareil. Le nettoyage et
l'entretien par l'usager ne doivent pas être effectués par des enfants sans
surveillance.
Si le câble d'alimentation est endommagé, il doit être remplacé par le
fabricant, son service après-vente ou des personnes de qualification similaire
afin d'éviter un danger.
En ce qui concerne les informations détaillées sur la manière du remplissage,
du nettoyage et du détartrage, référez-vous aux sections
FR-8
FONCTIONNEMENT et NETTOYAGE ET ENTRETIEN en pages FR11-FR14 .
Débrancher l'appareil lors du remplissage et du nettoyage.
Downloaded from www.vandenborre.be

La batterie doit être retirée de l'appareil avant que celui-ci ne soit mis au
rebut.
L'appareil doit être déconnecté du réseau d'alimentation lorsqu'on retire la
batterie.
La batterie doit être éliminée de façon sûre.
Les piles doivent être installées en respectant la polarité +/-.
Il convient d’attirer l’attention sur les problèmes d’environnement dus à la
mise au rebut des piles usagées de façon sûre. Déposez-les dans des bacs de
collecte prévus pour cet effet (renseignez-vous auprès de votre revendeur afin
de protéger l'environnement).
Les piles ne doivent pas être exposées à une chaleur excessive telle que celle
du soleil, d'un feu ou d'origine similaire.
INSTRUCTIONS IMPORTANTES DE SÉCURITÉ
•N'inclinez pas et n'essayez pas de déplacer l'humidificateur lorsqu'il est en fonctionnement ou qu'il est rempli
d'eau. Eteignez et débranchez l'humidificateur avant de le déplacer.
•Ne laissez pas le câble d’alimentation pendre du rebord d’une table ou d’un plan de travail ni toucher des
surfaces chaudes.
•Ne placez pas l'humidificateur directement sur un meuble en bois ni sur aucune autre surface pouvant être
endommagée par de l'eau.
•Veillez à ce que la brume ne soit pas diffusée par l’appareil directement vers un mur. L’humidité pourrait en effet
le détériorer, notamment s’il est recouvert de papier peint.
•Ne laissez pas l'humidificateur fonctionner sans eau.
•Si l'humidificateur est utilisé dans une petite pièce ou une pièce fermée, vérifiez régulièrement qu'elle est
suffisamment aérée, car une humidité excessive pourrait provoquer de la condensation sur les murs et les
meubles.
•S'il y a de la condensation sur les fenêtres intérieures, veuillez éteindre l'humidificateur.
FR-9
Downloaded from www.vandenborre.be

•Ne rajoutez jamais d'eau dans l'humidificateur sans l'avoir préalablement débranché de la prise secteur. Le
non-respect de cette consigne pourrait provoquer des blessures corporelles.
•Ne placez aucun objet sur l'embout de sortie de la brume lorsque l'humidificateur est en fonctionnement.
•N’utilisez jamais cet appareil dans une pièce où des aérosols (vaporisateurs) sont utilisés ni dans un lieu où de
l'oxygène est administré.
Manipulation et utilisation des piles
Pile de la télécommande (incluse) :
La pile doit impérativement être changée par un adulte. Ne laissez pas un enfant utiliser la télécommande si le
couvercle du compartiment à pile n'est pas en place.
Si la pile n’est pas placée dans le bon sens, le produit risque d'être endommagé, voire de prendre feu.
Ne jetez jamais une pile au feu: Elle risquerait d'exploser.
Une pile doit toujours être remplacée par une pile du même type. La télécommande fonctionne avec une pile en
lithium de type CR2025 de 3 volts qui est accessible et peut être remplacée.
Changer la pile de la télécommande
Retirez le support de la pile comme illustré au dos de la télécommande puis
retirez la pile.
DESCRIPTION DES PIÈCES
Vue avant
Haut du réservoir d’eau
Intérieur de la base
Bas du réservoir d’eau
1. Orifice rotatif de diffusion de la brume sur 360°
•Vous pouvez facilement changer la direction
de diffusion de la brume
2. Jauge du niveau d’eau
3. Affichage
4. Bouton d’alimentation
5. Bouton de fonction d’ionisation
FR-10
Downloaded from www.vandenborre.be

6. Bouton de contrôle de diffusion de la
brume
7. Bouton de réglage de l'humidité
8. Bouton du minuteur
9. Réservoir d’eau
10. Base
11.Couvercle du réservoir d’eau
12.Embout de sortie de la brume (sur le couvercle)
13.Poignée du réservoir d’eau
•Vous pouvez voir la poignée après avoir
enlevé le couvercle du réservoir d'eau.
14.Sortie d'air
15.Atomiseur
16.Indicateur lumineux de mise sous tension
17.Bouchon du réservoir d'eau
18.Filtre à eau (attaché au bouchon du réservoir
d'eau)
•Pour adoucir l'eau
Télécommande
Boutons :
Alimentation
Contrôle de la diffusion
de la brume
Fonction d’ionisation
Réglage de l'humidité
Minuteur
La télécommande a les mêmes fonctions
que les boutons sur le panneau de
contrôle de l'humidificateur.
Pour utiliser la télécommande,
assurez-vous que l'humidificateur est
branché sur la prise secteur, puis pointez
la télécommande vers le panneau
d'affichage et appuyez sur le bouton
désiré.
Assurez-vous qu’il n’y a aucun obstacle
entre la télécommande et l'affichage.
FONCTIONNEMENT
1. Posez l'humidificateur sur une surface ferme, plane et horizontale, à 10 cm au moins des murs.
2. Enlevez le réservoir d’eau en utilisant la poignée.
3. Retournez le réservoir d'eau et dévissez le bouchon du réservoir.
FR-11
4. Remplissez le réservoir d’eau avec de l’eau froide du
robinet.
•NE remplissez PAS le réservoir avec de l'eau
chaude car cela pourrait provoquer une fuite.
•AVERTISSEMENT ! NE versez PAS l'eau directement
dans la base car l'eau pourrait pénétrer dans la sortie
d'air, ce qui endommagerait l'appareil.
Downloaded from www.vandenborre.be

•L'indicateur lumineux de mise sous tension s’allumera.
•L'appareil commencera à produire de la brume froide à un niveau moyen. L’écran affichera le numéro“2”
et le taux d'humidité relative en cours (%RH).
•Pour éteindre l'humidificateur, appuyez à nouveau sur . L'indicateur lumineux de mise sous tension
s’éteindra.
Contrôle de la diffusion de la brume
Appuyez plusieurs fois sur pour sélectionner le niveau désiré de diffusion de brume.
Le numéro correspondant 1, 2 ou 3 apparaîtra sur l'affichage.
1. Faible 2. Moyen 3. Fort
Ionisation
La fonction d'ionisation est conçue pour purifier l'air en libérant des ions négatifs dans l'air.
Pour activer cette fonction, appuyez sur . Le symbole apparaîtra sur l'affichage.
Pour désactiver cette fonction, appuyez de nouveau sur et le symbole disparaîtra de l'affichage.
Humidité automatique
1. Appuyez plusieurs fois sur pour sélectionner le niveau d'humidité désiré.
•Le texte "AUTO" clignotera sur l'affichage.
•Vous pouvez régler le taux d'humidité relative entre 45% et 90% par tranches de 5%.
2. Le réglage du taux d'humidité sera confirmé après environ 5 secondes.
•Le texte "AUTO" s'arrêtera de clignoter.
•L'affichage indiquera alternativement le taux d'humidité en cours et le réglage d'humidité désiré.
REMARQUE : Si l'humidité ambiante est égale ou supérieure à l'humidité réglée, l'humidificateur s'arrêtera de
produire de la brume.
Minuteur
Vous pouvez régler le minuteur pour éteindre l'humidificateur une fois que la durée choisie est écoulée.
Le minuteur permet de paramétrer le fonctionnement de l'humidificateur de 1 à 12 heures.
Pour activer cette fonction :
1. Appuyez de manière répétée sur pour sélectionner le nombre d'heures désiré.
•Le texte “Timer” clignotera sur l'affichage.
2. Le réglage du minuteur sera confirmé après environ 5 secondes.
•Le texte“Timer” s'arrêtera de clignoter.
Pour désactiver cette fonction :
Appuyez de manière répétée sur jusqu'à ce que le texte “Timer”disparaisse de l'affichage.
FR-12
5. Revissez le bouchon du réservoir.
6. Remettez le réservoir à l'endroit et placez-le sur la base en veillant à le positionner correctement.
7. Branchez le câble de l'humidificateur dans une prise secteur.
8. Mettez l'humidificateur en marche en appuyant sur .
Ne remplissez pas le réservoir
en versant de l'eau par l'orifice
de diffusion de la brume.
Downloaded from www.vandenborre.be

Lorsque l'humidificateur est vide, il s'éteindra automatiquement et l'indicateur lumineux clignotera.
Éteignez et débranchez l'humidificateur avant de retirer et de remplir le réservoir d'eau.
FR-13
Arrêt automatique
NETTOYAGE ET ENTRETIEN
Avant de nettoyer l'humidificateur, éteignez-le et débranchez-le
de la prise secteur.
Pour garder une performance optimale de l'humidificateur, il est
important de le nettoyer régulièrement.
Important :
NE laissez PAS d'eau dans le réservoir ou dans la base lorsque
l'appareil n'est pas utilisé car cela pourrait causer une
accumulation de dépôts minéraux et de bactéries.
Il est recommandé de changer l'eau au moins une fois par
semaine.
Videz l’eau du réservoir et de la base de l'humidificateur. Essuyez
et séchez avec un chiffon propre et sec ou une serviette en
papier.
Réinsérez le réservoir d’eau.
REMARQUE :Veillez à ce que le panneau de contrôle n'entre
jamais en contact avec de l'eau ni aucun autre liquide.
N'immergez pas la base dans l'eau.
N’utilisez jamais de nettoyant chimique ou abrasif.
Détartrage
Lorsqu'une accumulation de dépôts minéraux apparaît dans la
base, veuillez suivre les instructions ci-dessous pour détartrer la
base.
Downloaded from www.vandenborre.be

FR-14
Versez environ 200 ml de vinaigre blanc dans la base. Laissez le
vinaigre reposer pendant 15 minutes puis videz la base. Enlevez
les dépôts et nettoyez l'atomiseur dans la base avec une brosse
souple (non fournie).
REMARQUE : Ne laissez jamais de l’eau ni aucun autre liquide
pénétrer dans la sortie d'air de la base.
Nettoyage du filtre à eau
Placez le filtre à eau attaché au bouchon du réservoir d'eau dans
du vinaigre blanc pendant environ 10 minutes.
Secouez le filtre à eau et lavez-le sous l’eau courante.
Rangement
Assurez-vous que l'humidificateur est complètement sec avant
de le ranger.
Rangez-le dans un endroit sec et frais.
GUIDE DE DÉPANNAGE
Problème Cause possible Solution possible
L’appareil ne fonctionne
pas.
L'appareil n'est pas
branché à
l'alimentation.
Branchez l'appareil dans une prise secteur.
L'indicateur lumineux de
mise sous tension s'allume
mais l'appareil ne diffuse
pas de brume.
Il n'y a pas d'eau
dans le réservoir. Remplissez le réservoir avec de l'eau fraiche.
Il y a une odeur étrange.
L’appareil est neuf. Laissez le réservoir ouvert un certain temps sans
le bouchon et dans un endroit frais.
L'a p pareil est sale.
Nettoyez le réservoir avec de l'eau et du
détergent, puis rincez-le soigneusement à l'eau
du robinet.
SPÉCIFICATIONS
Caractéristiques nominales: 220-240 V~, 50/60 Hz
30W
Downloaded from www.vandenborre.be

MISE AU REBUT
En tant que distributeur responsable, nous accordons une grande importance à la protection de
l’environnement.
Nous vous encourageons à respecter les procédures correctes de mise au rebut de votre appareil, des piles et des
éléments d’emballage. Cela aidera à préserver les ressources naturelles et à garantir qu’il soit recyclé d’une manière
respectueuse de la santé et de l’environnement.
Vous devez jeter ce produit et son emballage selon les lois et les règles locales.
Puisque ce produit contient des composants électroniques et parfois des piles, le produit et ses accessoires
doivent être jetés séparément des déchets domestiques lorsque le produit est en fin de vie.
Pour plus de renseignements sur les procédures de mise au rebut et de recyclage, contactez les autorités de votre
commune.
Apportez l’appareil à un point de collecte local pour qu’il soit recyclé. Certains centres acceptent les produits
gratuitement.
Hotline Darty France
Quels que soient votre panne et le lieu d'achat de votre produit en France, avant de vous déplacer en magasin
Darty, appelez le 0 978 970 970 (prix d'un appel local) 7j/7 et 24h/24.
Hotline Vanden Borre
Le service après-vente est joignable au +32 2 334 00 00, du lundi au vendredi de 8h à 18h et le samedi de 9h à 18h.
En raison des mises au point et améliorations constamment apportées à nos produits, de petites incohérences
peuvent apparaître dans ces instructions. Veuillez nous excuser pour la gêne occasionnée.
Darty Holdings SAS © 14 route d’Aulnay 93140 Bondy, France 16 / 08 / 2017
FR-15
Downloaded from www.vandenborre.be

Lees de instructies aandachtig door voordat u het
apparaat in gebruik neemt en bewaar deze
instructies voor latere raadpleging.
WAARSCHUWINGEN
Dit apparaat is alleen bestemd voor huishoudelijk gebruik en mag niet voor
andere doeleinden of toepassingen worden gebruikt, zoals niet-huishoudelijk
gebruik of in een commerciële omgeving.
Dit apparaat kan worden gebruikt door kinderen vanaf 8 jaar en ouder of
personen met beperkte fysische, visuele of mentale mogelijkheden, of die
een gebrek hebben aan ervaring en kennis, als ze onder toezicht staan of
instructies hebben gekregen over het veilig gebruik van het apparaat en de
gevaren die het gebruik van het apparaat met zich meebrengen begrijpen.
Laat kinderen nooit met het apparaat spelen. Kinderen mogen het apparaat
niet zonder toezicht reinigen of onderhouden.
Als de kabel beschadigd is, moet hij worden vervangen door de fabrikant, een
erkend servicecentrum of een gelijkwaardig vakbekwaam persoon om elk
gevaar te vermijden.
Voor informatie over het vullen, reinigen en ontkalken, raadpleeg de sectie
“Gebruik, reiniging en onderhoud & ontkalken”op de pagina’s
van deze gebruiksaanwijzing.
Trek de stekker uit het stopcontact tijdens het vullen en reinigen van het
apparaat.
Haal de batterij uit het apparaat voordat u het afdankt.
NL-16
NL19-NL2
2
Downloaded from www.vandenborre.be

Haal het apparaat van de netvoeding alvorens de batterij te verwijderen.
Verwijder de batterij op een juiste manier.
Plaats de batterijen volgens de juiste polariteit.
Houd rekening met het milieu bij het weggooien van batterijen. Gooi lege
batterijen niet bij het huishoudelijk afval. Neem contact op met uw handelaar
om het milieu te beschermen.
Stel de batterijen (geïnstalleerde batterijen) niet bloot aan overmatige hitte
zoals zonlicht, vuur, etc.
BELANGRIJKE VEILIGHEIDSINSTRUCTIES
•Kantel de luchtbevochtiger niet en verplaats hem niet als hij in gebruik is of gevuld is met water. Schakel de
luchtbevochtiger uit en haal de stekker uit het stopcontact voordat u de luchtbevochtiger verplaatst.
•Laat de kabel niet over de rand van een tafel of aanrecht hangen en laat hem niet met hete oppervlakken in
aanraking komen.
•Plaats de luchtbevochtiger niet rechtstreeks op houten meubels of andere oppervlakken die door water
beschadigd kunnen worden.
•Sta niet toe dat de neveluitgang direct op de wand is gericht. Nevel kan schade, in het bijzonder aan
behangpapier, veroorzaken.
•Gebruik de luchtbevochtiger niet zonder water.
•In geval dat de luchtbevochtiger in een afgesloten of kleine kamer wordt gebruikt, controleer regelmatig op
een juiste ventilatie. Overmatige vochtigheid kan condensatie op muren of meubels veroorzaken.
•Mocht er vocht aan de binnenkant van de ramen worden waargenomen, dient u de luchtbevochtiger UIT te
schakelen.
•Haal eerst de stekker uit het stopcontact alvorens de luchtbevochtiger opnieuw te vullen. anders kan dit
persoonlijk letsel veroorzaken.
•Plaats niets over de vochtuitlaat wanneer de luchtbevochtiger in gebruik is.
•Gebruik dit apparaat nooit in een kamer waar aerosole producten (sprays) worden gebruikt of waar puur
zuurstof wordt aangevoerd.
Omgang en gebruik van de batterij
Batterij voor afstandsbediening (meegeleverd):
De batterij mag alleen door volwassenen worden vervangen. Zorg dat kinderen de afstandsbediening niet
gebruiken, tenzij het batterijvakdeksel er goed op zit.
De batterij op de verkeerde polen aansluiten kan schade aan het product en brandgevaar veroorzaken.
Gooi geen batterijen in vuur, dit kan gevaar op ontploffing veroorzaken.
Vervang de batterij alleen door een batterij van hetzelfde type. De afstandsbediening werkt op één CR2025 3V
lithium batterij, die toegankelijk is en op een eenvoudige manier kan worden vervangen.
NL-17
Downloaded from www.vandenborre.be

De batterij in de afstandsbediening verwijderen
Trek de batterijhouder zoals weergegeven uit de achterkant van de
afstandsbediening en verwijder vervolgens de batterij uit de
afstandsbediening.
ONDERDELEN
Frontaanzicht
Bovenaanzicht van waterreservoir
Binnenin het voetstuk
Onderaanzicht van waterreservoir
1. 360°draaiende, verwijderbare neveluitlaat
•Hiermee kunt u de richting van de nevel
eenvoudig wijzigen.
2. Waterniveau-aanduiding
3. Display
4. Aan/uit-knop
5. Ionenknop
6. Nevelregelknop
7. Afstelknop voor vocht
8. Timerknop
9. Waterreservoir
10. Voetstuk
11.Deksel van waterreservoir
12.Neveluitlaat (op het deksel)
13.Handvat van waterreservoir
•U kunt het handvat zien na het verwijderen
van het deksel van het waterreservoir.
14.Luchtopening
15.Verstuiver
16.Aan/uit-indicatielampje
17.Waterreservoirdop
18.Waterfilter (bevestigd aan de waterreservoirdop)
•Om het water zachter te maken
NL-18
Downloaded from www.vandenborre.be

Afstandsbediening
Knoppen:
Aan-/uitschakelen
Nevelregeling
Ion
Vochtregeling
Timer
De knoppen op de afstandsbediening
hebben dezelfde functie als de knoppen
op het bedieningspaneel van de
luchtbevochtiger.
Om de afstandsbediening te gebruiken,
zorg dat de stekker van de
luchtbevochtiger in een stopcontact
steekt en richt de afstandsbediening
vervolgens naar het bedieningspaneel en
druk op de gewenste knop.
Zorg dat er zich geen obstakel tussen de
afstandsbediening en het display bevindt.
GEBRUIK
1. Plaats de luchtbevochtiger op een stevig, vlak oppervlak, op circa 10 cm van de muur.
2. Verwijder het waterreservoir met behulp van het handvat.
3. Draai het waterreservoir ondersteboven en schroef de dop van het reservoir los.
NL-19
4. Vul het waterreservoir met koud leidingwater.
•Vul het reservoir NIET met warm water; dit kan
lekkageS veroorzaken.
•WAARSCHUWING! Giet GEEN water rechtstreeks in
het voetstuk, water kan in de luchtopening terecht
komen en schade aan het apparaat veroorzaken.
5. Schroef de reservoirdop opnieuw op het waterreservoir vast.
6. Draai het waterreservoir om en plaats het in de juiste positie op het voetstuk.
7. Steek de stekker van de luchtbevochtiger in het stopcontact.
8. Schakel de luchtbevochtiger aan door op te drukken.
•Het aan/uit-indicatielampje begint te branden.
•Het apparaat start met het produceren van koude nevel op een medium niveau. Het display geeft het
cijfer
“
2
”
en de huidige relatieve vochtigheidsgraad (%RV) weer.
•Om de luchtbevochtiger uit te schakelen, druk opnieuw op . Het aan/uit-indicatielampje gaat uit.
Vul het waterreservoir niet
met water via de opening.
Downloaded from www.vandenborre.be
Table of contents
Languages:
Other Okoia Humidifier manuals