Installation Instructions
Installation Instructions
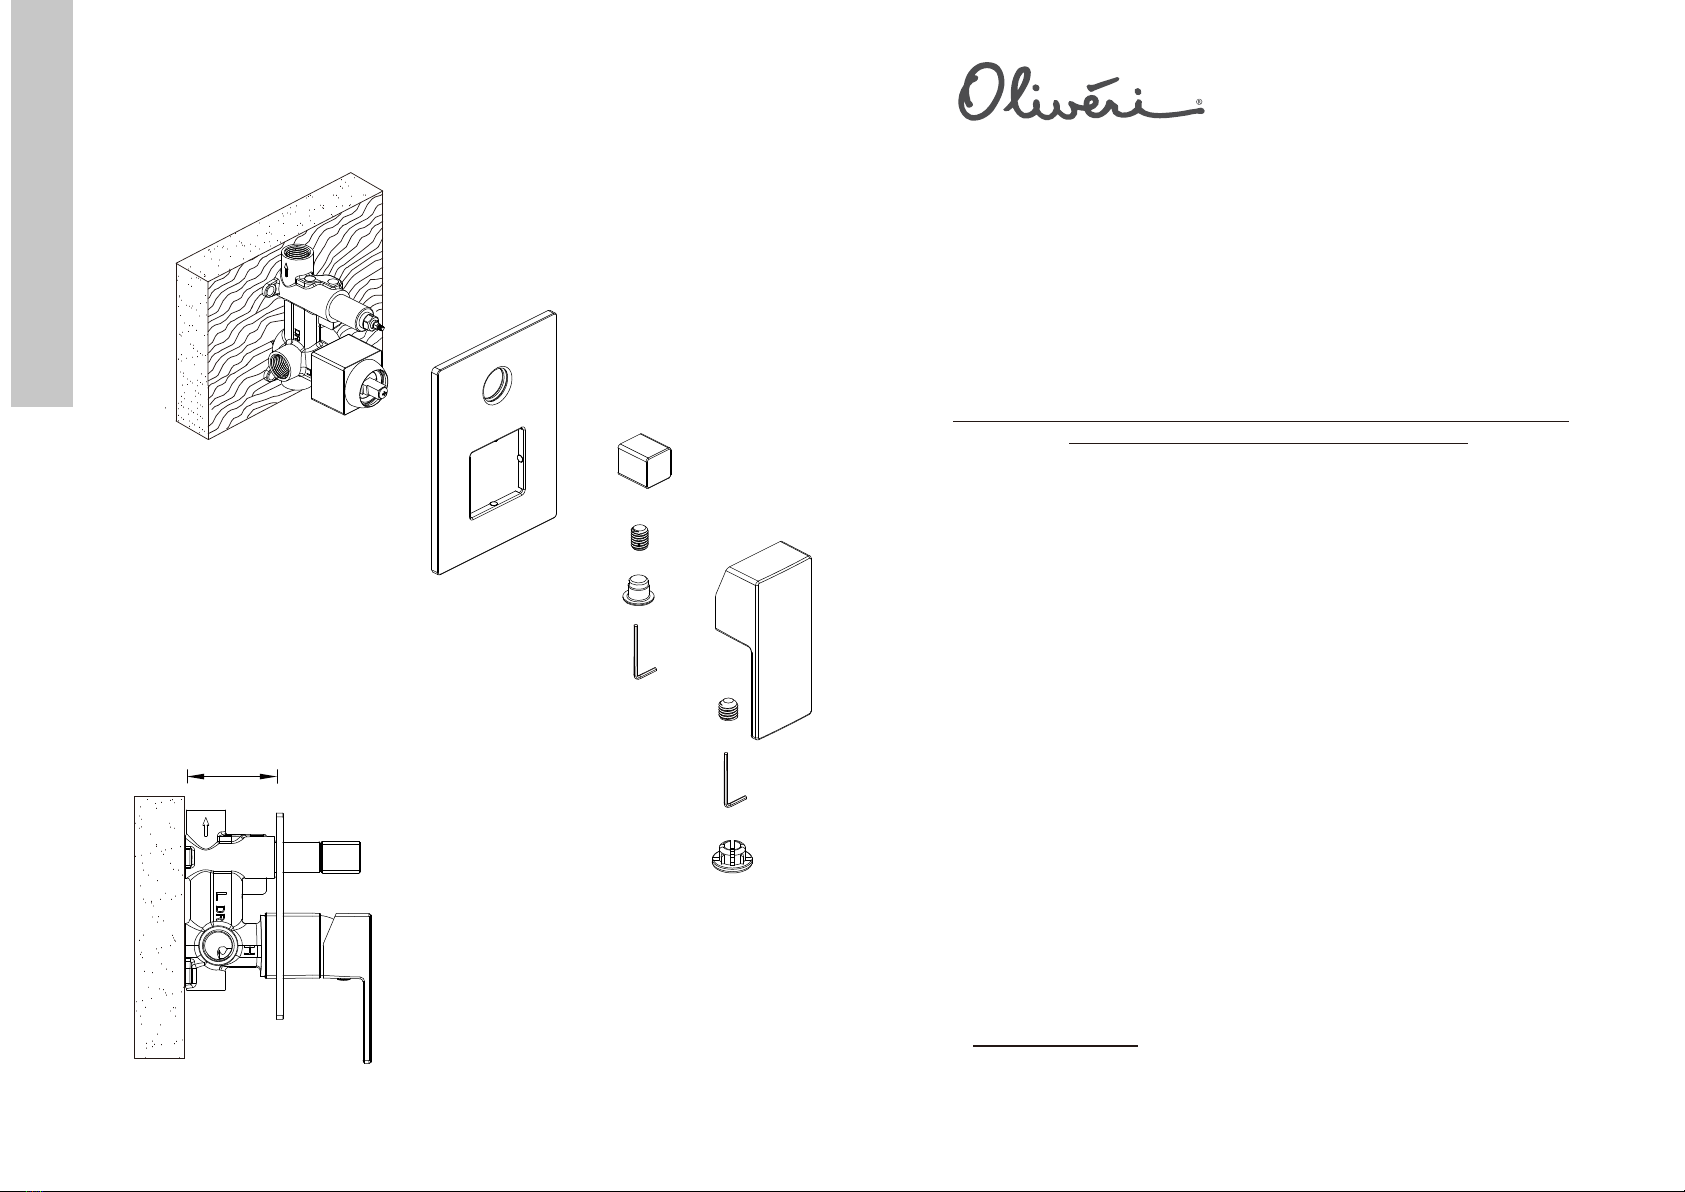
A
B
C
H
D
I
J
K
F
E
G
60-75
PR116500CR installation instructions.pdfIssue Date 30/11/2018 Revision Number: V1.0
General Note: This product is to be installed by a licensed plumber, installation must comply with AS/NZS
3500 and local plumbing codes.
°
C
Pressures & Temperatures
Maximum Hydrostatic Pressure – 500 kpa. (As per AS/NZS3500)
Note: AS/NZS 3500.1-2003 (Clause 3.3.4) states that “Provision shall be made to ensure that the
maximum static pressure at any outlet, other than a fire service outlet, within a building does not
exceed 500 kPa.
Note: Pressures above 500kPa can cause damage from water hammer, reduced life of appliances,
taps and fittings, and cause excessive noise in the system.
Minimum Hydrostatic Pressure – 100 kpa
The Maximum operating temperature for the Mixer Tap is 65 .
Please ensure that the lines are flushed prior to installation as contaminates in the water can damage the
Ceramic Cartridge and also affect the performance of the Mixer.
1. Remove product from packaging and check for damages, if the product is damaged do not install and
return to store of purchase.
2. Ensure Product is complete as per exploded drawing.
3. All Shower and Shower Divertor Mixers are supplied with Plastic Protection Body covers, ensure the body
cover is on the mixer body and push pull dial on divertor Mixers prior to installation.
4. Screw Mixer Body (A) to the Stud Wall or Brick Cavity taking into account set out minimum and maximum
from back of Mixer to Finished Wall (F).
5. Install Water supply to Mixer body, Left (Hot), Right (Cold) as per AS3500 and Local Authority requirements.
6. Install water supply lines for shower and/or bath outlets.
7. Once wall sheeting and tiles have been fitted seal around the Mixer body with plumbers grade silicon or
sealing compound.
8. Slide Mixer Wall plate in Place (B) N.B Shower/Bath Wall Plates and Shower & Bath Divertor Wall plates
are fitted with concealed sealing washers, to assist with assembly of the wall plate onto the mixer body
apply soapy water or plumbers grade grease to the concealed sealing washers.
9. Fit Mixer Handle (C).
10. Screw in handle grub (D) using Allen key (E) press the cap (G) in to the handle (C). Take down the
pre-assembled Cap (J) and Screw (I) from Knob (H) and press Knob (H) into diverter on the body (A).
Lock the Knob (H) with Screw (I) and press the Cap (J) in to the knob.
11. N.B Some Grub Screw covers are also Hot and Cold indicators, ensure when fitting a Grub screw cover on
the handle that has the hot and cold indicators that the Red (Hot) is on the left hand side.
To the consumer
Under No Circumstances should any abrasive, cream or acid based cleaning agents be used as these
types of cleaners will damage the finish, Cartridge and seals.
1. The Mixer is to only be cleaned with warm soapy water.
2.
N.B Shower/Bath Mixers (Not Divertor Mixers) are a 3 Port Body, for Bath installation loop the copper
pipe to the underside of the mixer for bath installation. DO NOT turn Mixer upside down as the Mixer
will not function correctly.


