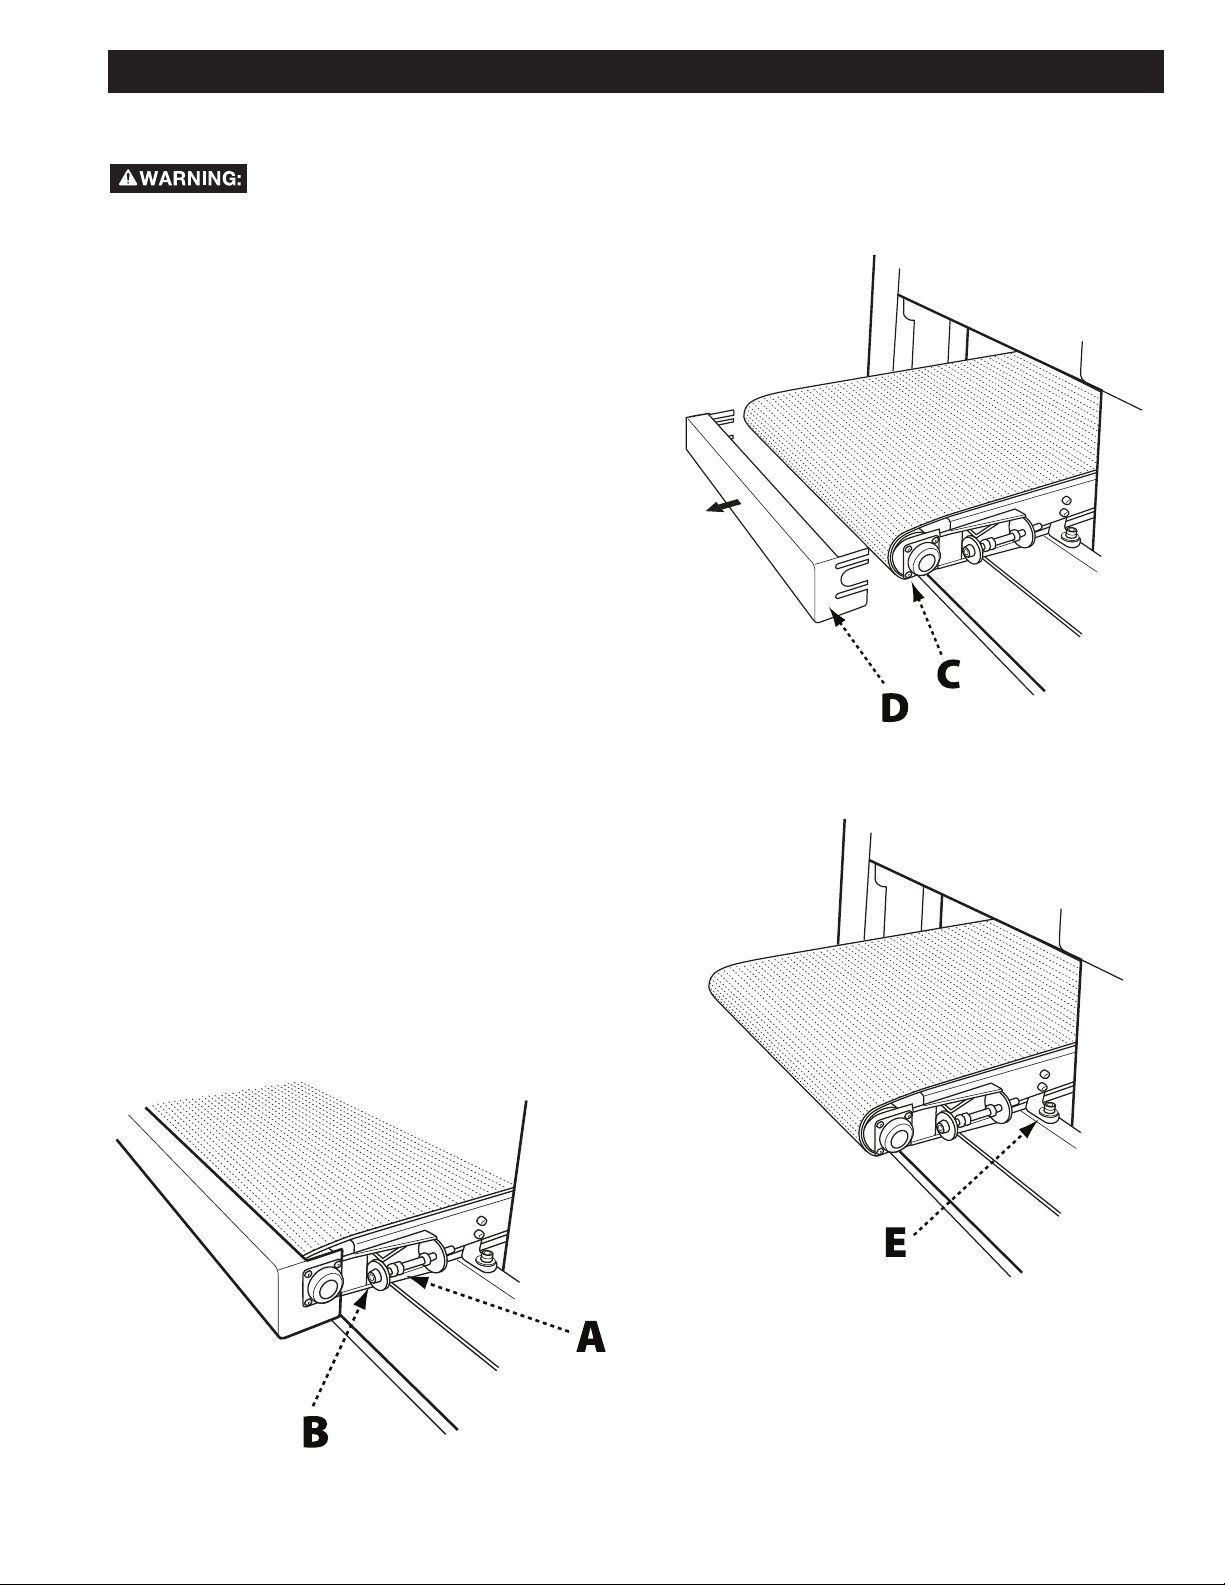
OLTRE DRS2602 Service manual

Operating Instructions and Parts Manual
Manual de instrucciones
26 IN. Dual Drum SaNDer
OPERATION MANUAL
DRS2602 (W0602)

2
TABLE OF CONTENTS
IMPORTANTSAFETY INSTRUCTIONS...................................2
SAFETY GUIDELINES - DEFINITIONS....................................3
GENERAL SAFETY RULES ......................................................3
FEATURES
AND
COMPONENTS
.............................................5
FUNCTIONAL
DESCRIPTION
..................................................6
PRODUCT
SPECIFICATIONS
...................................................6
UNPACKING
..............................................................................6
ASSEMBLY
................................................................................7
Securing Switch to
Frame
...................................................
Table
Elevation CrankHandle
.............................................
Dust Collect
.........................................................................
ADJUSTMENTS
.........................................................................8
Replacing
the Sanding Belt
................................................. 8
Feed Belt
Tracking
............................................................... 8
Drive
Belt
Tension
.............................................................. 9
Replacing
Feed
belt
.......................................................... 10
Parallelism of Sanding Drums ........................................... 11
RollerPressure .................................................................. 11
Drum Height ...................................................................... 12
OPERATION.............................................................................12
OPERATING TIPS....................................................................12
Depth of Wood Removal ................................................... 12
Sanding Imperfect Stock ................................................... 12
Stock Feeding Angle ......................................................... 13
Multi-Piece Sanding .......................................................... 13
Face Frames and Raised Panel Doors ............................. 13
Edge Sanding .................................................................... 13
SELECTING ABRASIVES........................................................13
MAINTENANCE PROCEDURES ............................................14
Routine Inspection ............................................................. 14
Lubrication ......................................................................... 14
Cleaning the Sanding Belts ............................................... 14
TROUBLESHOOTING .............................................................14
ESPAÑOL
.................................................................................15
IMPORTANT SAFETY INSTRUCTIONS
READ AND UNDERSTAND ALL WARNINGS AND OPERATING INSTRUCTIONS BEFORE USING THIS
EQUIPMENT. Failure to follow all instructions listed below, may result in electric shock, fire, and/or
serious personal injury or property damage.
Woodworking can be dangerous if safe and proper operating procedures are not followed. As with all
machinery, there are certain hazards involved with the operation of the product. Using the machine with
respect and caution will considerably lessen the possibility of personal injury. However, if normal safety
precautions are overlooked or ignored, personal injury to the operator may result. Safety equipment such
as guards, push sticks, hold-downs, featherboards, goggles, dust masks and hearing protection can reduce your
potential for injury. But even the best guard won’t make up for poor judgment, carelessness or inattention. Always
use common sense and exercise caution in the workshop. If a procedure feels dangerous, don’t try it. Figure out
an alternative procedure that feels safer. REMEMBER: Your personal safety is your responsibility.
7
7
7

3
SAFETY GUIDELINES - DEFINITIONS
This manual contains information that is important for you to know and understand. This information relates to
protecting YOUR SAFETY and PREVENTING EQUIPMENT PROBLEMS. To help you recognize this information, we
use the symbols below. Please read the manual and pay attention to these sections.
Indicates an imminently hazardous situation which, if not avoided, will result in death or serious
injury.
Indicates a potentially hazardous situation which, if not avoided, could result in death or serious
injury.
Indicates a potentially hazardous situation which, if not avoided, may result in minor or moderate
injury.
Used without the safety alert symbol indicates potentially hazardous situation which, if not avoided,
may result in property damage.
GENERAL SAFETY RULES
WARNING FAILURE TO FOLLOW THESE RULES MAY RESULT IN SERIOUS PERSONAL INJURY.
• FOR YOUR OWN SAFETY, READ AND UNDERSTAND THE INSTRUCTION MANUAL BEFORE OPERATING THE
UNIT. Learn the unit’s application and limitations as well as the specific hazards peculiar to it.
• KEEP WORK AREA CLEAN. Cluttered areas and benches invite accidents.
• DON’T USE IN DANGEROUS ENVIRONMENT. Don’t use this unit in damp or wet locations, or expose it to rain.
Keep work area well-lighted.
• KEEP CHILDREN AND VISITORS AWAY. All children and visitors should be kept a safe distance from work area.
• DISCONNECT UNIT before servicing.
• CHECK DAMAGED PARTS. Before further use of the unit, properly repair or replace any part that is damaged.
1. Read and understand the warnings posted on the
machine and in this manual. Failure to comply with
all of these warnings may cause serious injury.
2. Replace the warning labels if they become
obscured or removed.
3. This Dual Drum Sander is designed and intended
for use by properly trained and experienced
personnel only. If you are not familiar with the
proper and safe operation of a drum sander, do not
use until proper training and knowledge have been
obtained.
4. Do not use this machine for other than its intended
use. If used for other purposes, Delta Power
Equipment Company, Inc. disclaims any real or
implied warranty and holds itself harmless from any
injury that may result from that use.
5. Always wear approved safety glasses/face shields
while using this Dual Drum Sander.
6. Before operating this drum sander, remove tie,
rings, watches and other jewelry, and roll sleeves
up past the elbows. Remove all loose clothing and
confine long hair. Non-slip footwear or anti-skid
floor strips are recommended. Do not wear gloves.
7. Wear ear protectors (plugs or muffs) during
extended periods of operation.
FAILURE TO FOLLOW THESE RULES MAY RESULT IN SERIOUS INJURY.
8. Some dust created by power sanding, sawing,
grinding, drilling and other construction activities
contain chemicals known to cause cancer,
birth defects or other reproductive harm. Some
examples of these chemicals are:
• Lead from lead based paint.
• Crystalline silica from bricks, cement and other
masonry products.
• Arsenic and chromium from chemically treated
lumber.
Your risk of exposure varies, depending on how often
you do this type of work. To reduce your exposure to
these chemicals, work in a well-ventilated area and
work with approved safety equipment, such as face or
dust masks that are specifically designed to filter out
microscopic particles.
1. Do not operate this machine while tired or under
the influence of drugs, alcohol or any medication.
2. Make certain the switch is in the OFF position
before connecting the machine to the power
source.
3. Make certain the machine is properly grounded.
4. Make all machine adjustments or maintenance with
the machine unplugged from the power source.
continued on page 4

4
5. Form a habit of checking to see that all extra
equipment such as adjusting keys, wrenches,
scrap, stock, and cleaning rags are removed away
from the machine before turning on.
6. Keep safety guards in place at all times when the
machine is in use. If removed for maintenance
purposes, use extreme caution and replace the
guards immediately when maintenance is complete.
7. Make sure the drum sander is firmly secured to the
floor before use.
8. Check damaged parts. Before further use of the
machine, a guard or other part that is damaged
should be carefully checked to determine that it will
operate properly and perform its intended function.
Check for alignment of moving parts, binding of
moving parts, breakage of parts, mounting and
any other conditions that may affect its operation.
A guard or other part that is damaged should be
properly repaired or replaced.
9. Provide for adequate space surrounding work area
and non-glare, overhead lighting.
10.Keep the floor around the machine clean and free of
scrap material, oil and grease.
11.Keep visitors a safe distance from the work area.
Keep children away.
12.Make your workshop child proof with padlocks,
master switches or by removing starter keys.
13.Give your work undivided attention. Looking
around, carrying on a conversation and “horse-
play” are careless acts that can result in serious
injury.
14.Maintain a balanced stance at all times so that you
do not fall or lean against the sanding belt or other
moving parts. Do not overreach or use excessive
force to perform any machine operation.
15.Use the right tool at the correct speed and feed
rate. Do not force a tool or attachment to do a job
for which it was not designed. The right tool will do
the job better and safer.
16.Use recommended accessories; improper
accessories may be hazardous.
17.Maintain machinery with care. Follow instructions
for lubricating and changing accessories.
18.Turn off the machine before cleaning. Use a brush
or compressed air to remove dust or debris — do
not use your hands.
19.Do not stand on the machine. Serious injury could
occur if the machine tips over.
20.Never leave the machine running unattended. Turn
the power off and do not leave the machine until it
comes to a complete stop.
21.At all times hold the stock firmly.
SAVE THESE INSTRUCTIONS.
Refer to them often and use them to instruct others.

5
KEY FEATURES AND COMPONENTS
FIG. 1
1. Variable speed feed belt
2.
3HP continuous duty motor
3. Dual 26” drums
4.
Sanding elevation cursor
5.
Elevation crank handle
6.
Switch assembly

6
PRODUCT SPECIFICATIONS
FUNCTIONAL DESCRIPTION
This 26” Dual Drum Sander is specifically designed to handle both rough and final sanding
processes in a single pass. This machine features an adjustable height automatic feed table and comes with 80-grit
and 120-grit pre-cut sanding belts already installed. This dual drum sander is powered by a 3HP continuous duty
sealed motor with a variable speed feed that enables you work at 3-20 S.F.P.M. The wide feed belt accepts stock as
big as 25 ½” and allows you to sand pieces up to 12 ¼” thick.
UNPACKING
The machine is heavy, be careful when removing it from the shipping container! Failure to comply
may cause serious injury and/or damage to the sander and/or property!
Your Dual Drum Sander comes packed in a single container. Use a safety strap to avoid tip over when lifting
machine. Check shipping carton and machine for damage before unpacking.
Open the shipping container. Carefully remove packaging materials, parts and machine from shipping carton.
Always check for and remove protective shipping materials around motors and moving parts. Lay out all parts on a
clean work surface and check that all parts are present and in good condition:
DESCRIPTION (QUANTITY)
Delta 26” Dual Drum Sander (1)
8-10mm Open End Wrench (1)
Elevation Handle (1)
DRUM MOTOR SPECIFICATIONS
Type Induction Ball bearing/
Continuous Duty
Horsepower 3HP
Amps 16A
Voltage 230V
Phase Single
Hertz 60Hz
RPM 3,450
BELT FEED MOTOR SPECIFICATIONS
Type Universal
Horsepower 1/6
PRODUCT SPECIFICATIONS
Maximum sanding width 25-1/2”
Maximum board thickness 12-1/4”
Minimum board thickness
Minimum board length 6”
Feed Speed 3-20 FPM (variable)
Compare the items to inventory figures; verify that all items are accounted
for before discarding the shipping box. Report any missing or damaged
parts to your distributor or dealer. Prior to tool assembly and use, read
this manual thoroughly to familiarize yourself with proper assembly,
maintenance and safety procedures.
Remove any protective materials and coatings from all of the parts and the
drum sander. The protective coatings can be removed by spraying WD-40
on them and wiping it off with a soft cloth. This may need to be redone
several times before all of the protective coatings are removed completely.
If any parts are missing, do not attempt to plug in the power
cord and turn “ON” the machine. The machine should
only be turned “ON” after all the parts have been obtained and installed
correctly.
Number of Sanding Drums 2
Drum Size 5” x 26”
Drum Speed 1,550 RPM
Dust Ports 2-4”
PRODUCT DIMENSIONS
Footprint 17-3/4” x 43”
Length 31”
Width 46”
Height 53”
Weight 485 lbs.
SHIPPING DIMENSIONS
Carton Type Wooden Crate
Length 33”
Width 48”
Height 55”
Gross Weight 535 lbs.
1/4”
26" inch

26" inch
7
FIG. 2
ASSEMBLY
TOOLS REQUIRED
• Flat head screw driver
• 10mm open-end wrench
FIG. 3
SECURE SWITCH BOX TO FRAME
Tools Required: 10mm open-end wrench
Parts: None
Hardware Needed: Two 10mm hex head screws
1. Locate the two threaded holes on the upper right side of
the machine as shown in Fig. 2.
2. Attach the two 10mm hex head screws to the mounting
plate, leaving about 1/8” between the screw head and
mounting plate.
3. Mount switch assembly (A) to the machine frame by
aligning the keyholes (B) in the switch assembly over the
screw heads and pushing the assembly back and into
position.
4. Tighten screws using 10mm open-end wrench.
ASSEMBLE TABLE ELEVATION
CRANK AND HANDLE
Tools Required: None
Parts: Table Elevation Crank
Table Elevation Handle
Hardware Needed: None
1. Install the table elevation crank (C) by aligning the
groove in the bottom of the crank with the pin located on
the shaft (D). See Fig. 3.
2. Screw the table elevation handle into the threaded hole
in the table elevation crank.
CONNECT DUST COLLECTOR TO DUST COLLECTION PORT
Tools Required: Flat head screwdriver
Parts: None
Hardware Needed: Two 4” Ring Clamps (not provided)
Your Dual Drum Sander is equipped with two 4-inch dust collection ports. These must be connected to dust
collector hoses to ensure safe operation.
Do not attempt to operate this tool without first connecting it to an adequate dust collection system.
1. Fit a 4” ring clamp over the end of each dust collection hose.
2. Place a dust collection hose over each dust collection port and tighten ring clamp with the flat head screwdriver.

8
ADJUSTMENTS
FIG. 4
FIG. 5
TO REPLACE THE SANDING
BELT
1. Lift the upper guard up and tilt it toward the rear of
the machine to expose the drums.
2. Locate the spring-loaded locking clamp (A) on the
right end of the drum. Squeeze the clamp open
and remove the end of the sanding belt (B) from the
drum slot. See Fig. 4.
3. Slowly pull the old sanding belt off the drum.
4. Squeeze the spring-loaded locking clamp on the left
end of the drum and remove the old sanding belt.
5. Squeeze the spring-loaded locking clamp on the
left end of the drum and insert the end of the new
sanding belt approximately 2 inches into the drum
slot.
6. Release the clamp to lock the belt end in place.
7. Rolling the roller by hand, carefully wind the
sanding belt around the drum, making sure to keep
it snug. The edges of the belt should meet without
overlapping.
NOTE: The Dual Drum Sander is designed to achieve coarse and fine sanding in a single pass. Therefore, the
coarser sanding belt should always be installed on the front roller with the finer belt on the rear roller.
8. Squeeze the locking clamp on the right end of the
drum and insert as much of the end of the sanding
belt into the slot as possible.
9. Release the clamp to lock the belt in place.
10.Roll the roller by hand to ensure the belt is snug
and the edges meet without overlapping.
TO ADJUST THE FEED BELT
TRACKING
For proper stock feed, both sides of the feed belt must
travel at exactly the same rate. If the feed belt tracks to
the right or left during operation, you will need to adjust
the tension.
NOTE: If the belt tracks to the left, tighten the left
tensioning bolt. If it tracks to the right, tighten the right
tensioning bolt.
1. Locate the feed belt tensioning bolts as shown in
Fig. 5.
2. Turn the sander on and, depending on which
direction the feed belt is tracking, use a 6mm Allen
wrench to tighten either the left or right adjustment
bolt in 1/4-turn increments until the feed belt tracks
evenly.

9
ADJUSTMENTS
FIG. 6
TO ADJUST DRIVE BELT
TENSION
1. Remove the elevation cursor by unscrewing the
retaining screw.
2. Remove the eight Phillips head bolts and washers
securing the left and right side guards (A) to the
machine and remove the guards. See Fig. 6.
3. Use a 6mm Allen wrench to remove the four hex
cap bolts and washers securing the bottom guard
(B) to the machine. See Fig. 7.
4. Raise the telescoping panels (C) high enough to
expose the motor mount (D). See Fig. 7. Prop up
using a scrap block of wood.
5. Locate the two M12 nuts (E) that raise and lower the
motor. See Fig. 7.
6. To increase tension on the drive belts, loosen the
bottom nuts then tighten the top nuts.
7. Drop the telescoping panels back into place and
re-secure to the bottom guard.
8. Re-attach the side guards and elevation cursor.
FIG. 7

10
FIG. 9
TO REPLACE THE FEED BELT
This step requires two adults. The feed table is heavy, be careful when disconnecting and
removing it from the machine. Failure to comply may cause serious injury and/or damage to the
sander and/or property!
ADJUSTMENTS
1. Using the table elevation crank and handle, lower
the table as far as it will go.
2. Release tension on the feed belt by backing off
the locking nuts (A) on the feed belt adjustment
bolts (Fig. 8) and then tightening the feed belt
adjustment bolts (B) until they are loose enough to
remove the feed belt assembly.
3. Loosen but do not remove the eight Philips head
screws (C) holding the bearings to either side of the
front of the feed table. See Fig. 9.
4. Remove the front guard (D) by sliding it forward.
5. Locate and remove the four 6mm hex head screws
(E) securing the feed table to the base. See Fig. 10.
6. With the aid of a second adult, carefully remove the
feed table through the rear of the machine being
careful to angle it away from the motor housing.
7. Position the feed table on its side and remove the
worn feed belt.
8. Carefully slide the new feed belt into place.
9. Slide feed belt assembly back onto machine base
through the rear, being careful not to damage motor
housing.
10.Replace and tighten the four 6mm hex cap head
screws to secure the feed table to the machine
base.
11.Replace the front guard and retighten the Phillips
head screws on each bearing.
12.Re-tension the feed belt.
13.Adjust the tracking as described on page 9.
FIG. 10
FIG. 8

11
ADJUSTMENTS
FIG.12
TO ADJUST PARALLELISM OF
SANDING DRUMS
The front sanding drum has been factory adjusted and
needs no further adjustment. The rear sanding drum
must be adjusted for parallelism.
1. Lift the upper guard up and tilt it toward the rear of
the machine to expose the sanding drums.
2. Using the 6mm wrench, rotate the cap
screws, indicated in Fig. 11, on either end of the
rear drum.
3. Turning the cap screws clockwise will raise the
drum while turning it counterclockwise will lower
the drum.
4. Repeat this dial setting on the opposite end of the
drum.
5. Replace the upper guard to its original position over
the drums.
NOTE: For proper operation of the machine, the dial
settings at both ends of the drum must be identical.
FIG. 11
TO ADJUST ROLLER PRESSURE
The pressure rollers maintain tension upon the
workpiece as it passes through the machine. If the
stock refuses to pass through the machine, or the
finished surface is uneven, the tension on the pressure
rollers may need adjusting.
1. Lift the upper guard up and tilt it toward the rear of
the machine to expose the sanding drums.
2. Locate the roller pressure adjustment screws as
indicated in Fig. 12.
3. Using a Phillips head screw driver, turn the screws
clockwise to increase the roller pressure on the
workpiece; or counterclockwise to decrease the
pressure.
4. Adjust both sides of the pressure rollers to ensure
parallelism with the drums.
5. Replace the upper guard to its original position over
the drums.
Do not overtighten the adjustment screw. Too much roller pressure will prevent the workpiece from
passing through the machine, and may cause the feed belt to stop.

12
Front Grit / Rear Grit Setting (mm)
80/100, 120/150, 120/180, 150/220 .15
80/120, 100/150, 100/180 .30
60/100, 36/38 .40
36/120 .56
36/60 .76
36/80 .9
ADJUSTMENTS
TO ADJUST DRUM HEIGHT
In order to accommodate different abrasive grits on
the drums, the height of the drums from the workpiece
must vary. The height of the front drum has been
factory set and should not be adjusted. The back drum
is designed for easy adjustment.
1. Lift the upper guard up and tilt it toward the rear of
the machine to expose the sanding drums.
2. Locate the drum height adjustment screw as shown
in Fig. 13.
3. Rotate the adjustment screw to the desired
measurement.
4. Repeat this same adjustment at the opposite end of
the roller to maintain parallel orientation to the front
drum.
5. Replace the upper guard to its original position over
the drums.
NOTE: For proper operation of the machine, the dial
settings at both ends of the drum must be identical.
IMPORTANT: The chart at the right shows the proper
settings based upon sanding grits.
FIG. 13
OPERATION
The basic operating procedure for the Dual Drum Sander is as follows:
1. Establish the depth of wood removal and set table height.
2. Start drums.
3. Start feed belt and select proper feed rate.
4. Ensure dust collection system is running.
5. Feed stock through machine.
OPERATING TIPS
DETERMINING DEPTH OF
WOOD REMOVAL
Given the variables of grit abrasion, wood type, and
feed rate, determining proper depth of removal may
take some experimentation. For best results, use
scrap wood to practice sanding and to develop skill
and familiarity with the machine before doing finish
work. Also consider any cups and/or crowns in the
workpiece.
A good rule of thumb when sanding with grits finer than
80 is to lower the drum so it contacts the workpiece
but drum can still be rotated by hand. For grits coarser
than 80, lower the drum slightly more.
SANDING IMPERFECT STOCK
When sanding stock with a cup or crown, place the
crown up. This will stabilize the stock to help prevent
tipping or rocking during sanding. After the crown has
been removed and the top is flat, turn the stock over
and sand the opposite side. To avoid personal injury,
take special care when sanding stock that is twisted,
bowed, or otherwise varies in thickness from end to
end.
If possible, support such stock as it is being sanded
to keep it from slipping or tipping. Use an extra roller
stand, help from another person, or hand pressure on
the stock to minimize potentially hazardous situations.

13
OPERATING TIPS
STOCK FEEDING ANGLE
Some pieces, because of their dimensions, will need
to be fed into the machine at a 90-degree angle
(perpendicular to the drums). However, even a slight
offset angle of the stock will provide for more effective
stock removal. The optimum feeding angle is about
60-degrees. Angling the workpiece for stock removal
provides other advantages, such as less loading of
certain areas of the drums due to glue lines or mineral
streaks in the stock, more even wear of abrasive strips,
potentially faster feed rates, and lighter loads on the
motor. For the best final finish, however, the stock
should be fed with the grain on the final one or two
passes.
MULTIPLE-PIECE SANDING
When sanding multiple pieces simultaneously, make
sure to stagger (step) the pieces across the width of
the feed belt. Multiple pieces should also be of similar
thickness and this helps to ensure consistent contact
with the pressure rollers.
SANDING FACE FRAMES AND
RAISED PANEL DOORS
It is important to have the proper abrasive contact
when doing this type of sanding. If the machine is set
to take an excessive depth of cut, the result can be a
gouge or dip as the drum goes from sanding the rails
at full width to sanding just a few inches of width of the
stiles.
EDGE SANDING
When edge sanding, the sander will mimic the opposite
edge of the stock which is lying on the feed belt.
Because of this, it is important for the stock edge to
have been ripped at the proper angle to the face before
the sanding process. When edge sanding small stock,
clamp several pieces together to prevent them from
slipping on the feed belt.
The abrasive material you choose will have a
substantial effect on the performance of your sander.
Variations in paper type, weight, coating and durability
all contribute to achieving your desired finish.
As with any sanding operation, first begin sanding
with a coarser grit, depending on the roughness of
the stock or the amount of stock to be removed. Then
progressively work toward finer grits. This means if you
are using two different grits on your 31-481 Dual Drum
Sander, the coarser grit should always be placed on
the front drum.
The amount of stock to be removed is a major
consideration when initially choosing the grit grade.
Grits 36 and 60 are primarily designed for stock
removal; grits over 100 are primarily finishing grits
designed to remove the scratch pattern from the
previous grit used.
For best results, never skip more than one grit grade
when progressing through a sanding sequence.
For fine work, such as furniture, try not to skip any
grit grades during the sanding process. In general,
premium quality abrasives will produce a better finish
with a less noticeable scratch pattern.
CAUTION: Grits that are too fine can sometimes
burnish the wood and leave a glossy surface which will
not accept stains evenly. This will vary by type of wood.
Oak, for example, is susceptible to burnishing because
of its open pores.
SELECTING THE PROPER ABRASIVES
READY-TO-CUT ABRASIVE
STRIPS
DESCRIPTION NORMAL USE
60 Grit Sandpaper surfacing and dimensioning
boards, trueing warped
boards
80 Grit Sandpaper surfacing, light dimensioning,
removing planer ripples
120 Grit Sandpaper light surfacing, minimal stock
removal
150 Grit Sandpaper finish sanding, minimal stock
removal
180 Grit Sandpaper finish sanding only, not for
stock removal
220 Grit Sandpaper finish sanding only, not for
stock removal.

14
RECOMMENDED MAINTENANCE PROCEDURES
ROUTINE INSPECTION
It is recommended that you periodically inspect your
DELTA®Dual Drum Sander as a precautionary action.
During this time, check all hardware such as bolts,
nuts and screws to ensure they are properly tightened.
Also verify that the sanding belts and drive belts are
mounted properly and have not become loose or torn.
Also take this opportunity to inspect for dust and/or
wood particles that may have accumulated on or in the
machine.
LUBRICATION
The table height adjustment screw shafts, located at
either end of the machine must be well lubricated with
grease at all times. In order to access, inspect and
lubricate the screw shafts, it is necessary to remove
the two side guards located on either end of the
machine.
To remove the side guards:
1. Remove the elevation cursor by unscrewing the
retaining screw.
2. Remove the eight Phillips head bolts and washers
securing the left and right side guards to the
machine and remove the guards. See Fig. 14.
3. Re-attach side guards and elevation cursor.
CLEANING THE SANDING BELTS
Regularly clean the sanding belts on the drums with
commercially available cleaning sticks, following the
manufacturer’s directions. When cleaning, also brush
the stick crumbs from the sanding drum while it is still
rotating.
FIG. 14
TROUBLESHOOTING GUIDE
PROBLEM POTENTIAL CAUSE SOLUTION
Sanding surface clogs too
quickly.
Sanding grit too fine.
Too much material being removed at once.
Dirty board surface.
Insufficient dust collection.
Board contains too much moisture.
Worn sanding belt.
Change to a coarser grit.
Adjust table height.
Ensure board is free of debris prior to sanding.
Inspect dust collection system.
Properly dry stock before sanding.
Replace sanding belt (Page 8)
Sanding belt tears.
Drums not parallel to feed table.
Sandpaper edges overlapped.
Tape is slipping.
Too much material is removed at once.
Re-align drums (Page 10)
Re-install sanding belt.
Rewind the loose belt on the drum.
Lower the table height.
Rounding on the edges. Too much material is removed at once. Lower the table height.
Uneven thickness on right
and left side of the board. Drums are not parallel to feed table.
Uneven wear of sanding paper. Re-align drums (Page 10)
Replace sanding belt.
Stock slips on the feed
belt.
Too much material is removed at once.
Too much dust on the feed belt surface.
Worn feed belt.
Lower the table height.
Clean surface with air hose.
Replace feed belt (Page 8)
Shiny spots on sanded
surface. Sanding paper too old.
Drums too high. Replace sanding belt (Page 8)
Lower table height.
Marks on sanded surface Partial damage to sanding paper.
Paper overlapped on edges. Replace sanding belt (Page 8)
Re-align sanding belt on drum
Feed belt does not
run smoothly or stops
completely.
Feed belt tension is incorrect.
Belt tracking is incorrect. Adjust feed belt tension (Page 8)
Adjust feed tracking (Page 8)
Consistently noticeable
“snipe”
No out-feed support.
Pressure roller spring tension incorrect.
Drum height incorrect in relation to pressure rollers.
Use supplementary support in rear of
machine.
Check and adjust.
Adjust pressure rollers (Page 11)

15
STRUCCIONES IMPORTANTES DE SEGURIDAD
NORMAS DE SEGURIDAD: DEFINICIONES
LEA Y COMPRENDA TODAS LAS ADVERTENCIAS E INSTRUCCIONES DE OPERACIÓN
ANTES DE USAR ESTE EQUIPO. No seguir todas las instrucciones que figuran a
continuación podría resultar enshock eléctrico, incendio y/o graves lesionespersonaleso daños a la propiedad.
Trabajar con madera puede ser peligroso si no se siguen procedimientos de operación seguros y
adecuados. Tal como sucede con toda maquinaria, hay determinados peligros asociados con la
operación del producto. Utilizar esta máquina con respeto y cautela disminuirá considerablemente la
posibilidad de lesiones personales. Sin embargo, no observar o ignorar las precauciones normales
de seguridad podría resultar en lesiones personales para el operador. Los equipos de seguridad tales como
protectores, varillas para empujar, sujetadores, tablas con canto biselado, gafas, máscaras para polvo y
protección auditiva pueden reducir la posibilidad de lesiones. Pero incluso el mejor protector no compensará
el mal criterio, el descuido ni la falta de atención. Siempre aplique el sentido común y actúe con cautela en el
taller. Si un procedimiento parece peligroso, no lo intente. Busque un procedimiento alternativo que parezca más
seguro.
Este
manual
contiene
información
que
es
importante
que
usted
conozca
y
comprenda.
Esta
información
está
relacionada
con
la
protección
de
SU
SEGURIDAD
y
la
PREVENCIÓN
DE
PROBLEMAS
CON
EL
EQUIPO.
Para
ayudarle
a
reconocer
esta
información,
usamos
los
símbolos
a
continuación.
Lea
este
manual
y
preste
atención
a
estas secciones.
Indica
una
situación
inminentemente
peligrosa
que,
de
no
evitarse,
resultará
en
muerte
o
lesiones
graves.
Indica
una
situación
potencialmente
peligrosa
que,
de
no
evitarse,
podría
resultar
en
muerte
o lesiones graves.
Indica
una
situación
potencialmente
peligrosa
que,
de
no
evitarse,
puede
resultar
en
lesiones
menores
o
moderadas.
Usado
sin
el
símbolo
de
alerta
de
seguridad
indica
una
situación
potencialmente
peligrosa
que,
de
no evitarse, puede
resultar en
daños
a la propiedad.

16
REGLAS GENERALES DE SEGURIDAD
ADVERTENCIA: NO SEGUIR ESTAS REGLAS DE SEGURIDAD PUEDE RESULTAR EN
LESIONES PERSONALES GRAVES.
• POR SU PROPIA SEGURIDAD, LEA Y COMPRENDA EL MANUAL DE INSTRUCCIONES ANTES DE OPERAR
LA UNIDAD. Conozca las aplicaciones y limitaciones de la unidad, así como los peligros específicos propios de la
misma.
• MANTENGA LIMPIA EL ÁREA DE TRABAJO. Las áreas y los bancos desordenados pueden provocar accidentes.
• NO LA USE EN ENTORNOS PELIGROSOS. No use esta unidad en lugares húmedos o mojados, ni la exponga a la
lluvia. Mantenga el área de trabajo bien iluminada.
• MANTENGA ALEJADOS A LOS NIÑOS Y VISITANTES. Todos los niños y visitantes deben mantenerse a una
distancia prudente del área de trabajo.
• DESCONECTE LA UNIDAD antes de efectuarle tareas de mantenimiento.
• CONTROLE LAS PIEZAS DAÑADAS. Antes de seguir usando la unidad, repare o reemplace de forma adecuada
cualquier pieza que esté dañada.
NO SEGUIR ESTAS REGLAS DE SEGURIDAD PUEDE RESULTAR EN LESIONES
GRAVES. corbatas, anillos, relojes y cualquier otra alhaja, y
1. Lea y comprenda los carteles de advertencia en la
máquina y en este manual. No cumplir con todas
estas advertencias puede causar lesiones graves.
2. Reemplace las etiquetas de advertencia si se
tornan borrosas o se desprenden.
3. Esta Lijadora de Tambor Doble está diseñada
y destinada para ser utilizada únicamente
por personal experimentado y capacitado
adecuadamente. Si no está familiarizado con la
operación adecuada y segura de una lijadora de
tambor, no la utilice hasta recibir la capacitación y
el conocimiento adecuados.
4. No utilice esta máquina para otra cosa que no sea
su uso previsto. Si se utiliza para otros propósitos,
DELTA®Power Equipment Company, Inc. se exime
de cualquier garantía real o implícita y se mantiene
indemne ante cualquier lesión que pueda derivarse
de dicha utilización.
5. Siempre use gafas de seguridad/protectores
faciales aprobados mientras esté utilizando esta
Lijadora de Tambor Doble.
6. Antes de operar esta lijadora de tambor,
quítese arremánguese más arriba del codo. Quítese
toda la ropa suelta y sujétese el cabello largo. Se
recomienda el uso de calzado y franjas de piso
antideslizantes. No use guantes.
7. Use protectores auditivos (tapones u orejeras)
durante períodos de operación extensos.
8. Parte del polvo creado por el lijado, el aserrado,
el amolado y la perforación eléctricos y otras
actividades de construcción contienen productos
químicos que se sabe que causan cáncer, defectos
congénitos y otros daños reproductivos. Algunos
ejemplos de estos productos químicos son:
• Plomo de pinturas a base de plomo.
• Sílice cristalino de ladrillos, cemento y otros
productos de albañilería.
• Arsénico y cromo de madera tratada químicamente.
Su riesgo de exposición varía dependiendo de la
frecuencia con la que realice este tipo de trabajo. Para
reducir su exposición a estos productos químicos,
trabaje en un área bien ventilada y trabaje con equipos
de seguridad aprobados, como máscaras faciales y
para polvo que estén específicamente diseñadas para
no dejar pasar las partículas microscópicas.
1. No opere esta máquina cuando esté cansado o
bajo los efectos de drogas, alcohol o cualquier
medicamento.
2. Asegúrese de que el interruptor esté en la posición
OFF (APAGADO) antes de conectar la máquina a
una fuente de alimentación.
3. Asegúrese de que la máquina esté conectada a
tierra de forma adecuada.
4. Desenchufe la máquina de la fuente de alimentación
para realizar todos los ajustes y el mantenimiento
de la misma.
5. Fórmese el hábito de controlar que todos los
equipos adicionales, tales como llaves de ajuste,
llaves, descartes, material y paños de limpieza,
se retiren lejos de la máquina antes de encenderla.
6. Mantenga los protectores de seguridad en su lugar
en todo momento cuando la máquina esté en
uso. Si se quitan por razones de mantenimiento,
aplique extrema precaución y vuelva a colocar los
protectores inmediatamente cuando se complete el
mantenimiento.
7. Asegúrese de que la lijadora de tambor esté
firmemente asegurada al piso antes de usarla.
8. Controle si hay piezas dañadas. Antes de
seguir utilizando la máquina, debe controlarse
cuidadosamente si el protector u otra pieza
está dañada, para determinar que funcionará
adecuadamente y desempeñará su función
prevista. Controle la alineación de las piezas
móviles, la unión de las piezas móviles, si hay
piezas rotas, el montaje y cualquier otra condición
que pueda afectar su funcionamiento. Un protector

17
u otra parte que estén dañados deben repararse o
reemplazarse adecuadamente.
9. Provea un espacio adecuado alrededor del área de
trabajo e iluminación superior antirreflejo.
10.Mantenga el piso alrededor de la máquina limpio y
libre de descartes de material, aceite y grasa.
11.Mantenga a los visitantes a una distancia prudente
del área de trabajo. Mantenga alejados a los niños.
12.Haga su taller a prueba de niños, mediante
candados, interruptores generales o sacando las
llaves de encendido.
13.Preste absoluta atención a su trabajo. Mirar
alrededor, mantener una conversación y hacer
“payasadas” son acciones descuidadas que
pueden resultar en lesiones graves.
14.Mantenga una postura balanceada en todo
momento para que no se caiga ni se apoye sobre
la correa de lijado u otras piezas móviles. No se
extralimite ni aplique fuerza excesiva para realizar
cualquiera de las operaciones de la máquina.
15.Utilice la herramienta correcta, a la velocidad y
tasa de alimentación adecuadas. No fuerce una
herramienta o acoplamiento para que realicen
un trabajo para el cual no fueron diseñados. La
herramienta adecuada realizará mejor el trabajo y
de manera más segura.
16.Utilice los accesorios recomendados; los
accesorios incorrectos pueden ser peligrosos.
17.Realice el mantenimiento de la maquinaria con
cuidado. Siga las instrucciones para lubricar y
cambiar los accesorios.
18.Apague la máquina antes de limpiarla. Utilice un
cepillo o aire comprimido para quitar el polvo o la
suciedad; no utilice sus manos.
19. No se pare sobre la máquina. Si la máquina se
vuelca, podrían ocurrir lesiones graves.
20.Nunca deje la máquina funcionando sin supervisión.
Apáguela y no deje la máquina hasta que haya
detenido completamente.
21.Sujete el material con firmeza en todo momento.
GUARDE ESTAS INSTRUCCIONES.
Consúltelas con frecuencia y utilícelas para instruir a otros.

19
CARACTÉRISTIQUES IMPORTANTES ET COMPOSANTES
FIG. 1
1.
Cinta de alimentación de
velocidad variable
2.
Motor de servicio continuo de
3HP
3.
Tambores dobles de 26”
4.
Cursor de elevación de lijado
5.
Manivela de elevación
6.
Ensamblado del interruptor

20
ESPECIFICACIONES DEL PRODUCTO
DESCRIPCIÓN FUNCIONAL
de Tambor Doble de 26”, está específicamente diseñada para manejar tanto
el proceso de lijado preliminar como el de lijado final en una sola pasada. Esta máquina cuenta con una mesa
de alimentación automática de altura ajustable y tiene correas de lijado precortadas de grano 80 y grano 120 ya
instaladas. Esta lijadora de tambor doble está impulsada por un motor sellado de servicio continuo de 3HP, con una
velocidad de alimentación variable que le permite a usted trabajar entre 3 y 20 pies de superficie por minuto (surface
feet per minute, SFPM). La cinta de alimentación ancha acepta un material de hasta 25 ½” de tamaño y le permite
lijar piezas de hasta 12 ¼” de espesor.
DESEMBALAJE
Esta máquina es pesada, ¡sea cuidadoso cuando la retire del contenedor de envío! ¡No
cumplir con este requisito puede causar lesiones graves y/o daños a la lijadora y/o a la
propiedad!
Su Lijadora DELTA®de Tambor Doble viene empacada en un único contenedor. Utilice una correa de seguridad para
evitar que se vuelque cuando levante la máquina. Controle que la caja de envío y la máquina no muestren daños antes
de desembalarla. Abra el contenedor de envío. Con cuidado, quite los materiales de embalaje, las piezas y la máquina
de la caja de envío. Siempre busque y retire los materiales de protección de envío que se encuentran alrededor de los
motores y las piezas móviles. Ponga todas las piezas sobre una superficie de trabajo limpia y controle que todas las
partes estén presentes y en buenas condiciones:
DESCRIPCIÓN (CANTI DAD)
Lijadora Delta de Tambor Doble
de 26” (1)
Llave de boca fija de 8-10 mm (1)
Manija de elevación (1)
ESPECIFICACIONES DEL MOTOR DEL TAMBOR
Tipo Rodamiento por inducción/
Servicio
Caballos de fuerza 3HP
Amperes 16A
Voltaje 230V
Fase Simple
Hercios 60Hz
RPM 3,450
SPÉCIFICATIONS DU MOTEUR DE LA COURROIE
D'ALIMENTATION
Tipo Universal
Caballos de fuerza 1/6
ESPECIFICACIONES DEL PRODUCTOALIMENTACIÓN
Ancho de lijado máximo 25-1/2”
Espesor máximo de las tablas 12-1/4”
Espesor mínimo de las tablas 1/4"
Largo mínimo de las tablas 6”
Compare los elementos con las cifras del inventario; verifique que todos los
elementos estén presentes antes de desechar la caja de envío. Informe a su
distribuidor o comerciante sobre cualquier pieza faltante o dañada. Antes
de ensamblar y utilizar la herramienta, lea este manual íntegramente para
familiarizarse con el ensamblaje, el mantenimiento y los procedimientos de
seguridad adecuados.
Quite cualquier material y revestimiento de protección de todas las piezas y
de la lijadora de tambor. Los revestimientos de protección pueden quitarse
rociándolos con WD-40 y limpiándolos con un paño suave. Es posible que
se necesite hacer esto varias veces antes de que se quiten completamente
todos los revestimientos de protección.
Si hay alguna pieza faltante, no intente enchufar el
cable de alimentación y encender (poner en “ON”)
la máquina. Esta máquina debe encenderse (ponerse en “ON”) únicamente
después de que se hayan obtenido todas las piezas y que estas se hayan
instalado correctamente.
Velocidad de alimentación 3-20 FPM (variable)
Cantidad de tambores de lijado 2
Tamaño de los tambores 5” x 26”
Velocidad de los tambores 1,550 RPM
Abertura para recolección de 2-4”
DIMENSIONES DEL PRODUCTO
Base de apoyo 17-3/4” x 43”
Largo 31”
Ancho 46”
Altura 53”
Peso 485 lbs.
DIMENSIONES DE ENVÍO
Tipo de caja Caja de madera
Largo 33”
Ancho 48”
Altura Altura
Peso total 535 lbs.

21
FIG. 2
ASSEMBLAGE
HERRAMIENTAS NECESARIAS
• Destornillador de cabeza plana
• Llave de boca fija de 10 mm
FIG. 3
ASEGURE LA CAJA DEL
INTERRUPTOR AL ARMAZÓN
Herramientas necesarias: Llave de boca fija de 10 mm
Piezas: Ninguna
Elementos de ferretería necesarios: Dos tornillos con cabeza
allen de 10 mm
1. Ubique los dos orificios roscados en la parte superior
derecha de la máquina como se muestra en la Fig. 2.
2. Sujete los dos tornillos con cabeza allen de 10 mm a la placa
de montaje, dejando aproximadamente 1/8” entre el tornillo y
la placa de montaje.
3. Monte el ensamblado del interruptor (A) al marco de la
máquina alineando los orificios (B) en el ensamblado del
interruptor sobre las cabezas de los tornillos y empujando el
ensamblado hacia atrás y en la posición requerida.
4. Ajuste los tornillos utilizando la llave de boca fija de 10 mm.
ENSAMBLE LA MANIVELA Y MANIJA
DE ELEVACIÓN DE LA MESA
Herramientas necesarias: Ninguna
Piezas: Manivela de elevación de la mesa
Manija de elevación de la mesa
Elementos de ferretería necesarios: Ninguno
1. Instale la manivela de elevación de la mesa (C) alineando la
ranura de la parte inferior de la manivela con el perno del eje
(D). Consulte la Fig. 3.
2. Atornille la manija de elevación de la mesa en el orificio
roscado en la manivela de elevación de la mesa.
CONECTE LOS COLECTORES DE POLVO A LA ABERTURA PARA
RECOLECCIÓN DE POLVO
Herramientas necesarias: Destornillador de cabeza plana
Piezas: Ninguna
Elementos de ferretería necesarios: Dos anillos de sujeción de 4” (no proporcionados)
Su Lijadora de Tambor Doble está equipada con dos aberturas para recolección de
polvo de 4 pulgadas. Estos deben estar conectados a mangueras de recolección de polvo
para asegurar un funcionamiento seguro.
No intente operar esta herramienta sin conectarla primero a un sistema de recolección de polvo adecuado.
1. Coloque un anillo de sujeción de 4” sobre el extremo de cada una de las mangueras de recolección de polvo.
2. Coloque una manguera de recolección de polvo sobre cada una de las aberturas para recolección de polvo y
ajuste el anillo de sujeción con el destornillador de cabeza plana.
This manual suits for next models
1
Table of contents
Languages:
Popular Sander manuals by other brands

Chicago Pneumatic
Chicago Pneumatic CP7200 Operator's manual

CRL
CRL 2300RP Set up and operating instructions

ZIMBERG
ZIMBERG PZP-5114 manual

Clarke
Clarke air CAT25B Operating & maintenance instructions

Chicago Pneumatic
Chicago Pneumatic CP869 Series instruction manual

Shop fox
Shop fox SHOP FOX W1737 owner's manual