10
and moisture from the logs escapes and this can
cause staining which the Airwash may find difficult to
remove.
Only reduce the Secondary air control when the wood
has ‘carbonised’ and the fire is burning at a high
temperature. This is when the ash on the burning
wood looks light grey and virtually covers all of the
wood. You will be able to tell when the stove is at this
stage by studying the colour of the burning surfaces
– the ‘lighter’ they are the better the wood is burning.
If the log surface is predominately black and / or the
flames are a dull orange then there is still some time
to go before the fire is operating at full temperature.
Avoid leaving the stove unattended after refuelling
until the flames are well established on the new logs.
Always load onto a bed of hot embers.
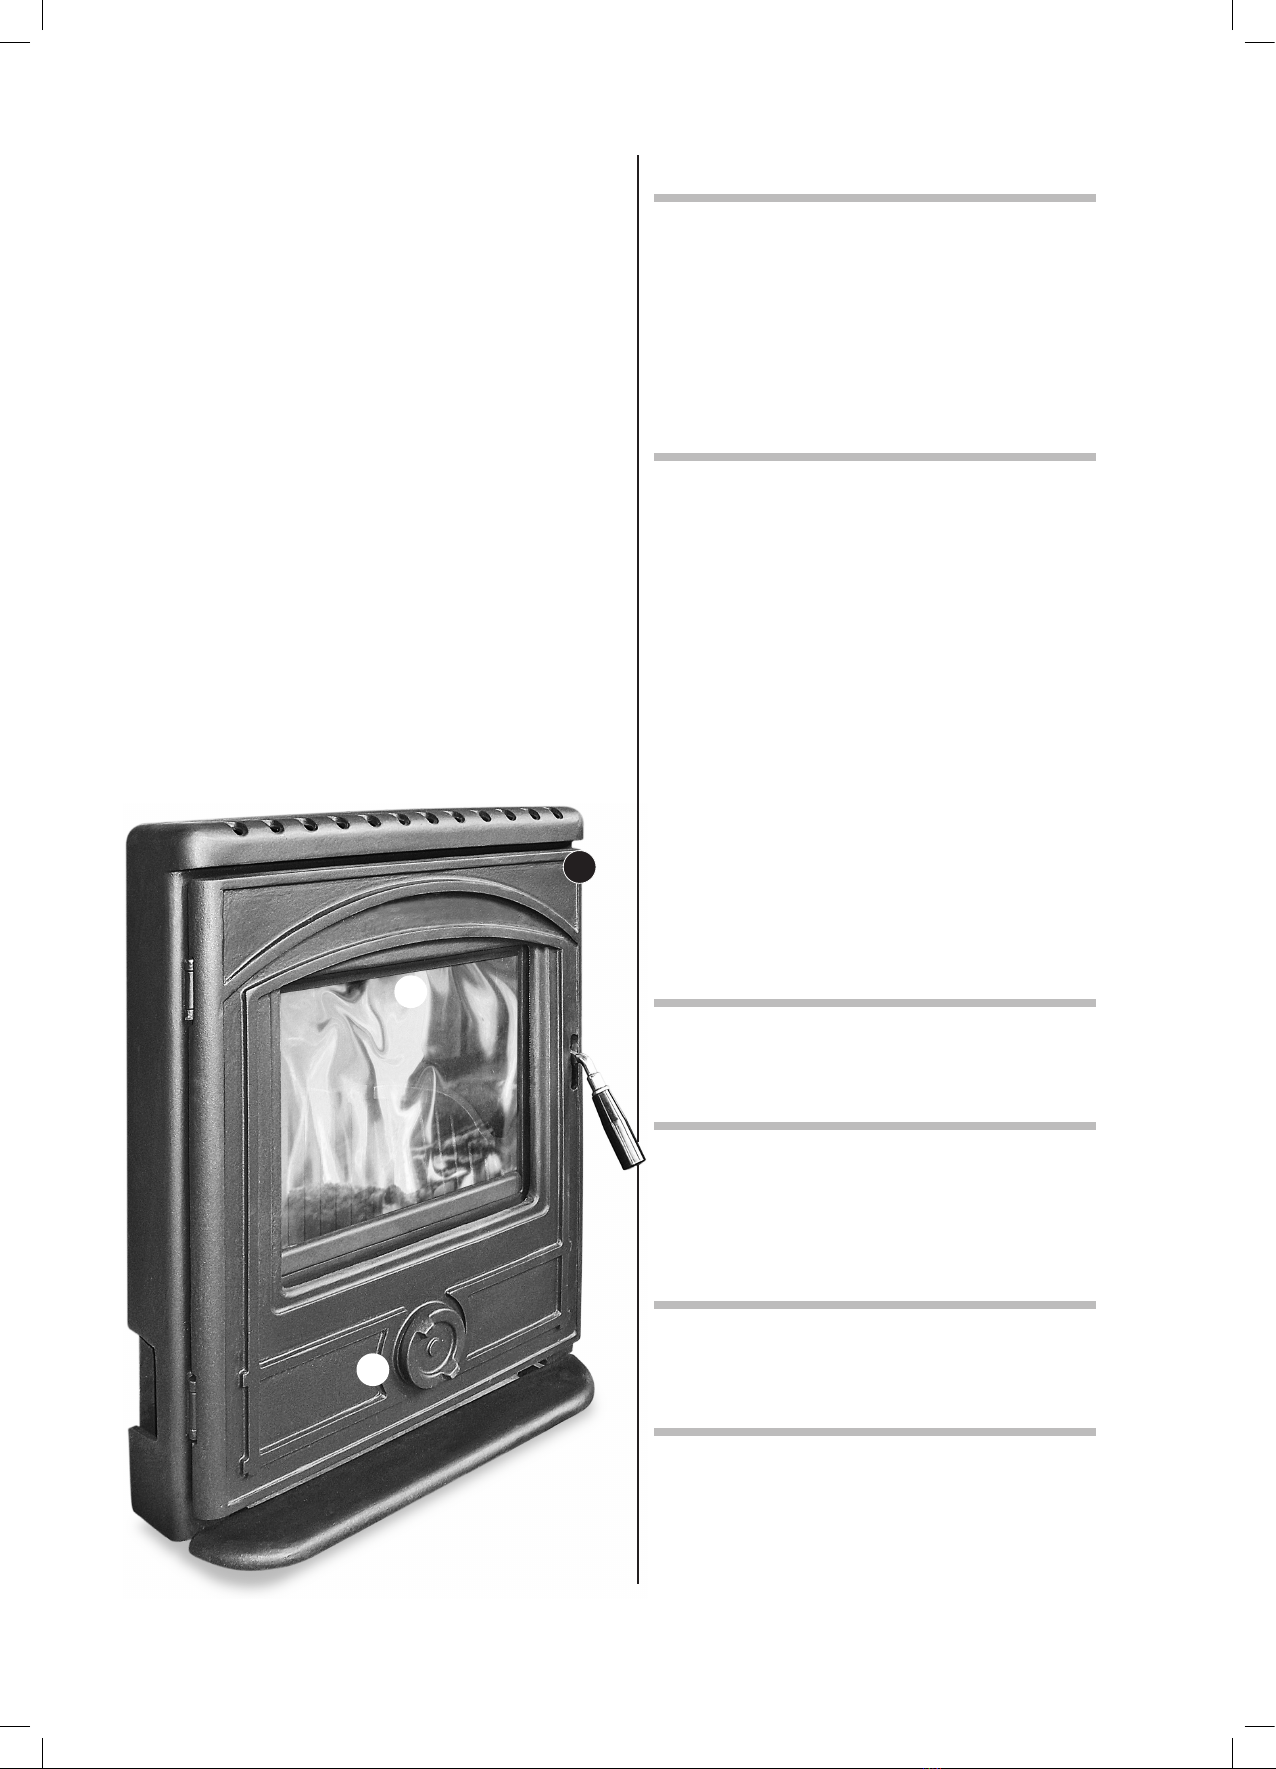
Once the fire is established the flame pattern can
then be adjusted to your requirements with the top
Secondary air (Airwash) control.
Getting the balance right between a gently burning
stove and one that is burning too slowly, creating
smoke and causing the Airwash to fail and
consequently the glass to stain, is very much a matter
of trial and error. If you are burning well-seasoned
wood then a quick ‘blast’ of the stove operating at
‘full throttle’, with Secondary and Primary air fully
open, should quickly burn off any deposits left from
any slower burning phase.
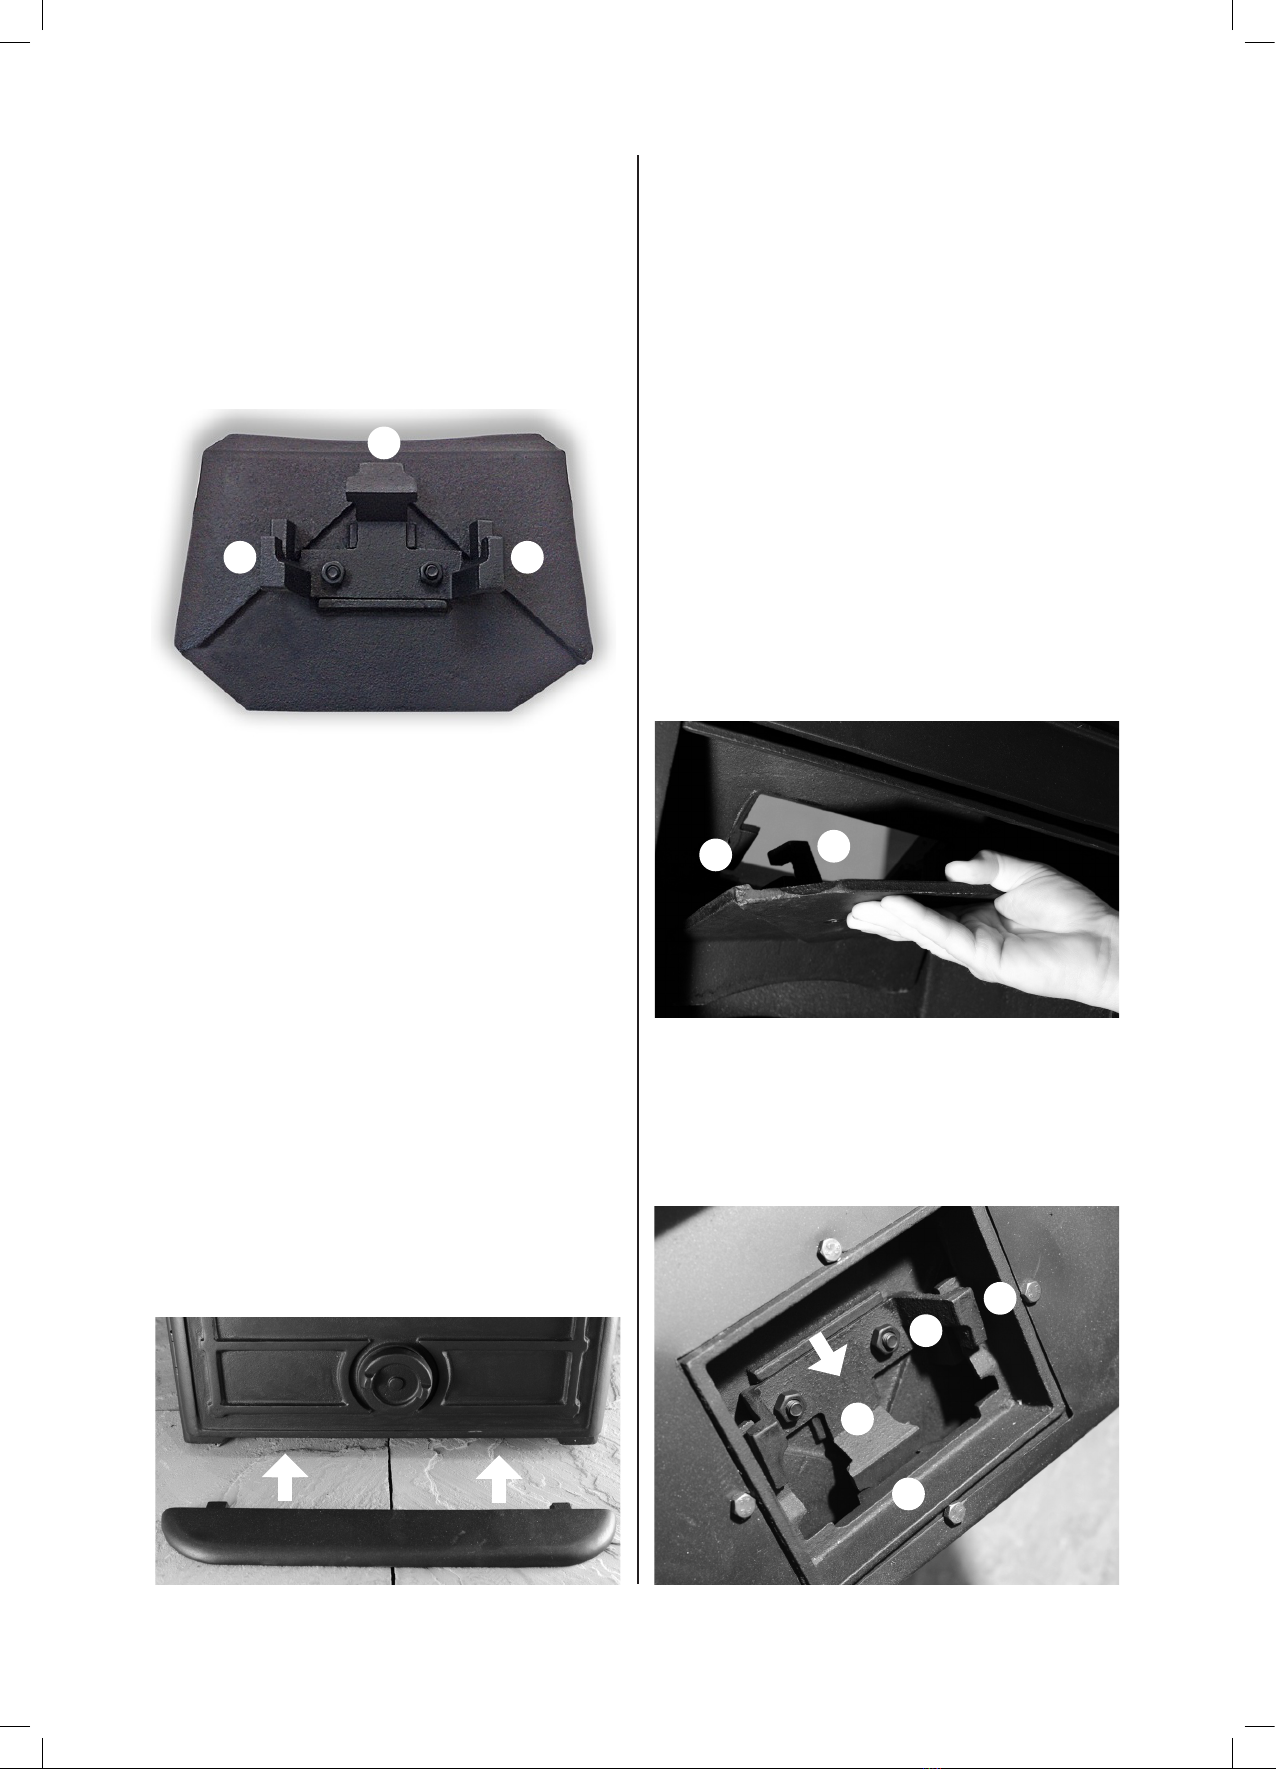
4 Refuelling
For best results: Just before you refuel –
Primary Air (bottom control) – fully open
Secondary Air (top control) – fully open (pull out)
After loading and when new fuel is burning well –
Primary Air – close completely
Secondary Air– adjust to suit
Regular, smaller loads are better because they keep
the fire chamber at a higher temperature, without
over-firing it. The higher operating temperature helps
prevent nuisance smoke and sooty deposits.
Never overfill the fire chamber and also avoid
over-sized pieces of wood which will ‘slow’ the fire
down at the start but then could lead to over-firing.
Before refuelling open the Primary and Secondary
air supply so that there is a good strong fire so that
the embers are glowing red which will help the new
fuel to start burning quickly. This will also ensure that
there is no build-up of harmful gas which could be
released into the room when the fire chamber door is
opened.
Rake the embers and spread them out to make an
even bed. You may need to add some kindling to
re-establish the fire. Add the new wood as before
ensuring that the logs are not tightly packed.
Newly refuelled wood always requires some addi-
tional air so make sure the Secondary air is back in the
fully open position after refuelling. Do not adjust the
Secondary air until the fire is burning well and you can
see bright yellow vigorous flames.
Once the fire is established, usually after about 5
minutes, close the Primary air and adjust the flame
pattern again to your requirements with the
Secondary air (Airwash) control.
If the new wood fuel is slow to catch alight, even with
the Primary and Secondary air fully open then you
could open the stove door slightly tom provide
additional combustion air and until strong vibrant
flames are established. This should only take a
matter of a minute or so and on no account should
the stove be left unattended while this is happening
as the stove could very easily over-fire.
Some simple wood burning tips
1 Small regular loads when refuelling will produce a
more efficient and cleaner burning performance.
2 Avoid burning large amounts of wood with the
Secondary air supply turned down as this will reduce
the effectiveness of the Airwash system, as well as
produce excessive smoke and create potential
creosote build-up.
3 Burn on a high output for approximately 30 minutes
each day to ‘burn off’ any potential soot and creosote
build-up – but be careful not to over-fire the stove.
4 Never overload the stove – it will be smoky and
inefficient as well as very slow to establish a good
burn and could eventually possibly over-fire when it
does get going.
5 Bright vibrant flames and a clean fire chamber
indicates that your stove is operating well.
BURNING MINERAL FUELS
Mineral fuels require much more combustion air from
below the fuel load than wood. This means (depend-
ing on your chimney / flue draught) that Primary air
(bottom control) is generally needed throughout all of
the burning phases. The Primary air control should be
in the fully open position at the start of the lighting
phase (you may also need to leave the stove door
open slightly). Burning mineral fuels also requires the
grate to be riddled more often to allow the free flow
of combustion air from the Primary air control.
Light your fire in the traditional way with a small
wood kindling fire and small amounts of your choice
of mineral fuel placed lightly on top making sure
to leave plenty of air space. Once the mineral fuel
is burning well add additional fuel until a there is a
good bed of burning fuel. Avoid stacking too much
fuel against the back and sides of the stove as this
could potentially overheat the stove’s components and
cause permanent damage. Ideally, when fully burning
the fire should look dome-shaped.
When burning good quality mineral fuels the Airwash
system (Secondary air) should not be needed to keep