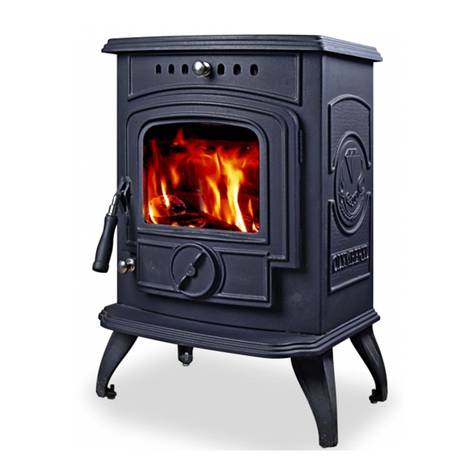
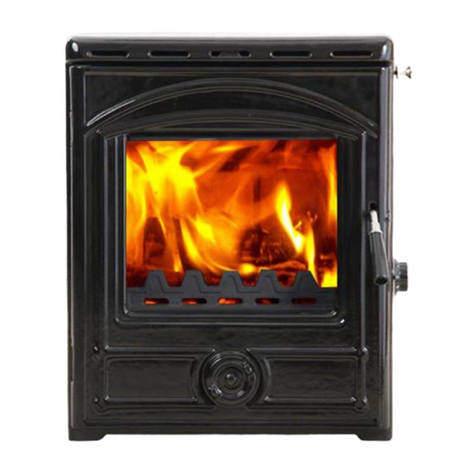
Olymberyl MULTI-FUEL STOVE User manual

Please contact the olymberyl dealer
in your area if you have any questions
about your stove that are not covered
in this manual.

Olymberyl Multi-Fuel Stove
Introduction
Congratulations on purchasing a genuine Olymberyl Stove. When cared for properly,
these high-quality, finely crafted cast iron stoves and fireplaces will offer many years of
reliable performance. This instruction manual has been developed to ensure optimum
performance from the Olymberyl stove and fireplace range. It's very important that you
thoroughly read and understand all instructions before using your new stove or fireplace.
VERY IMPORTANT
FAILURE TO READ AND FOLLOW THESE INSTRUCTIONS BEFORE YOU PROCEED
MAY RESULT IN DAMAGE, VOIDING YOUR WARRANTY!
Safety Instructions
This manual describes the features and functions of the Olymberyl Stoves and fireplaces.
This stove or fireplace will give you considerable pleasure, satisfaction, and performance if
you strictly follow these safety instructions and take heed of the warnings as to the stove
or fire place's safe and proper use. Remember at all times, these stoves and fireplaces
emit more than enough heat to cause harm if misused or if the safety precautions are not
observed.
Stove Safety................................................................................................... 3
Before installing your stove.............................................................................. 4
Adequate provision air.................................................................................
....
5
Well sealed flue system................................................................................... 5
Protection of combustible materials................................................................. 6
Plumbing Wetback(Boiler) Model Only ........................................................ 6
Unpacking and preparing for Installation................................................ 6
Operating your Stove ................................................................................. 7
Fuel.................................................................................................................. 7
First operation of stove................................................................................ .... 8
Air controls....................................................................................................... 8
Refuelling......................................................................................................... 9
Ash removal..................................................................................................... 9
Care of glass.................................................................................................... 10
Overnight burning............................................................................................ 10
Stove
Maintenance
.. .................................................................................... 11.
Check stove regularly................................................................................... 11
Replacing parts................................................................................................ 11
Surface finish................................................................................................... 11
Wetback (Boiler).............................................................................................. 12
...................................................................................... 12
Fire not burning................................................................................................ 12
Glass blackens................................................................................................. 12
Smoke in room................................................................................................. 12
Fire burning too quickly.................................................................................... 13
Chimney fire..................................................................................................... 13
Limited Lifetime . ..................................................................... 14
Warranty Specifics........................................................................................... 14
RContents
R
R
....
Trouble-shooting
Warranty

The term Multi-fuel refers to any of the main commercially available solid fuels such as coal,
wood, turf, anthracite, briquettes. Never use liquid fuels such as oil or kerosene when
lighting or refreshing the fire or at any other time. Do not store liquid fuels near stove.
The burning of solid fuels gives off gases which can be extremely dangerous. These gases
under normal operating conditions will pass up the flue/chimney, and not to escape into your
home, however it is important that your flue system is properly installed and that you check
all joints regularly to ensure there are no cracks or gaps. Also check the door sealing rope
and replace when worn or damaged. We recommend a smoke alarm be fitted in the room
where stoves are installed.
Do not use stove in a room where negative pressure conditions may occur, such as through
the use of extraction fans unless adequate air supply into the room is ensured, as this may
draw air through the stove, thereby escaping into the room.
Creosote and soot may accumulate in your flue pipe and chimney; this may ignite to
cause a chimney fire. If you suspect a chimney fire, evacuate people from the building,
shut down the air controls on the stove and call the Fire Department. To prevent the
accumulation of soot or creosote, check flue and chimney regularly and clean as necessary.
In general well burning hot stoves will cause a lot less build-up than slow burning stoves;
likewise dry wood will cause less build-up than wet wood. We recommend a fire extingu-
isher be available where stoves are in operation. In the event of a chimney fire do not
re-light the stove until the stove and flue/chimney system has been thoroughly cleaned,
checked and repaired as necessary.
Stoves get extremely hot and should not be touched, where young children are in the area
we recommend the use of a suitable fire guard around the stove. Always wear protective
Never use a fan to supply air to the stove or to extract from it.
All users of the stove should be aware of the contents of this manual. Please leave this
manual where it is accessible to stove users and do not allow anyone to use the stove
who is unfamiliar with its correct operation.
Never use the stove if any parts are missing or damaged, only use
genuine parts as replacements and Never modify your stove.
Stove Safety gloves when reloading stove.
Never over fire your stove, if external parts of your stove are glowing red then the stove is
over firing and your draught settings should be reduced. Never interfere with the draught
mechanisms or adjust your air settings outside those limits set when the stove is
manufactured.
Before installing your stove
You need to consider the following to ensure the safe operation of your stove.
Provision of adequate air to support efficient combustion of the fuel.
A well sealed flue/chimney system, herein after referred to as the flue system .
The protection of combustible materials in proximity of the stove.
3
4
When properly maintained and operated your stove will give you many years of service; however
there are important safety aspects of these products that you need to be aware of when operating
a multi-fuel stove.
We hope you have many years of comfort and warmth from your
stove, but please do so safely.
Adequate provision air
It is essential for the safe and efficient use of your stove that you provide an adequate airsupply to
Your stove. This may mean the provision of an outside air supply to the room, especially if there are
extraction units such as cooker hoods or clothes dryers in the vicinity. Failure to do so will mean
that fuel is burned inefficiently causing smoke and blackening the glass and may also cause smoke
to come back into the room. It is normal for the stove to emit smoke and the glass to blacken when

Well sealed flue system
Only materials and items approved for solid fuel stoves should be used for your stove as fuel.
Under no circumstances should you use aluminium or galvanised steel pipes for your stove flue.
Always fit pipes with the narrow side down, this allow any creosote to run down the inside of the
pipe and not to come out and cause an unsightly mess and possible fire hazard. All joints in the
flue system should be sealed with fire cement and/or an appropriate fire resistant rope or gasket.
Pipe bends should be kept to a minimum and we do not recommend using more than 2 bends on
any installation. Likewise the length of horizontal sections of the flue system should be kept to a
minimum. Always follow flue manufacturers' instructions when installing fabricated flues. Flues
must not pass through ceilings, floors, attics, roofs, or combustible walls without adequate and
approved insulation being provided to protect combustible materials.
The chimney and flue provide a means of taking combusted fuel from the stove, as well as a
draught to enable the stove to work. It is essential that the flue system is kept in good condition
and there are no breaks or cracks allowing contact with any other combustible materials of the
House. It is also essential that the flue system is kept clean and seals are maintained to ensure the
Draught is not lost. If the flue system is broken or cracked it should be lined with an approved lining
system.
The open end of the flue system must be above the height of the apex of the building and any
other obstructions, such as trees, which are within 3 meters (10ft) of the flue system. Failure to do
this will affect the efficiency of the stove and may cause down draughts which will mean dangerous
Products of combustion are emitted into room.
Under no circumstances should the flue pipe be less than 5 (125mm) internal diameter. The
stove should not be connected to a chimney which is used on any other appliance or which
connects to other rooms in the building.
it has been lit but as the temperature in the firebox rises the smoke should become lighter and the
glass should clear. If this is not happening then you may need to provide an outside air supply into
the room. As a simple check for this open a door or window in the room and check if the stove
burns more efficiently.
Plumbing [Wetback (Boiler) Model Only]
We recommend that the stove be connected to the heating system by a qualified craftsman. All
plumbing must comply with relevant national standards.
The pipe fittings on your boiler model stove are 1 BSP, all inlet and outlet piping and connections
should be 1 BSP or larger. An indirect water heating cylinder should be installed such that there
is not more that 7.6m of piping between the stove and the cylinder.
An expansion pipe must be fitted to the stove water outlet pipe which must be vented to atmosphere
above the height of the header tank. There must be no valves between the stove and this vent pipe
outlet and it must not be possible to obstruct the outlet in anyway.
Protection of combustible materials
The following clearances should be maintained from all combustible materials,
Back of stove - 760mm
Sides of stove - 510mm
It is important to note not all combustible materials can be seen (such as wooden studs in walls)
and care should be taken to ensure you have thoroughly checked all materials in the vicinity of the
stove. You should also note that Fire Resistant materials will burn and should be treated like other
combustible materials.
The stove itself should be placed on a non-combustible surface of minimum 10mm thickness and
this should extend 460mm in front of the stove, 200mm at the sides and back of the stove. This
floor protection should also be placed under any horizontal length of the flue system protruding out
of the back outlet and should extend 50mm either side of the pipe.
1. Remove your stove from the outer packaging and place on the floor. Inspect stove, check for
any damage, if damage is found or suspected, please contact your dealer. Never attempt to use a
stove that has been damaged.
2. Please follow the instructions below if you are installing the stove yourself, however if
5
6
Unpacking and preparing your stove for installation

You are unsure about any aspect of stove installation please contact your dealer and he will
discussinstallation with you or put you in touch with a experienced stove installer.
3. Open the stove door; remove the packing list and other contents. Ensure all items are present
per the packing list. In the unlikely event that something is missing please contact your dealer
immediately and we will rectify the situation.
4. Screw wooden handle onto stainless steel door latch.
5. Gently lay the stove on its back, remove screws from 4 corners of base and fit one of the legs to
each corner of the stove. Tighten bolt to ensure leg is secure to base of stove. Careful stand the
stove upright.
6. Move the stove into its final position; do not drag the stove, as this may damage the legs,
screws or the base.
7. Please fit the applicable flue spigot to the flue outlet and cover the other flue outlet with the flue
blanking plate, making sure it is properly sealed.
8. Connect flue pipe to stove, seal all joints with ceramic rope and/or approved fire cement.
Follow manufacturers' instruction for flue pipes.
9. On the wetback (boiler) model, we recommend you have it connected to heating system by a
qualified plumber.
Operating your stove
Fuel
Your stove is designed to burn a range of solid fuels such as coal, wood, turf (peat) and etc.; it is
not designed to burn,
Paper or cardboard, other than small amounts used to light stove.
Treated or painted wood
Synthetic fuel or logs that are not approved for solid fuel stoves
Household rubbish
Liquid fuels
Plastics
Burning these or other products for which the stove was not designed may damage the stove and
cause a fire hazard or release toxic fumes
Turf or Peat
Briquettes
Wood
Brown coal nuggets
Standard coal
4.0 kWh/kg
5.3 kWh/kg
5.5 kWh/kg
5.8 kWh/kg
7.9 kWh/kg
The figure shown for wood is based on dry hardwood.
First operation of stove
The initial fires in your new stove should be smaller than usual, which get progressively bigger. We
recommend a series of five small fires before you put the stove into full service. Allow the stove to
fully cool between each of these fires.
There may be some smell and small amount of smoke from the stove during the initial operations,
these are perfectly normal and is merely the curing of the stove paint. Opening a window or door to
provide additional ventilation will help alleviate this.
Air controls
Your stove needs air to burn fuel. This air is supplied through the spin valve (Primary Air) at the
base of the door and through the slots over the glass (Secondary Air).
Primary air as the name suggests is used for the initial burning of the fuels, secondary air is used
for secondary combustion, which makes the stove more efficient, reduces the emissions and is
also used to keep the stove glass clean. Fuels like coal and anthracite require more air under the
7
8
Fuel should be stored in a dry place; wood should be dried for at least 1 year. Wet wood may cause
serious creosote, which may damage your flue system and even your stove. Therefore the use of
wet wood is strongly discouraged.
The approximate calorific (Heat) Value of the most common fuels is;

The exact setting of this depends on local conditions but we suggest you begin with it about a
turn open.
fire bed and so should have the majority of the air supplied through the spin valve. Wood burns
better with the air over the fire bed and when burning a lot of wood you should use the secondary
air supply more.
The settings of both of these air controls very much depends on draught and local conditions and
after a few fires you should have a good idea of the best settings for your stove. The air controls
should be fully opened when lighting the fire, once the fire is established the controls may be
adjusted as required. Reducing the air intake will cause the stove to burn slower, this may cause
some blackening of the stove glass but this should burn off once the stove is burning brightly again
Refuelling
Before refuelling your stove turn the air supply to high for a few moments until there is a good fire
in the stove, this will ensure there is no build-up of harmful gases in the stove when the door is
opened and will also get the new fuel burning quickly and not allow it to kill the fire. .
possible this should be done before lighting the stove when the ash is cold. Even if the ash appears
to be cold it should be placed in a non-combustible container as there maybe be hot ash in the
centre of the pile. You should always wear protective gloves when removing ash from the stove.
To reload the stove:
Open the door and feed the fuel in slowly using a tongs or small shovel. Do not overfill the stove. It
is always better to put in small loads often rather than big fills less frequently. Close door gently
after stove is reloaded.
You should always wear protective gloves and use tongs when tending a hot stove.
Ash removal
Your stove is fitted with a shaker grate to remove the ash from the firebox. Use the operating tool
To move the shaker knob forward and back. This will allow the ash to fall into the ash pan under
the fire bed. This can also be achieved by using a poker.
Care of glass
At times, especially when the air controls are turned to low settings or when certain fuels such as
damp wood are used, the stove glass will blacken. This is caused by fuel that is not completely
burnt. However the view through the glass will return to normal once a good hot fire is established
in the stove.
Overnight burning
Your stove is designed to allow overnight burning.
To do this:
Place sufficient fuel into the stove allowing it to burn for about 15 minutes so as not to kill fire.
Close the secondary air supply at top of door and turn primary air inlet until it's almost closed.
If the fire burns away then next time close it a little more, if the fire goes out you need to try with it a
little more open. After a couple of nights you will find the setting that best suits the local conditions
of your stove.
9
10
When ash has built up in the ash pan it should be emptied, failure to do this will cause ash to build-
up around the grate and may cause your grate to warp or burn out. It is especially important when
burning fuels with high ash content such as turf/peat, that you keep your grate clear and your ash
pan is emptied regularly so as not to damage your grate. Clear the grate with the shaker bar or a
poker regularly.
To remove the ash:
Open the stove door and use the operating tool provided to lift the ash pan out of the stove. If
There may be times however when you need to clean the glass. To do this use a soft cloth and a
non-abrasive glass cleaner. Only ever clean the glass when the stove is cold.
When loading fuel into the stove always makes sure it is not protruding out through the door
opening as this may break the glass when you close the door. This is especially relevant when
loading logs. Always close the door gently.
If the glass does crack when the stove is lighting, let the fire die out, do not open the door until the
stove has fully cooled. Replace the glass with a genuine replacement before the re-using the stove.
This stove is not designed to operate with the door open. Always close stove door when you have
taken out the ash tray and leave closed while disposing of the ash, only reopen to put ash pan
back into stove and close immediately afterwards.

When you return to your stove fully open both air controls until you have a good fire and then set
to normal operating levels. Do not add fuel until the fire bed is hot and red, then add a little for the
first time and allow that to ignite before adding more. During overnight burning the stove glass will
blacken but when a hot fire is established again this should burn off allowing a clear view of the fire.
Stove Maintenance
Check stove regularly
Initially, we recommend you check your flue system at least once per month, after the first few
months you will notice a pattern of soot and creosote build-up and you can then determine an
appropriate inspection interval suitable for your stove installation. Other checks as listed below
should be carried out at least twice per year. If you notice anything wrong at any time it should be
repaired immediately. Never use a stove that is in any way damaged or has a damaged flue
system.
Check your flue system for build-up of soot or creosote and for signs of damage to joints. To
check flue outlet remove top baffle by lifting and pulling out at end. Use a torch to check flue
outlet. Clean and repair as necessary. Always replace top baffle before relighting stove.
Check that glass is not cracked or chipped and the sealing rope is in good condition.
Replace as necessary.
When the room is dark use a torch to check the sealing of the stove at the edges and
corners for leaks. Any leaks or cracks found should be repaired with fire cement, cracked or
damaged parts should be replaced with genuine spares.
Check that stove door is tight and well sealed when closed. Place a strip of paper into the stove
and close the door, then try to remove the paper, you should feel some resistance; then proceed
to check several points around the door. If the paper pulls out too easily replace the rope and
seal a suitable high temperature sealant.
Replacing parts
Always use genuine replacement parts. Only ever make replacements when the stove is cold.
Surface finish
The stove should only be cleaned using a damp cloth. Some cleaning products may leave stains
on the stove surface. Never use abrasive cloths as these may scratch the surface. Painted stoves
can be re-painted by using a good quality, high temperature stove paint. When re-painting, make
sure there is plenty of ventilation and follow the manufacturer's instructions. Allow the paint to fully
dry before lighting the stove and allow extra ventilation for the first couple of fires, due to possible
fumes as paint cures.
Wetback (Boiler)
Check the surface of your boiler regularly, if you find a build-up of creosote scrap away with a flat
steel scraper. This build-up of creosote will insulate the boiler and reduce the heat absorbed by the
water.
Trouble-shooting
Fire not burning
A stove not burning is generally caused by either a shortage of air and/or incorrect or damp fuel
If fuel is not the problem check
the air controls are open,
there is no blockage in the flue system,
the open end of the flue is above the height of any nearby obstructions
there is a sufficient air supply into the room and this supply is not being taken by an extractor
fan.
Glass blackens
Glass usually blackens when
fuel is not being burned efficiently because of starvation of air
bad quality or damp fuel is being used
balance between primary and secondary air is incorrect
Try to introduce more air into the stove, especially through the secondary air control on the top
of the stove door as this air flows down over the glass to help burn off the creosote.
For optimum efficiency always use a good quality fuel.
Smoke in room
If the stove is properly installed it should not emit any smoke into your room. Should this happen,
11
12

check your room is not airtight. This can easily be checked by opening a door or window. If the
smoking stops you need to provide an additional air supply into the room. If this is not the problem
check if your flue system is blocked or obstructed and you are not getting a down draught caused
by the location of the open end of the flue system.
If the problem persists contact your dealer and ask him to get your flue system and stove
installation checked.
This is usually caused by too much air. Firstly try reducing the air supply to the stove by closing
down your air controls, if this fails then you may have damage to the sealing, check the condition of
the door sealing rope and the joints within the stove.
If neither of these solves the problem you may have too much draught on your chimney and you
may need to fit a damper valve into your flue system. You should not install a flue damper without
consulting a specialist. Never install a damper that can completely block your flue or chimney.
Contact your dealer to discuss this.
Chimney fires occur when soot and creosote have built up in the flue system ignite. If the stove is
operated properly and the flue checked and cleaned regularly, then chimney fires should not occur.
These fires can be very dangerous and must be avoided. Try to maintain good hot fires in the
stoves whenever possible and at least once in every firing open the air controls and allow the
stove to burn on full for a short while until the full fire bed is glowing red. Check your flue system
regularly for build-up of soot and creosote and clean as necessary.
Chimney fires can be detected by sparks coming from the top of the chimney, a roaring sound
coming from the area of the stove or chimney or vibration in the stove or chimney. In the event of a
chimney fire close the air controls, evacuate the building and call the fire department.
Do not relight the stove after a chimney fire until the stove and flue system have been fully checked
and any necessary repairs have been carried out.
Limited Lifetime Warranty
This warranty applies to normal house use only. Damage caused by misuse, abuse,
Improper installation, lack of maintenance, over firing, negligence or transportation is not
covered by this warranty.
This warranty does not cover any scratches, corrosion or discolouration caused by over firing,
abrasives or chemical cleaners. Any defect or damage caused by the use of unauthorized parts
voids this warranty.
Any service call related to an improper installation is not covered by this warranty. Returned stoves
are to be shipped prepaid to the manufacturer for investigation. If a stove is found to be defective,
the manufacturer will repair or replace such defect and reasonable transportation fees will be
refund . Repair work covered by the warranty, executed at the purchaser house by an authorized
qualified technician requires the prior approval of the manufacturer. Labour cost and repair work to
the account of the manufacturer are based on predetermined rate schedule and must not exceed
the wholesale price of the replacement part.
The manufacturer at its discretion may decide to repair or replace any part or stove after inspection
and investigation of the defect. The manufacturer may, at its discretion, fully discharge all
obligations with respect to this warranty by refunding the wholesale price of any warranted but
defective parts. The manufacturer shall in no event be responsible for any special, indirect,
consequential damages of any nature, which are in excess of the original purchase price of the
stove.
DESCRIPTION
Firebox (welding only )
Handle assembly
Ash pan
Cast iron parts
Ceramic glass (thermal breakage only )
Paint, fire bricks
WARRANTY APPLICATION
PAR TS
Lifetime
5 years
Lifetime
5 years
1 year
1 year
LABOUR
5 years
N/A
1 year
1 year
N/A
N/A
Warranty Specifics
13
14
Fire burning too quickly
Chimney fire
Table of contents
Other Olymberyl Stove manuals
Popular Stove manuals by other brands

Morsø
Morsø S50-40 Instructions for installation and use

Wamsler
Wamsler W2-90 Instructions for installation and use

Nectre Fireplaces
Nectre Fireplaces 15 LE operating instructions

Element
Element Trisore 95 User and installation manual

Campingaz
Campingaz PARTY GRILL 400 Instructions for use

Harman Stove Company
Harman Stove Company DVC500-C manual

EdilKamin
EdilKamin BRIO user guide

Woodstock Soapstone
Woodstock Soapstone 211 Navajo Hybrid Installation

Palazzetti
Palazzetti Ecofire BRIAN Assembly - Description - Cleaning - Technical Data

BuckMaster
BuckMaster CVF200A OWNER'S OPERATION AND INSTALLATION MANUAL

SCAN
SCAN DSA 5 Instructions for installation and use

Daiwa
Daiwa D-17 installation manual