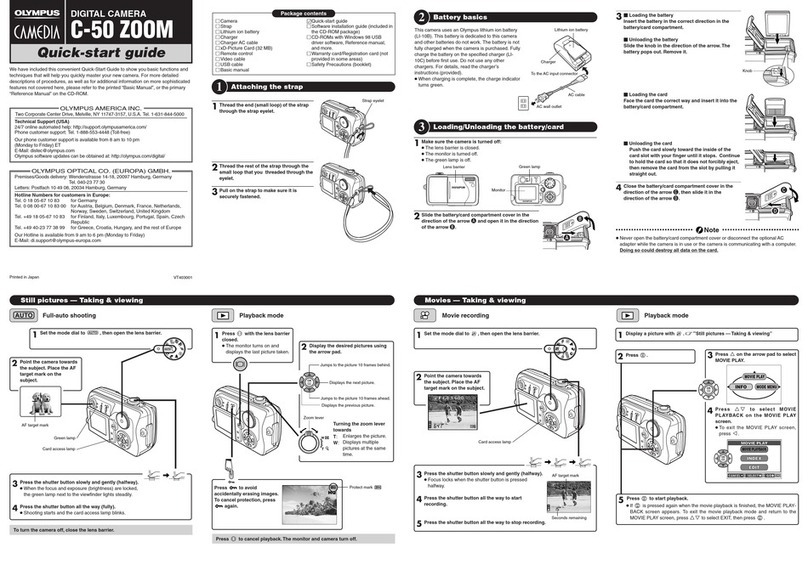
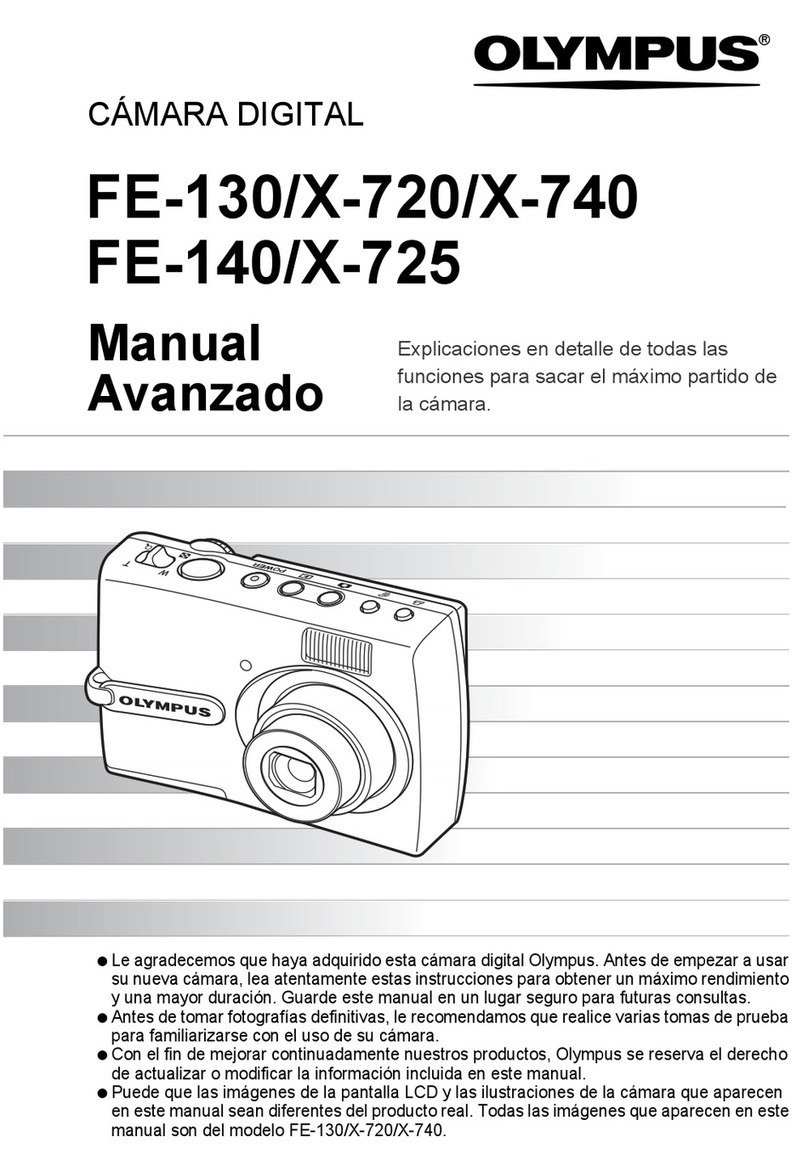
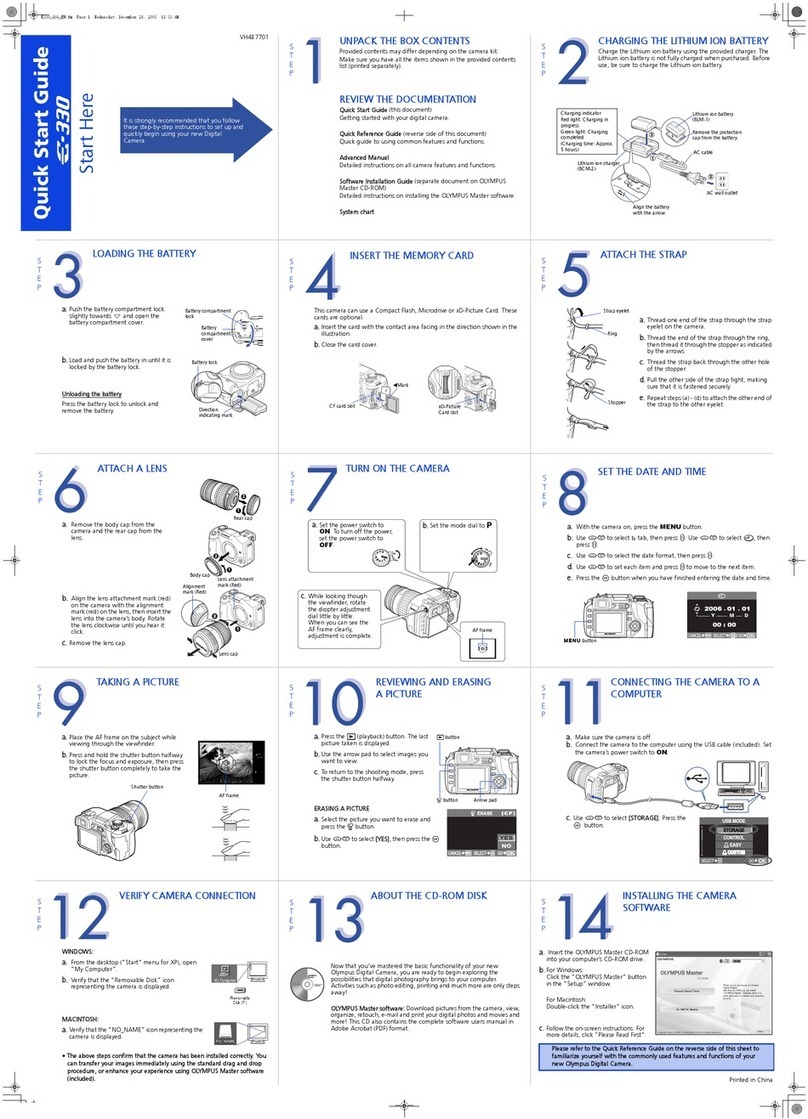
manuals.online logo
Brands
  1. Home
  2. •
  3. Brands
  4. •
  5. Olympus
  6. •
  7. Digital Camera
  8. •
  9. Olympus CAMEDIA C-100 User manual

Olympus CAMEDIA C-100 User manual

○○○○○○○
○○○○○○○
○○○○○○○
DIGITAL CAMERA
C-100
D-370
QUICK START GUIDE
Thank you for purchasing an Olympus digital camera.
Please read the operation manual supplied with the camera before using your
camera, and check that it is functioning correctly by taking a number of test shots.
■PACKAGE CONTENTS
Check that your digital camera comes complete with the items listed below in the specified
quantities.
 Digital camera ..................................................................................................... 1
 Strap ................................................................................................................... 1
 AA Alkaline batteries ........................................................................................... 4
 USB cable ........................................................................................................... 1
 CD-ROM ............................................................................................................. 1
 Quick Start Guide ............................................................................................... 1
 Basic Manual ...................................................................................................... 1
■NAMES OF PARTS
1Shutter button 8Connector cover EMonitor button
2Lens barrier 9USB connector FOK/Menu button
3Lens 0Monitor GCard cover
4Flash AViewfinder HStrap eyelet
5Macro lever BGreen lamp IBattery compartment
6Selftimer lamp CArrow pad cover
7DC-IN jack DTripod socket
■ATTACHING THE STRAP
1Pass the short end of the strap through the strap eyelet.
2Pass the long end of the strap through the loop.
3Pull tight and check that it is securely attached.
■LOADING THE BATTERIES
Caution
Check that the lens barrier is closed and both the monitor and the green lamp are
off.
1Pull the battery compartment cover toward Aand pull up in the direction of B.
2Insert the batteries as shown, making sure that they are correctly oriented.
3Pull down the battery compartment cover in the direction of the arrow Cand close
firmly in the direction of D.
0
ABC
E
F
D
G
I
H
2
1
347
8
9
6
5
✓
12 3
A
B
D
C
➜➜
■ADJUSTING THE DATE AND TIME
1Press the button to turn the monitor on.
2Press the button to display the menu.
3Select [SETUP] using the / buttons and press the button.
4Select [ ] using the / buttons and press the button.
5Select the date format [Y-M-D (Year-Month-Day), M-D-Y (Month-Day-Year) or D-M-Y
(Day-Month-Year)] using the / buttons and press the button.
6Adjust the first item using the / buttons, and then proceed to the next item
using the button.
7Repeat the above procedure until the date and time settings are adjusted.
8For the most accurate setting, press the button when the clock reaches 00 seconds.
9Press the button to turn the monitor off.
■TAKING PICTURES
To turn the camera on : Open the lens barrier. (You are now ready to take pictures.)
To turn the camera off : Close the lens barrier.
Caution
Never remove the batteries or the AC adapter when the green lamp is blinking. If
you are using a SmartMedia card, do not open the card cover as this will not only
prevent the image taken from being recorded, but may also destroy any images
already recorded.
Note
Press the Shutter button halfway Aand then press it fully B.
■FLASH ( )
1Open the lens barrier.
2Check the current flash mode by pressing the button.
3Press the button after the confirmation to change the mode setting.
Setting of the flash mode is completed.
Note
• Flash mode settings
Auto (no display) Automatically fires in low light and backlit
conditions (default setting)
Red-eye ( ) Reduces the phenomenon of the subject’s eyes
appearing red in the picture
Flash On ( ) Fires regardless of the light conditions
Flash Off ( ) Does not fire even in dark conditions
Night view ( ) For taking pictures of night views
Night view/Red-eye ( ) For taking pictures of people against a night view
• All the flash mode settings except for Red-eye ( ) will return to Auto mode
(default setting) when the lens barrier is closed.
■MACRO ( )
This mode is for taking close-up pictures at a distance of 25cm-60cm (10"-2ft).
1Open the lens barrier and slide the macro lever toward the symbol on the camera.
2Press the button to turn the monitor on.
3Take the picture by looking at the monitor.
Note
Close the lens barrier to cancel Macro mode.
■SELFTIMER ( )
1Press the button with the lens barrier open to display the Camera menu screen.
2Select [CAMERA] using the / buttons and press the button.
3Select [DRIVE] using the / buttons and press the button.
4Select [ SELF-TIMER] using the / buttons and press the button.
5Press the button again to exit the menu.
6Take the picture.
The selftimer lamp on the front of the camera lights for 10 seconds and then blinks for
2 seconds before the picture is taken.
Note
The selftimer is automatically cancelled after the picture is taken.
■DIGITAL TELE
This mode enables you to take pictures in four magnifications: 1.6×, 2×, 3.2×and 4×.
1Open the lens barrier and press the button to turn the monitor on.
2The setting changes in the sequence [1.6×→2.0×→3.2×→4.0×] each time the
button is pressed.
The setting changes in the sequence [3.2×→2.0×→1.6×→No display (1.0)] each
time the button is pressed.
3Take the picture by looking at the monitor.
Note
•Press the button to turn the monitor off and cancel Digital Tele mode.
•When the magnification is set to 3.2×or 4×, set the Image Quality mode to SQ2.
■SEQUENCE MODE ( )
1Press the button with the lens barrier open to display the Camera menu screen.
2Select [CAMERA] using the / buttons and press the button.
3Select [DRIVE] using the / buttons and press the button.
4Select [ SEQUENCE] using the / buttons and press the button.
5Press the button again to exit the menu.
6Take the picture. (Picture-taking continues while the Shutter button is pressed and
stops when the button is released.)
Note
Close the lens barrier to cancel Sequence mode.
➜
AB
C-100_QSGuide-E.65E 5/22/01, 5:43 PM1
■EXPOSURE COMPENSATION
This mode enables you to change the brightness of the image.
1Press the button with the lens barrier open to display the Camera menu screen.
2Select [CAMERA] using the / buttons and press the button.
3Select [ ] using the / buttons and press the button.
4Adjust the compensation using the button (for a darker image) and the button
(for a brighter image), and press the button.
5Press the button again to exit the menu.
6Take the picture.
Note
Close the lens barrier to return to 0.0 (default setting).
■METERING MODE ( )
1Press the button with the lens barrier open to display the Camera menu screen.
2Select [CAMERA] using the / buttons and press the button.
3Select [ ] using the / buttons and press the button.
4Select the Metering mode setting using the / buttons and press the button.
5Press the button again to exit the menu.
6Take the picture.
Note
•Metering mode settings
ESP (No display) The camera measures the light at the center of the
picture and around the periphery of the picture separately
and then selects the optimal exposure.
SPOT ( ) The camera measures only the light levels at the center
of the image, allowing you to obtain the correct exposure
for backlit subjects since the exposure is not affected by
the background light.
•Close the lens barrier to return to ESP (default setting).
■WHITE BALANCE ( )
1Press the button with the lens barrier open to display the Camera menu screen.
2Select [PICTURE] using the / buttons and press the button.
3Select [ ] using the / buttons and press the button.
4Select the white balance using the / buttons and press the button.
5Press the button again to exit the menu.
6Take the picture.
Note
•White balance settings
Auto (no display) Automatically adjusts the white balance to ensure natural
colors
Daylight ( ) Ensures natural colors outdoors in full daylight (sunny
weather)
Cloudy ( ) Ensures natural colors outdoors in overcast daylight
(cloudy weather)
Tungsten ( ) Ensures natural colors under tungsten lighting
Fluorescent ( ) Ensures natural colors under fluorescent lighting
•Close the lens barrier to return to Auto mode (default setting).
■IMAGE QUALITY (SHQ, HQ, SQ1, SQ2)
1Press the button with the lens barrier open to display the Camera menu screen.
2Select [PICTURE] using the / buttons and press the button.
3Select [ ] using the / buttons and press the button.
4Select the image quality using the / buttons and press the button.
5Press the button again to exit the menu.
6Take the picture.
Note
•Image quality modes (pixel size)
SHQ 1280 ×960 pixels (For clear prints)
HQ 1280 ×960 pixels (For viewing images on a PC)
SQ1 1024 ×768 pixels (For e-mail attachments)
SQ2 640 ×480 pixels (For taking a lot of pictures)
•The image quality setting remains when the lens barrier is closed.
■ PLAYING BACK PICTURES
To turn the monitor on : Press the button with the lens barrier closed to turn the monitor
on.
To turn the monitor off : Press the button again to turn the monitor off.
Note
•button : Displays the previous image.
•button : Displays the next image.
•button : Displays several images. Press the button to return.
If you press the button in multi-display, the green frame moves to
the previous image, and if you press the button, it moves to the
next image.
•button : Magnifies the image (1.5×→2×→2.5×→3×). Press the button
to return to 1×.
If you press the button while magnifying the image, scroll mode
is enabled.
Press the / / / buttons to move the image up, down, left
or right.
Press the button again to exit scroll mode.
■ ERASING AN IMAGE
1Display the image you want to erase.
2Press the button for at least 1 second to display the menu.
3Select [ ] using the / buttons and press the button. The image will be
erased.
■ ERASING ALL IMAGES
Caution
•When erasing images in the internal memory, do not insert a SmartMedia card.
•When erasing images on a SmartMedia card, insert the card before following the
procedure below.
1Press the button with the lens barrier closed.
2Press the button to display the Play menu screen.
3Select [SETUP] using the / buttons and press the button.
4Select [ ] or [ ] using the / buttons and press the button.
5Select [ ALL ERASE] using the / buttons and press the button.
6Select [ ] using the / buttons and press the button. All the images
will be erased.
Caution
Once erased, images cannot be restored. Before erasing, make sure that you are
not erasing important data.
■PROTECT ( )
1Display the image you want to protect.
2Press the button for at least 1 second. The symbol will be displayed.
Caution
Protected images cannot be erased by [Erasing an image] or [Erasing all images],
but they will all be erased by formatting.
Note
•The protect setting is saved when the lens barrier is closed.
•To cancel the protect setting, press the button again for at least 1 second.
■
RECORDING/PLAYING BACK MOVING IMAGES ( )
Taking moving images
1Press the button with the lens barrier open to display the Camera menu screen.
2Select [CAMERA] using the / buttons and press the button.
3Select [DRIVE] using the / buttons and press the button.
4Select [ MOVIE] using the / buttons and press the button.
5Press the button again to exit the menu. The monitor will turn on.
6Record the moving images by looking at the monitor. (Press the Shutter button to
start recording moving images. Recording stops when the Shutter button is pressed
again.)
Note
Movie mode is canceled when the monitor is turned off by pressing the button.
Playing back moving images
1Press the button with the lens barrier closed.
Display the image with the symbol indicated.
2Press the button to display the Play menu screen.
3Select [PLAY] using the / buttons and press the button.
4Select [ ] using the / buttons and press the button.
5Select [START] using the / button and press the button. The image will
be played back.
■ TURNING BEEP SOUND OFF
1Press the button with the lens barrier open to display the Camera menu screen.
2Select [SETUP] using the / buttons and press the button.
3Select [ ] using the / buttons and press the button.
4Select [OFF] using the / buttons and press the button.
5Press the button again to exit the menu.
Note
The beep sound setting remains when the lens barrier is closed.
■ ADJUSTING THE MONITOR BRIGHTNESS
1Press the button with the lens barrier open to display the Camera menu screen.
2Select [SETUP] using the / buttons and press the button.
3Select [ ] using the / buttons and press the button.
4Adjust the monitor brightness using the (for a darker monitor) or (for a brighter
monitor) and press the button.
5Press the button again to exit the menu.
Note
The monitor brightness setting remains when the lens barrier is closed.
OLYMPUS AMERICA INC.
Two Corporate Center Drive, Melville, NY 11747-3157, U.S.A. Tel.631-844-5000
(Technical support) Tel.1-888-553-4448 (Toll-free) (First 30 days after purchase)
(Technical support) Tel. 1-631-844-5520 (After 30 days)
[email protected]
OLYMPUS OPTICAL CO.(EUROPA) GMBH.
(Premises/Goods delivery) Wendenstraße 14-18, 20097 Hamburg, Germany. Tel. 040-237730
(Letters) Postfach 10 49 08, 20034 Hamburg, Germany.
(Hotline Numbers for customers in Europe)
Tel. 01805-67 10 83 for Germany
Tel. 00800-67 10 83 00 for Austria, Belgium, Denmark, France, Netherlands, Norway,
Sweden, Switzerland, United Kingdom
Tel. +49 180 5-67 10 83 for Finland, Italy, Luxemburg, Portugal, Spain, Czech
Republic
Tel. +49 40-237 73 899 for Greece, Croatia, Hungaria and the Rest of Europe
Our Hotline is available from 9 am to 6 pm (Monday to Friday)
(E-Mail) [email protected]
Copyright © 2001 OLYMPUS OPTICAL Co., Ltd.
Printed in Japan
1AG6P1P1038-A VT274602
C-100_QSGuide-E.65E 5/22/01, 5:44 PM2

Other manuals for CAMEDIA C-100

5

This manual suits for next models

1

Other Olympus Digital Camera manuals

Olympus CAMEDIA C-480 ZOOM Installation guide

Olympus

Olympus CAMEDIA C-480 ZOOM Installation guide

Olympus VG-160 Instruction Manual

Olympus

Olympus VG-160 Instruction Manual

Olympus Stylus 810 User manual

Olympus

Olympus Stylus 810 User manual

Olympus SP 570 - UZ Digital Camera User manual

Olympus

Olympus SP 570 - UZ Digital Camera User manual

Olympus CAMEDIA C-5000 Zoom User manual

Olympus

Olympus CAMEDIA C-5000 Zoom User manual

Olympus CAMEDIA C-2 ZOOM User manual

Olympus

Olympus CAMEDIA C-2 ZOOM User manual

Olympus E-PL6 Installation guide

Olympus

Olympus E-PL6 Installation guide

Olympus IR 300 - Digital Camera - 5.0 Megapixel User manual

Olympus

Olympus IR 300 - Digital Camera - 5.0 Megapixel User manual

Olympus STYLUS 9000 Setup guide

Olympus

Olympus STYLUS 9000 Setup guide

Olympus STYLUS VERVE S Installation guide

Olympus

Olympus STYLUS VERVE S Installation guide

Olympus 226275 - Stylus 1010 10MP Digital Camera Setup guide

Olympus

Olympus 226275 - Stylus 1010 10MP Digital Camera Setup guide

Olympus FE-290 Installation guide

Olympus

Olympus FE-290 Installation guide

Olympus SH-2 User manual

Olympus

Olympus SH-2 User manual

Olympus CAMEDIA C-470 Zoom Setup guide

Olympus

Olympus CAMEDIA C-470 Zoom Setup guide

Olympus FE-5000 Installation guide

Olympus

Olympus FE-5000 Installation guide

Olympus IR 300 - Digital Camera - 5.0 Megapixel Installation guide

Olympus

Olympus IR 300 - Digital Camera - 5.0 Megapixel Installation guide

Olympus E420 - Evolt 10MP Digital SLR Camera Quick start guide

Olympus

Olympus E420 - Evolt 10MP Digital SLR Camera Quick start guide

Olympus Stylus 740 User manual

Olympus

Olympus Stylus 740 User manual

Olympus FE-290 User manual

Olympus

Olympus FE-290 User manual

Olympus CAMEDIA C-2020 Zoom User manual

Olympus

Olympus CAMEDIA C-2020 Zoom User manual

Olympus CAMEDIA C-740 Ultra Zoom Installation guide

Olympus

Olympus CAMEDIA C-740 Ultra Zoom Installation guide

Olympus SP-590 UZ - Digital Camera - Compact User manual

Olympus

Olympus SP-590 UZ - Digital Camera - Compact User manual

Olympus µ[MJU:] MJU 850SW User manual

Olympus

Olympus µ[MJU:] MJU 850SW User manual

Olympus D630 - CAMEDIA D 630 Zoom Digital Camera Installation guide

Olympus

Olympus D630 - CAMEDIA D 630 Zoom Digital Camera Installation guide

Popular Digital Camera manuals by other brands

Canon Powershot SX40 HS Getting started

Canon

Canon Powershot SX40 HS Getting started

FujiFilm DX 7 Specifications

FujiFilm

FujiFilm DX 7 Specifications

BlueVision BVC6100LM instruction manual

BlueVision

BlueVision BVC6100LM instruction manual

BenQ DC E1000 user manual

BenQ

BenQ DC E1000 user manual

Nikon CoolPix 3100 quick start guide

Nikon

Nikon CoolPix 3100 quick start guide

Ricoh R50 instruction manual

Ricoh

Ricoh R50 instruction manual

Samsung SAMSUNG L301 user manual

Samsung

Samsung SAMSUNG L301 user manual

Pentax 115V - IQZoom Date - Camera operating manual

Pentax

Pentax 115V - IQZoom Date - Camera operating manual

SecurView SV-6940.LM installation instructions

SecurView

SecurView SV-6940.LM installation instructions

Pentax *istDL2 operating manual

Pentax

Pentax *istDL2 operating manual

ring Floodlight Cam Wired Pro user manual

ring

ring Floodlight Cam Wired Pro user manual

Gemini J44416 instruction manual

Gemini

Gemini J44416 instruction manual

Samsung VLUU PL120 Service manual

Samsung

Samsung VLUU PL120 Service manual

Nikon Z 5 Reference manual

Nikon

Nikon Z 5 Reference manual

Canon Digital IXUS I5 User giude

Canon

Canon Digital IXUS I5 User giude

Sony DSC-G1 - Cyber-shot Digital Camera instruction manual

Sony

Sony DSC-G1 - Cyber-shot Digital Camera instruction manual

Pentax Optio S55 operating manual

Pentax

Pentax Optio S55 operating manual

ARRI ALEXA Mini LF SUP 7.1 Beta manual

ARRI

ARRI ALEXA Mini LF SUP 7.1 Beta manual

manuals.online logo
manuals.online logoBrands
  • About & Mission
  • Contact us
  • Privacy Policy
  • Terms and Conditions

Copyright 2025 Manuals.Online. All Rights Reserved.