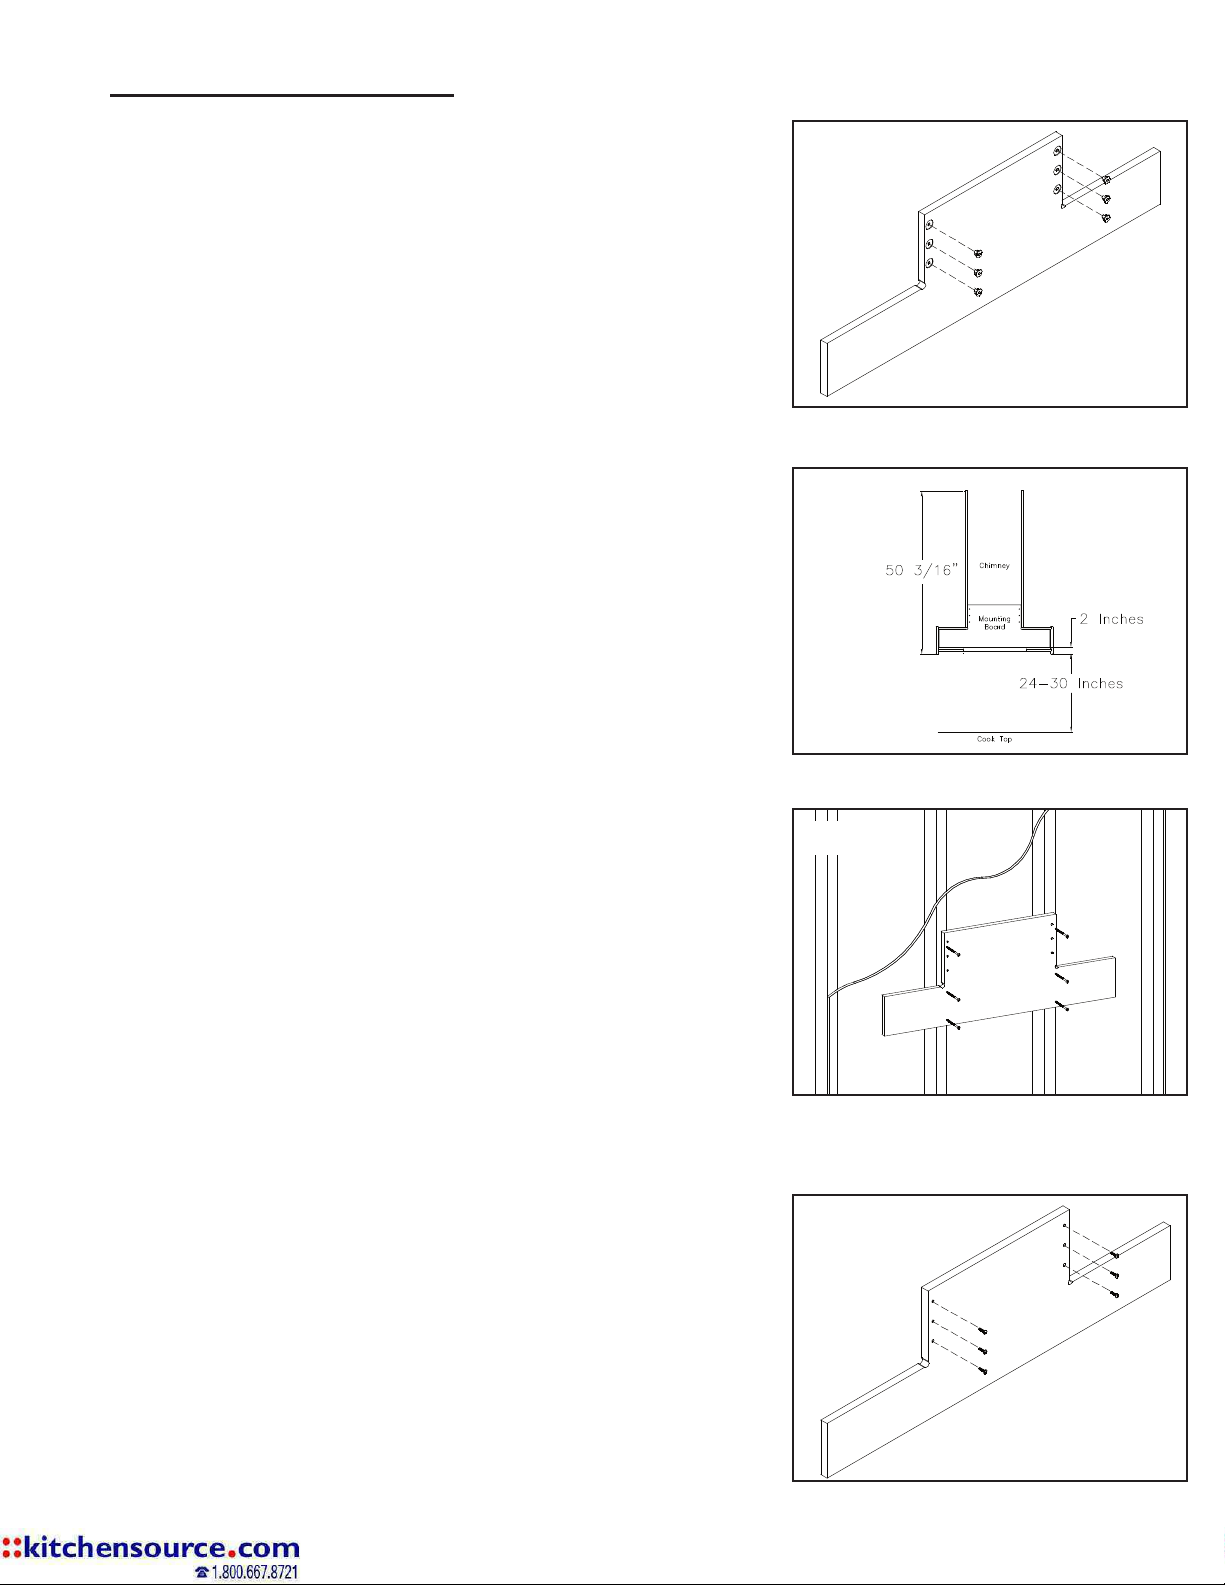
Step 2: Draw a level line on the wall centered where
the Range Hood is to go 2 inches above
where the bottom of the Range Hood will be
(See figure 2). A distance of 24-30 inches
from the stove top to the wood hood is rec-
ommended. Check local building codes and
regulations for final determination.
Step 3: Screw the Mounting Board to the wall match-
ing the bottom of the Mounting plate to the
line on the wall. Make sure to hit at least two
studs and to use at least 6 screws of sufficient
size and length for the application (See figure
3).
Warning: Failure to fasten this panel to studs
or using the wrong screws may cause a failure
of the mounting system and possible injury.
Assembly Instructions
Figure 2
Figure 3
Step 1: Install 6 each "T" nuts into the back of the
Mounting Board, into the counterbored holes.
Hammer them flush to the surface (see figure
1.)
Figure 1
Step 4: Start 6 each 10-24 x 3/4" screws into the "T"
nuts that were previously installed (see fig-
ure 4.) The large barbed end of the "T" nuts
should be on the opposite side of the Mounting
Board.
Figure 4
Form OME-091, 05/2013
©Omega National Products


