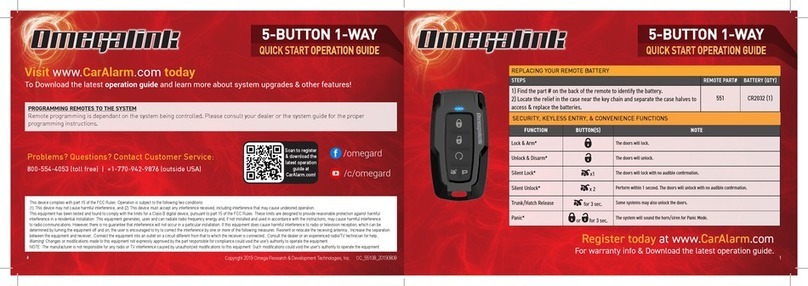
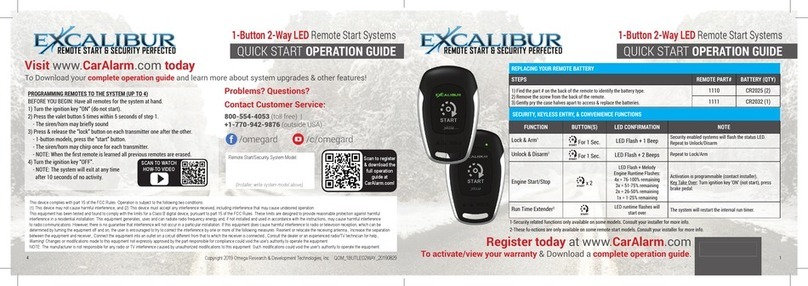
Omega Research & Development Excalibur RS-130-DP User manual

RS-130-DP
Deluxe Keyless Entry & Remote Start
July 28, 2010
Operation Guide
Temporary cover. Color cover is in a separate le.

2
Table Of Contents
Congratulations on your purchase of this convenience system by Omega
Research & Development, Inc., a world leader in vehicle security and convenience
products since 1975. This system is designed to offer ease of use and it’s modular
design allows for many features to be customizable to suit your needs.
Pleasenotethatthismanualiswrittentoreectthefullcapabilityofthissystem
though some features may not be available to you because of vehicle limitations
and/orchosenoptionsatthetimeofinstallation.Itisalsowrittentoreecttheopera-
tionsintheirdefaultcongurations.
This system has two principal user components that you should familiarize your-
self with:
The Status Lights which indicate the current system status and helps in trouble-
shooting failed remote start attempts as well as in customizing the programmable
features.Thespecicoperationsofthelightsaredescribedonpage 4.
The Valet Switch is used to access transmitter and feature programming. It is
also used to place the system in valet mode which temporarily bypasses the remote
start feature. See “Using the Valet Switch” on page 3.
Remote Start Features ..........................................................................3
Low Battery/Low Temp Automatic Starting........................................3
Turbo Timer Feature..........................................................................3
Pit-Stop Feature ................................................................................3
Using The Valet Switch..........................................................................3
The Status Light ....................................................................................4
Programming Features..........................................................................4
User Programmable Features ...............................................................5
Installer Programmable Features ..........................................................5
Programmable Features Matrix.............................................................7
To remote start your vehicle, press the button or button combinations on your
alarm/keylessentry’stransmitterthatwereconguredtoactivatethisfeature.Ifyou
are unsure, consult with your installer to learn how to activate the system. You can
write the activation method in the space below for later reference.
Remote start:
Introduction
Remote Starting

3
It is typically recommended that vehicles equipped with turbocharged engines
allow the engine to idle for after driving to cool the turbocharger. When this Installer
Programmable Feature is enabled, the system will automatically keep the engine
running as follows:
• Withtheenginerunning,holdthebrakepedalandengagetheparking brake.
When the brake pedal is released, the system will keep the engine running for the
programmed time (1, 2, or 3 minutes), and then automatically turn it off.
• Thesystemmaybelockedwhiletheengineisrunning.TurboTimercanbe
prevented from engaging, or “bypassed” if desired, by turning the engine off before
engaging the parking brake, or if it’s already engaged, step on the brake pedal to
turn the engine off.
This feature will automatically start the engine should the vehicle battery drop
below 11 volts or the interior temperature drop to 15 (or 32) degrees fahrenheit. This
feature is very useful when the vehicle is parked for a long period of time in cold cli-
mates. You must activate these features each time you park and wish to use them.
• Turntheignitionswitch“on”,then“off”(enginenotrunning),andwithin7seconds
press the valet switch twice. The system is now in low voltage start mode.
• Toactivatelowtempstarting,enterlowvoltagestartmodeasdescribedabove
but, within 5 seconds of entering low voltage mode, press the valet switch 1 time (15
degrees) or 2 times (32 degrees) within 5 seconds.
NOTE: When low temp start mode is activated, low voltage start is also activated.
These features will operate once every two hours until the ignition key is turned
“ON”.
LOW BATTERY/LOW TEMP AUTOMATIC STARTING
TURBO TIMER FEATURE
PIT-STOP FEATURE
This feature allows you to leave your engine running for making quick errands. To
use this feature, have the engine running normally from the ignition switch and your
footoffthebrakepedal.PresstheValetSwitchtwice;theparkinglightswillash.
Turn the key off and the engine will remain running for the programmed run time.
Valet Mode
Valet mode prevents the remote start feature from being activated. It also dis-
ables horn honks when unlocking the doors. Valet Mode should be used when you
do not wish for remote starting to be operated, such as when you have your vehicle
serviced. To engage Valet Mode:
• Withthesystem“unlocked”,pressandholdtheValetSwitchfor3seconds;the
StatusLightwillturnonandstayontoindicateValetMode.Thelightswillash
twice. Once in Valet Mode, an attempt to remote start will result in no response.
Keep this in mind if remote start stops functioning.
• ToturnoffValetMode,simplypress&releasetheValetSwitchonce.
Remote Start Features
Using The Valet Switch

4
TheStatusLighthelpstovisuallyconrmsthestatusofthesystemandprovides
a high level of visual deterrence. The Status Light is located in the window mount
receiver unit.
Normal System Status
1) Off = The remote starter system is off, in standby mode.
2) On Constant = The system is in the Valet Mode & remote start is disabled.
Starting System Status
The Status Light also indicates the remote start status:
3) Flashing Slow (once per second): Remote start is on.
4) Flashing Fast (after activating remote start): The system is in the process of start-
ing the engine.
Remote Starting Diagnostics
Whenever the system is placed into Valet Mode, the Status Light illuminates
solid.However,whenthisrstoccurs,theStatusLightwillash1to6ashesbe-
fore resuming solid illumination. This indicates why the engine stopped running from
the last previous remote starting attempt.
5) 1 Flash = Programmed run time expired.
6)2Flashes=Brakewaspressedorhoodopened.
7) 3 Flashes = Engine stalled or bad tach signal.
8) 4 Flashes = Received transmitter command on activation input to stop.
9) 5 Flashes = Gear selector removed from “park”.
10)6FLashes=Lowvoltage.
Step 1 Turn the ignition key “ON”, then “OFF”
Step 2 Within 5 seconds of step 1, press the valet switch 5 times to access user
features (10 times to access installer features).
~ The parking lights and the status light will turn on.
Step 3 Within 10 seconds of step 2, press the valet switch the number of times cor-
responding with the desired feature’s number.
~Thestatuslightsandtheparkinglightswillashequaltotheselectedfeature.
Step 4 Change the feature by pressing the brake pedal the same number of times
that corresponds with the desired setting.
~Thestatuslightsandtheparkinglightswillashequaltotheselectedsetting.
Step 5 If you wish to change more features, repeat steps 3 & 4 at this time.
Step 6 To exit programming, turn the ignition key “ON” then “OFF”. Or, you can wait
10 seconds for programming mode to expire. The lights will turn off.
The Status Light
Programming Features

5
User Programmable Features
Feature #1 Remote Start Run Time
10 Minutes (press the brake pedal 1 time to program) - DEFAULT
5 Minutes (press the brake pedal 2 times to program)
15 Minutes (press the brake pedal 3 times to program)
20 Minutes (press the brake pedal 4 times to program)
This feature sets the period of time that the engine will run after being remotely
started. If the engine is not stopped by controller/transmitter command or a safety
circuit violation, the engine will automatically stop upon the expiration of the selected
time period. Caution: The remote engine starting feature should NEVER be
used when the vehicle is parked in an enclosed structure or garage.
ThisgroupofUserProgrammableFeaturesareallaccessedasagroupintherst
level of features’ programming. These features have a direct affect upon the sys-
tem’s operations, so the programming and operation of each are described.
Feature #2 Steady/Flashing Lights During Remote Start
Steady (press the brake pedal 1 time to program) - DEFAULT
Flashing (press the brake pedal 2 times to program)
ThisFeaturecongurestheoperationofthevehicle’sparkinglightsduringthe
remote start operation. The default setting turns on the parking lights during remote
start;theothersettingashestheparkinglightsonandoffduringremotestart.
This group of Installer Programmable Features are all accessed as a group in the
second level of features’ programming. These features have a direct affect upon the
system’s operations related to the installation and vehicle type AND SHOULD ONLY
BE CHANGED BY THE INSTALLER!!!
Feature #1 Remote Start Activation
1 button pulses (press the brake pedal 1 time to program)
2 button pulses (press the brake pedal 2 times to program) - DEFAULT
3 button pulses (press the brake pedal 3 times to program)
4 button pulses (press the brake pedal 4 times to program)
This feature allows you to choose the number of pulses required on the White/Blue
activation wire to activate the remote start feature. All of the settings must occur
within a 5 second window of the previous pulse.
Feature #2 Engine Detection Method
Tachless Hi (press the brake pedal 1 time to program) - DEFAULT
Tachless Lo (press the brake pedal 2 times to program)
Tach Wire (press the brake pedal 3 times to program)
Data Tach (press the brake pedal 4 times to program)
Crank Only (press the brake pedal 5 times to program)
This feature selects the method in which the remote start monitors the engine’s run-
ning condition in remote start mode.
“Tachless Hi” sensitivity mode has an associated base starter output time duration
(see installer feature #5) and monitors the vehicle’s voltage level to determine if the
engine is running. This setting looks for a voltage increase of 0.3v after cranking.
“Tachless Lo” sensitivity mode operates like the “Tachless Hi” setting but
Installer Programmable Features

6
looks for a voltage increase of 0.5v after cranking.
“Tach Wire” Before this setting is programmed, refer to the “Violet/White wire” sec-
tion of the installation manual for proper wiring connection and the Tach Learn Pro-
cedure. It will crank the engine for up to 3 seconds or until a tach signal is detected.
“Data Tach” mode operates just like the “Tach Wire” setting except it takes its
reading from the D2D data port instead of using the Violet/White wire. Before using,
make sure this function is supported by the Databus Interface module.
“Crank Only” AKA “blind start” is similar to the “Tachless” settings however, it only
makes one start attempt and does not monitor engine running conditions. This is
useful for many “push-to-start” vehicles.
Feature #4 Satellite Relay Port Green Wire Function
Starter (press the brake pedal 1 time to program) - DEFAULT
Pulse After Engine Start (press the brake pedal 2 times to program)
Status (press the brake pedal 3 times to program)
Domelight (press the brake pedal 4 times to program)
This feature changes the operation of the Green wire (negative) on the satellite relay
port.Thisgivesyoutheexibilitytoaccomodatecertainvehiclesthatrequireany
out-of-the-ordinary pulses or remote start timing.
Starter setting operates as a secondary START output. This will have the same
pulse timing as the large Violet wire on the main harness.
Pulse After Start gives a 0.8 second pulse after the engine starts and is running.
Status will behave like the PINK ignition output except it turns on 1.5 seconds
earlier than the primary ignition output.
Domelight provides domelight supervision output. It will turn on when the system is
unlocked and after turning the ignition “off”.
Feature #5 Extended Starter Cranking Time
0.7 Second (press the brake pedal 1 time to program) - DEFAULT
1.00 Second (press the brake pedal 2 times to program)
1.5 Seconds (press the brake pedal 3 times to program)
2.25 Seconds (press the brake pedal 4 times to program)
This feature determines the crank time of the 1st start attempt when in “Tachless”
mode.Iftheenginedoesn’tstartontherstattempt,itwillretryupto3moretimes
extending the crank time by an additional 0.2 second with each attempt..
Installer Programmable Features (cont’d)
Feature #3 Gasoline Or Diesel Engine
Gasoline (press the brake pedal 1 time to program) - DEFAULT
Diesel 15 Sec. Delay (press the brake pedal 2 times to program)
Diesel 20 Sec. Delay (press the brake pedal 3 times to program)
Diesel 30 Sec. Delay (press the brake pedal 4 times to program)
This feature changes the system’s timing of the ignition and starter output sequence
for gas or diesel engines. Gasoline: the starter output will occur 3 seconds after the
ignitions turn on. When in “Tachless” mode, the engine running status is determined
10 seconds after starting. Diesel: the starter output will occur 15, 20, or 30 seconds
after the ignitions turn on (allows for glow plug warming). When in “Tachless” mode,
the engine running status will be determined 40 seconds after cranking.

7
Installer Programmable Features (cont’d)
Feature #9 Turbo Timer
Off (press the brake pedal 1 time to program) - DEFAULT
Run 1 Minute (press the brake pedal 2 times to program)
Run 2 Minutes (press the brake pedal 3 times to program)
Run 3 Minutes (press the brake pedal 4 times to program)
Thisfeaturewhenturnedonconguresthesystemtoautomaticallykeeptheengine
runningbrieyafteritisturnedoff.Thisoperationisdesignedspecicallyforve-
hicles having turbocharged engines. This feature should only be programmed by the
installer, and the operation of this feature depends on the correct connection of the
neutral safety wire to the vehicle’s parking brake. Please refer to the “Black/White
wire” in the installation manual for the proper connection of this important wire.
Programmable Features Matrix
User Feature Programming: Ignition on, off, press valet 5 times
# Feature Brake Pedal x 1 Brake Pedal x 2 Brake Pedal x 3 Brake Pedal x 4
1 Engine Run Time 10 min 5 min 15 min 20 min
2 Steady/Flashing lights for RS Steady Flashing
Installer Feature Programming: Ignition on, off, press valet 10 times
1 RS Activation 1 pulse 2 pulses 3 pulses 4 pulses
2 Engine Detection Tachless Hi Tachless Lo Tach Wire Datatach
Crank Only (Brake Pedal x 5)
3 Gas or Diesel Engine Gas Diesel
(15 sec delay)
Diesel
(20 sec delay)
Diesel
(30 sec delay)
4 Sat. Port Green Wire Starter Pulse After Start Status Domelight
5 Crank Time 0.7 Sec 1.00 Sec 1.5 Sec 2.25 Sec
6 Low Temp Crank Extender 0ms 200ms 300ms 400ms
7 N/A
8 N/A
9 Turbo Timer OFF 1 min 2 min 3 min
Feature #6 Low Temp Crank Extender
0ms (Off) (press the brake pedal 1 time to program)
200ms (press the brake pedal 2 times to program) - DEFAULT
300ms (press the brake pedal 3 times to program)
400ms (press the brake pedal 4 times to program)
When the vehicle’s interior temperature is below freezing, this feature adds extra
crank time to the base timing (see installer feature #5). It applies to tachless modes
only (installer feature #2)

Back Cover
Color cover is in a
separate le.
Table of contents
Other Omega Research & Development Remote Starter manuals
Popular Remote Starter manuals by other brands

CrimeStopper
CrimeStopper Cool Start RS-840 operating instructions

CoastKey
CoastKey Evinrude E-tec installation guide

EverStart
EverStart maxx EL224 user manual

MEGATRONIX
MEGATRONIX Viking VS 200 installation manual

Prestige
Prestige APSRS Installation and reference guide

Firstech
Firstech 2WQ9R-SS Quick start card