OONN OOFF FF
OONN OOFF FF
OONN OOFF FF
Installation Guide
STEP 1. STEP 2.
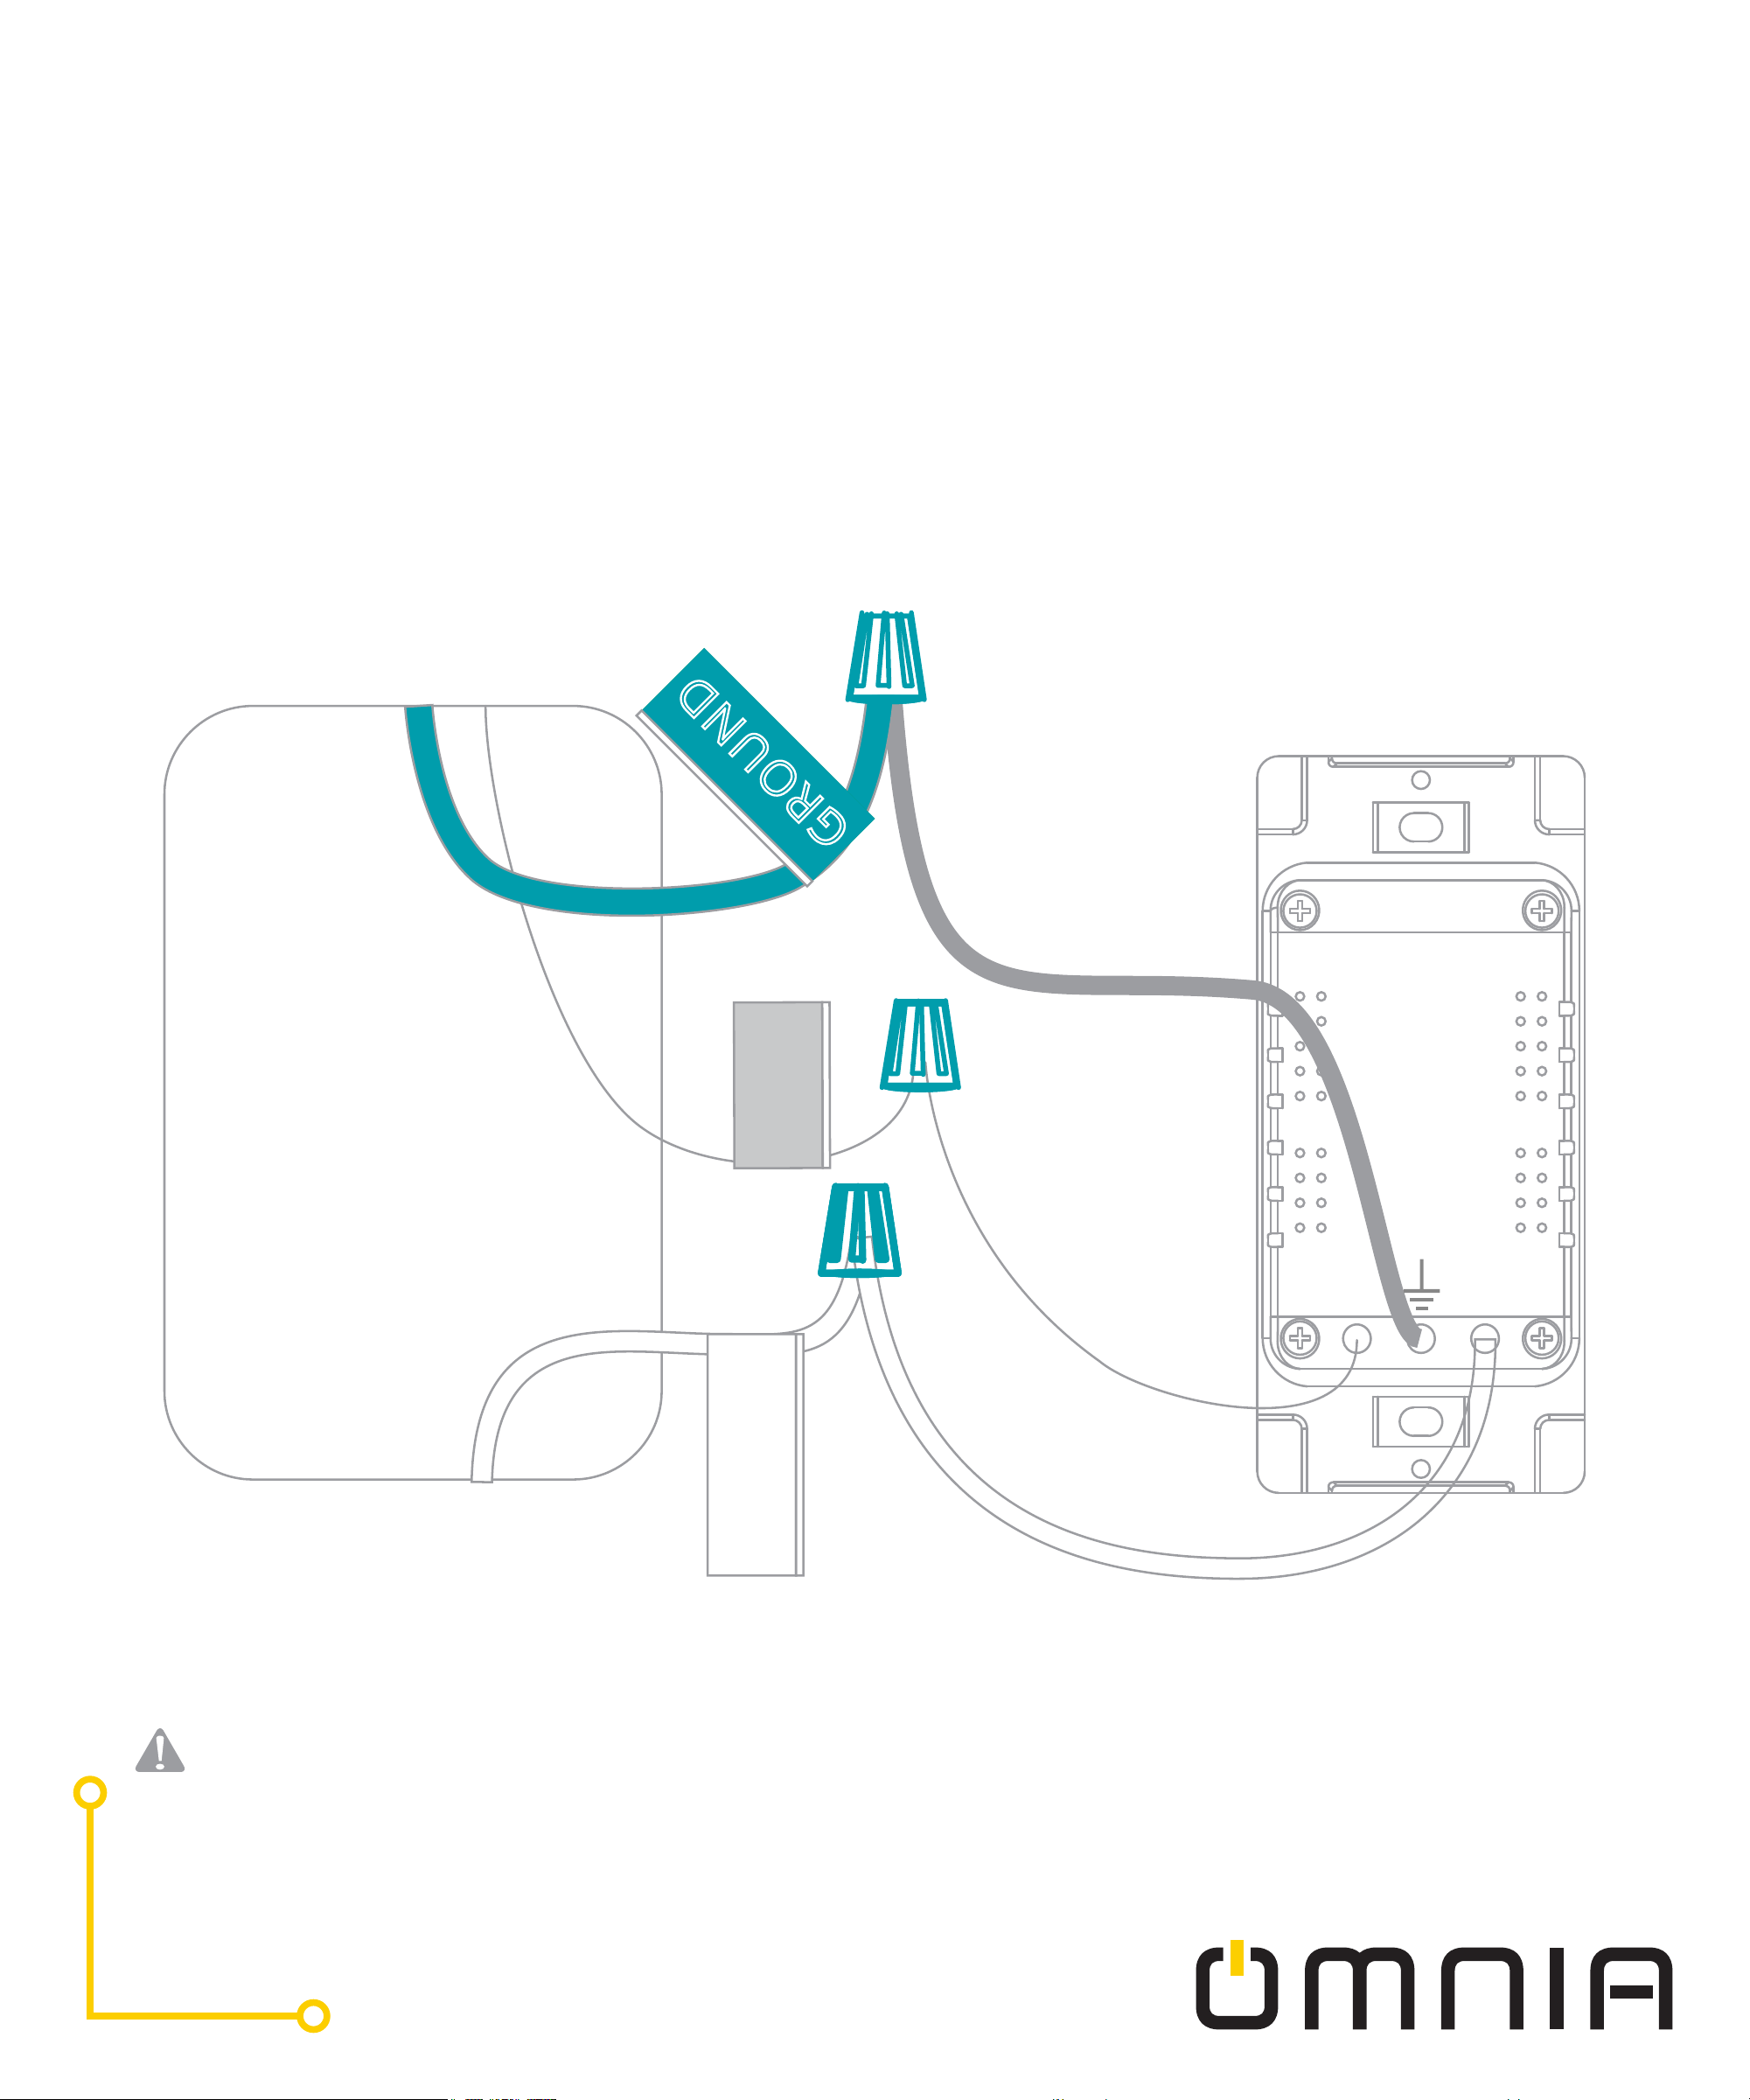
Ground
Line
Neutral
If your original socket is also two jacks, you may find 4 or 5 wires. Please find the
neutral wires, Line wires and ground wires. This smart socket only needs to use the
neutral wires, Line wires and ground wires, other lines do not need to be connected
Remove the original socket
In the wall cassette find the
neutral wire, line wire and
ground wire.
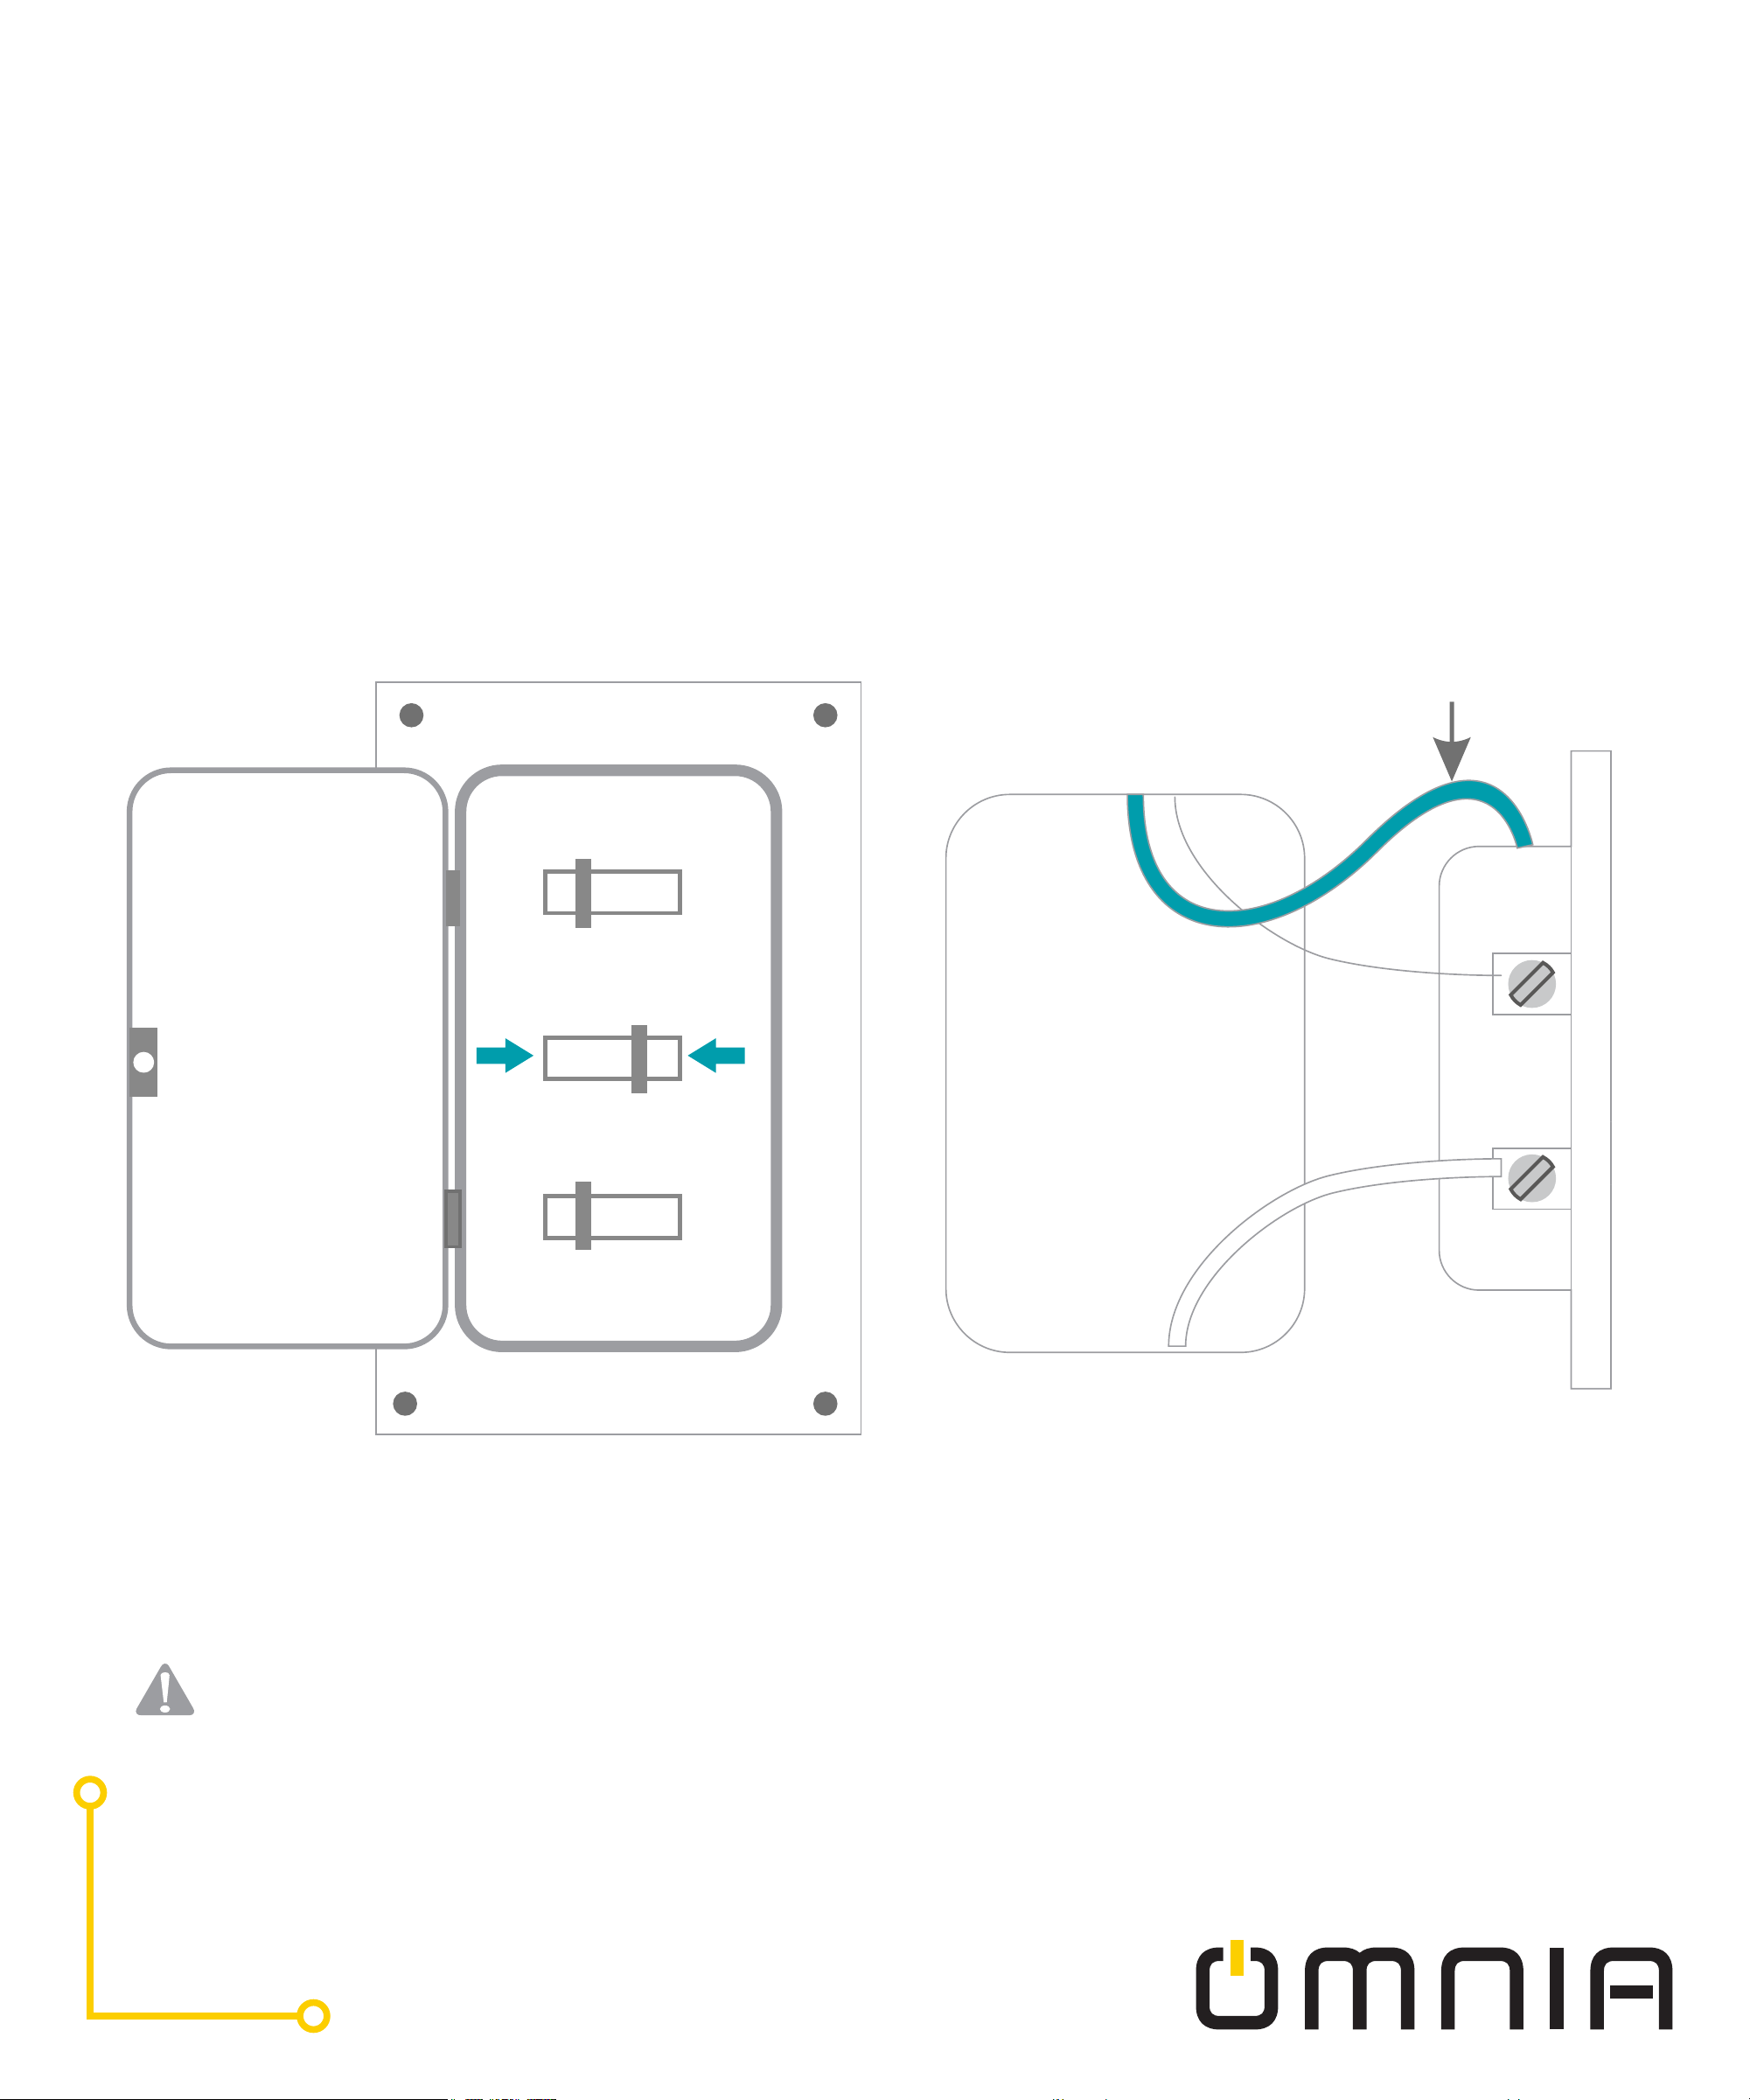
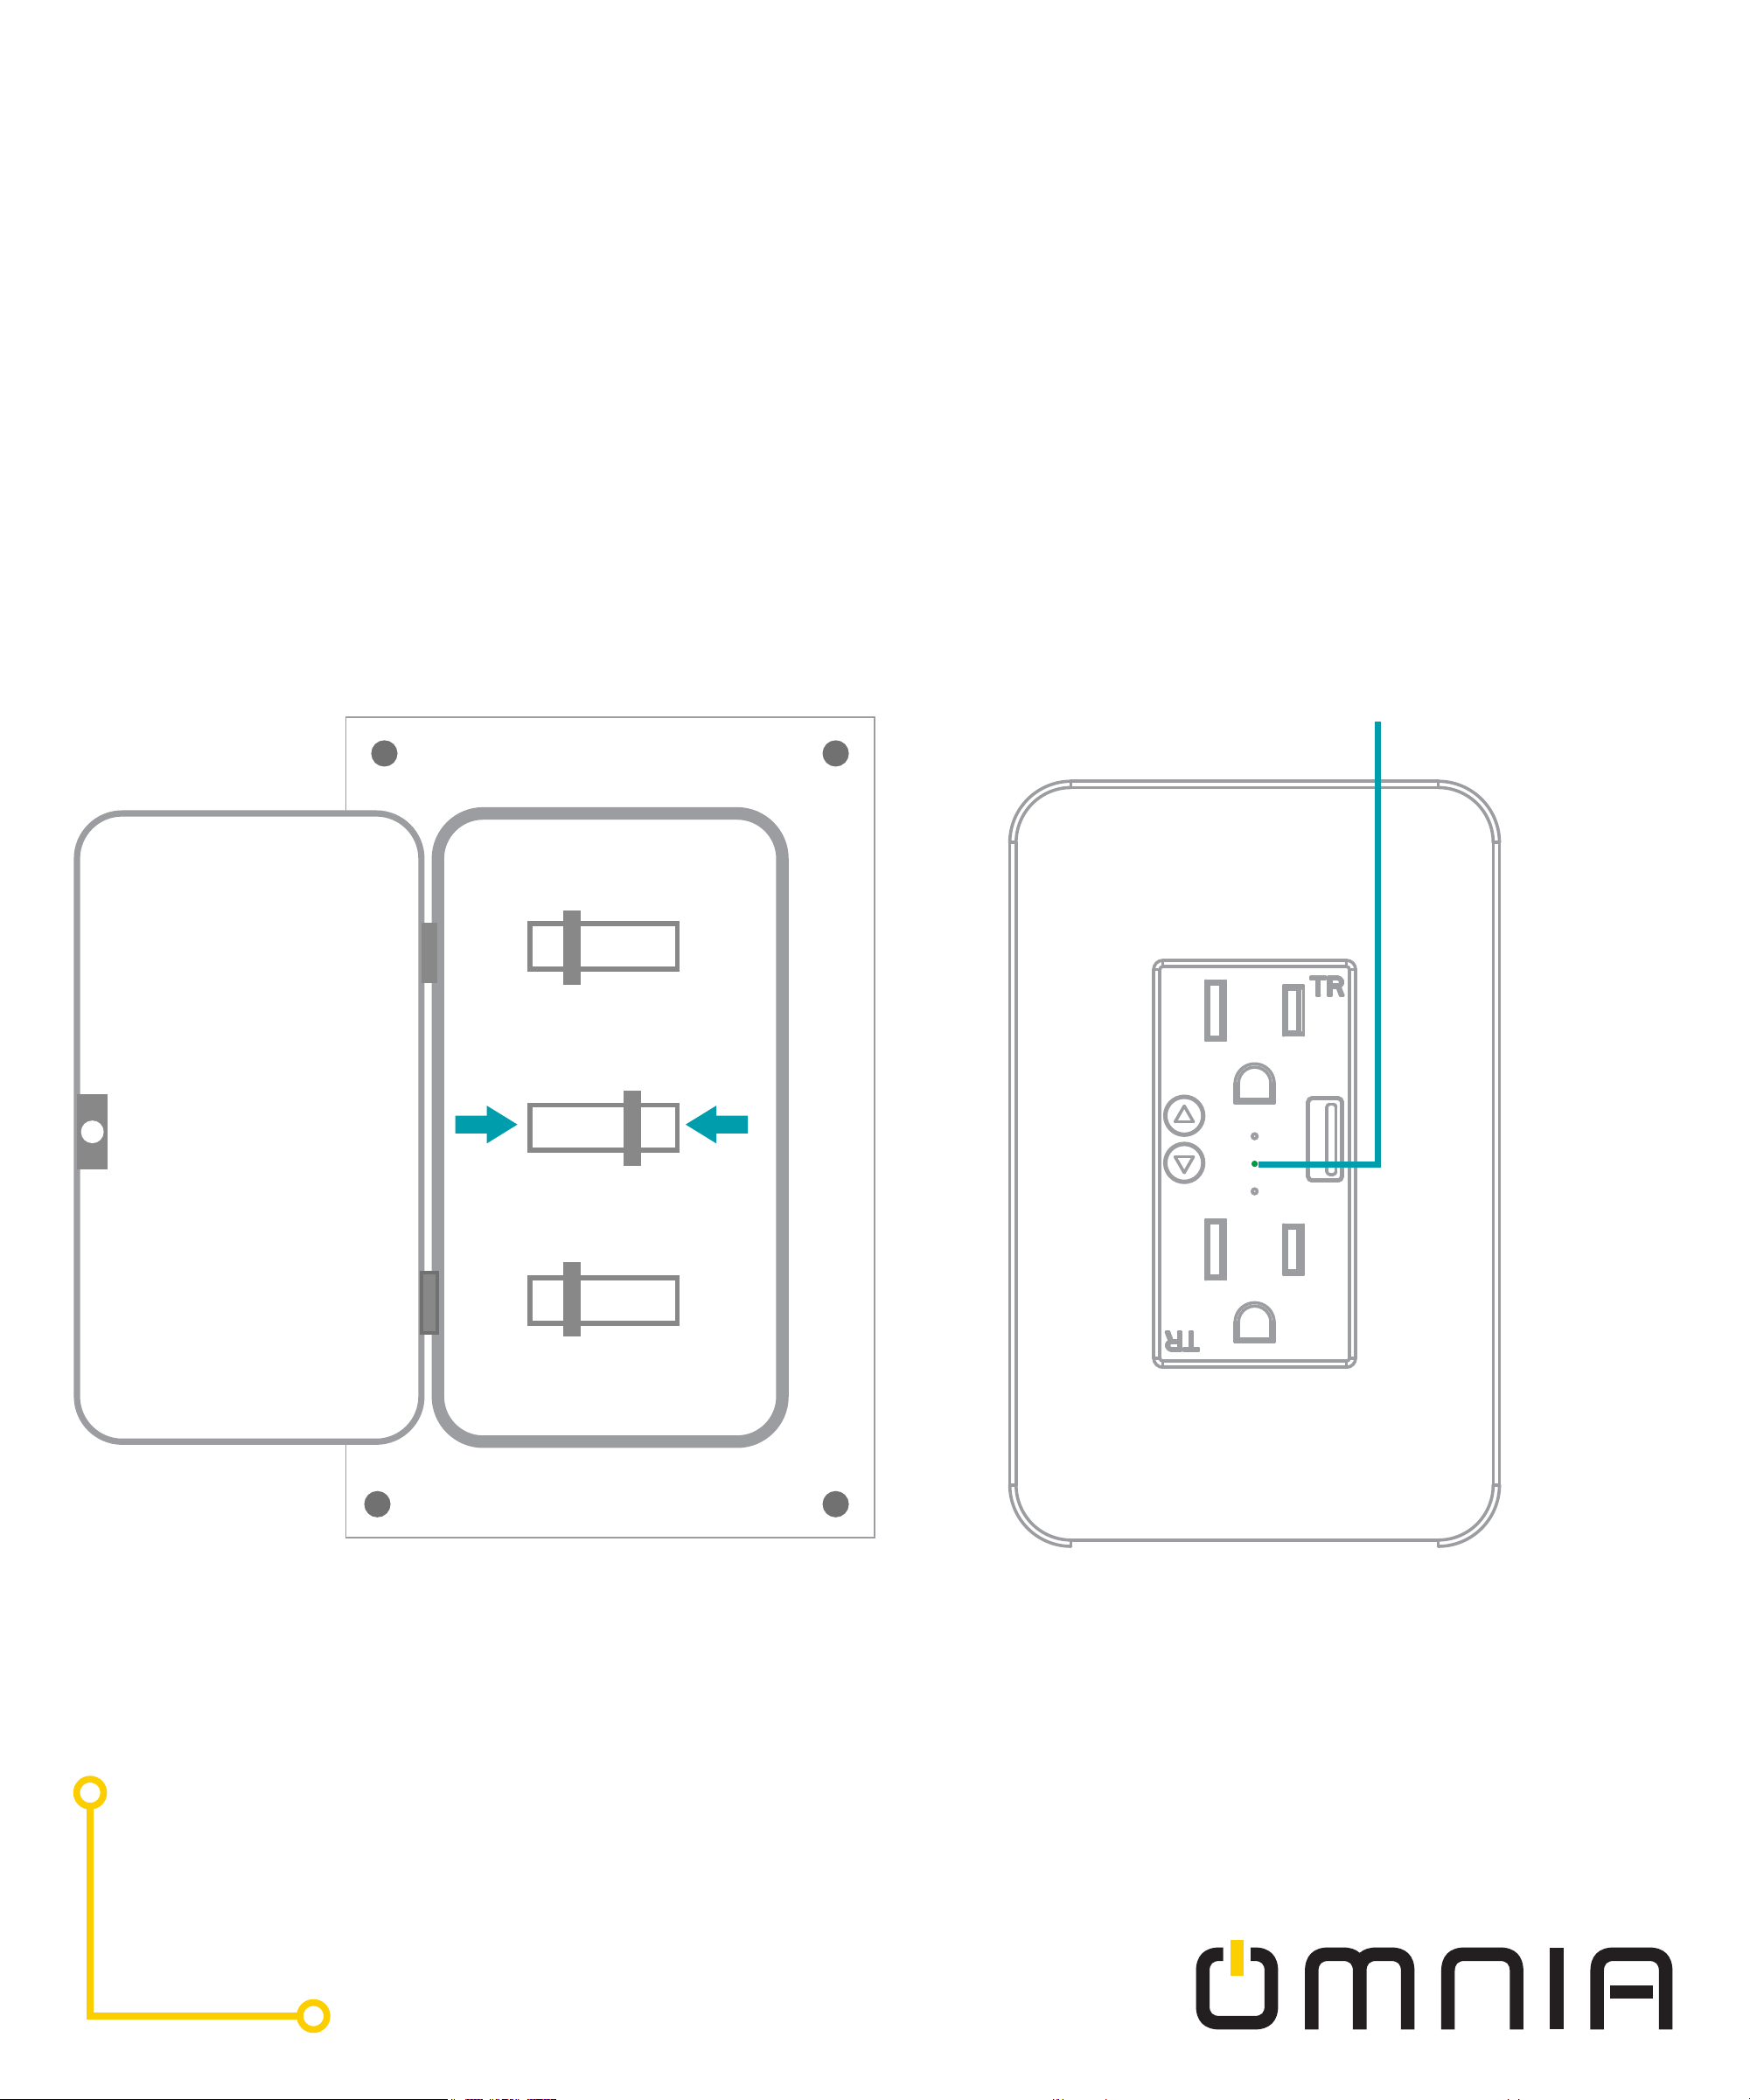
Turn off circuit breaker.
Find your socket’s control in your
circuit breaker and turn it off,