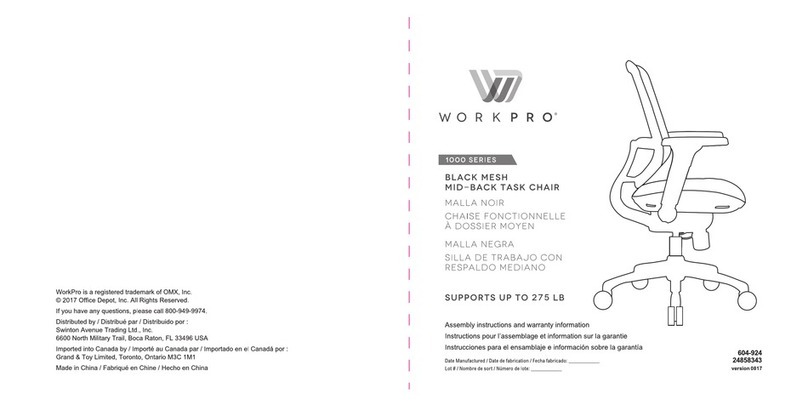
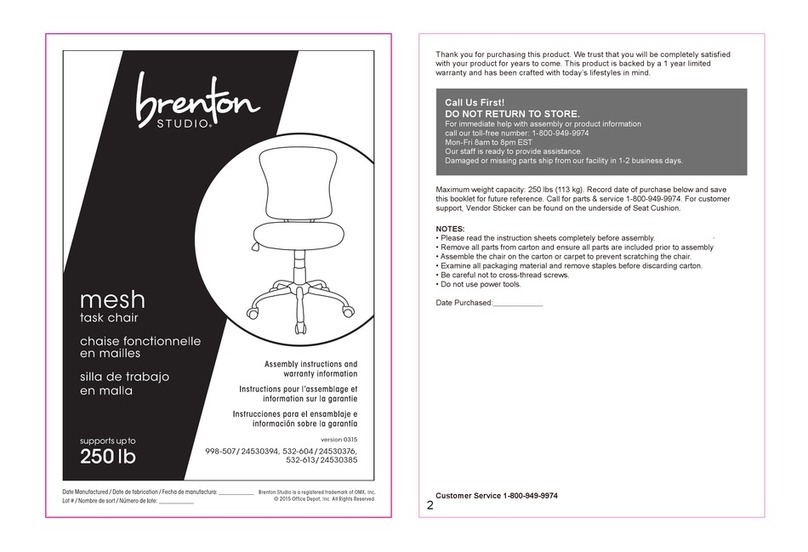
OMX WorkPro Serta Icomfort i5000 Series Installation guide

Version 0617
330-812 / 898-221
i5000
series
EXCLUSIVELY FOR
BIG & TALL
EXECUTIVE CHAIR
Made in China / Fabriqué aux Chine / Hecho en China

Armrests
Accoudoirs
Descansabrazos
Seat Plate
Plaque du siège
Placa del asiento
Gas Lift
Cylindre à gaz
Elevador de gas
Casters
Roulettes
Rodillos
Bolts (1")
Boulons (25mm)
Pernos (25mm)
F
E
D
A
I
J2
C
M
G
Back Cushion
Dossier
Cojín del respaldo
Seat Cushion
Assise
Cojín del asiento
Parts / Pièces / Piezas
Quantity/Quantité/cantidad: 1 Quantity/Quantité/cantidad: 1
Quantity/Quantité/cantidad: 5
Quantity/Quantité/cantidad: 4+1
Quantity/Quantité/cantidad: 1
Quantity/Quantité/cantidad: 2
Quantity/Quantité/cantidad: 4+1
Quantity/Quantité/cantidad: 1
Quantity/Quantité/cantidad: 1 Quantity/Quantité/cantidad: 2
Allen Key
Clé Allen
Llave Allen
Step 1
Select a smooth surface in order not to scratch
the parts. Turn the Star Base (F) upside down.
Press the Casters (G) into holes at the end of
each leg. Turn the Star Base (F) upright and
insert Gas Lift (E) into the central hole of Star
Base (F).
Étape 1
Travailler sur une surface lisse pour ne pas rayer
les pièces. Tourner la base (F) à l’envers.
Enfoncer les roulettes (G) dans les trous de
chaque pied. Retourner la base (F) à l’endroit et
engager le cylindre à gaz (E ) dans le trou central
de la base (F).
Paso 1
Seleccione una superficie suave para no
rasguñar las piezas. Gire la base de estrella (F)
boca abajo. Oprima los rodillos (G) en los
barrenos al final de cada extremo. Gire la base
estrella (F) boca arriba e inserte el elevador de
gas (E) en el barreno central de la base (F).
3
Base
Base
Base
B
Quantity/Quantité/cantidad: 1
G
F
Bolts (1 1/4”)
Boulons (32mm)
Pernos (32mm)
H
Quantity/Quantité/cantidad: 1
C2
K2
C1
K1
Arm Inserts
Moldura del brazo
Encarts d’accoudoir
Knob (5/8”)
Bouton (16mm)
Perilla (16mm)
Quantity/Quantité/cantidad: 4+1
Bolts with Spring Washers (2”)
Bouton (51mm)
Perilla (51mm)
FRONT
DEVANT
FRENTE
J1
Plastic Shroud
Protecteur plastique
Cubierta de plástico
K
Quantity/Quantité/cantidad: 2
L2 L1
Arm Inserts
Moldura del brazo
Encarts d’accoudoir
LF
E
Right Arm Left Arm
J3
EXCLUSIVELY FOR
Note: Do not use power tools. Only use the Allen Key provided.
Note : Ne pas utiliser d’outils électriques. Utiliser seulement la clé Allen (hexagonale) fournie.
Nota: No use herramientas eléctricas. Use solamente la llave Allen proporcionada.

B
J1
Step 2
Place the Seat Cushion (B) on top of the box prior to
assembly. Align Seat Plate (D) over pre-drilled holes
on the underside of Seat Cushion (B) with black
tension knob facing the front of the seat. Attach Seat
Plate (D) to Seat Cushion (B) using 4 Bolts (J1) for
the holes of Seat Plate (D) as shown. Securely
tighten the bolts with enclosed Allen Key (M).
Étape 2
Avant de commencer l'assemblage, placez le coussin
du siège(B) sur le carton. Alignez la plaque du siège
(D) sur les trous prépercés du côté inférieur du
coussin du siège (B). Le bouton de tension noir doit
être placé du côté avant du siège. Fixez la plaque du
siège (D) au coussin du siège (B) à l'aide de 4
boulons (J1) pour les trous de la plaque du siège (D)
comme indiqué. Serrez fort à l'aide de la clé allen
fournie (M).
Paso 2
Coloque el cojín del asiento (B) sobre la caja antes de
proceder al montaje. Alinee la placa del asiento (D)
con los agujeros taladrados en la parte inferior del
cojín del asiento (B) con la palanca de tensión negra
en posición de cara a la parte delantera del asiento.
Atornille la placa del asiento (D) al cojín (B) utilizando
4 tornillos (J1) para los agujeros de la placa del
asiento (D) como se muestra en la figura. Apriete de
forma segura con la llave allen (M) suministrada.
Step 3
Attach the Seat Cushion (B) to the Back Cushion (A)
at a right angle. Align the metal bar of the Back
Cushion (A) over the Seat Cushion (B) as shown
and connectwith 4 Bolts (J3). Do not tighten bolts
fully until you have completed assembly.
Étape 3
Fixez le coussin de siège (B) au coussin pour le dos
(A) en veillant à obtenir un angle droit. Alignez la
barre de métal du coussin pour le dos (A) au-dessus
du coussin de siège (B) tel qu’illustré et fixez-le avec
les 4 vis (J3). Ne serrez pas ces boulons à fond
avant d'avoir terminé l'assemblage.
Paso 3
Fije el asiento acojinado (B) al respaldo acojinado
(A) en un ángulo recto. Alinee la barra metálica del
respaldo acojinado (A) sobre el asiento acojinado
(B) como se muestra y conecte con 4 pernos (J3).
No apriete los tornillos por completo hasta que
haya finalizado el montaje.
5
FRONT
DEVANT
FRENTE
FRONT
DEVANT
FRENTE
D
J3
B
FRONT
DEVANT
FRENTE
FRONT
DEVANT
FRENTE
D
M
A
M
EXCLUSIVELY FOR

Step 5
Attention: Please keep levers on Arms (C1 & C2) to
the down position for easy assembly.
Lift the lids of the EZ cable connectors attached to
Seat Plate (D) as shown. Insert the ends of the arm
cables into the grooves of the EZ cable connectors,
pull tightly and snap them into place as shown. Then
close the lids.
Note: Fix the cables into the plastic clips attached to
the bottom of the seat cushion.
Étape 5
Attention : Veuillez maintenir les leviers des bras
(C1 et C2) vers le bas pour faciliter l’assemblage.
Soulevez les couvercles des connecteurs de câble
EZ liés à l’assise (D), tel qu’illustré. Insérez les
extrémités des câbles des bras dans les rainures de
connecteurs de câble EZ, tirez-les fermement et
fixez-les tel qu’illustré. Fermez ensuite les couver-
cles.
Remarque : Fixez les câbles aux pinces de plastique
situées sous le coussin du siège.
Paso 5
Atención: Favor de mantener las palancas en los
brazos (C1 y C2) en la posición hacia abajo para
assemblar.
Levante las tapas de los conectores del cable EZ
que se encuentran adjunto el Mecanismo del asiento
(D) como se muestra. Inserte las puntas de los
cables de brazos en las ranuras de los connectores
del cable EZ, tire de ellos firmemente y encajen en
su lugar come se muestra. Luego ciere las tapas.
Nota: Fije los cables a los clips de plástico situados
en la parte inferior del cojín del asiento.
7
C2 C1
M
M
B
C2
A
B
FRONT
DEVANT
FRENTE
FRONT
DEVANT
FRENTE
FRONT
DEVANT
FRENTE
D
A
FRONT
DEVANT
FRENTE
21
3 4
Cable end
Lid
EZ Cable
Lid
EZ Cable
Lid
EZ Cable
J2
A
FRONT
DEVANT
FRENTE
FRONT
DEVANT
FRENTE
J2
OK
B
C1
Step 4
Attach the Right Arm (C2) to the sides of Back
Cushion (A) and Seat Cushion (B) with two Bolts
with Spring Washers (J2). Then assemble the
Left Arm (C1) in the same way. Securely tighten
all the bolts with enclosed Allen Key (M).
Remember to tighten the back support plate
screws from step 3!
Étape 4
Fixez le accoudoir de droite (C2) au dossier
coussiné (A) et au siège coussiné (B) à l’aide de
deux boulons avec rondelles élastiques (J2).
Ensuite, assemblez le accoudoir de gauche(C1)
de la même manière. Fixez tous les boulons à
fond à l’aide de la clé hexagonale (M). N’oubliez
surtout pas de bien visser les vis de la plaque
du dossier de l'étape 3!
Paso 4
Atornille el brazo derecho (C2) a los laterales del
respaldo (A) y el asiento (B) con dos pernos con
arandelas elásticas (J2). Luego ensamble el
brazo izquierdo (C1) de la misma manera.
Asegure todos los tornillos completamente con la
llave allen (M). Recuerde que debe ajustar
también los tornillos de la placa de soporte
posterior del paso 3.
EXCLUSIVELY FOR

Step 6
Pull down the metal plate of Back Cushion (A)
and attach it over to the Seat Plate (D) by using
1 Knob (I). Tighten the knob.
Étape 6
Tirez vers le bas la plaque de métal du coussin
du dossier (A) et fixez-la à la plaque du siège (D)
en utilisant 1 bouton (I). Serrez la bouton.
Paso 6
Tire hacia abajo la placa metálica de la parte
posterior del cojín (A) y fíjelo a la placa del
asiento (D) usando 1 perilla (I). Apriete la
perilla.
Step 7
Put the Plastic Shroud (H) over the Seat Plate (D)
(with front of plastic shroud facing the front of seat
cushion). Align shroud posts to holes on bottom of
Seat Cushion (B) and press into position.
Étape 7
Placez le protecteur plastique (H) sur la plaque du
siège (D) (l'avant du protecteur plastique faisant
face à l'avant du coussin du siège). Alignez les
montants du protecteur avec les trous sous le
coussin du siège (B) et exercez une pression pour
mettre le tout en place.
Paso 7
Coloque la cubierta de plástico (H) sobre la
plancha del asiento (D) (con la parte frontal de la
cubierta de plástico mirando hacia el frente del
cojín del asiento). Alinee los postes de la cubierta
con los huecos en la parte inferior del cojín del
asiento (B) y presiónelos hasta dejarlos en
posición.
9
B
H
I
FRONT
DEVANT
FRENTE
D
B
A
FRONT
DEVANT
FRENTE
FRONT
DEVANT
FRENTE
D
FRONT
DEVANT
FRENTE
FRONT
DEVANT
FRENTE
1 2
FRONT
DEVANT
FRENTE
FRONT
DEVANT
FRENTE
EXCLUSIVELY FOR

Step 8
Insert the Gas Lift (E) into the central hole on the
Seat Plate (D) as shown. Turn the assembled chair
upright and push down firmly over the Gas Lift (E)
until it is securely connected.
Étape 8
Engager le cylindre à gaz (E ) dans le trou central
du plateau du siège (D) comme indiqué. Placer
l'assemblage en position verticale et presser
fermement sur le vérin pneumatique (E) jusqu'à ce
qu'il soit en place de manière sécuritaire.
Paso 8
Inserte el elevador de gas (E) en el barreno central
en la placa del asiento (D) como se muestra. De
vuelta la silla hacia arriba y presione firmemente
sobre el elevador de gas (E) hasta que la silla
quede ajustada.
11
B
D
Step 9
Place the Arm Inserts (K & L) into arm grooves
once all screws have been tightened.
Étape 9
Placez les encarts des accoudoirs (K et L) dans les
rainures une fois toutes les vis bien serrées.
Paso 9
Ponga las molduras de los brazos (K y L) en las
ranuras de los brazos una vez que haya ajustado
todos los tornillos.
K1
C1
C2
L1
K2
L2
F
E
FRONT
DEVANT
FRENTE
FRONT
DEVANT
FRENTE
EXCLUSIVELY FOR

Step 10
Before using your Chair, ensure that all the bolts
are tightened fully for safety. You can now enjoy
the comfort of your new Chair!
NOTE: Please keep the allen key and
check all bolts periodically to ensure
these remain tightly fastened.
Étape 10
Avant d'utiliser votre fauteuil de bureau, assurez-
vous que tous les boulons sont entièrement serrés
par précaution. Vous pouvez désormais profiter de
votre nouveau fauteuil!
REMARQUE : Conservez la clé et vérifiez
tous les boulons régulièrement pour vous
assurer qu'ils soient toujours bien serrés.
Paso 10
Antes de utilizar su nuevo sillón, asegúrese de
haber ajustado bien todos los tornillos. Ya puede
disfrutar de la comodidad de su nueva silla.
NOTA: Conserve la llave y compruebe
todos los tornillos periódicamente para
asegurarse de que continúan bien
apretados.
13
TO ADJUST SEAT HEIGHT
While seated, reach under the right side of the arm to find the
lever. Lift the lever and raise your body up slightly to allow the
chair to rise to the desired height. Once desired height is
reached, release lever to lock chair at desired height. To lower
the seat, lift the lever while seated. The chair will descend until
the lever is released or the chair reaches the bottom position.
POUR RÉGLER LA HAUTEUR DU SIÈGE
Asseyez-vous sur la chaise, atteindre le côté droit de la chaise et
trouver le levier. Soulevez le levier et relevez légèrement votre
corps pour permettre à la chaise de se soulever à la hauteur
désirée. Une fois à la hauteur désirée, relâchez le levier pour
verrouiller la chaise à la hauteur désirée. Pour descendre la
chaise, soulevez le levier en étant assis. La chaise descendra
tant que le levier est activé ou si la chaise atteint la position la
plus basse.
PARA AJUSTAR LA ALTURA DEL ASIENTO
Estando sentado, sujete la palanca que se encuentra debajo del
lado derecho del brazo. Levante la palanca y eleve su cuerpo un
poco para que la silla alcance la altura deseada. Cuando la silla
tenga la altura deseada, suelte la palanca para que la silla quede
fijada en la altura deseada. Para bajar el asiento, levante la
palanca estando sentado. La silla descenderá hasta que se
suelte la palanca o la silla llegue a la posición inferior.
EXCLUSIVELY FOR

TO OPERATE TILT LOCKOUT
While seated, reach under the left side of the arm to
find the lever. Pull up the lever and lean back to allow
the chair to tilt backwards. To lock the chair in the
upright or vertical position, sit upright and push the
lever to the down position.
RÉGLAGE DE L'INCLINAISON
Asseyez-vous sur la chaise, tendez la main sous le
côté gauche de la chaise pour trouver le levier. Tirez le
levier et inclinez le dos pour permettre à la chaise de
s’incliner vers l’arrière. Pour verrouiller la chaise en
position verticale, asseyez-vous le dos droit et tirez le
levier vers le haut.
CÓMO FUNCIONA EL SEGURO PARA INCLI-
NAR EL SILLÓN
Estando sentado, sujete la palanca que se encuentra
debajo del lado izquierdo del brazo. Tire de la palanca
hacia arriba e incline su cuerpo hacia atrás para que la
silla se incline hacia atrás. Para fijar la silla en la
posición vertical, siéntese recto y empuje la palanca
hacia abajo.
TO ADJUST TILT TENSION
Reach under the front center of chair seat and
grasp the round black knob. To loosen the tilt
mechanism, turn the knob clockwise. This lessens
the effort required to rock back and forth. Rotate
the knob until desired resistance is reached.
POUR RÉGLER LA TENSION DU MÉCAN-
ISME D’INCLINAISON
Repérez la poignée plate sous le siège, du côté
droit. Faites glisser la poignée vers l'extérieur du
fauteuil. Quand la poignée est dans cette position,
vous pouvez faire basculer le fauteuil vers l'arrière
en vous appuyant au dossier. Pour verrouiller ce
dernier en position verticale, asseyez-vous droit et
poussez la poignée vers l'intérieur (vers le centre
du siège).
AJUSTE DE LA TENSIÓN EN EL MECAN-
ISMO PARA INCLINAR EL SILLÓN
Busque debajo del asiento del sillón, en la parte
central del frente y sujete la perilla negra redonda.
Para aflojar el mecanismo de inclinación, de vuelta
a la perilla en el sentido de las manecillas del reloj.
Esto disminuye el esfuerzo necesario para
moverse hacia atrásy hacia adelante. Gire la perilla
hasta obtener el nivel de resistencia deseado.
15
Round knob
Bouton rond
Perilla redonda
EXCLUSIVELY FOR

17
Featuring PostureSync™ Responsive Support
System
Patented posturesync responsive support system allows the
lumbar zone to flex, changing from full support to relaxed as you
shift your sitting position from upright to reclined. The chair can
be locked in the upright position using the tilt lockout for constant
lumbar support while in a work posture.
Présentation du système de soutien réactif Postur-
eSync™
Système de soutien réactif breveté posturesync permet à la
région lombaire de s'adapter en passant du soutien complet à
une position de relaxation lorsque le dossier passe de la position
droite à inclinée. Le fauteuil peut être verrouillé en position
verticale à l'aide du verrou d'inclinaison pour un soutien lombaire
constant lorsque vous êtes en posture de travail.
Con el Sistema de soporte receptivo PostureSync™
El sistema patentado de soporte receptivo PostureSync hace
que el área lumbar sea flexible, lo que permite cambiar de un
soporte completo a uno relajado cuando cambia de posición de
sentado a reclinado. Es posible bloquear la silla en posición
vertical mediante el bloqueo de inclinación para obtener un
soporte lumbar constante mientras esté en postura de trabajo.
360˚ SWIVEL
360˚ Seat swivel.
ROTATION DE
360 DEGRÉS
Rotation du siège de
360 degrés
GIRO DE 360˚
Giro de 360˚ del asiento
EXCLUSIVELY FOR

True Innovations seating products. Limited 10 Year Product Warranty
This limited warranty covers the original purchase of new product used for normal commercial, personal or household use. True
Innovations seating products warrants its products will be free from defects in materials and workmanship (normal wear and tear
excepted), for 10 years from the date of purchase, except as provided below. True Innovations seating products, at its option, will
replace with a comparable product, free of charge, any product purchased from it that fails under normal use as a result of such
defect. This warranty does not apply to damage caused by fire, accident, negligence, misuse, use other than as stated in product
instructions, improper cleaning or other circumstances not directly attributable to defects in materials and workmanship.
Natural variations occurring in wood or other materials will not be considered defects, and True Innovations seating
products does not warrant the color-fastness or matching of colors, grains, or textures of such materials. This warranty
does not apply to: modifications of the product, attachments to the product not approved by True Innovations seating
products, and products that were not installed, used, or maintained in accordance with product instructions and
warnings.
This warranty has the following exceptions: Fabrics, foam, veneer finishes and other covering materials are warranted for
three years from date of purchase.
Proof of purchase is required in the form of a receipt (copy or original) to validate warranty. Warranty claims without the receipt
may be rejected.
TRUE INNOVATIONS SEATING PRODUCTS PROVIDES THIS LIMITED WARRANTY IN LIEU OF ALL OTHER WARRANTIES
EITHER EXPRESSED OR IMPLIED. EXPRESSLY EXCLUDED ARE ALL WARRANTIES OF FITNESS FOR A PARTICULAR
PURPOSE OR MERCHANTABILITY. OFFICE DEPOT’S SOLE OBLIGATION AND THE USER’S EXCLUSIVE REMEDY UNDER
THIS WARRANTY SHALL BE LIMITED TO THE REPAIR, REFUND (IN THE FORM OF AN OFFICE DEPOT MERCHANDISE
CARD) OR REPLACEMENT AT TRUE INNOVATIONS SEATING PRODUCTS’S SOLE DISCRETION AND COST, OF PRODUCT
OR COMPONENTS.
IN NO EVENT SHALL TRUE INNOVATIONS SEATING PRODUCTS, ITS AFFILIATES, SUBSIDIARIES OR PARENT COMPA-
NIES BE RESPONSIBLE FOR CONSEQUENTIAL, SPECIAL, OR INCIDENTAL DAMAGES ARISING OUT OF A CLAIM OF
DEFECTIVE PRODUCT EVEN IF TRUE INNOVATIONS SEATING PRODUCTS HAS BEEN ADVISED OF THE POSSIBILITY OF
SUCH DAMAGES.SOME STATES OR PROVINCES DO NOT ALLOW THE EXCLUSION OF IMPLIED WARRANTIES OR
LIMITATIONS ON HOW LONG AN IMPLIED WARRANTY LASTS OR THE EXCLUSION OR LIMITATION OF INCIDENTIAL OR
CONSEQUENTIAL DAMAGES SO THE ABOVE LIMITATIONS MAY NOT APPLY TO YOU. THIS WARRANTY GIVES YOU
SPECIFIC LEGAL RIGHTS, AND YOU MAY ALSO HAVE OTHER RIGHTS WHICH MAY VARY BY STATE OR PROVINCE.
THIS WARRANTY APPLIES ONLY TO THE U.S. AND CANADA.
Service Instructions
Please call: 1-800-379-9773 for warranty service.
True Innovations seating products. Garantie limitée de 10 ans
Cette garantie limitée couvre les produits neufs utilisés dans le cadre d'applications commerciales ou domestiques normales.
True Innovations seating products garantit ses produits contre les défauts de matériel et de main-d'oeuvre (à l'exception de
l'usure normale) durant 10 ans à compter de la date d'achat, à l'exception des conditions ci-dessous. True Innovations seating
products, à son gré, remplacera sans frais tout produit défectueux dans des conditions d'usure normale par un produit
comparable. La présente garantie ne s'applique pas aux dommages causés par le feu, un accident, la négligence, l'usage abusif,
le non-respect des instructions, un nettoyage inapproprié ou autre circonstance non directement attribuable à des défauts de
matériel et de main-d'oeuvre.
Les variations naturelles du bois et des autres matériaux utilisés ne sont pas considérées comme des
défauts, et True Innovations seating products ne garantit pas les couleurs, les grains et les textures de
ces matériaux. La présente garantie ne s'applique pas aux produits modifiés, aux fixations non approu-
vées par True Innovations seating products et aux produits n'ayant pas été installés, utilisés et entrete-
nus conformément aux instructions et aux avertissements fournis avec le produit.
Les tissus, la mousse, les placages et les autres matériaux de recouvrement sont garantis pendant trois
ans à compter de la date d'achat.
Une preuve d'achat sous forme de reçu (original ou photocopie) est exigée pour valider la garantie, sans quoi les réclamations au
titre de la garantie peuvent être rejetées.
CETTE GARANTIE EST FOURNIE EN LIEU ET PLACE DE TOUTE AUTRE GARANTIE. SONT EXCLUES TOUTES LES
GARANTIES D'ADÉQUATION À UN USAGE SPÉCIFIQUE ET DE QUALITÉ SATISFAISANTE. LA SEULE OBLIGATION
D'TRUE INNOVATIONS SEATING PRODUCTS ET VOTRE SEUL RECOURS EN VERTU DE CETTE GARANTIE SONT
LIMITÉS À LA RÉPARATION DU PRODUIT, AU REMBOURSEMENT SOUS FORME DE CARTE D'ACHAT OFFICE DEPOT OU
AU REMPLACEMENT DU PRODUIT OU DE COMPOSANTS À SES FRAIS.
TRUE INNOVATIONS SEATING PRODUCTS, SES FILIALES, SES COMPAGNIES ASSOCIÉES ET SES SOCIÉTÉS MÈRES
NE PEUVENT ÊTRE TENUES RESPONSABLES DES DOMMAGES INDIRECTS OU PARTICULIERS INHÉRENTS À UNE
RÉCLAMATION POUR PRODUIT DÉFECTUEUX MÊME SI LA POSSIBILITÉ D'UN TEL DOMMAGE A ÉTÉ DÉJÀ ÉTÉ
PORTÉE À LA CONNAISSANCE D'TRUE INNOVATIONS SEATING PRODUCTS.
CERTAINS ÉTATS ET CERTAINES PROVINCES INTERDISANT L'EXCLUSION OU LES RESTRICTIONS DE DURÉE DES
GARANTIES IMPLICITES OU L'EXCLUSION DES DOMMAGES INDIRECTS, LES RESTRICTIONS CI-DESSUS PEUVENT NE
PAS S'APPLIQUER À VOUS. LA PRÉSENTE GARANTIE VOUS CONFÈRE DES DROITS JURIDIQUES SPÉCIFIQUES ET
VOUS POUVEZ DISPOSER D'AUTRES DROITS, LESQUELS PEUVENT VARIER SELON L'ÉTAT OU LA PROVINCE.
CETTE GARANTIE S'APPLIQUE UNIQUEMENT AU CANADA ET AUX ÉTATS-UNIS.
Procédure de réclamation en vertu de la garantie
Pour faire une réclamation, composez le 1-800-379-9773
19
EXCLUSIVELY FOR

True Innovations seating products Garantía limitada de 10 años para el producto
Esta garantía limitada cubre la adquisición original de un producto nuevo utilizado con fines comerciales, personales o domésticos
normales. True Innovations seating products garantiza que sus productos estarán exentos de defectos materiales y de fabricación
(a excepción de los derivados de un uso y desgaste normal) durante 10 años a partir de la fecha de compra del producto, con la
salvedad de lo dispuesto a continuación. True Innovations seating products, a su discreción, sustituirá de forma gratuita por un
producto de características similares cualquier producto adquirido que no soporte unas condiciones de uso normales como
consecuencia de dicho defecto. Esta garantía no se aplica a daños causados por incendio, accidente, negligencia, uso incorrecto o
cualquier otro uso no especificado en las instrucciones del producto, así como a daños causados por una limpieza incorrecta o por
otras circunstancias no atribuibles de forma directa a defectos en los materiales y la fabricación.
Los cambios atribuibles a la propia naturaleza de la madera u otros materiales no se considerarán defectos y True
Innovations seating products no garantiza la resistencia del color o la coincidencia del color, el veteado o la textura de
dichos materiales.
Esta garantía no se aplica a: modificaciones del producto, accesorios del producto no aprobados por True Innovations
seating products y productos no instalados, utilizados o mantenidos de acuerdo a las instrucciones y advertencias del
producto. Esta garantía cuenta con las siguientes excepciones: el tejido, la espuma, el acabado de chapa y el resto de
materiales de revestimiento tienen una garantía de tres años a partir de la fecha de compra.
Se requiere el recibo de compra (copia u original) para validar la garantía. Los reclamos relacionados con la garantía podrían ser
rechazados si no se presenta dicho recibo.
ESTA GARANTÍA LIMITADA DE TRUE INNOVATIONS SEATING PRODUCTS SUSTITUYE A TODAS LAS DEMÁS GARANTÍAS,
YA SEAN EXPLÍCITAS O IMPLÍCITAS. QUEDAN EXPRESAMENTE EXCLUIDAS TODAS LAS GARANTÍAS DE ADECUACIÓN
PARA UN DETERMINADO FIN O COMERCIABILIDAD. LA ÚNICA OBLIGACIÓN DE TRUE INNOVATIONS SEATING
PRODUCTS Y EL ÚNICO RECURSO DEL USUARIO EN VIRTUD DE ESTA GARANTÍA CONSISTIRÁ EN LA REPARACIÓN,
REEMBOLSO (MEDIANTE UNA TARJETA COMERCIAL DE OFFICE DEPOT) O SUSTITUCIÓN, SEGÚN ESTIME OPORTUNO
ODP Y ASUMIENDO TODOS LOS COSTES, DEL PRODUCTO O SUS COMPONENTES.
EN NINGÚN CASO TRUE INNOVATIONS SEATING PRODUCTS, SUS AFILIADOS, SUBSIDIARIOS O EMPRESAS MATRICES
SERÁN RESPONSABLES DE DAÑOS DERIVADOS, ESPECIALES O NO INTENCIONADOS PROCEDENTES DE UNA
RECLAMACIÓN POR UN PRODUCTO DEFECTUOSO, AUNQUE SE HAYA ADVERTIDO A TRUE INNOVATIONS SEATING
PRODUCTS DE LA POSIBILIDAD DE TALES DAÑOS.
ALGUNAS ESTADOS O PROVINCIAS NO PERMITEN LA EXCLUSIÓN DE GARANTÍAS IMPLÍCITAS, LAS LIMITACIONES
SOBRE LA DURACIÓN DE UNA GARANTÍA IMPLÍCITA O LA EXCLUSIÓN O LIMITACIÓN DE DAÑOS DERIVADOS O NO
INTENCIONADOS, POR LO QUE ES POSIBLE QUE LAS LIMITACIONES MENCIONADAS NO SE APLIQUEN EN SU CASO.
ESTA GARANTÍA OTORGA AL USUARIO DERECHOSLEGALES ESPECÍFICOS; ADEMÁS, ES POSIBLE QUE GOCE DE
OTROS DERECHOS QUE VARÍAN SEGÚN EL ESTADO O LA PROVINCIA.
ESTA GARANTÍA SE APLICA SÓLO EN EE. UU. Y CANADÁ.
Instrucciones de servicio
Llame al 1-800-379-9773 para obtener más información sobre el servicio de garantía.
21
EXCLUSIVELY FOR
Table of contents
Other OMX Indoor Furnishing manuals
Popular Indoor Furnishing manuals by other brands

Target
Target TGNWBD1DBK Assembly instructions

aspenhome
aspenhome I256-264 Assembly instructions

BLACK RED WHITE
BLACK RED WHITE re set adgpn 4/15 Assembly manual

DURAVIT
DURAVIT L-Cube LC 7551 Mounting instructions

Furniture of America
Furniture of America CM7415M Assembly instructions

Bolia
Bolia Care Series Product Care Guide

Atlantic Furniture
Atlantic Furniture WINDSOR HEADBOARD Assembly instructions

Whittier Wood Furniture
Whittier Wood Furniture McKenzie 1346GACf Assembly instructions

WIEMANN
WIEMANN 992 212 Assembly instructions

Maintal
Maintal Zazou EB SH42 Assembly instructions

Zenna Home
Zenna Home BBHB75RS Assembly instructions

Safavieh Furniture
Safavieh Furniture Kyler FOX8511 manual