manuals.online logo
Brands
  1. Home
  2. •
  3. Brands
  4. •
  5. One Control
  6. •
  7. Switch
  8. •
  9. One Control Crocodile Tail Loop Manual

One Control Crocodile Tail Loop Manual

KEY
All Red Lines Are Cables
Taking Signal Into OC10
All Green Lines Are Cables
Taking Signal Out Of OC10
OC 10 Crocodile Tail Loop Setup Utilising Tuner Out And One Loop
 The above setup is using the OC10 in it’s most basic form were the guitar signal is run directly into
the rear main input jack.
 The tuner output is selected when the OC10 is in program mode via the top row left hand footswitch
labelled “TUNER/L10”, when selected this mutes all output from unit except signal running from tuner
jack output.
 Loop 1 is being utilised in this example. loops 1 thru 7 are internally connected so signal from main
input will always be running to OUT 1 and OUT 2 whether pedals are connected or not.
 OUT 2 is being utilised in this example to run directly to amp input, OUT 1 and OUT 2 are in parallel
and are both supplied signal from the input jacks through loops 1 to 7, OUT 1 would be utilised if sig-
nal was required to run directly into IN 8 which is the start of the second run of loops (8,9,10)
SETUP 1
KEY
All Red Lines Are Cables
Taking Signal Into OC10
All Green Lines Are Cables
Taking Signal Out Of OC10
All Purple Lines Are Cables
Taking Signal Out of OC10
and Immediately Back Into
OC10
OC10 Setup Utilising Buffer Circuit, 1 Loop
from Loops 1 thru 7 and Loop 8
 The above setup is using the OC10 with the guitar running into the Buffer circuit, Tuner out, loop 1
and loop 8
 Utilising the Buffer circuit will give the signal increased strength and retention of clarity, primarily this
circuit is designed for running longer cable runs and running through multiple effects units which ulti-
mately can lower signal strength and dull the top end of the signal.
 Loop 1 is being utilised in this example. loops 1 thru 7 are internally connected so signal from main
input will always be running to OUT 1 and OUT 2 whether pedals are connected or not.
SETUP 2
PAGE 1
 In this example you can see that the echo unit in Loop 8 is connected via the S8 (Send 8) and R8
(Return 8) sockets, unlike Loops 1 thru 7 which are all internally connected, Loops 8 Thru 10 are not
and must be linked together using the Out and In sockets from each loop to run the signal into the next
loop.
 The output of Loop 8 in this example is being used as the main out to run to the amplifier input, if you
needed to use more loops for effects in the second section of loops (8, 9, 10) then simply connect the
output from the previous loop into the input of the next loop. For example if you desired to run a reverb
unit in loop 9 you would need to link the out socket of Loop 8 to the input socket of loop 9, Loop 9 Out
would then become your main output.
SETUP 2 PAGE 2
KEY
All red lines are cables
taking signal into OC10
All green lines are cables
taking signal out of OC10
All purple lines are cables
taking signal out of OC10
and immediately back Into
OC10 (Links)
All blue lines are cables used
for control switching
(Channel, Reverb On/Off etc)
and do not carry signal
OC10 setup utilising BJF buffer Circuit, 4 loops from Loops
1 Thru 7, Loops 8 And 9 for effects and Loop 10, S10 (N.C)
socket for amp channel switching.
SETUP 3
PAGE 1
Using footswitchable facilities or control switch-
ing or “CTRL” as it is commonly abbreviated
can be done by utilising the Send (S) and Out
sockets on loops 8, 9 and 10. The terms listed
next to the sockets refer to a footswitch status,
(N.C) being normally closed, and (N.O) being
normally open. Manufacturers of amplifiers
and effects units do not always list what status
there CTRL/Footswitch sockets are in so it is
necessary to connect these sockets individu-
ally to see how they react and which is prefer-
able to the user. (please see page 2 for more
information)
NOTE, Loops can only be used as one of the
two functions, either as a loop for an effects
unit, or as a control switch.
To footswitch input rear amp
UTILISING FOOTSWITCHING
(Control Switching)
 In setup 3 we utilise the buffer circuit, 4 loops from loops 1 to 7, loops 8 and 9 and loop 10 as a Ctrl
switch to switch channels on our amplifier.
 Utilising the Buffer circuit will give the signal increased strength and retention of clarity, primarily this
circuit is designed for running longer cable runs and running through multiple effects units which ulti-
mately can lower signal strength and dull the top end of the signal.
 Loops 1,2,3 and 4 are being utilised in setup 3. loops 1 thru 7 are internally connected so signal from
main input will always be running to OUT 1 and OUT 2 whether pedals are connected or not.
 Out 1 is utilised in setup 3 as it is the most conveniently placed to run signal into the input of Loop 8
 In setup 3 you can see that the echo unit in Loop 8 is connected via the S8 (Send 8) and R8 (Return 8)
sockets, the signal is then sent via a short patch cable (Linked) from OUT8(N.O) to IN9, if this is not
done no signal will be running into loop 9 as loops 8, 9 and 10 are not internally connected and do not
pass signal through to the next loop unless they are connected together.
 Repeating the same method used to connect the echo, the reverb in setup 3 is connected via the S9
(Send 9) and R9 (Return 9) sockets, the signal is then sent via OUT9(N.O) to the amplifier input
 In setup 3 we are using loop 10 to switch our amplifier channel via S10(N.C) send socket, this we are
doing with a mono cable (Standard Jack Cable or Speaker Cable will both work fine for this purpose),
using S10(N.C) assumes that the Normally Closed (N.C) send socket is best suited for this amplifier
meaning that when the relevant button on the OC10 panel for loop 10 is not lit the amplifier would be
on the clean channel and when the button is pressed for Loop 10 and is lit then the amplifier would
have switched to its drive channel, if this works in reverse when tried use the OUT10(N.O) Normally
Open socket instead of the S10(N.C) socket.
SETUP 3 PAGE 2
FX LOOPS ON AMPLIFIERS
In Setup 4 we are utilising the FX loop in the amp by running
OUT-2 into the amp input, then returning the signal to the OC
10 via the FX loop send to IN 8, the signal is then run through
loops 8 and 9 and returned to the amp FX return via OUT9
(N.O)
In most cases the effects loop of an amplifier is used to run
Time based FX such as Delay, Echo and Reverb, and Modu-
lation FX such as Chorus, Flangers and Pitch Shifters.
Primarily this is done to avoid distorting or driving the sound
created by these pedals by the preamp of the amplifier where
all the drive and distortion is created in an amplifier, this is
achieved by running the FX loop after the preamp stage of
any amplifier thus bypassing the drive stage and unwanted
distortion.
KEY
All red lines are cables
taking signal into OC10
All green lines are cables
taking signal out of OC10
All purple lines are cables
taking signal out of OC10
and immediately back Into
OC10 (Links)
OC10 setup utilising BJF buffer Circuit, 4 loops from Loops
1 Thru 7 running to amplifier front input and Loops 8 and 9
running through amplifier FX loop
SETUP 4
PAGE 1
From Amplifier
FX Send to
OC10 Loop IN 8
From OC10 Loop
OUT9 (N.O) to
Amplifier FX
Return
 In setup 4 we utilise the buffer circuit, 4 loops from loops 1 to 7 which are then running directly into the
amplifier input, using the FX send of the amp we are returning the signal into loop 8 through loop 9 and
then back to the FX return of the amplifier.
 Utilising the Buffer circuit will give the signal increased strength and retention of clarity, primarily this
circuit is designed for running longer cable runs and running through multiple effects units which ulti-
mately can lower signal strength and dull the top end of the signal.
 Loops 1,2,3 and 4 are being utilised in setup 4. loops 1 thru 7 are internally connected so signal from
main input will always be running to OUT 1 and OUT 2 whether pedals are connected or not.
 Out 2 is utilised in setup 4 as it is the most conveniently placed to run signal into the amplifier input.
 The signal is returned to the OC10 from the amplifier via the FX loop send into Loop IN 8 on the OC10
 In setup 4 you can see that the echo unit in Loop 8 is connected via the S8 (Send 8) and R8 (Return 8)
sockets, the signal is then sent via a short patch cable (Linked) from OUT8(N.O) to IN9, if this is not
done no signal will be running into loop 9 as loops 8, 9 and 10 are not internally connected and do not
pass signal through to the next loop unless they are connected together.
 Repeating the same method used to connect the echo, the reverb in setup 4 is connected via the S9
(Send 9) and R9 (Return 9) sockets, the signal is then sent via OUT9(N.O) to the amplifier FX return
More on FX Loops
FX loops fall into two categories those being Parallel and Series.
Parallel loops were primarily designed to combat signal degradation due to poor quality FX by not running
the whole signal after the preamp through the FX, but by splitting the signal into two signals paths running in
Parallel as the name suggests, one signal goes through the FX unit and is called the wet signal or effected
signal, the other does not run through the effect and is called the dry signal or non effected signal.
Parallel FX loops will always have a mix or FX level dial on the amp so if in doubt of which type your amp has
look for this feature. Parallel loops can sometimes cause the effect and dry signal to be out of phase, this is
most common on older Mesa Boogie amps.
Series FX loops have no FX loop level or mix dial as they are sending the full signal from the preamp through
the FX in the loop, the mix is determined by the amount of mix of wet to dry signal you assign on the FX unit.
As the quality of FX units has improved drastically over recent years more amps are featuring series FX
loops.
There are a few models of amplifiers that feature switchable FX loops or similar and have the ability to run in
either Series or Parallel mode, some Laney amps and newer Mesa Boogie amps have this feature.
SETUP 4 PAGE 2
FX LOOPS ON AMPLIFIERS
In Setup 4 we are utilising the FX loop in the amp by running
OUT-2 into the amp input, then returning the signal to the OC
10 via the FX loop send to IN 8, the signal is then run through
loops 8 and 9 and returned to the amp FX return via OUT9
(N.O)
In most cases the effects loop of an amplifier is used to run
Time based FX such as Delay, Echo and Reverb, and Modu-
lation FX such as Chorus, Flangers and Pitch Shifters.
Primarily this is done to avoid distorting or driving the sound
created by these pedals by the preamp of the amplifier where
all the drive and distortion is created in an amplifier, this is
achieved by running the FX loop after the preamp stage of
any amplifier thus bypassing the drive stage and unwanted
distortion.
KEY
All red lines are cables
taking signal into OC10
All green lines are cables
taking signal out of OC10
All purple lines are cables
taking signal out of OC10
and immediately back Into
OC10 (Links)
OC10 setup utilising BJF buffer Circuit, 4 loops from Loops
1 Thru 7 running to amplifier front input and Loops 8 and 9
running through amplifier FX loop with Midi control from OC10
SETUP 5
PAGE 1
From Amplifier
FX Send to
OC10 Loop IN 8
From OC10 Loop
OUT9 (N.O) to
Amplifier FX
Return
MIDI IN
KEY (Continued)
All Gold lines are cables
Taking Midi signal out of
OC10
 In setup 5 we utilise the buffer circuit, 4 loops from loops 1 to 7 which are then running directly into the
amplifier input, using the FX send of the amp we are returning the signal into loop 8 through loop 9 and
then back to the FX return of the amplifier.
 Utilising the Buffer circuit will give the signal increased strength and retention of clarity, primarily this
circuit is designed for running longer cable runs and running through multiple effects units which ulti-
mately can lower signal strength and dull the top end of the signal.
 Loops 1,2,3 and 4 are being utilised in setup 5. loops 1 thru 7 are internally connected so signal from
main input will always be running to OUT 1 and OUT 2 whether pedals are connected or not.
 Out 2 is utilised in setup 5 as it is the most conveniently placed to run signal into the amplifier input.
 The signal is returned to the OC10 from the amplifier via the FX loop send into Loop IN 8 on the OC10
 In setup 5 you can see that the echo unit in Loop 8 is connected via the S8 (Send 8) and R8 (Return 8)
sockets, the signal is then sent via a short patch cable (Linked) from OUT8(N.O) to IN9, if this is not
done no signal will be running into loop 9 as loops 8, 9 and 10 are not internally connected and do not
pass signal through to the next loop unless they are connected together.
 Repeating the same method used to connect the echo, the reverb in setup 5 is connected via the S9
(Send 9) and R9 (Return 9) sockets, the signal is then sent via OUT9(N.O) to the amplifier FX return
 Setup 5 utilises the Midi facilities of the OC10 running the Midi out to the Midi in of the delay unit, Midi
on the OC10 is only transmitted on Channel 1 and cannot be changed, Midi will work on presets 1 to
70, there is no Midi mapping on the OC10 so presets and midi numbers are exactly the same, for ex-
ample, preset 1 = midi patch number 1, preset 2 = midi patch number 2, preset 10 = midi patch num-
ber 10
 Activating the Midi on the OC10 is similar to activating the loops on the OC10 and is done via the Midi
On/Off switch, to transmit Midi the TX light must be lit on the preset you are storing otherwise Midi in-
formation will not be sent to the receiving unit on that preset. The RX light only needs to be lit when
Midi is being received by the OC10.
More on Amplifier FX Loops
FX loops fall into two categories those being Parallel and Series.
Parallel loops were primarily designed to combat signal degradation due to poor quality FX by not running
the whole signal after the preamp through the FX, but by splitting the signal into two signals paths running in
Parallel as the name suggests, one signal goes through the FX unit and is called the wet signal or effected
signal, the other does not run through the effect and is called the dry signal or non effected signal.
Parallel FX loops will always have a mix or FX level dial on the amp so if in doubt of which type your amp has
look for this feature. Parallel loops can sometimes cause the effect and dry signal to be out of phase, this is
most common on older Mesa Boogie amps.
Series FX loops have no FX loop level or mix dial as they are sending the full signal from the preamp through
the FX in the loop, the mix is determined by the amount of mix of wet to dry signal you assign on the FX unit.
As the quality of FX units has improved drastically over recent years more amps are featuring series FX
loops.
There are a few models of amplifiers that feature switchable FX loops or similar and have the ability to run in
either Series or Parallel mode, some Laney amps and newer Mesa Boogie amps have this feature.
SETUP 5 PAGE 2

This manual suits for next models

1

Other One Control Switch manuals

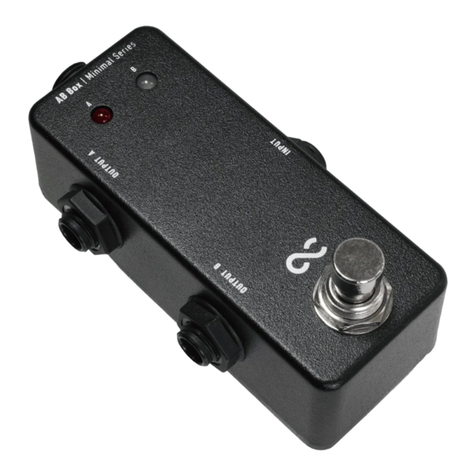
One Control Minimal Series User manual

One Control

One Control Minimal Series User manual

Popular Switch manuals by other brands

Allied Telesis GS910/XST Series Installation and user guide

Allied Telesis

Allied Telesis GS910/XST Series Installation and user guide

Manhattan 153522 user manual

Manhattan

Manhattan 153522 user manual

TESmart HKS0402A2U user manual

TESmart

TESmart HKS0402A2U user manual

Asante IntraCore 3524 Series Getting started guide

Asante

Asante IntraCore 3524 Series Getting started guide

IOGear GCS932UB installation guide

IOGear

IOGear GCS932UB installation guide

ZyXEL Communications GS-2750 Specifications

ZyXEL Communications

ZyXEL Communications GS-2750 Specifications

Fortinet FortiSwitch-28C Administration guide

Fortinet

Fortinet FortiSwitch-28C Administration guide

NETGEAR S350 Series Hardware installation guide

NETGEAR

NETGEAR S350 Series Hardware installation guide

PESA Jaguar Audio manual

PESA

PESA Jaguar Audio manual

Key Digital KD-EXWPSTX manual

Key Digital

Key Digital KD-EXWPSTX manual

socomec ATyS g M quick start

socomec

socomec ATyS g M quick start

Longshine FSP8108-4 manual

Longshine

Longshine FSP8108-4 manual

Pickering 40-855A user manual

Pickering

Pickering 40-855A user manual

Cisco Catalyst 2960-S Series Hardware installation guide

Cisco

Cisco Catalyst 2960-S Series Hardware installation guide

Tripp Lite NetDirector B024-HU08 owner's manual

Tripp Lite

Tripp Lite NetDirector B024-HU08 owner's manual

Tripp Lite NetDirector B064-016-02-IP owner's manual

Tripp Lite

Tripp Lite NetDirector B064-016-02-IP owner's manual

TP-Link JetStream TL-SL3452 reference guide

TP-Link

TP-Link JetStream TL-SL3452 reference guide

Netis ST-3105 Quick installation guide

Netis

Netis ST-3105 Quick installation guide

manuals.online logo
manuals.online logoBrands
  • About & Mission
  • Contact us
  • Privacy Policy
  • Terms and Conditions

Copyright 2025 Manuals.Online. All Rights Reserved.