ONfinity CM2 PRO User manual

1
Contents
1. FCC STATEMENT................................................................................................................. 2
2. Product Description............................................................................................................... 3
3. Features.................................................................................................................................. 3
4. Product Specifications .......................................................................................................... 4
5. Hardware Installation ............................................................................................................ 6
6. ONfinity FreeBoard Introduction.......................................................................................... 8
7. Software Installation.............................................................................................................. 8
8. ONfinity FreeBoard Activation ........................................................................................... 10
9. Software Trial and Registration ......................................................................................... 11
10. Calibration......................................................................................................................... 13
11. Operating mode............................................................................................................... 15
12. Interface Introduction ...................................................................................................... 15
13. Drawing tool ..................................................................................................................... 18
14. Tagging tool ...................................................................................................................... 24
15. Measuring tool ................................................................................................................. 25
16. Functions .......................................................................................................................... 26
17. Formula............................................................................................................................. 26
18. Sound ................................................................................................................................ 27
19. Link .................................................................................................................................... 27
20. Page Operation................................................................................................................ 28
21. Edit Objects ...................................................................................................................... 30
22. Insert objects into Microsoft Office................................................................................ 31
23. Resource Operation........................................................................................................ 31
24. Pen command recognition ............................................................................................. 32
25. Other Tools ....................................................................................................................... 32
26. Record/Play...................................................................................................................... 36
27. File Operation................................................................................................................... 37
28. Custom floating tool bar.................................................................................................. 40
29. The operation of Primary and Secondary E-pen ........................................................ 40

2
1. FCC STATEMENT
1. This device complies with Part 15 of the FCC Rules. Operation is subject to the
following two conditions:
(1) This device may not cause harmful interference.
(2) This device must accept any interference received, including interference that may
cause undesired operation.
2. Changes or modifications not expressly approved by the party responsible for
compliance could void the user's authority to operate the equipment.
NOTE: This equipment has been tested and found to comply with the limits for a Class B
digital device, pursuant to Part 15 of the FCC Rules. These limits are designed to provide
reasonable protection against harmful interference in a residential installation.
This equipment generates uses and can radiate radio frequency energy and, if not
installed and used in accordance with the instructions, may cause harmful interference to
radio communications. However, there is no guarantee that interference will not occur in a
particular installation. If this equipment does cause harmful interference to radio or
television reception, which can be determined by turning the equipment off and on, the
user is encouraged to try to correct the interference by one or more of the following
measures:
Reorient or relocate the receiving antenna.
Increase the separation between the equipment and receiver.
Connect the equipment into an outlet on a circuit different from that to which the
receiver is connected.
Consult the dealer or an experienced radio/TV technician for help

3
2. Product Description
ONfinity CM2 PRO is the latest portable interactive whiteboard system which the
signal receiver can be fixed to the projector. Calibration only need to be carry out
once during the initial setup.
This product is mainly used in teaching, meetings or presentation, can transform any
large-screen or projection surface into an interactive whiteboard. The system has
real-time annotation, free writing, the immediate preservation, use it to fully meet the
teachers and students, impromptu speaker, inspiring, creative expression needs.
Lectures or speakers on the rostrum using Stylus E-pen to control the display and
operating computers, and also at any time on the screen with annotation, drawing a line to
express ideas, enhanced interactivity, so you can greatly improve the lectures and
conference efficiency. The ONfinity CM2 PRO is a new type of e-learning and
conference presentations, interactive system.
3. Features
1. Support real dual pen – allow simultaneous overlapped writing.
2. Image viewing function enable precise positioning.
3. Auto-calibration makes calibration process more easily and quickly.
4. Ultra-strong resistance to ambient light interference.
5. Rechargeable E-Pen with low power consumption for prolonged usage.

4
4. Product Specifications
CM2 PRO Receiver
Position Detection Technology Infrared
Multi-pen support Real dual-pen system
Multi-pen technology TDMP technology
Calibrate method Automatic calibration / Manual calibration
Auto calibrate technology Filter switch and image reversion
Wavelength Pen tip: 850nm / Synchronize: 940nm
Horizontal Reception Angle 85°±2°
Recommend screen-receiver
distance
Screen Width *0.6 ( About 1m for 80'' screen,
Aspect Ratio 4:3)
Positioning method Image view
Response Time Less than 25ms
Position precision ±1 Pixel
Maximum Area 120 inch diagonal
Communication USB HID
Input voltage DC4.5~5.5V
Power Consumption Less than 0.5W(computer system dependent)
Installation mode Projector mounting or ceiling mounting
Working temperature 0℃~50℃
Transport /storage temperature -20℃~80℃
Working humidity 20%~80%

5
Primary
Rechargeable E-pen
Secondary
Rechargeable E-pen
Pen tip light emission 850nm Infrared 850nm Infrared
Tip trigger mode All-directional pressure
trigger
All-directional pressure
trigger
Lateral trigger sensitivity < 35g < 35g
Key press Single none
Power supply Super capacitor Super capacitor
Charging method USB charging USB charging
Voltage range 4.5V~5.5V 4.5V~5.5V
Charging time <3 minutes <3 minutes
Use time after a single
charging
Normal use for 10 hours
Normal use for 10 hours
Number of charging cycles 100 000 100 000
Charge holding time 72 hours undetermined 72 hours undetermined
Dimension 18 X160(mm) 18 X135(mm)
Weight 35g 24g
System Requirements
Operating system Microsoft Windows XP/Vista/7/8, Mac OS X,
Processor 1GHz or above
Memory size 512 MB or above
Minimum hard disk space 100 MB or above
6
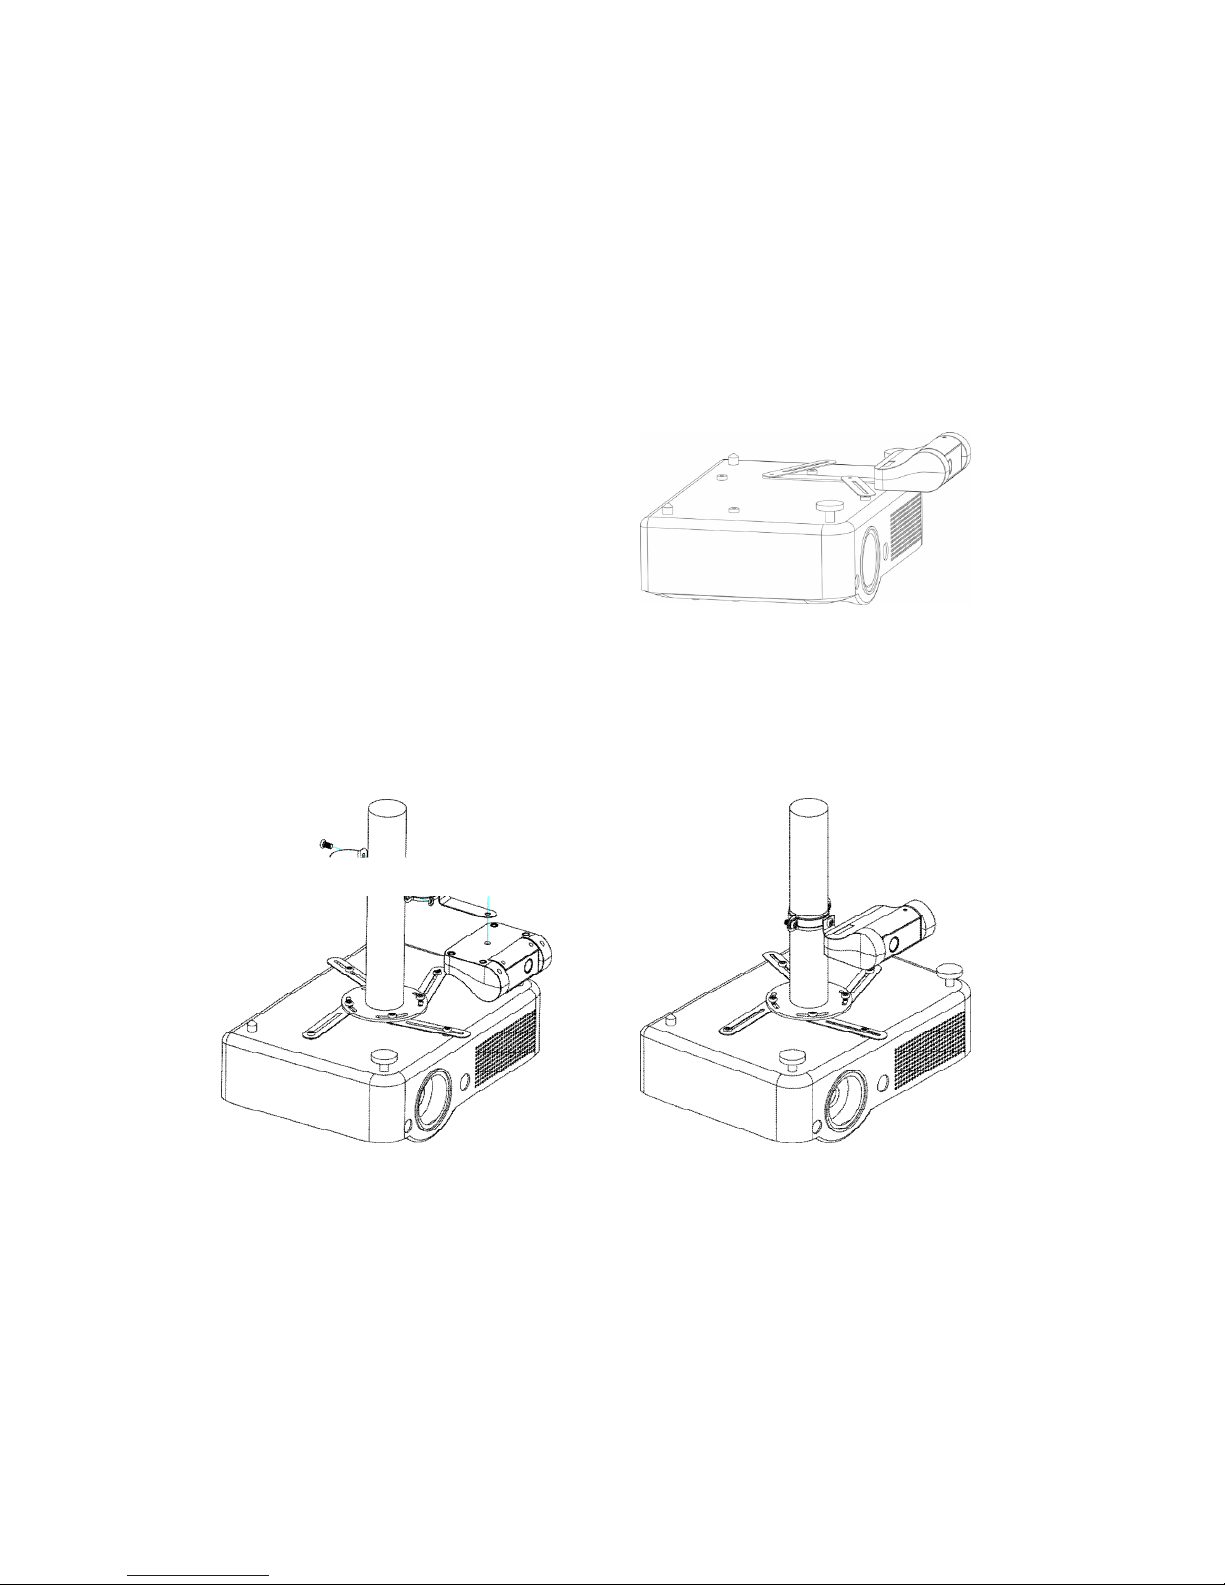
5. Hardware Installation
Installation of Signal Receiver (projector mount).
Installation complete.
Installation of Signal Receiver (projector rod).
Installation complete.

7
Installation of Signal Receiver (mirror projector mount).
Installation complete.
Device connection
8
6. ONfinity FreeBoard Introduction
The ONfinity FreeBoard application is a whiteboard program, which text and graphics
annotation can be done on top of any slide, documents, reports without affecting the
original file.
The ONfinity FreeBoard application brings superb interactivity to the ONfinity Interactive
Whiteboard System by performing various versatile functions under Interactive mode,
Annotation mode and Whiteboard mode.
All three working modes provide various accessory tools such as screen shade,
spotlight … etc., to enable users conveniently highlight key points or annotations, making
teaching much more interactive.
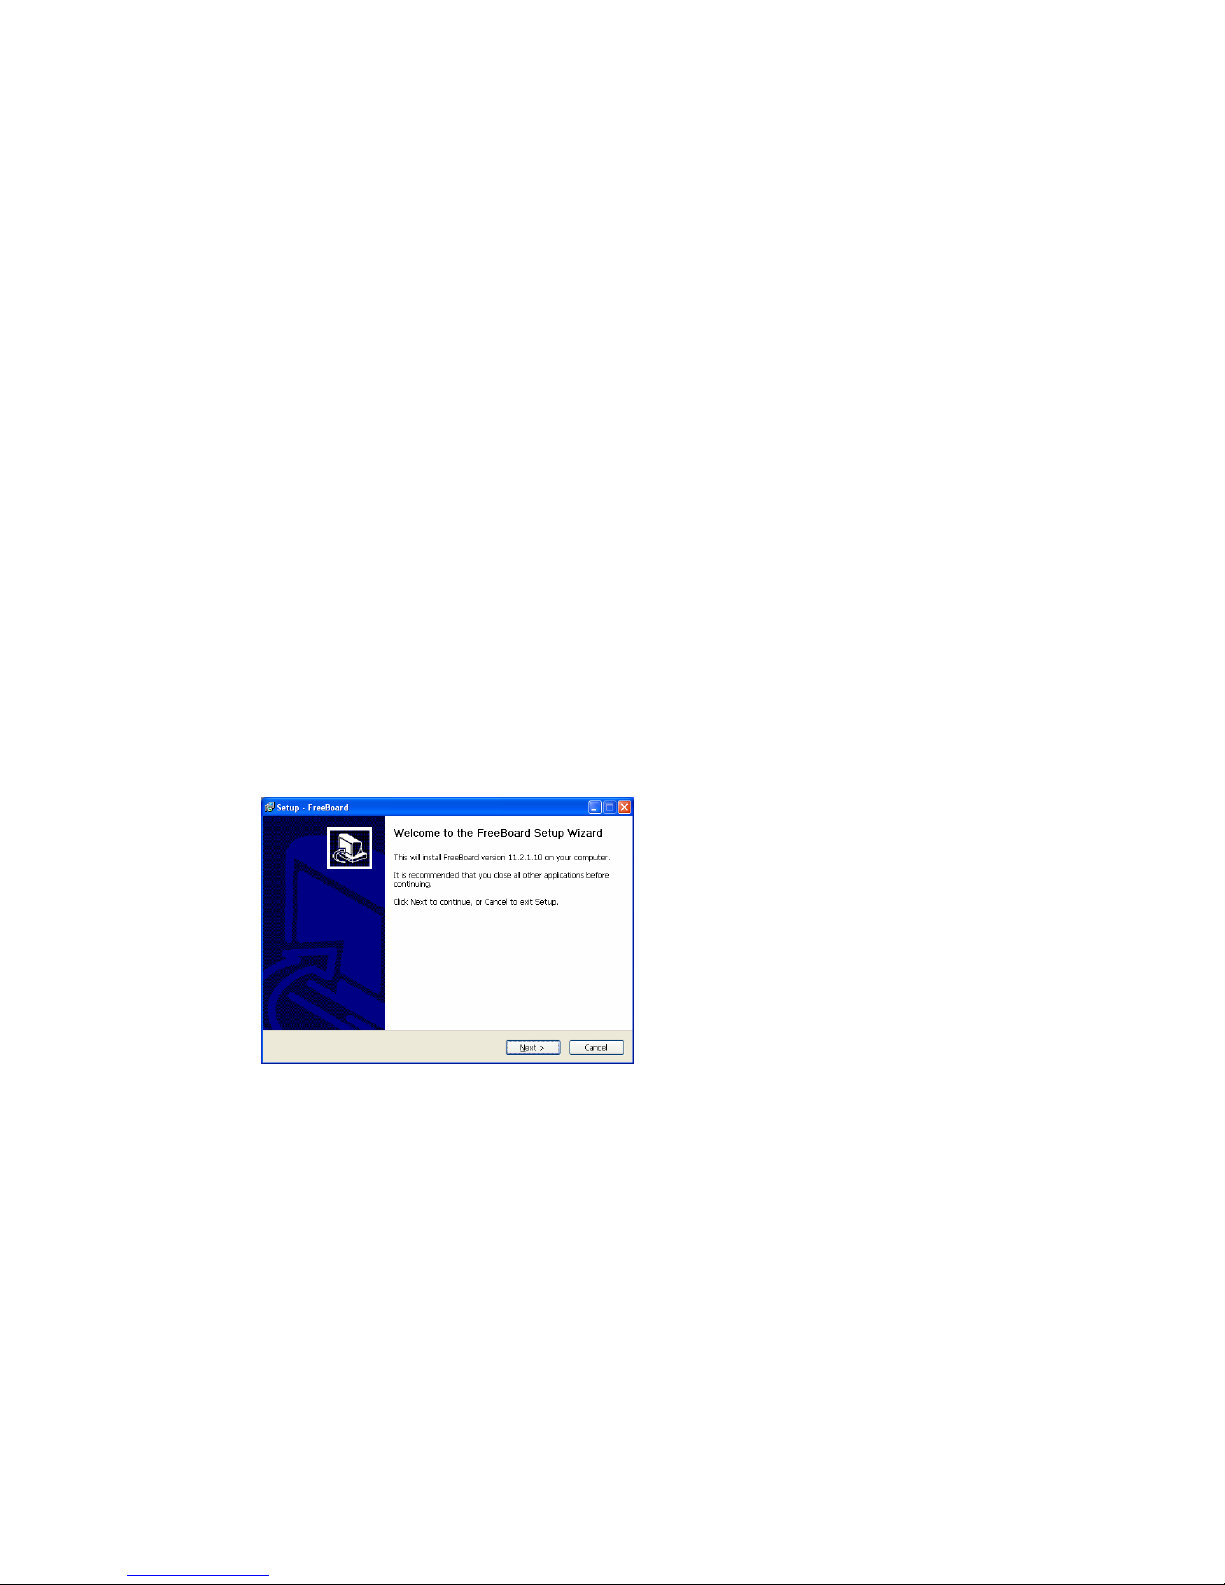
7. Software Installation
Insert the FreeBoard driver CD-ROM into the computer’s CD drive. The following
window will appear automatically (picture 1- 5). If the CD does not automatically play,
double click the ‘Setup’ file from the CD drive directory for manual installation.
picture 1
Click ‘Next’ to continue the installation.

9
picture 2
If you would like to select a different folder, click ‘Browse’. If not click ‘Next’ to continue.
picture 3
Click ‘Install’ to start the installation process.
picture 4
System begin installation.
picture 5
'Microsoft Visual C++ 2005 Redistributable' will be installed automatically if it's not
installed on the computer.
10
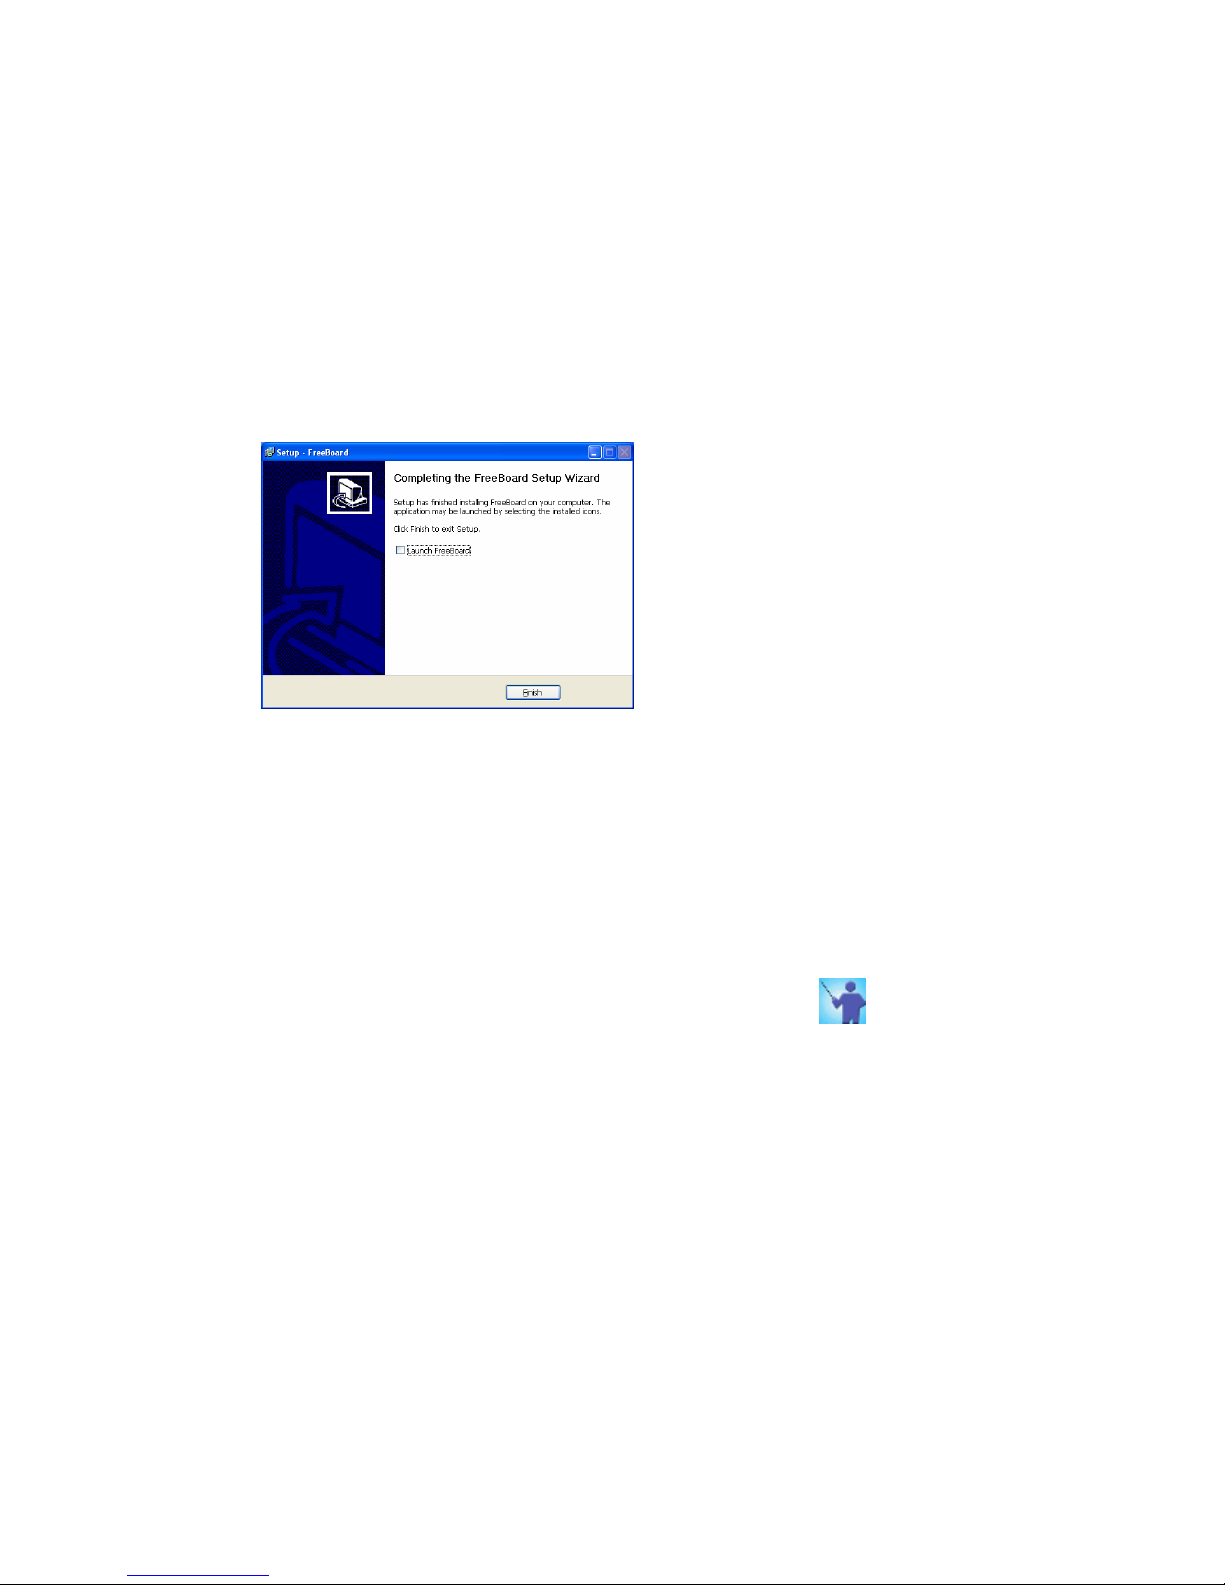
picture 6
picture 7
Click ‘Finish’ to complete the installation of the application program procedure.
8. ONfinity FreeBoard Activation
ONfinity FreeBoard can be activate by simply click on the ‘FreeBoard’ icon on the PC’s
desktop or Click on menu ‘Start’ ‘All Programs’ ‘FreeBorad’s folder’ ‘FreeBoard’.
To exit the ONfinity FreeBoard, simply click or right click on the icon in the system
tray then choose “Exit” to exit ONfinity FreeBoard.
Table of contents


