manuals.online logo
Brands
  1. Home
  2. •
  3. Brands
  4. •
  5. neuland
  6. •
  7. Whiteboard
  8. •
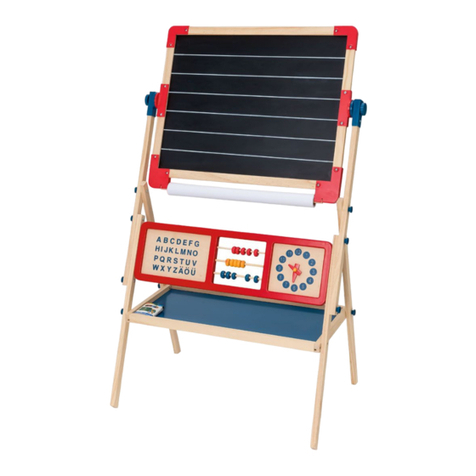
  9. neuland FlipWood User manual

neuland FlipWood User manual

A
H
DF
A
I
D
G
B
E
FlipWood
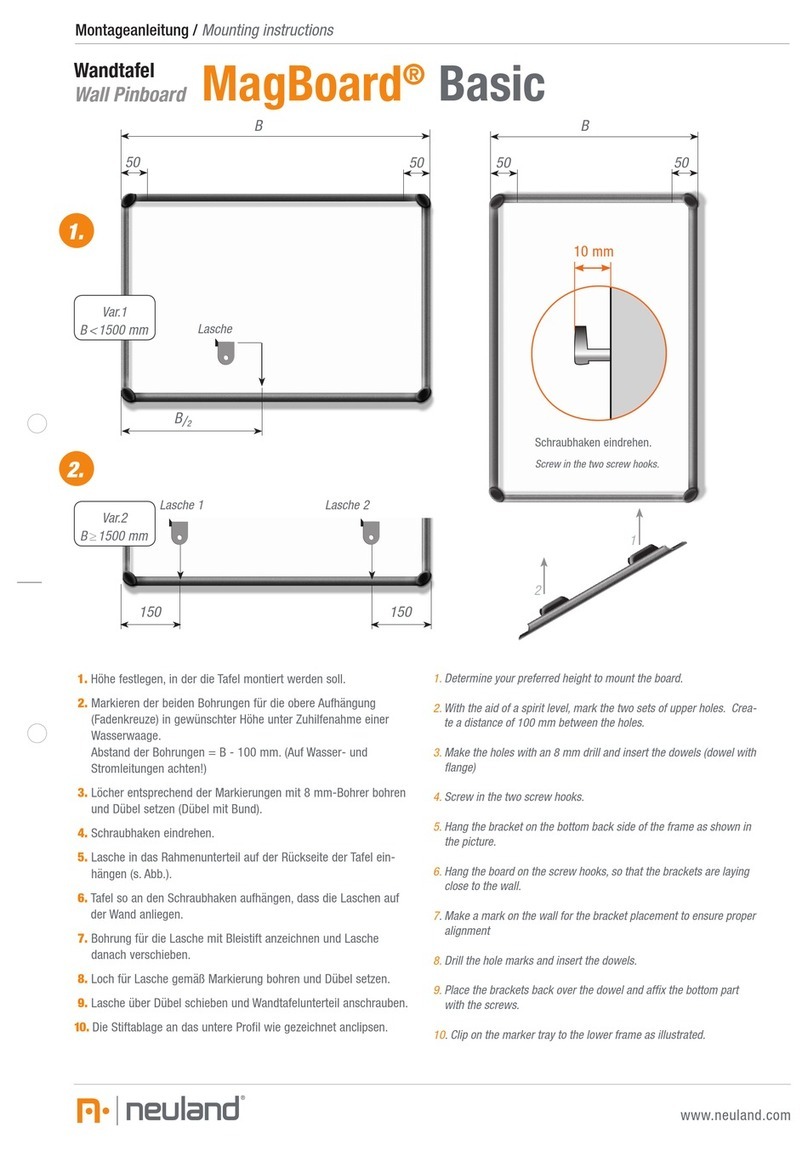
Montageanleitung / Assembly instructions
www.neuland-world.com
1.
Rahmenunterteil (B), seitliche Rahmenteile (A) und Beine (D)
auf den Boden legen. Jeweils mit langer Schraube unten und
kurzer Schraube oben befestigen.
Lay the frame base (B), side frame components (A) and legs (D)
on the floor. Fix the top and base segments into position using
long and short screws respectively.
3.
Querstrebe (E, F) zwischen die Beine setzen und mit 2 kurzen
Schrauben befestigen (locker anziehen).
Position the cross beam (E, F) between the legs and fix this in
position with 2 short screws (ensure that these are tight).
C
B
D
A
F
E
EF
(A) Rahmenseitenteil rechts, links
Left, right frame sides
(B) Rahmenunterteil mit Stiftablage
Frame base with pen tray
(C) Rahmenoberteil mit Langlöchern
Frame top with longitudinal slots
(D) Beine rechts, links /Left, right legs
(E) Querstrebe / Cross beam
(F) Stützstrebe / Support strut
(G) Ausstellbein / Display leg
(H) Papier-Abreißleiste
Paper holding-strip
(I) Tafelelemente (4 Stück)
Panel elements (4 pieces)
Befestigungsteile:
11 Schrauben kurz
2 Schrauben lang
2 Hülsen
3 Unterlegscheiben
1 Linsenkopfschraube
1 Druckfeder
1 Flügelschraube mit
Druckfeder, Scheibe und
Verliersicherung
2 Flügelmuttern Kunststoff
1 Schraubenschlüssel
Innensechskant
Fixing parts:
11 screws, short
2 screws, long
2 shucks
3 washers
1 pan head screw
1 compression spring
1 wing screw with spring,
washer and retaining
collar
2 wing nuts, plastic
1 Allen key
Einzelteile /components:
2.
Querstrebe (E) mit Stützstrebe (F) verschrauben.
Screw the cross beam (E) to the support strut (F).
A
D
B
8.
Linsenkopfschraube, Druckfeder und Scheibe zusammenstecken
und durch linke Bohrung der Abreißleiste führen. Schraube so weit
in das linke Rahmenseitenteil drehen, bis der Schraubenkopf auf
der Feder anliegt.
Assemble the pan head screw, compression spring and washer
and pass these through the left-hand hole in the holding strip.
Screw this into the left frame side component until the screw
head rests on the spring.
9.
Verliersicherung von der Flügelschraube abziehen. Schraube durch die
rechte Bohrung im Rahmenseitenteil führen und Verliersicherung von
hinten wieder aufstecken. So weit, bis Schraubenkopf auf der Feder
aufliegt.
Remove the retaining collar from the wing screw. Insert a screw into
the right-hand hole in the frame side component and once again
tighten the retaining collar from the rear. Tighten until the screw head
rests on the spring.
www.neuland-world.com
6.
Rahmenoberteil aufstecken und mit 2 kurzen Schrauben
mit den Rahmenseitenteilen verbinden. Abschließend
nochmals alle Verschraubungen kontrollieren und gege-
benenfalls festziehen.
Insert the frame top and fasten this to the frame side
components with 2 short screws. Finally, check all
screws and tighten if necessary.
7.
Kurze Schraube, Hülse und Unterlegscheibe wie abgebildet
zusammenstecken und in das Langloch des Rahmenoberteils
einführen. Von hinten mit Flügelmutter sichern.
Assemble the short screws, shucks and washers as shown
and insert into the slots in the top of the frame. Secure using
the wing nuts from the rear.
C
4.
Ausstellbein (G) mit schrägem Ende in die Aussparung am
Rahmenunterteil (B) setzen und mit kurzer Schraube befestigen.
Querstrebe (E, F) so drehen, dass die Stützstrebe ebenfalls mit
einer kurzen Schraube befestigt werden kann.
Position the display leg (G) with its sharp end in the recess in
the frame base (B) and fix this in position with a short screw.
Rotate the cross beam (E, F) in such a way that the support strut
can also be fixed in position using a short screw.
5.
Vormontiertes „Gerüst“ aufstellen und Tafelelemente von oben
in den Schlitzen der Rahmenseitenteile nach unten führen.
Dabei darauf achten, dass die Feder des ersten Elementes
sicher in die Nut des Rahmenunterteils passt.
Set up the pre-assembled “framework” and lower the panel
elements from above downward into the slots in the frame side
sections. When doing so, ensure that the tongue of the first
element fits securely into the groove of the frame base.
G
G
B
EF
I
I
I
This manual suits for next models

3

Other neuland Whiteboard manuals

neuland GraphicWall V3 User manual

neuland

neuland GraphicWall V3 User manual

neuland GraphicWall V3 XL User manual

neuland

neuland GraphicWall V3 XL User manual

neuland MagBoard Basic User manual

neuland

neuland MagBoard Basic User manual

neuland GraphicWall V3 User manual

neuland

neuland GraphicWall V3 User manual

neuland GraphicWall V3 User manual

neuland

neuland GraphicWall V3 User manual

neuland GraphicWall V3 User manual

neuland

neuland GraphicWall V3 User manual

Popular Whiteboard manuals by other brands

Ferno Najo user manual

Ferno

Ferno Najo user manual

EGAN GlassWrite TableScreen TSG Assembly & installation

EGAN

EGAN GlassWrite TableScreen TSG Assembly & installation

Epson AN2WA87 installation instructions

Epson

Epson AN2WA87 installation instructions

Best-Rite SPLASH CORK instruction manual

Best-Rite

Best-Rite SPLASH CORK instruction manual

Plus CR-5 Service manual

Plus

Plus CR-5 Service manual

SMART SB880E quick start guide

SMART

SMART SB880E quick start guide

Displays2go INTWHITWRD troubleshooting guide

Displays2go

Displays2go INTWHITWRD troubleshooting guide

AAVARA CDT861M-NEW instruction manual

AAVARA

AAVARA CDT861M-NEW instruction manual

Best-Rite New-Rite instruction manual

Best-Rite

Best-Rite New-Rite instruction manual

Sahara CleverBOARD manual

Sahara

Sahara CleverBOARD manual

Clevertouch Cleverboard 3 installation instructions

Clevertouch

Clevertouch Cleverboard 3 installation instructions

SMART Board SBID8055i-G5-SMP quick start guide

SMART Board

SMART Board SBID8055i-G5-SMP quick start guide

Plus Magicolor Plus user manual

Plus

Plus Magicolor Plus user manual

SMART Board 600 Series Basic Functionality

SMART

SMART Board 600 Series Basic Functionality

Da-Lite Presenter P-40 Instruction book

Da-Lite

Da-Lite Presenter P-40 Instruction book

Displays2go WHBMG2840 Assembly instructions

Displays2go

Displays2go WHBMG2840 Assembly instructions

Herman Miller Canvas Office Landscape Installation and Disassembly for Recycling Instructions

Herman Miller

Herman Miller Canvas Office Landscape Installation and Disassembly for Recycling Instructions

Quartet Silhouette Total Erase Easel Assembly instructions

Quartet

Quartet Silhouette Total Erase Easel Assembly instructions

manuals.online logo
manuals.online logoBrands
  • About & Mission
  • Contact us
  • Privacy Policy
  • Terms and Conditions

Copyright 2025 Manuals.Online. All Rights Reserved.