manuals.online logo
Brands
  1. Home
  2. •
  3. Brands
  4. •
  5. Optima
  6. •
  7. Plumbing Product
  8. •
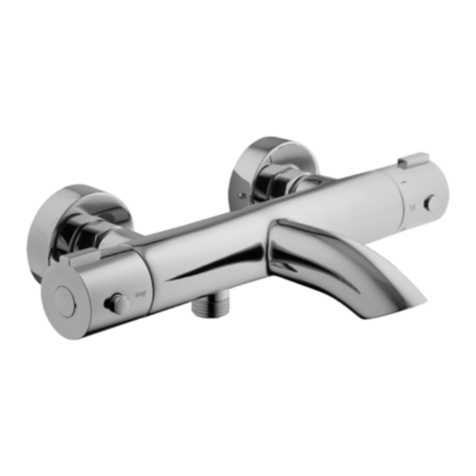
  9. Optima CS200 User manual

Optima CS200 User manual

10/2019 AT23332A25
CS200
CS201
min.36-max.60
180
20
55
56
100
44
G1/2
52
G1/2 G1/2
40
G1/2 G1/2
40
100
min.36-max.60
180
44
20
G1/2
55
56
52
-
-
-
Reinigen Sie die Armaturen nur mit Wasser und seifigen Waschmittel, mit einem weichen Tuch reinigen und abtrocknen. Keine alkoholhaltigen
Lösungsmittel, scheuernden oder ätzenden Mittel (Salzsäure, Chlorwasserstoffe, Ameisensäure, Essigsäure, Phosphorsäure), Waschlappen mit
synthetischen oder metallischen Fasern benutzen.
Pour nettoyer correctement le mitigeur, utilisez simplement de l'eau et du savon neutre, rincez-le et essuyez-le avec un chiffon doux. A éviter absolument tout
emploi d'alcool, de solvants, de détergents contenant des substances corrosives ou acides (acide chlorhydrique, formique, acétique et phosphorique), des
éponges abrasives et des tampons métalliques.
For a correct cleaning of the mixer use only water and neutral soap, rinse and dry with a soft cloth. Don’t use alcohol, solvents, detergents
containing corrosive or acid substances (hydrochloric, formic, acetic and phosphoric acid), abrasive sponges and plugs with metallic thread.
Alle Produkte sind mit konventioneller Garantie (Handelsgarantie). Unsere Firma behält sich das Recht vor, die angemessenen Änderungen, die
die Funktion und die Ästhetik ihrer eigenen Produkte verbessern können, ohne Vorankündigung vorzunehmen.
Tous les produits sont couverts par une Garantie Conventionnelle (Commerciale). L’entreprise se réserve le droit d’apporter les modifications qui seront retenu
appropriés et utiles pour améliorer la fonctionnalité et l’esthétique de ses produits sans aucun préavis.
All products are covered with a commercial conventional guarantee according.
The firm reserves the right to make any appropriate modifications to improve functionality and design of its products without notice.
Empfohlener Betriebsdruck / Pression d'exercice recommandée / Recommended operational pressure : .................................................................. 1-5 bar
Prüf-Höchstdruck / Pression maximum de preuve / Maximum test pressure : .................................................................................................................16 bar
Warmwasser-Höchsttemperatur / Température maximum eau chaude / Maximum hot water temperature : ................................................................... 80 °C
Temperatura consigliata / Recommended temperature / Température conseillée / Empfohlene Temperatur
Temperatura recomendada : ........................................................................................................................................................................................... 50-60 °C
Druckunterschied zwischen Warm- und Kaltwasser / Différence de pression entre eau chaude et eau froide
Pressure difference between hot and cold water : .................................................................................................................................................. max. 1,5 BAR
Installation von Filtern an der Wasserversorgungsanlage und Installation von allen dazu gelieferten Filtern am Produkt.
Etablir des filtres pour l’eau en amont de l’installation et installation au produit de tous les filtres qui l’accompagnent.
We suggest to install water filters at the beginning of the installation.
Bemerkung:
Bei der Nicht-Beachtung der am Punkt 1, 4, 5 und 6 erwähnten Konditionen könnte das Produkt nicht oder nicht gut funktionieren.
Wenn Abweichungen bei der oberflächlichen Ausführung noch vor dem Einbau der Sanitätsanlage festgestellt werden, kann der Austausch der kompletten
Armatur angefordert werden.
Nota bene:
- Si les conditions susvisé aux points 1, 4, 5 et 6, ne sont pas présentes, le produit pourrait ne fonctionner pas ou fonctionner pas en façon
optimale.
- Si pendant l’installation, avant la pose sur le sanitaire, on va rencontrer des anomalies dues à la finition superficielle, on peut demander le
remplacement complet du robinet.
Warning:
- if the above mentioned conditions (see points 1,4,5 and 6) are not observed, the product may not correctly work or not work at all.
- if during installation, before setting the product on the sanitary fittings, faults due to the special finishing are evident you may require the replacement of the
tap.
1.
2.
3.
4.
5.
6.
7.
"Bylaw n.166/2009 dd.25th September 2009 - As bylaw enacted we state that some components of this product are imported from extra-Eu countries. Tested, assembled and inspected inside our factory."
Pflegeanleitung - Nettoyage - Cleaning
Tecnische standarddaten - Donnée Techniques - Standard Specifications
Garantie - Garantie - Guarantee
CRISTINA SYSTEM
CS200-CS201
MONTAGEANLEITUNG
INSTALLATION INSTRUCTIONS
NOTICE DE MONTAGE
Silicone
Silicone
Silikon
CS200
Hot water inlet
Entrée eau Chaude
Eingang Warmwasser
Cold water inlet
Entrée eau froid
Eingang Kaltwasser
Hot water inlet
Entrée eau Chaude
Eingang Warmwasser
Cold water inlet
Entrée eau froid
Eingang Kaltwasser
Mixed Water Outlet
Sortie eau mélangée
Ausgang des gemischten Wassers
Mixed Water Outlet
Sortie eau mélangée
Ausgang des gemischten Wassers
Mixed Water Outlet
Sortie eau mélangée
Ausgang des gemischten Wassers
Tile surface
Surface de la faïence
Oberfläche der kacheln
CS201
Tile
Carrelage
Fliese/wandverkleidung
Plaster
Plâtres
Verputz
Wall
Mur
Wand
Gasket
Bague
Dichtung
3
1
2
5
6
4*
EMPFEHLUNGEN FÜR DIE SPÜLUNG UND PRÜFUNG DER ANLAGE
1 - Der Unterputz-Körper ist mit einer frontalen Kunststoffplatte ausgestattet (5), die die Spülung der Rohrleitungen ermöglicht.
2 -Prüf-Höchstdruck : 16 bar. Max 5 min.
3 - KAPPE 2 FÜR DEN ABFLUSS ABNEHMEN UND NACH DEM SPÜLEN WIEDER MONTIEREN UND ERNEUT AUF DICHTHEIT PRÜFEN
RECOMMANDATIONS POUR PURGE ET TEST D’INSTALLATION
1 - Le mitigeur douche-bain douche présente une plaque frontale (5) en plastique qui permet au flux de s'écouler pour le nettoyage des tuyaux.
2 - Pression maximum de preuve : 16 bar. Max 5 min.
3 - Démonter le bouchon 2 pour faire s’écouler le liquide et remonter après le rinçage en rétablissant l’étanchéité
Suggestions for flushing out and water tightness installation test
1 - The concealed bath/shower mixer is supplied with a plastic plate at the front (5) to enable the water to pass through and flush out the pipeworks .
2 - Maximum test pressure : 16 bar. Max 5 min.
3 - Dismantle plug 2 to have it flow out and then replace after rinsing, resetting the hermetic seal.
Vor dem zusammenbau des aussenkits immer prüfen, ob die passdichtung des einbaukörpers - patronenkörpers unversehrt und richtig
positioniert ist
Avant le montage de l’ensemble externe toujours vérifier la bonne intégrité et le bon placement du joint avec gabarit d’étanchéité du corps d’encastrement
corps cartouche
Before assembling the outdoor set, always ensure perfect conditions and postions of the gasket in the shape of the built-in body - cartridge body seal shape.
3
3,5 N/m
10
Vorbereitung für die Befestigung
an Gips, Holz, u.s.w.
Prédisposition pour fixage sur
structures: Placoplâtre, bois, etc.
Preparation for the installation in:
plasterboard, wood, etc.
Do not disassemble
Nicht zerlegen
Ne pas démonter
4* Wasserverschlusskappen, die unter der frontplatte 5 platziert
werden können, um so die wasserversorgung über die
warm-/kaltleitungen zu schliessen, je nachdem ob die eine oder
andere leitung gespült werden soll
4* les bouchons de fermeture de l’eau placés sous la plaque frontale
5 permettent de fermer l’alimentation des conduites chaud/froid selon
le besoin de rinçage de l’une ou l’autre des conduites
4* Water closing plugs can be positioned under the front plate 5,
allowing supply to be closed from the hot/cold piping according to
wheter you need to rinse one or others pipes.
Montage und Ersatzteile - Montage et pièces détachées - Installation And Spare Parts
16 bar.
Max 5 min.
TEST
- Installation performed by qualified personnel!
- Before connecting to mains, bleed the pipes to avoid damage.
- Installation von qualifiziertem Personal!
- Entleeren Sie die Leitungen bevor Sie die Armaturen
an die Wasserversorgung anschliessen.
UK
F
D
- L'installation effectuée par un personnel qualifié!
- Avant de brancher le robinet au rèseau hidraulique, purger la tuyauterie.

This manual suits for next models

1

Other Optima Plumbing Product manuals

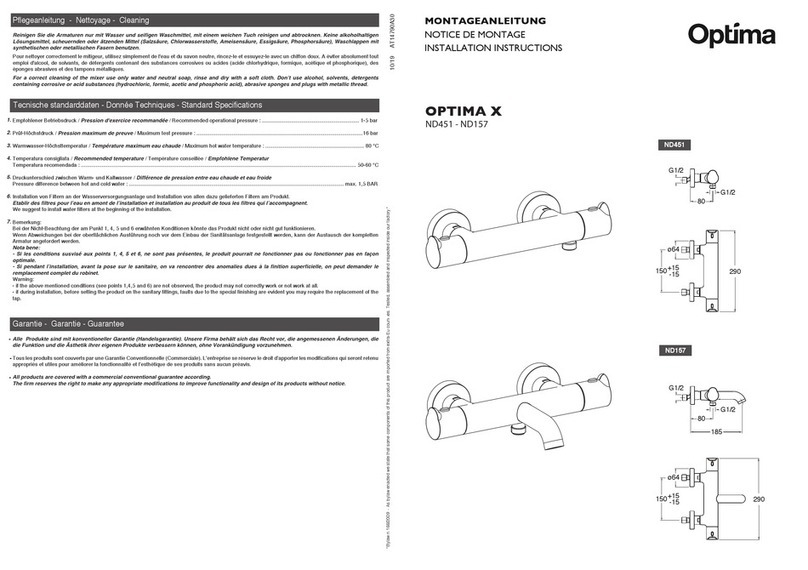
Optima X ND451 User manual

Optima

Optima X ND451 User manual

Optima OPS293 User guide

Optima

Optima OPS293 User guide

Optima OPS176 User guide

Optima

Optima OPS176 User guide

Optima SIKOBST222 User guide

Optima

Optima SIKOBST222 User guide

Optima OPH006 User guide

Optima

Optima OPH006 User guide

Optima OPB007 User manual

Optima

Optima OPB007 User manual

Optima LAVELA LA222 User guide

Optima

Optima LAVELA LA222 User guide

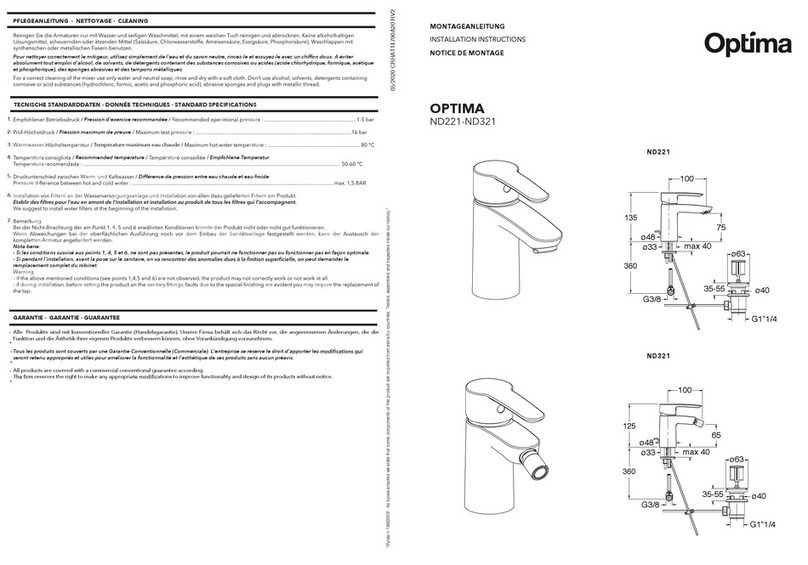
Optima ND221 User manual

Optima

Optima ND221 User manual

Optima DONATA DO268 User guide

Optima

Optima DONATA DO268 User guide

Optima DUELA DU210 User guide

Optima

Optima DUELA DU210 User guide

Optima SOFIE SO071 User guide

Optima

Optima SOFIE SO071 User guide

Popular Plumbing Product manuals by other brands

Toto WH173BAT Series Installation instruction

Toto

Toto WH173BAT Series Installation instruction

American Standard Cadet Three-Handle Bath/Shower 3375 installation instructions

American Standard

American Standard Cadet Three-Handle Bath/Shower 3375 installation instructions

Toto RUFICE TTMR307 Installation

Toto

Toto RUFICE TTMR307 Installation

Symmons S-71 Series Installation

Symmons

Symmons S-71 Series Installation

Graff G-6951-C16B installation instructions

Graff

Graff G-6951-C16B installation instructions

Grohe Grohtherm Cube manual

Grohe

Grohe Grohtherm Cube manual

Hans Grohe Rainfinity 250 1jet EcoSmart 26227 Series Instructions for use

Hans Grohe

Hans Grohe Rainfinity 250 1jet EcoSmart 26227 Series Instructions for use

Hans Grohe Logis 71074000 Instructions for use/assembly instructions

Hans Grohe

Hans Grohe Logis 71074000 Instructions for use/assembly instructions

Mirabelle PROVINCETOWN MIRPR3RTCP installation instructions

Mirabelle

Mirabelle PROVINCETOWN MIRPR3RTCP installation instructions

aquabrass Cura 928 PRE-INSTALLATION AND INSTALLATION MANUAL

aquabrass

aquabrass Cura 928 PRE-INSTALLATION AND INSTALLATION MANUAL

Kraus Geo Axis KPF-1750 installation manual

Kraus

Kraus Geo Axis KPF-1750 installation manual

Danze D151558 quick guide

Danze

Danze D151558 quick guide

Hans Grohe Citterio Toilet Paper Holder with Cover... Specification sheet

Hans Grohe

Hans Grohe Citterio Toilet Paper Holder with Cover... Specification sheet

Hans Grohe Porter'M2 27527 Series Assembly instructions

Hans Grohe

Hans Grohe Porter'M2 27527 Series Assembly instructions

American Standard Standart 4243 installation instructions

American Standard

American Standard Standart 4243 installation instructions

Moen 5923 Series installation guide

Moen

Moen 5923 Series installation guide

Thetford 51802 Repair instruction

Thetford

Thetford 51802 Repair instruction

WaterEvolution COATSTONE BD3 manual

WaterEvolution

WaterEvolution COATSTONE BD3 manual

manuals.online logo
manuals.online logoBrands
  • About & Mission
  • Contact us
  • Privacy Policy
  • Terms and Conditions

Copyright 2025 Manuals.Online. All Rights Reserved.