10
OPERATION
BASIC OPERATION
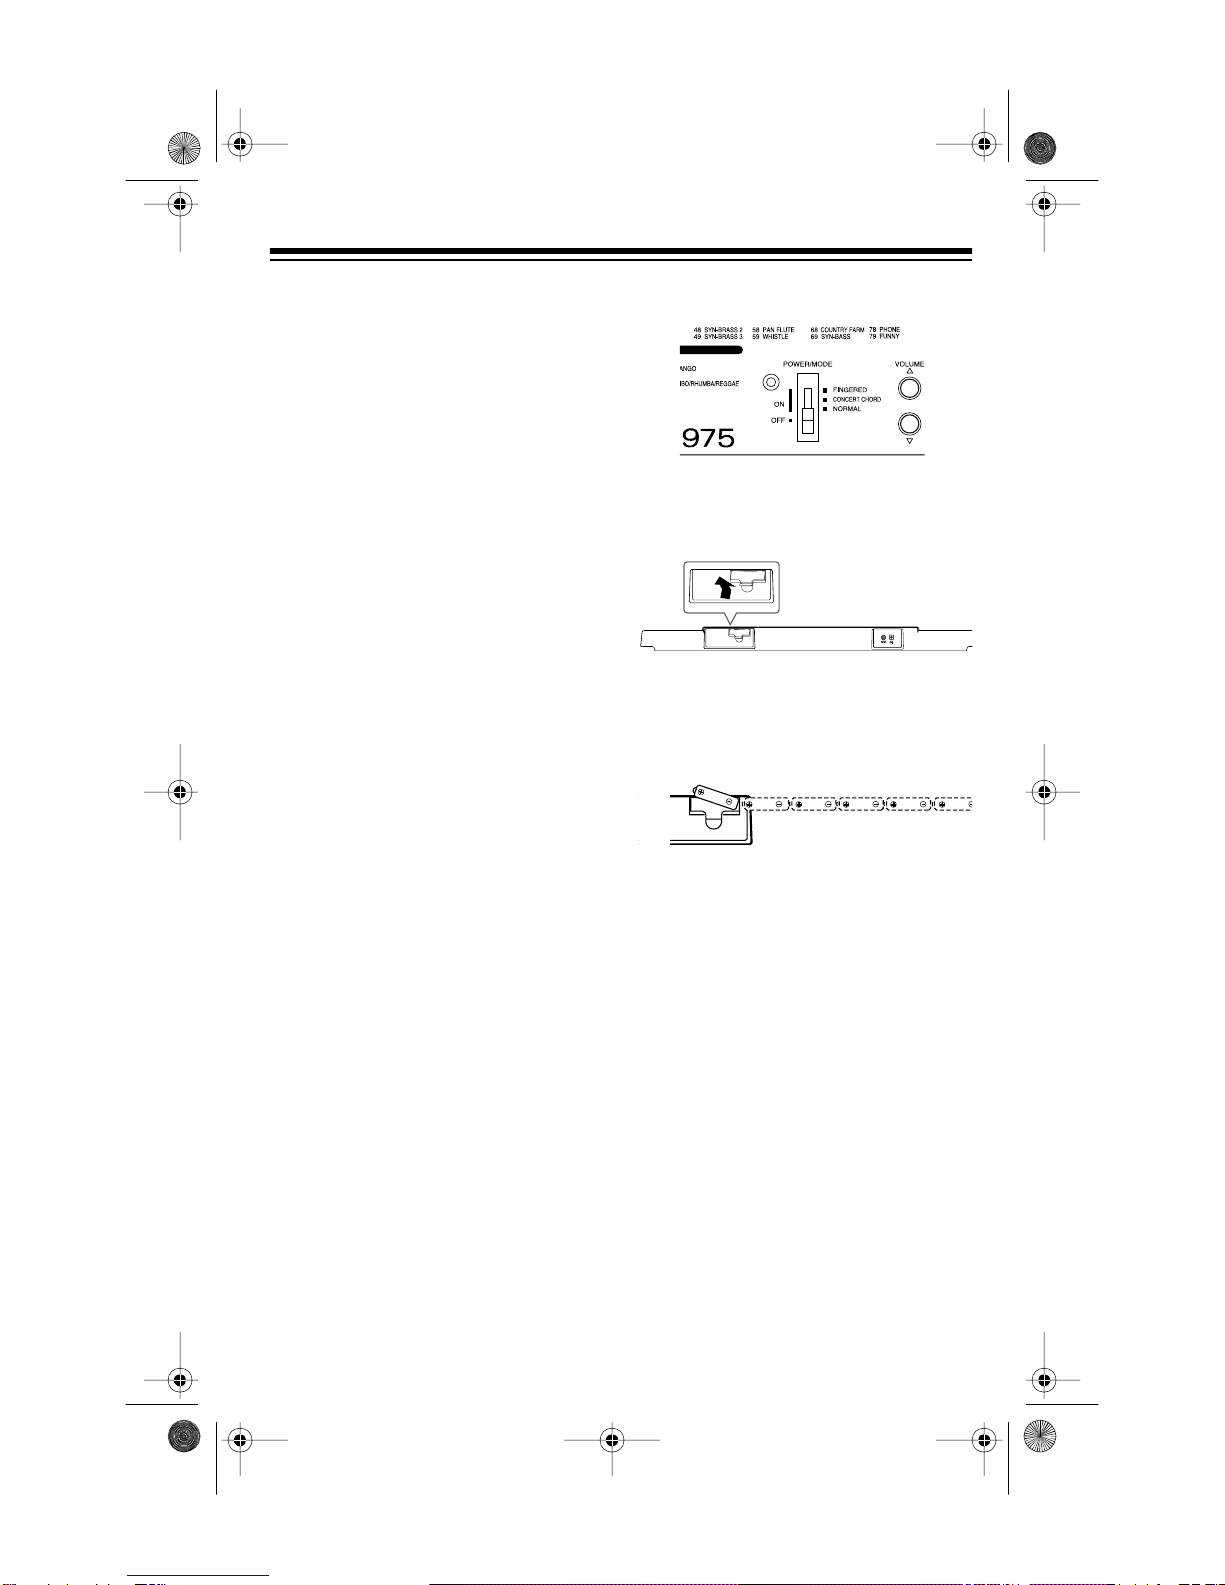
1. To turn on the keyboard, set
POWER/MODE to NORMAL.The
POWER/MODE indicator lights.
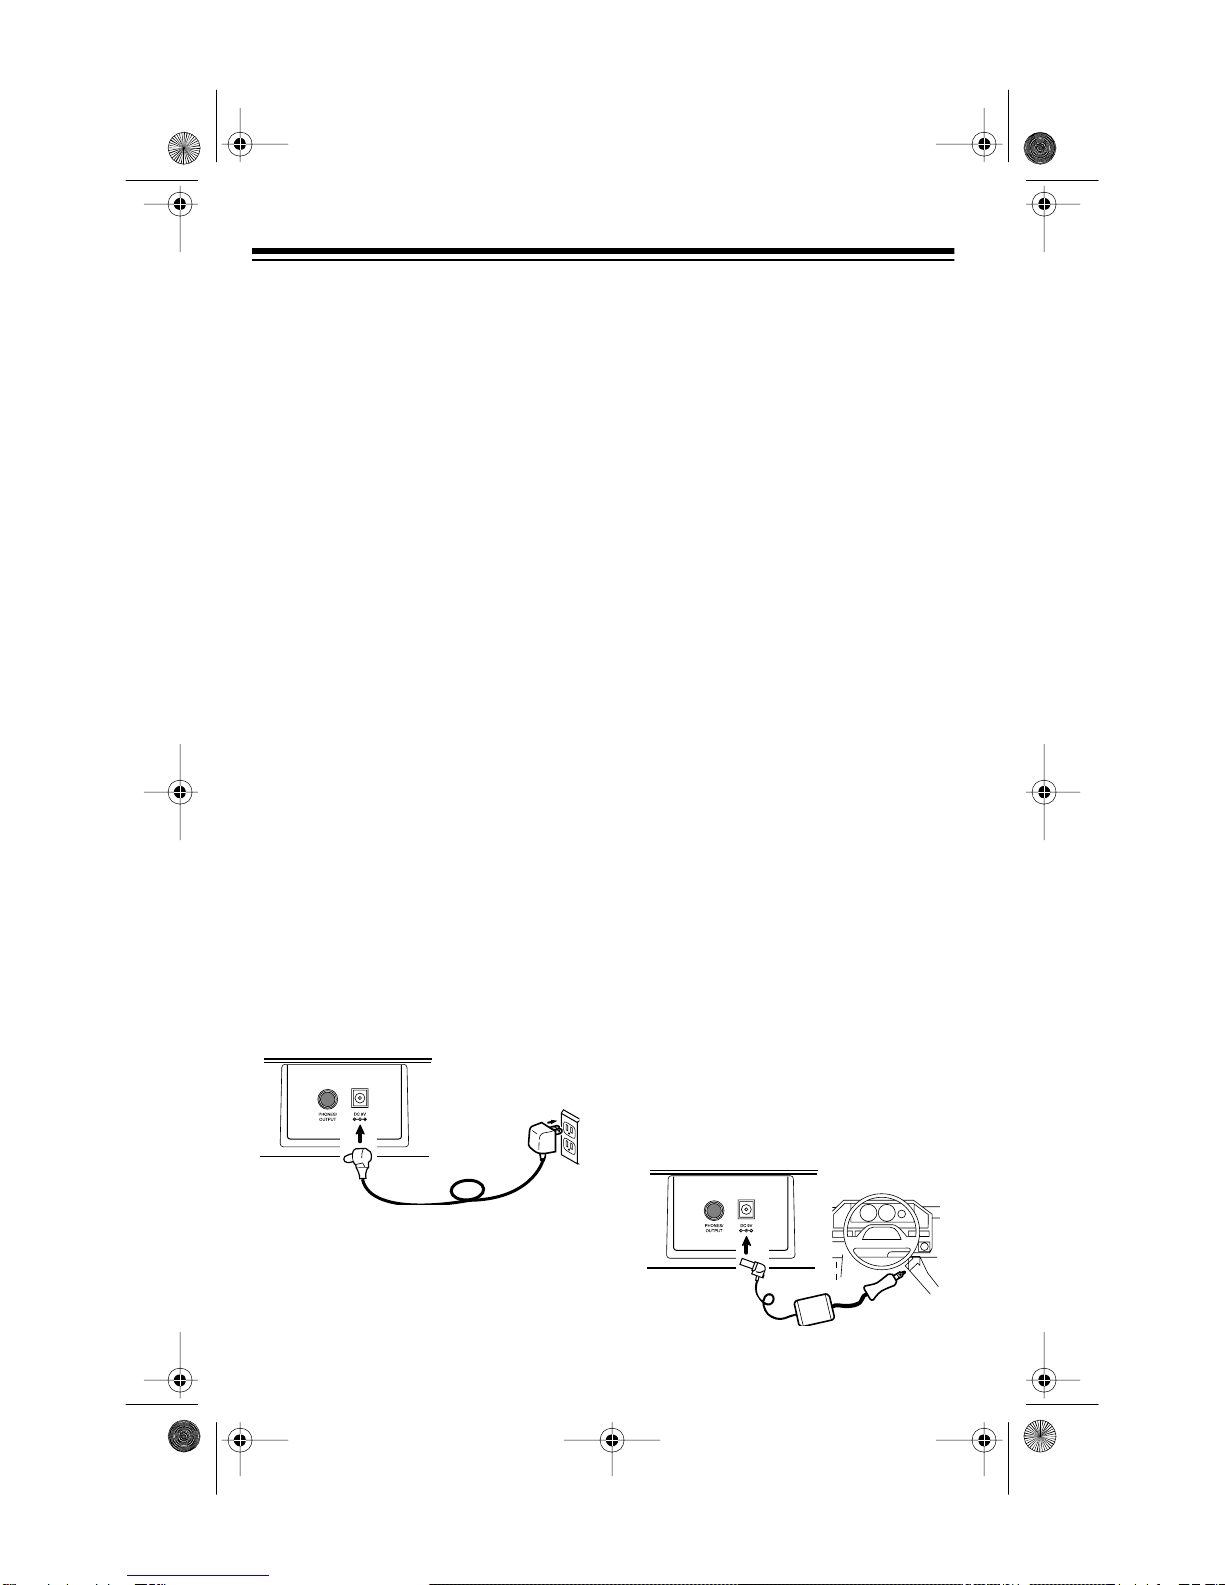
Note: To save power when oper-
ating on batteries, the keyboard
automatically turns off after about
6 minutes if you do not press a
key. To turn on the keyboard
again, set POWER/MODE to OFF
then back to NORMAL. (To cancel
the auto power off feature, see
“Cancelling Auto Power Off”).
2. To hear a sample of the Concert-
mate 975’s many sounds, play a
prerecorded tune (see “Playing
the Prerecorded Tunes” on
Page 11). To make your own
music, simply begin playing the
keyboard.
Notes:
• The keyboard automatically
selects the tone PIANO 1 (No.
00) when you turn the power
on. To select a different tone,
see “Selecting/Playing a Pre-
set Tone” on Page 13.
• To select an auto-rhythm, see
“Using the Preset Auto-
Rhythms” on Page 15.
• To play auto accompaniment,
see “Using Auto Accompani-
ment” on Page 16.
3. Repeatedly press VOLUME s or t to
increase or decrease the volume.
The current setting appears.
Notes:
• The keyboard’s volume ranges
from 0 (no sound) to 9 (maxi-
mum). Each time you turn on
the keyboard, the volume is set
to 7.
• To quickly change the volume
setting, hold down VOLUME s
or t.
• To quickly return to the default
volume setting of 7, press both
VOLUME buttons at the same
time.
• The volume level differs
depending on the tone, accom-
paniment, or song you
selected.
4. To turn off the keyboard, set
POWER/MODE to OFF. The POW-
ER/MODE indicator turns off.
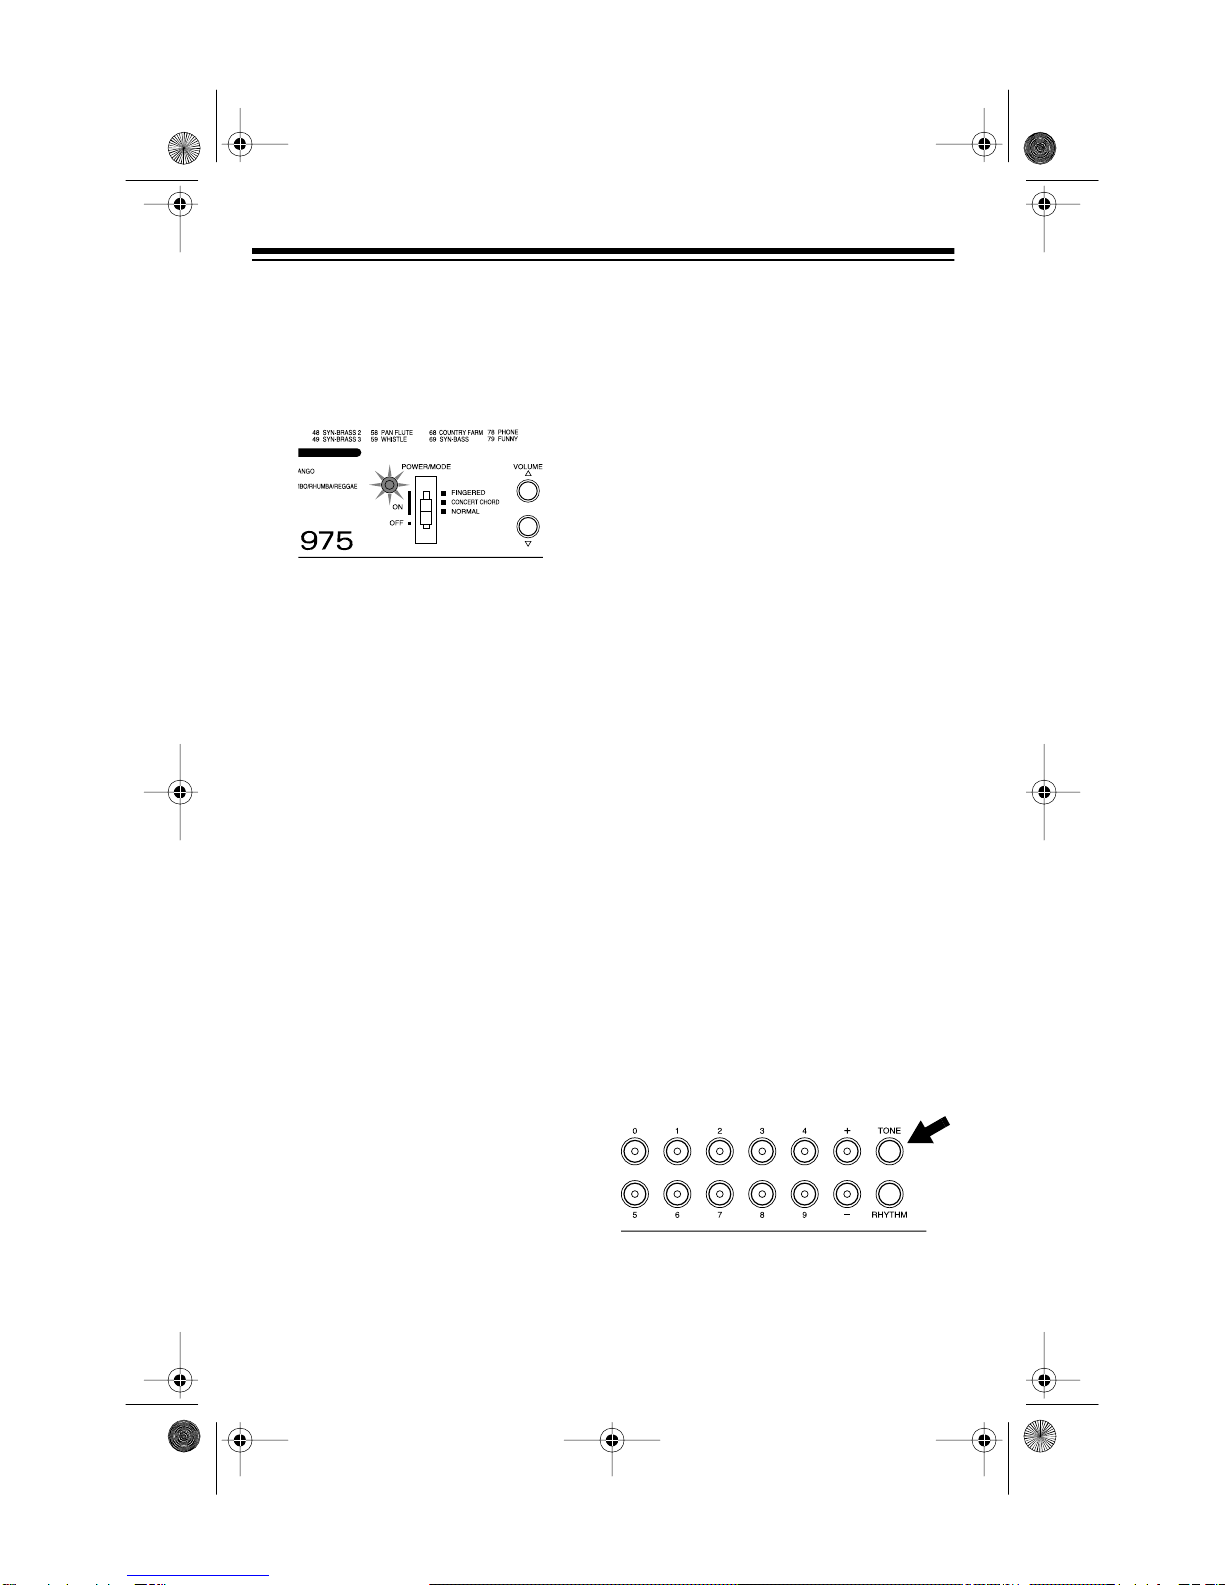
Cancelling Auto Power Off
To have the keyboard not automati-
cally turn off during a session, turn on
the keyboard while holding down
TONE.
The next time you turn the keyboard
off then back on again, it will automat-
ically turn off after about 6 minutes.
42-4036.fm Page 10 Thursday, August 12, 1999 8:20 AM