HDMI/DVI/VGA KVM & USB, RS232 , IR ,Analog Audio CAT5 Extender over IP
ITEM NO:
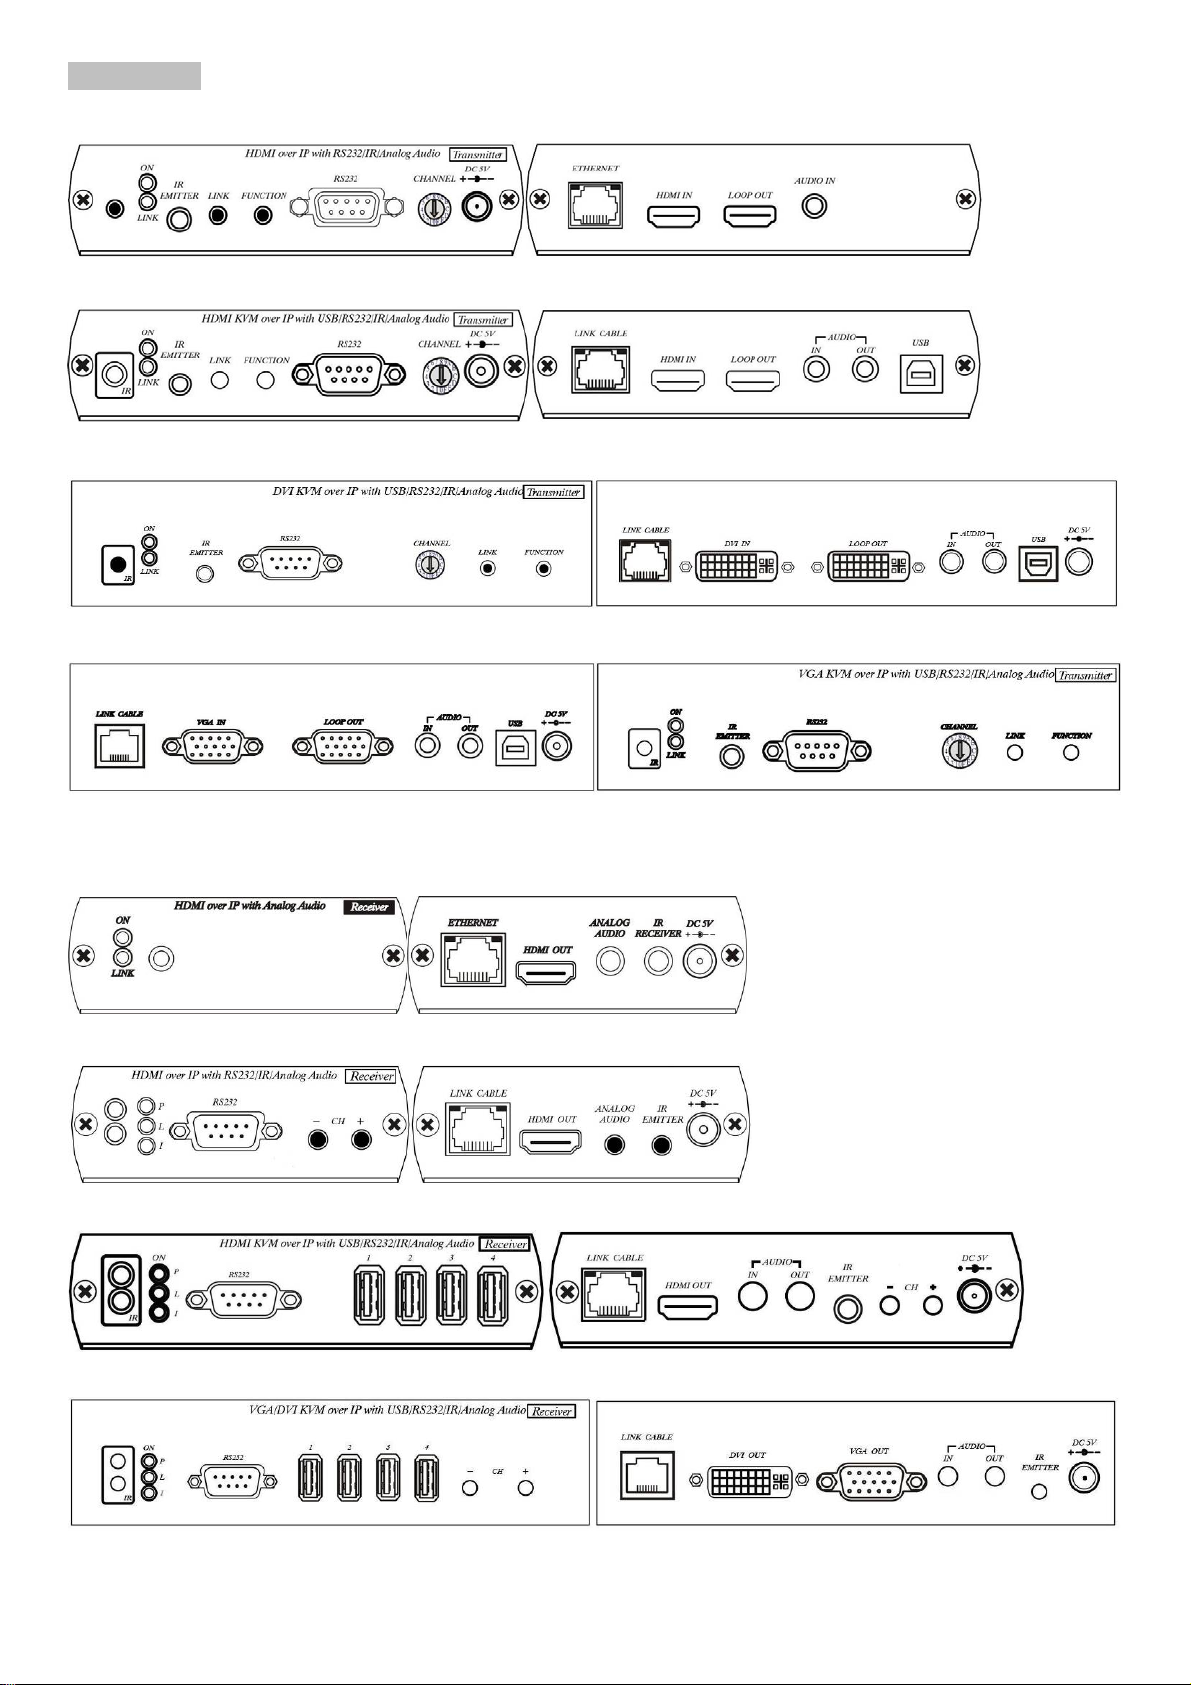
Transmitter:
HE05BT HDMI & RS232 , IR, Audio CAT5 over IP
HKM01BT HDMI KVM & USB, RS232 , IR, Audio CAT5 over IP
DKM01BT DVI KVM & USB, RS232 , IR, Audio CAT5 over IP
VKM03BT VGA KVM & USB, RS232 , IR, Audio CAT5 over IP
Receiver:
HE05BR HDMI & RS232 , IR, Audio CAT5 over IP
HE05BER HDMI & IR, Audio CAT5 over IP
HKM01BR HDMI KVM & USB, RS232 , IR, Audio CAT5 over IP
VDKM01BR VGA/DVI KVM & USB, RS232 , IR, Audio CAT5 over IP
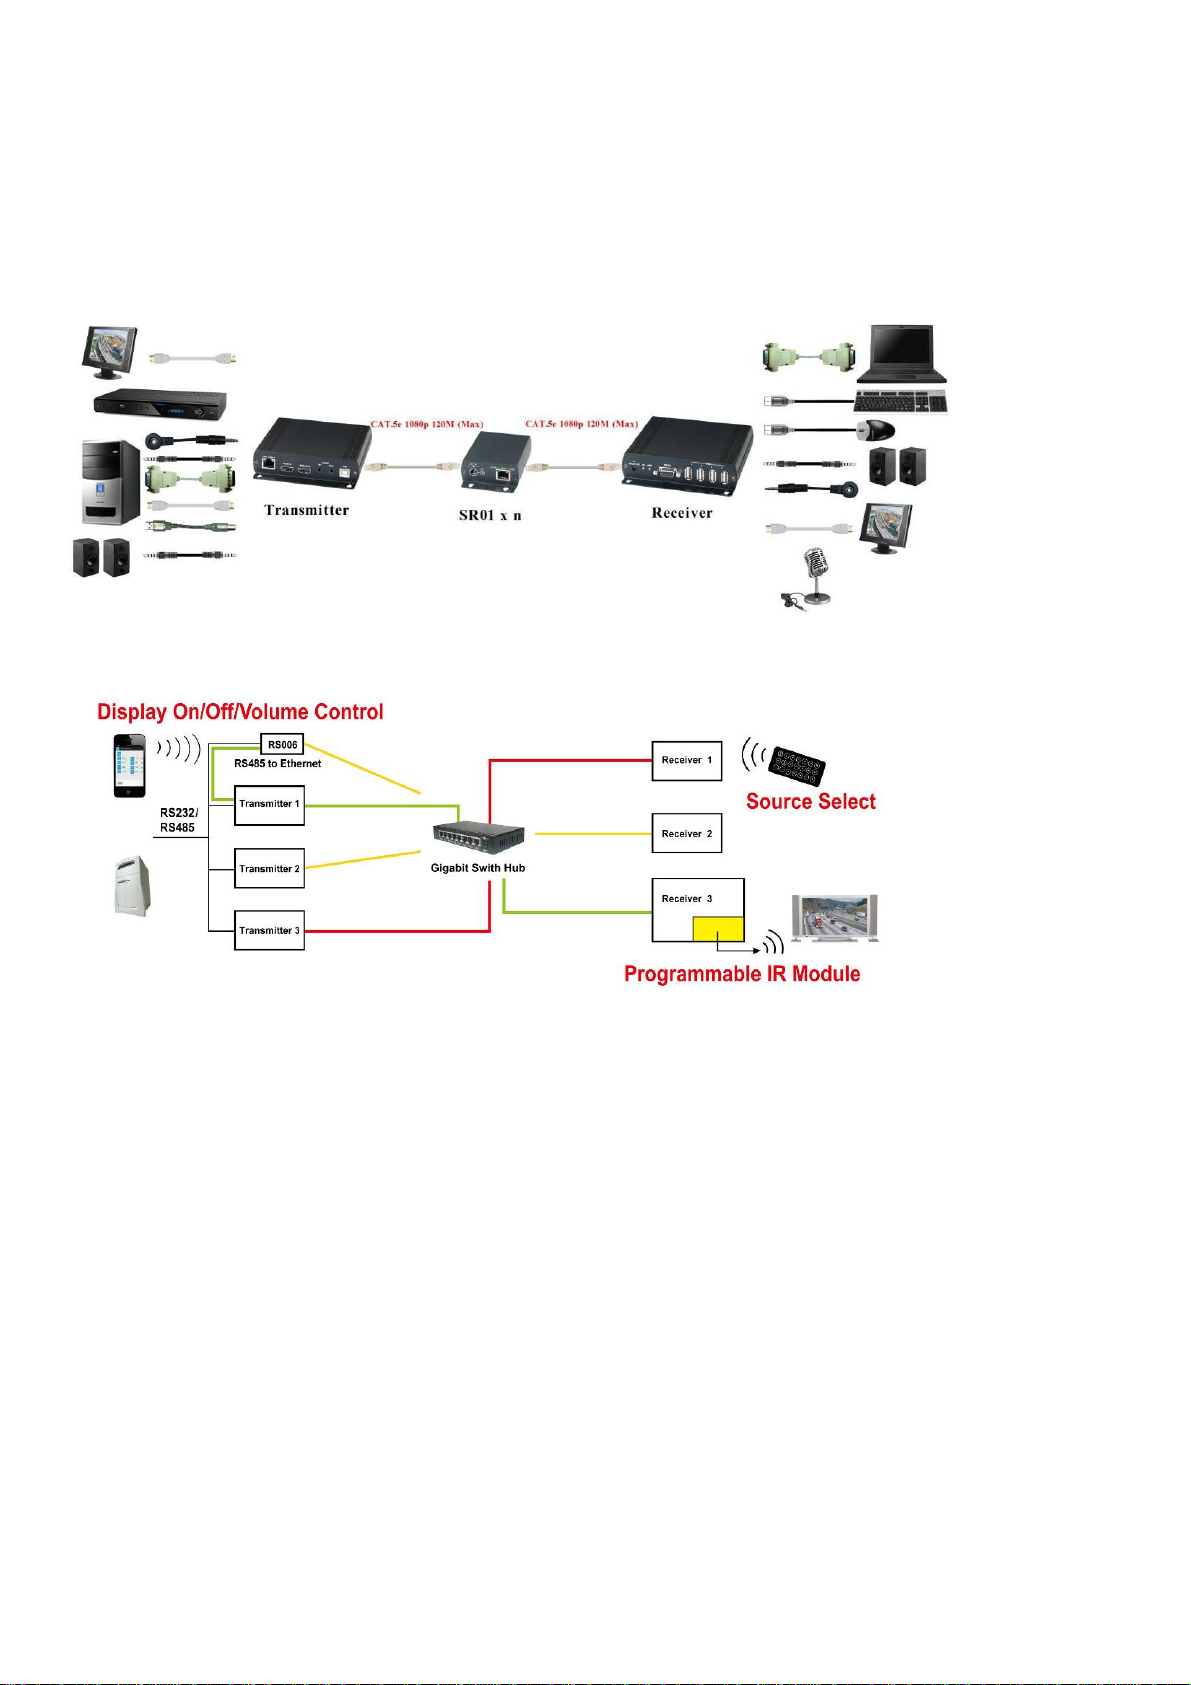
HDV over IP series include HDMI, DVI, VGA KVM, USB with Analog audio, RS232, and IR CAT5 extender design for
extends and distribute all signals over one CAT5 up to 150 meters, with local HD monitor output. It provides
superior video quality up to 1920 x 1200 resolutions, and using cost effective Cat5e cable, instead of HDMI, DVI,
and VGA, RS232 cables, for an easy, neater and reliable installation. The local and remote units can be connected
together for a Point-to-Point connection via CAT5e/6 cable or a Point-to-Many connection via a managed network
switch. Any combination of HDMI, DVI, and VGA transmitters and receivers can be used, easy to increase more
sources or monitor for a flexible application. It is optimized for applications at broadcasting system, multimedia
display and multi-data sharing, digital signage, home network integration, and industrial control, hospital,
education, security, Matrix network system and system control over RS232 and equipment control over IR.
Features:
Extend and distribute HDMI/DVI/VGA signal with bi-directional RS232, USB signal,IR and analog audio signals over LAN.
Supports resolutions up to 1080p Full HD or 1920 x 1200 (WUXGA) 32bpp@ 60 Hz
Transmission range up to 150M over CAT5e, 180M over CAT6.
Support window based management software, using PC for easy setting input/output link.
Support Android/iOS APP control.
Receiver input source select could be from IR remote control or front panel button.
Built in RS232 distribution function, to send RS232 signal from one TX to multiple RX.
Supports 2-way RS232 commands at baud rate 115200 (control software on a PC, or other automated control system
hardware) to control devices attached to the matrix using RS232. Full Duplex data communication.
HDMI 1.3b and HDCP compliant.
HDMI audio support up to LPCM 7.1@192Khz
Built in Bi-Directional analog audio transmission (only in point to point mode).
Built in Bi-Directional IR extension.
HE05BT/HKM01BT/DKM01BT/VKM03BT transmitter unit built in HDMI/HDMI/DVI/VGA local loop output.
HKM01BR/VDKM01BR receiver unit with 4 ports USB devices (1 port USB 1.1 & 3 Port USB 2.0), to extend USB peripheral
devices, such as flash disk, hard disk, keyboard, mouse, etc.
Use IGMP and Jumbo frame protocol Gigabit Switch Hub to do HD signal distribution and transmission.
Support point to point and multiple source devices to multi-display connections via Gigabit network switch.
The system could be works with any combination on HDMI, DVI, VGA transmitters and receivers.
Support total of transmitter unit up to 16 pieces, receiver unit over 254 pieces based on the number of ports on your network
switch.
Perfect for large scale remote HD content access and security monitoring systems, digital signage applications.
Optional model:
SR01: Signal repeater for longer distance application.
IRM01: Programmable IR module for HE05BR, HKM01BR, VDKM01BR receiver which allow using IR remote
control to do IR/RS232 command.
HDV Over IP Series :
ITEM NO. Video Interface Resolution TX RX USB
RS232
IR Extender Audio IR Control
HE05BT HDMI 1080p V
V V V
HKM01BT HDMI 1080p V
V V V V
DKM01BT DVI 1920x1200 V
V V V V
VKM03BT VGA 1920x1200 V
V V V V
HE05BER HDMI 1080p
V
V V
HE05BR HDMI 1080p
V
V V V V
HKM01BR HDMI 1080p
V V V V V V
VDKM01BR VGA/DVI 1920x1200
V V V V V V