Optoma BigVision HDBV3080 User manual

Getting Started Guide
HDBV3100, HDBV3090, HDBV3080

Getting Started Guide 2
For more information, please visit our website at:
http://www.optomausa.com/bigvizion
Getting Started Guide
HDBV3100, HDBV3090, HDBV3080
Table of Contents
Safeguards & Operation.……………..……...…………………....…
Introduction………………………………….....................................
Set-Up…………...........................................................................
Remote Control…………………………............................................
Basic Remote Operation.……………......….......................…….
Basic Picture Adjustments………………………............………..
Maintenance…………………...................................................…….
Troubleshooting…………………...................................................…
3-4
6-7
8-10
11
12-13
14-15
16
17

Getting Started Guide 3
For more information, please visit our website at:
http://www.optomausa.com/bigvizion
Getting Started Guide
HDBV3100, HDBV3090, HDBV3080
Safeguards & Operation
For your protection, please read these instructions completely, and keep this guide
available for future reference.
Carefully follow and comply with all cautions, warnings and instructions described in
this operating guide.
Always consult your installation professional for any operational servicing issues for
this product.
USE OF PRODUCT
POWER SOURCES
This product should only be operated with the type of power source
indicated on the serial/model plate on the system controller. If you
are not sure of the type of electrical power required, please consult
an installation professional.
OVERLOADING
Do not overload wall outlets and/or extension cords, beyond their
design as indicated by the manufacturer, or on the advice of a
professional installer.
CLEANING
Clean the bezel and the front screen of your BigVizion display with
a soft lint-free cloth. To remove finger prints and/or smudges, use a
mild soap and water mix, or an approved screen cleaning solvent.
Never use any ammonia-based products, since this can result in
damaging your screen.
VENTILATION
Always operate the system controller for BigVizion in a well venti-
lated area, and follow the recommendations from your professional
installer. Never change the placement of your system controller,
without first consulting your installation professional.

Getting Started Guide 4
For more information, please visit our website at:
http://www.optomausa.com/bigvizion
Getting Started Guide
HDBV3100, HDBV3090, HDBV3080
SERVICING
Do not try to service any BigVizion components yourself. Always
consult your installation professional if any function of the BigVizion
is not operational.
INSTALLATION
If direct sunlight or any type of strong light is directed towards the
BigVizion, there will be a reduction in image quality from the display.
Make certain that strong light is not directed towards your BigVizion.
VIEWING
Picture performance may be affected by your viewing position.
Please follow the following minimum recommended viewing
distances for your BigVizion.
HDBV3100 (100”) : 14 Feet
HDBV3090 (90”) : 10 Feet
HDBV3080 (80”) : 8 Feet
If you are uncertain about viewing distance, consult your installation
professional.
PROJECTION LAMP
The BigVizion is based on DLP®technology by Texas Instruments,
and utilizes a projection lamp for the light source. If you notice the
picture quality diminishing after a long period of use, the projection
lamp may need to be replaced.
(Note: A lamp warning message will appear on your display after 3900 hours
recommending replacement within 100 hours.)
Please consult your installation professional a replacement lamp.
COOLING FAN
The BigVizion uses a system of cooling fans to prevent the build-up
of high temperatures. This may result in hearing noise from the fan in
a very quiet room. Please consult your installation professional with
any questions regarding fan placement.
REMOTE CONTROL DETECTION
Aim your remote control towards the bottom of the screen of your
BigVizion. The remote sensor is placed behind the screen for
detection.

Getting Started Guide 5
For more information, please visit our website at:
http://www.optomausa.com/bigvizion
Getting Started Guide
HDBV3100, HDBV3090, HDBV3080
Introduction
Thank you for purchasing the Optoma BigVizion 1080p in-wall display system.
This guide covers basic instructions for the following models: HDBV3100,
HDBV3090 and HDBV3080.
This guide will discuss the day-to-day, normal operation of your BigVizion.
It is recommended you keep this guide available for operational assistance.
A detailed installation manual has been provided to your installation professional.
This manual covers the installation, setup and advanced settings of the BigVizion.
Consult with your installer for any questions regarding the BigVizion and its
operation.
The BigVizion by Optoma is the first customizable and modular in-wall rear
projection display system. BigVizion is available in three sizes: 100-, 90- and
80-inch.
The BigVizion displays stunning images at native 1080p resolution with amazing
color, clarity and sharpness.
BigVizion is designed to be the center of your home entertainment system.
Optoma’s exclusive system controller is designed to be an all digital “set and forget”
system. Once the system is set-up by your installer, the digital controls of the
BigVizion will not require any additional adjustments.
After the installation is complete, you can control of the entire system through the
remote control.
The BigVizion System Consists of Three Components:
1) The Display Unit
2) System Controller Box
3) Remote Control
The Display Unit:
The BigVizion is a customizable modular system installed by a professional installer
to blend in with any home décor. With its in-wall design, the flush mounted display
of the BigVizion maximizes your room space.

Getting Started Guide 6
For more information, please visit our website at:
http://www.optomausa.com/bigvizion
Getting Started Guide
HDBV3100, HDBV3090, HDBV3080
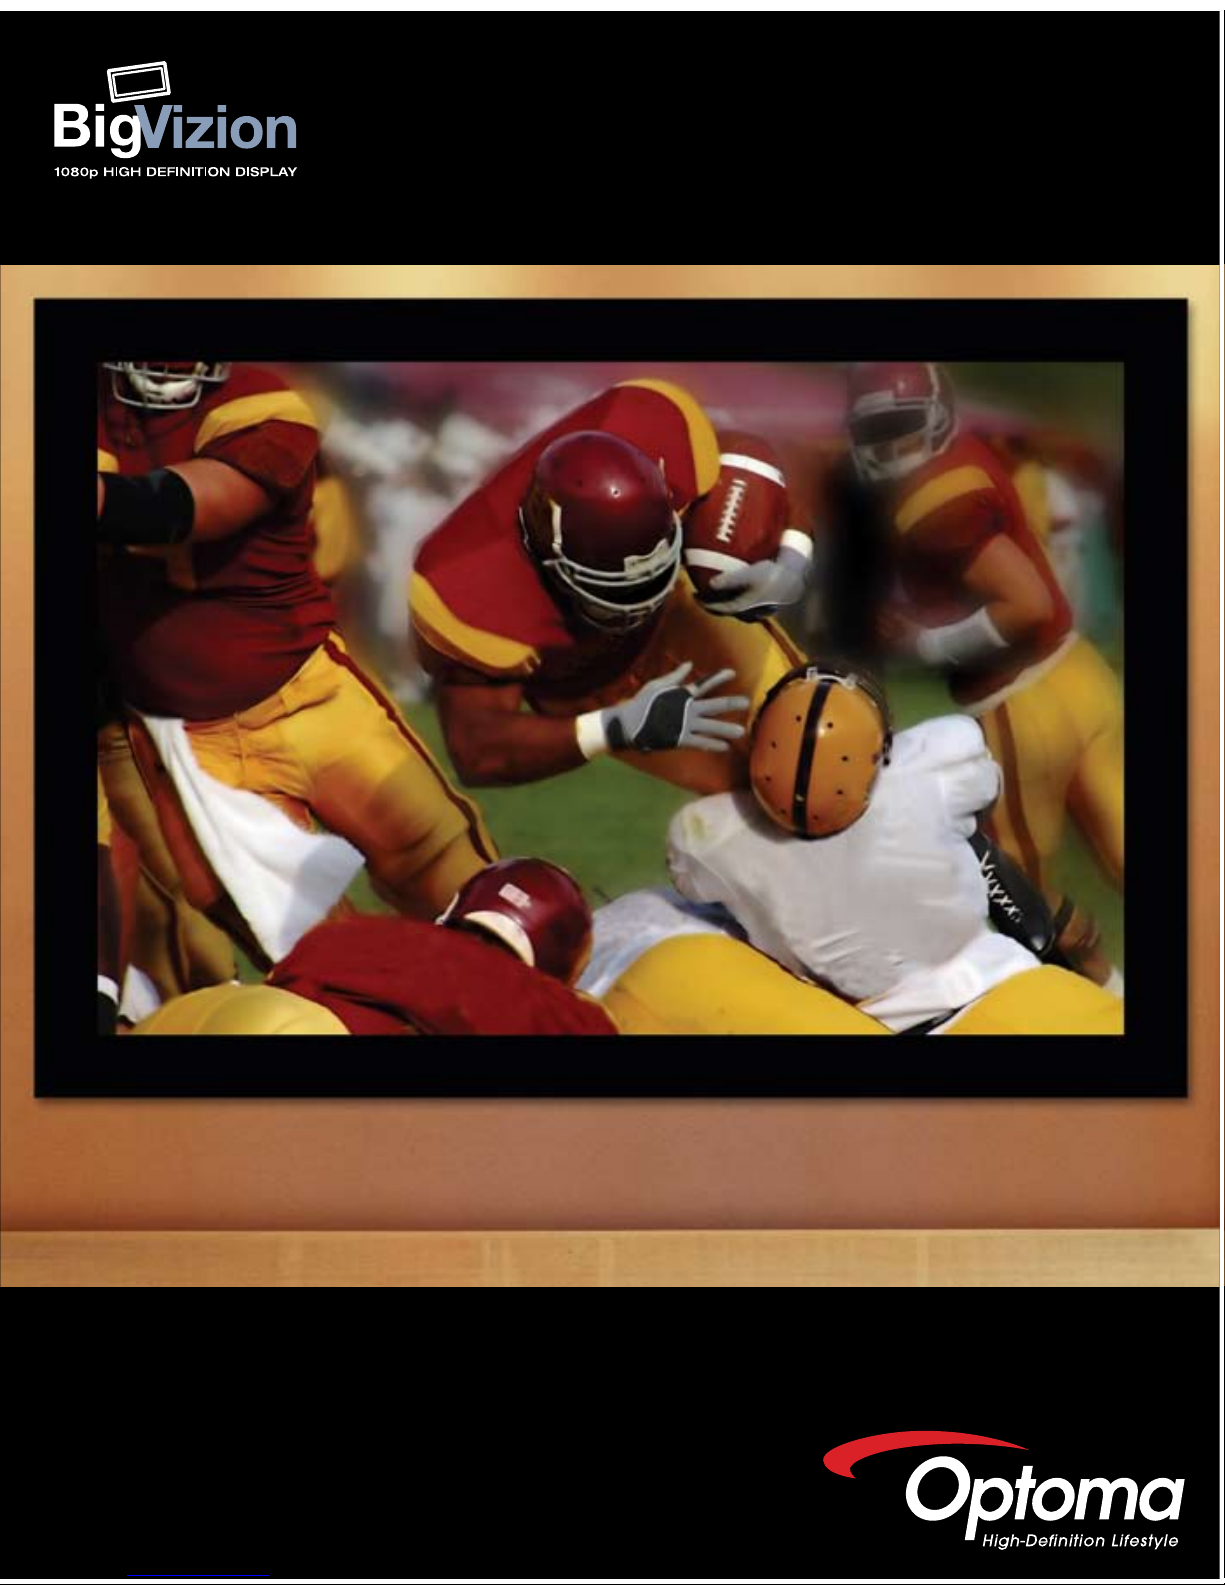
BigVizion is one of the largest in-wall display systems to feature native 1080p
resolution.
The BigVizion also features exclusive ISFccc modes for custom calibration.
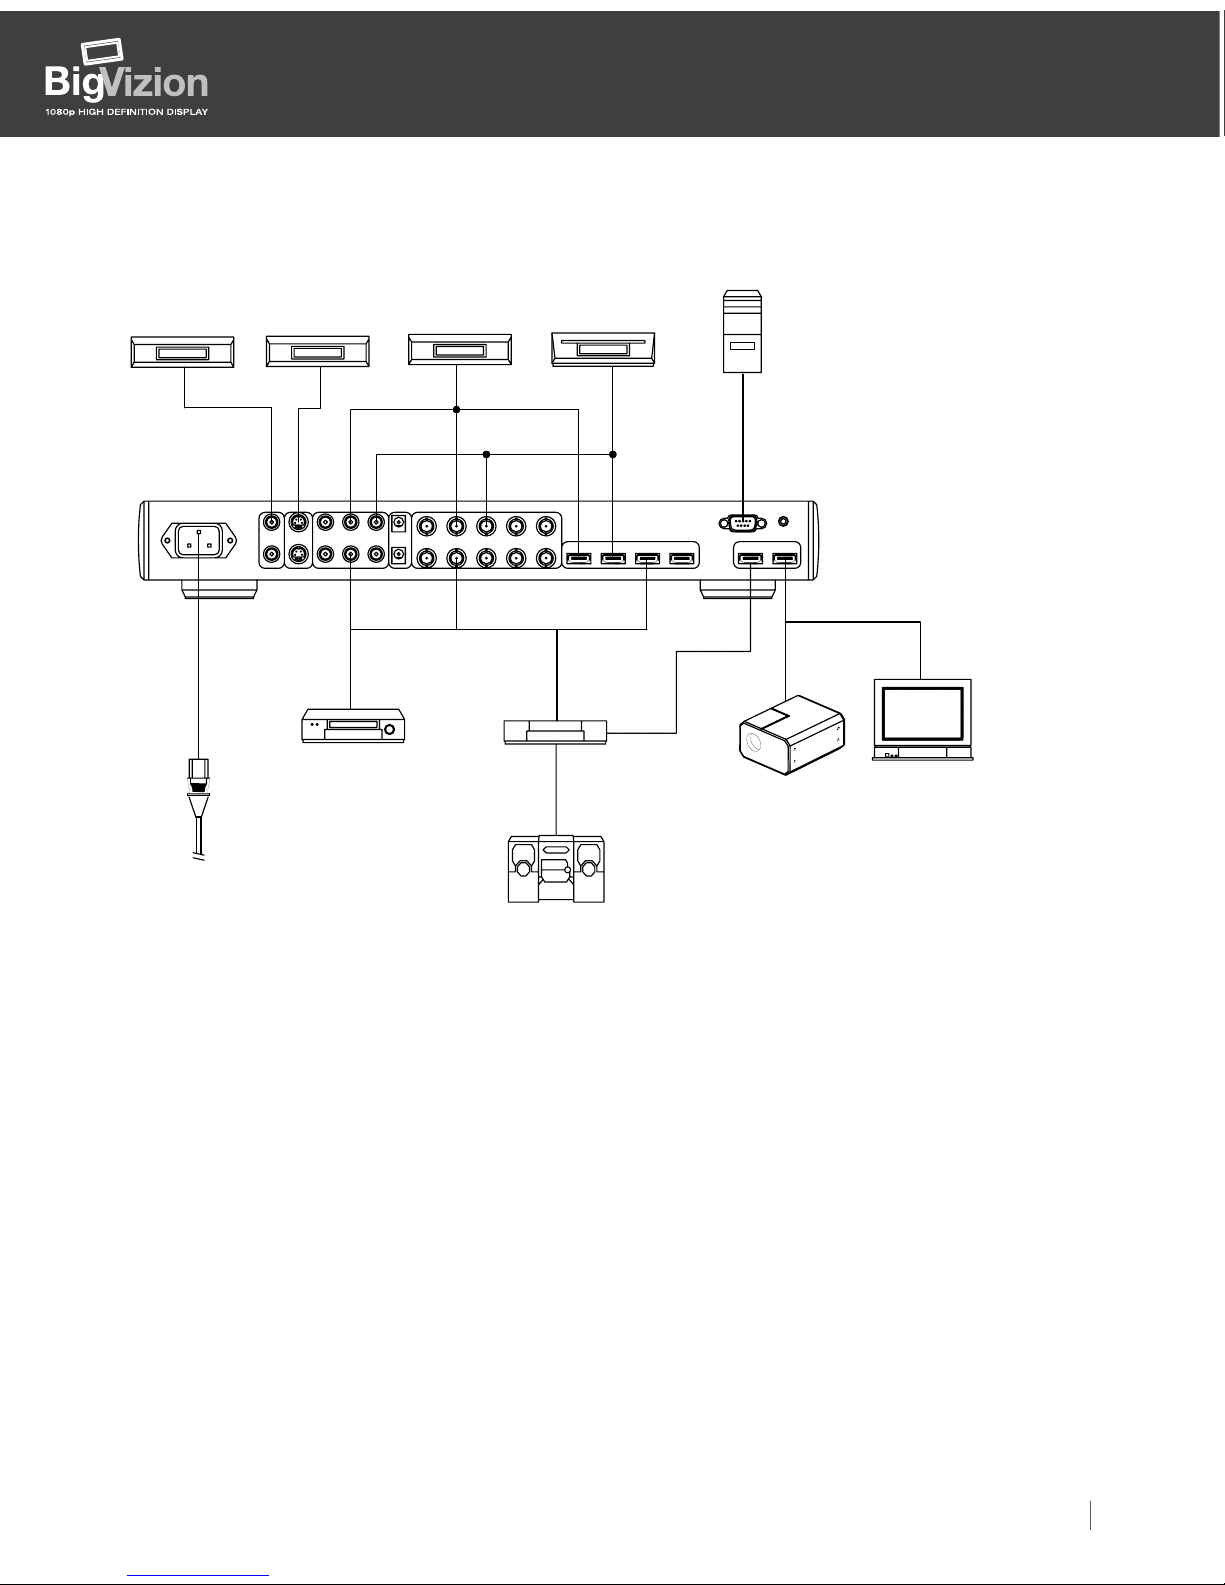
The System Controller Box:
The key component of the modular BigVizion display system is the system controller
developed by Optoma. This controller is a fully-featured, all digital, video processor
designed to create the best image for the BigVizion. The system controller provides
the best source for content switching, image de-interlacing, image scaling, and color
management, in one easy-to-use package.
Optoma developed the system controller to be the center of your home
entertainment center. All video content sources, such as a DVD player, cable box
and others, are easily routed through the system controller. These sources can be
accessed by the remote to control what is displayed on the screen.
The system controller can be installed into several different locations of your home
theater area – even behind the screen of the BigVizion. Work with your installer to
determine the best location.
Remote Control:
Operation of the BigVizion is managed by the remote control, such as:
- Powering the BigVizion system on/off
- Selecting the content to display on screen
- Changing the display from high-definition/widescreen 16:9 to standard definition
4:3 aspect ratios.
For the daily use of the remote control, only common functions are needed and are
described in this guide. For more intricate functions, consult the advanced user’s
guide supplied with your BigVizion.
Note: ISF modes are locked at the factory. A professional calibrator is required to
set-up and calibrate the ISF function. ISF calibration is not required to use your
BigVizion; however, advanced calibration provides the best picture performance
from your product. An additional cost maybe associated with ISF calibration.

Getting Started Guide 7
For more information, please visit our website at:
http://www.optomausa.com/bigvizion
Getting Started Guide
HDBV3100, HDBV3090, HDBV3080
S-VIDEO
VIDEO
IN 3
VGA IN
Down SOn / tandby
Exit
Menu/
Up
Re-sync
Right/
Left
Source
Enter/
.Computer
.Notebook
Set-Up
The system controller is designed to provide the best possible image for your
BigVizion display. For incredible picture performance, HDMI or DVI/HDCP is
recommended.
Typical System Controller Configuration
SYSTEM CONNECTIONS
Front Panel
You can connect video game consoles through the front panel RCA or S-Video
connector.
Camcorders can also be connected to the RCA or S-Video jack for easy playback
access.
Notebooks or computers can be connected through the VGA front panel connector.
XGA resolution (1024x768) is recommended for notebook computers.
•
- Notebook
- Computer
- Video Game
Consoles

Getting Started Guide 8
For more information, please visit our website at:
http://www.optomausa.com/bigvizion
Getting Started Guide
HDBV3100, HDBV3090, HDBV3080
Back Panel
4: AC IN
5: Composite 1/CVBS 1 (NTSC, PAL and SECAM)
6: Composite 2/CVBS 2 (NTSC, PAL and SECAM)
7: S-Video 1 (NTSC, PAL and SECAM)
8: S-Video 2 (NTSC, PAL and SECAM)
9: Component YPbPr/BNC 1 (NTSC, PAL and SECAM,
480i/p, 576p, 720p and 1080i)
10: Component YPbPr/BNC 2 (NTSC, PAL and SECAM,
480i/p, 576p, 720p and 1080i)
11: DC 12V Output
12: DC 12V Output
13: YPbPr/RGBHV 1 (NTSC, PAL and SECAM, 480i/p, 576i/p, 720p and 1080i)
14: YPbPr/RGBHV 2 (NTSC, PAL and SECAM, 480i/p, 576i/p, 720p and 1080i)
15: HDMI 1 (480i/p, 576i/p, 720p and 1080i)
16: HDMI 2 (480i/p, 576i/p, 720p and 1080i)
17: HDMI 3 (NTSC, PAL and SECAM, 480p, 576p, 720p, 1080i)
18: HDMI to AV Receiver
19: HDMI From AV Receiver
20: To DISPLAY
21: RS-232
22: IR Module
•
5
22
4
20
19
18
17
16
15
14
12
10
8
6
7911
13 21
RS-232
AC IN
VH
B/Pb
G/Y R/Pr IR Module
To
display
To
AV receiver
From
AV receiver
HDMI IN-3HDMI IN-2
HDMI IN-1
HDMI SWITCH
BNC IN
DC-12V
Pr
Pb
Y
COMPONENT IN
S-VIDEO
VIDEO
IN 1
IN 2

Getting Started Guide 9
For more information, please visit our website at:
http://www.optomausa.com/bigvizion
Getting Started Guide
HDBV3100, HDBV3090, HDBV3080
Back Panel
Typical component connections.
Please consult your installation professional for specific component set-up.
•
RS-232 IR Module
Pr
COMPONENT IN
VIDEO
AC IN
IN 2
Pb
Y
S-VIDEO
HDMI IN-1
BNC IN
B/Pb
G/Y
DC-12V
VH
R/Pr
To
AV receiver
HDMI IN-3HDMI IN-2
HDMI SWITCH
From
AV receiver
To
display
IN 1
HDTV TUNER
D-VHS
S-VHS
VHS
Speaker
Amplifier
DVD Player
Digital Projector
PDP TV, Monitor
RPTV/Monitor
LCD TV/Monitor
Power Cord
VHS S-VHS D-VHS HDTV Tuner Notebook
Computer
CRT TV/Monitor

Getting Started Guide 10
For more information, please visit our website at:
http://www.optomausa.com/bigvizion
Getting Started Guide
HDBV3100, HDBV3090, HDBV3080
Remote Control
Remote Control and Buttons
- 8 -
Appendix 1: Remote Control and Buttons
Here is a detailed look at the BigVizion System Controller remote control.
1. Power On
2. Power Off
3. ISD Day Mode
4. ISF Night Mode
5. User Mode 1
6. User Mode 2
7. User Mode 3
8. Image Mode
9. Gamma
10. Sharpness
11. Color
12. Noise Reduction
13. Contrast
14. Up
15. Left
16. Right
17. Enter
18. Down
19. Menu
20. Shift +
21. Shift –
22. Zoom +
23. Zoom -
24. 16:9 Aspect Ratio
25. 4:3 Aspect Ratio
26. Native
27. Format 2
28. Format 1
29. Format 3
30. HDMI 1
31. HDMI 2
32. HDMI 3
33. S-Video
34. CVBS 1
35. Y PbPr 1
36. BNC 1
37. S-Video 2
38. CVBS 2
39. YPbPr2
40. BNC 2
41. S-Video 3
42. CVBS 3
43. VGA
44. AUTO (Signal Search)
1 2
3 4
5
6
7
8
9
11
13
10
12
14
15
16
17
18 19
20
21
22
23
25
26
24
27
28
29
30
31
32
33
34
35
36
37
38
41
42
39
40
43
44
•

Getting Started Guide 11
For more information, please visit our website at:
http://www.optomausa.com/bigvizion
Getting Started Guide
HDBV3100, HDBV3090, HDBV3080
Basic Remote Operation
Control your BigVizion through the remote control.
Turning your BigVizion on/off:
The power on (blue button) and power off (the red button) are located at the top of
the remote. These buttons control both the screen and the system controller.
How to select what to watch:
During the installation of the BigVizion, your installer will integrate and connect all
your video sources to the BigVizion system controller. To select between sources,
use the buttons in the “Source” section of your remote control.
Since installations vary, please consult your installation professional for
detailed connections of system components.
As an example, your installer might have connected your DVD player to HDMI 1 and
your High Definition Digital Cable Box to HDMI 3.
- To watch a DVD, simply press the HDMI 1 button.
- To watch Cable TV, simply press the HDMI 3 button.
Your installer will determine the optimal methods.

Getting Started Guide 12
For more information, please visit our website at:
http://www.optomausa.com/bigvizion
Getting Started Guide
HDBV3100, HDBV3090, HDBV3080
The BigVizion is designed for use in a wide variety of rooms and lighting situations–
from dark theater environments to standard daylight viewing. Your BigVizion has
optional advanced calibration modes certified by the Imaging Science Foundation
(ISF). ISF modes are designed to calibrate your BigVizion for maximum picture
performance for both Day and Night viewing. ISF modes require optional calibration;
consult your installation professional for additional information.
Your installer can also create custom picture settings based on individual preference,
which you can then save as a “favorite.” These settings are accessible by selecting
the “User 1,” “User 2” or “User 3” buttons on the remote. Work with your installation
professional in setting up these favorite modes.
Changing Aspect Ratios:
Aspect ratio is the definition for the dimensions of your image. Most high-definition
sources are 16:9; while most standard are 4:3.
If the image playing on your BigVizion appears “stretched” or “compressed”— try
switching the aspect ratio.
On the remote control, there is a “Display Format” section. By pressing the buttons
in this area, you can switch to various aspect ratios to optimize your viewing.

Getting Started Guide 13
For more information, please visit our website at:
http://www.optomausa.com/bigvizion
Getting Started Guide
HDBV3100, HDBV3090, HDBV3080
Basic Picture Adjustments
IMAGE ADJUSTMENT
The IMAGE adjustment module allows you to tailor the image to your particular
tastes, with such frequently-used terms like: Contrast, Brightness, Color, Tint and
Sharpness. For advanced users, there is an “Advanced” sub-menu, which contains
more options for fine-tuning the image.
All functions may be operated by the remote control as shown below.
The “Up,” ”Down,” “Left,” “Right” and “Enter” keys are the control buttons.
1. Press the “Menu” button to show the on-screen display (OSD).
2. Use hand iarrow keys to select IMAGE category,
press “Enter” or gkey to enter this adjustment category:
IMAGE
IMAGE
Select Enter Enter Menu
Back
Mode
Contrast
Brightness
Color
Tint
Sharpness
Reset Current
Advanced
ISF DAY
0
0
0
0
0
DISPLAY
SYSTEM
SETUP
3. Use hand iarrow keys to select the desired adjustment item, press “Enter” or
gto enter this adjustment item. The OSD disappears and a small adjustment bar
appears.
4. To adjust other items, use hand ikeys to move to other adjustment settings.
5. When the adjustments are finished, press the “Menu” button to exit the
adjustment item and go back to Menu.

Getting Started Guide 14
For more information, please visit our website at:
http://www.optomausa.com/bigvizion
Getting Started Guide
HDBV3100, HDBV3090, HDBV3080
ISFCCC MODES
For optimum picture performance, the BigVizion comes with ISF Modes.
The BigVizion is designed to offer exceptional performance out of the box; however,
since lighting and other factors can affect the performance of your display, the
BigVizion offers ISF calibration capability. After ISF calibration, the user can simply
switch among the two ISF Day and Night modes to have certified image effects.
Day and Night modes are locked at the factory and require ISF certified calibrators
to unlock and set-up the modes. Certain factors cannot be set at the factory due
to variables during the setup. Professional calibration of Day and Night modes
allow for the appropriate setting of contrast, tint, sharpness, color levels and other
parameters to exactly match the environment where the BigVizion is used. There
are also three user modes which can be modified by the user, allowing a total of five
settings per signal/connection to match every condition.
For ISF calibration, please visit www.imagingscience.com to find a certified ISF
technician in your area.
1. To select an ISF mode, press “Menu” button and use “Enter” or gto enter the
IMAGE category, then use h, iarrow keys to highlight “Mode.” Press “Enter”
or gto enter ISF Mode menu.
2. Use h, ito select the desired mode.
ISF Day
ISF Night
User 1
User 2
User 3
Mode

Getting Started Guide 15
For more information, please visit our website at:
http://www.optomausa.com/bigvizion
Getting Started Guide
HDBV3100, HDBV3090, HDBV3080
Maintenance
Problems can be prevented through the regular maintenance of your BigVizion.
Careful and periodic cleaning can extend the life of various BigVizion parts, such
as the bezel and screen. Always power off the BigVizion when performing routine
maintenance.
Screen Cleaning
To minimize dust on the screen: Wet a soft cloth in a mixture of warm water
and a mild dish-washing detergent. Wring out the majority of the liquid until
almost dry, then wipe the screen.
Bezel Cleaning
Use a soft cloth with a commercially-approved wood cleaning product.
Note: Please keep wood cleaner away from the screen.
Extended Absence
If your BigVizion is left unattended for a long period of time, disconnect the
power to prevent any unforeseen power surges that may occur.
•
•
•

Getting Started Guide 16
For more information, please visit our website at:
http://www.optomausa.com/bigvizion
Getting Started Guide
HDBV3100, HDBV3090, HDBV3080
Troubleshooting
If you have any additional questions after reading this guide,
please consult your installation professional for assistance.
MODEL: __________________________ SERIAL # ____________________
DATE OF INSTALL:
INSTALLER NAME:
COMPANY NAME:
ADDRESS:
PHONE:
FAX:
_______________________________
_______________________________
_______________________________
______________________________________
__________________________________________________
__________________________________________________
_________________________________________
____________________________________________

Getting Started Guide 17
For more information, please visit our website at:
http://www.optomausa.com/bigvizion
Getting Started Guide
HDBV3100, HDBV3090, HDBV3080
ABOUT THIS MANUAL
This manual is designed for use with the Optoma BigVizion Display. Information in
this document has been carefully checked for accuracy; however, no guarantee is
given to the correctness of its contents. The information in this document is subject
to change without notice.
COPYRIGHT
© Copyright 2006 Optoma Technology, Inc.
This document contains proprietary information protected by copyright. All rights are
reserved. No part of this manual may be reproduced by any mechanical, electronic
or other means, in any form, without prior written permission of the manufacturer.
TRADEMARKS
All trademarks and registered trademarks are the property of their respective
owners.
FCC COMPLIANCE
This device complies with Part 15 of the FCC rules. Operation is subject to the
following two conditions:
(1) This device may not cause harmful interference, and
(2) This device must accept any interference received, including
interference that may cause undesired operation.
FEDERAL COMMUNICATIONS COMISSION (FCC) STATEMENT
This equipment has been tested and found to comply with the limits for a Class
B digital device, pursuant to part 15 of the FCC Rules. These limits are designed
to provide reasonable protection against harmful interference in a residential
installation. This equipment generates, uses and can radiate radio frequency energy
and, if not installed and used in accordance with the instructions, may cause
harmful interference to radio communications. However, there is no guarantee that
interference will not occur in a particular installation. If this equipment does cause
harmful interference to radio or television reception, which can be determined
by turning the equipment off and on, the user is encouraged to try to correct the
interference by one or more of the following measures:
Reorient or relocate the receiving antenna.
Increase the separation between the equipment and the receiver.
Connect the equipment to an outlet on a circuit different from that
to which the receiver is connected.
Consult the dealer or an experienced radio/TV technician for help.
•
•
•
•

USA
715 Sycamore Drive
Milpitas, CA 95035
Tel: 408-383-3700
Fax: 408-383-3702
www.optomausa.com
Optoma Technology, Inc.
715 Sycamore Drive, Milpitas, CA 95035 ·Tel: (408) 383-3700 · Fax: (408) 383-3702
Specifications subject to change without notice. Copyright © 2006 Optoma Technology, Inc. All rights reserved.
Canada
5630 Kennedy Road
Mississauga, ON, L4Z 2A9
Tel: 905-882-4228
Fax: 905-882-4229
www.optoma.ca
Other manuals for BigVision HDBV3080
1
This manual suits for next models
3
Table of contents
Other Optoma TV manuals