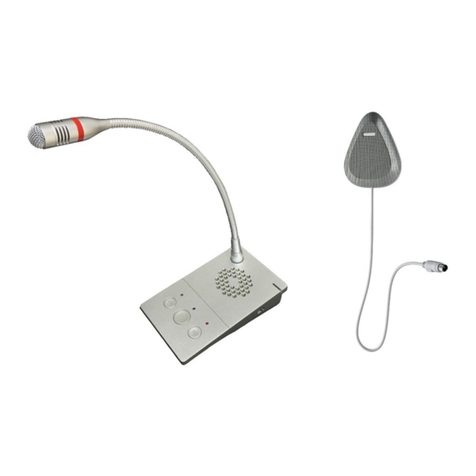
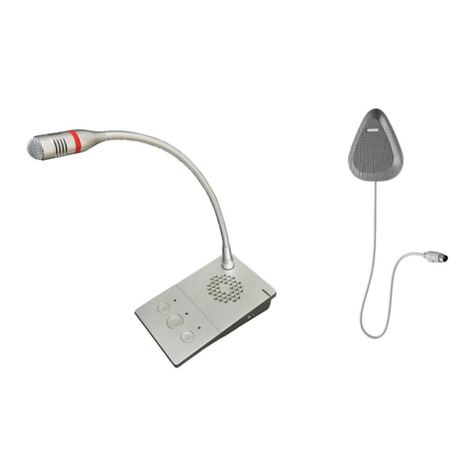
Opus Technologies OP-6510 User manual

Window Intercom System
User Guide
2021
OP-6510
1

2

3
Summary…………………………………………………………..…………….……. 3
Safety precautions……………………………………….………………..………… 4
Product introduction……………………………………………………….………. 6
Main features……………………………………………………………….…….…… 6
Hardware interface introduction……………………………………..….…… 7
Introduction……………………………………………………….………………… 8
Packing list…………………………………………………………….…….………….. 8
Wiring……………………………………………………….………………..…………... 10
Basic functions…….……………………………………………………………..… 10
Local intercom………………………………………………………….……….….…. 10
Warm prompt………………………………………………………….………….…… 10
Recording…………………….………………………….……………………………..… 11
EN |Contents

Safety precautions
Indicates apotentially hazardous situation which, if mishandled, could result in
death or serious personal injury
Indicates apotentially hazardous situation which, if mishandled, could result in
moderate or minor personal injury, and/or property damage
WARNING
Installation
•Do not expose the unit to rain or an environment where it may be splashed by water or
other liquids, as doing so may result in fire or electric shock.
•Use the unit only with the voltage specified on the unit.Using avoltage higher than that
which is specified may result in fire or electric shock.
•Do not cut, kink, otherwise damage nor modify the power supply cord.In addition, avoid
using the power cord in close proximity to heaters, and never place heavy objects -- including
the unit itself -- on the power cord, as doing so may result in fire or electric shock.
•Avoid installing or mounting the unit in unstable locations, such as on arickety table or a
slanted surface.Doing so may result in the unit falling down and causing personal injury
and/or property damage.
•Install the unit only in alocation that can structurally support the weight of the unit and the
mounting bracket.Doing otherwise may result in the unit falling down and causing personal
injury and/or property damage.
While using the machine
•Should the following irregularity be found during use, immediately disconnect the power
supply plug from the AC outlet and contact your nearest OPUS Technologies dealer.Make no
further attempt to operate the unit in this condition as this may cause fire or electric shock.
•If you detect smoke or astrange smell coming from the unit. ·
•If water or any metallic object gets into the unit
•If the unit falls, or the unit case breaks ·
•If the power supply cord is damaged (exposure of the core, disconnection, etc.)
•If it is malfunctioning (no tone sounds.)
•To prevent afire or electric shock, never open nor remove the unit case as there are high
voltage components inside the unit.Refer all servicing to your nearest OPUS Technologies
dealer. • Do not insert nor drop metallic objects or flammable materials in the ventilation
slots of the unit's cover, as this may result in fire or electric shock.
•Do not touch aplug during thunder and lightning, as this may result in electric shock.
4

Safety precautions
Caution
While using the unit
•Never plug in nor remove the power supply plug with wet hands, as doing so may cause
electric shock.
•When unplugging the power supply cord, be sure to grasp the power supply plug;never pull
on the cord itself.(Operating the unit with adamaged power supply cord may cause afire or
electric shock.)
•Do not block the ventilation slots in the unit's cover or fan exhaust vent.Doing so may cause
heat to build up inside the unit and result in fire.
•Be sure to follow the instructions below when rack mounting the unit.Failure to do so may
cause afire or personal injury.
•Install the equipment rack on astable, hard floor.Fix it with anchor bolts or take other
arrangements to prevent it from falling down.
•When connecting the unit's power cord to an AC outlet, use the AC outlet with current
capacity allowable to the unit.
When the Unit is in Use
•Do not place heavy objects on the unit as this may cause it to fall or break which may result
in personal injury and/or property damage.In addition, the object itself may fall off and cause
injury and/or damage.
•Do not stand or sit on, nor hang down from the unit as this may cause it to fall down or
drop, resulting in personal injury and/or property damage.
5

Internal window intercom Internal window intercom
Main Features
•The intercom integrates aDigital Signal Processing (DSP) avoiding squeaking and providing
real digital full-duplex .
•Using physical button (press button pad).
•Auto recognition of sound source, control of environment noises and automatic volume
adjustment for apristine reproduction of original sound.
•Three mode scene (quiet, standard, noisy) thanks to asingle button
•Wiring between external and internal intercom over asingle cable, avoiding poor contacts
potentially caused by moving the device on the desk for example.
•Professional metal structure design, adopting hard metal housing to prevent resonance,
purify and naturalize the sound to make it transparent
•Personalized and customized service message playback: “Hello, welcome”, “Thank you. See
you next time”.
•Supporting recording via DVR.
Product introduction
6

Hardware interface instruction
Internal window intercom
【Front view】
①Working indication light: red light indicates offiline status, green :online status
②Microphone pole socket: insert the microphone pole and collect the local
intercom audio
③Loudspeaker: amplify the audio from the external window intercom.
④Recording Button:During conversation ,pressing it to record ,press again to end record.
When recording, the corresponding indicator light will flash red (After intercom part and
external part are connected)
⑤Voice broadcast button/ remote intercom button (left):
•When the intercom button ⑤is on (blue light ON):
•Press voice broadcast button shortly to broadcast "Hello, welcome" message.
•Press long (1 second) to broadcast "Thank you, welcome next time".
•The broadcast button flashes green during broadcasting.
⑥Intercom button:press the button to communicate with the external speaker.End the
conversation by pressing the button again.The intercom button light blue during
conversation.
⑦
【Side view】
①Scene mode regulating switch:3 scene mode adjustment 【noisy(1)、standard(2)、
quiet(3)】,defaulted as standard mode.
7

①Power interface: connect with DC12/1,5A power.
②Network Interface: Only for OP-6502IP intercom
③Analog audio output interface: output analog audio, connect with DVR, IP camera or
DCL20.
④External window intercom speaker.
【External window intercom】
①Loudspeaker/MIC:
Loudspeaker:amplify the local intercom audio;MIC:pick up the local intercom audio;
②Internal window intercom interface
Introduction
Packing list
Window intercom system include the following accessories:
(to be checked upon reception. Please contactyour local distributor if any parts are missing.)
(1)Internal window intercom 1set
【connection wiring】
8

(2)External speaker 1set
(3)Gooseneck microphone (IM-300BY)
(2)Power adapter 1pcs
(3)Wire binder (3*100mm)3pcs
(4)Self adhesive clamp 3 pcs
(5)Wiring connector (3.81-2P) 1pcs
(6)Quick installation manual 1pcs
9

Basic function
Local intercom
After connecting the internal and external window intercom modules, turn on the power.
Press the intercom button of internal window intercom.The internal window intercom can
perform digital full-duplex HD intercom with the external window intercom.Press the
intercom button again to turn off the intercom.
Scene mode adjustment switch:
3scene modes are available:
1. Noisy (to the front)
2. Standard (in the middle)
3.Quiet (to the back)
Standard is the default mode.
Warm prompt
During intercom conversation, press shortly on the voice broadcast button (left button).The
window intercom system will automatically broadcast the welcome prompt "Hello, welcome".
Press longer on the left button to broadcast the goodbye prompt "Thank you, welcome next
time." Press the button again or short press any other buttons to end the prompt during
broadcasting.
Wiring
(1)Connect the power adapter connector to the power interface of central unit
(red colored connector).
(2)Connect the speaker customer side with the intercom central unit
10

11
Recording
Analog recording
The internal window intercom can output analog audio and be connected to aDVR to
automatically record on the hard disk of the recorder.
Table of contents
Other Opus Technologies Intercom System manuals