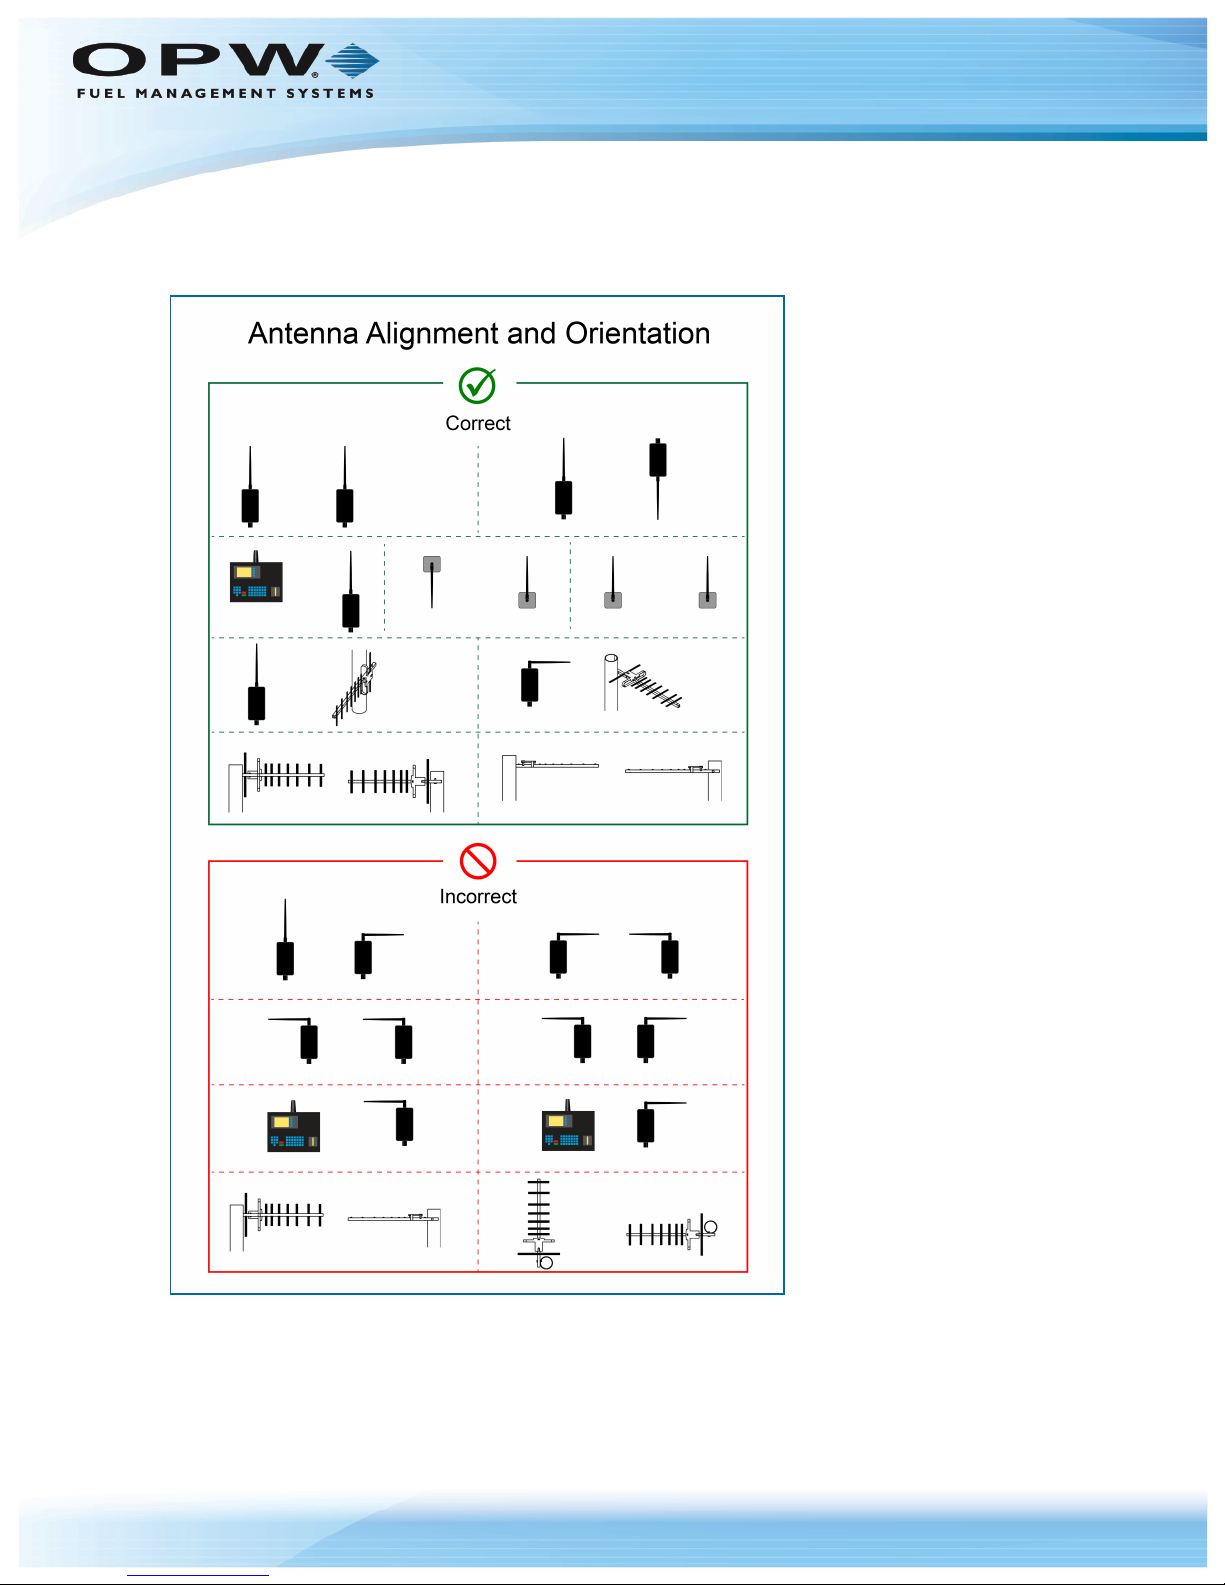
1.1 General Information
The 20-6020 Ethernet Radio pairs are designed to supply a wireless Ethernet connection to the fuel island.
They work up to 40 miles with line-of-site and directional antennas. They will also work non-line-of-site over
shorter distances. Built-in link quality LEDs show the strength of the signal.
Units are setup as a matched pair. 128 bit data encryption ensures the data is secure.
The -EXT version comes with one weatherproof Access Point and one weatherproof Subscriber Unit. The
Access Point is typically installed on a building where the Ethernet connection is located. The Subscriber
Unit is typically installed on a pole at the fuel island where Ethernet access is needed. Each radio is powered
by a wall pack using a PoE injector. Each comes with a mounting bracket and an omni-directional whip
antenna (an optional directional Yagi antenna is also available).
The –INT version comes with one weatherproof Access Point and one board-level Subscriber Unit. The
Access Point is typically installed on a building where the Ethernet connection is located. It is powered by a
wall pack using a PoE injector. It comes with a bracket and an omni-directional whip antenna. (an optional
directional Yagi antenna is also available). The Subscriber Unit is mounted on the FSC3000 circuit board.
The FSC3000 is installed inside the Fuel Island Terminal. A weatherproof omni-directional panel mount
antenna is installed in the top of the Fuel Island Terminal enclosure.
Doc. No.: M00-20-6020 Rev.: 1
Page 6 of 22