Oregon Scientific PDA293 User manual

ENGLISH
FRENCH
GERMAN
ITALIAN
SPANISH
ENGLISH
FRENCH
GERMAN
ITALIAN
SPANISH
PORTUGUESE
PORTUGUESE
• USER’S MANUAL
• MANUEL D’UTILISATION
• BEDIENUNGSANLEITUNG
• MINI-PALMARE
• MANUAL DEL USUARIO
• CARTÃO DE CRÉDITO
COM CONEXÃO
086-00-2264-045
PDA293/6-COVRE 16/12/02, 4:58 pm1
¶´ƒ

ENGLISH
FRENCH
GERMAN
ITALIAN
SPANISH
ENGLISH
FRENCH
GERMAN
ITALIAN
SPANISH
PORTUGUESE
PORTUGUESE
CREDIT CARD SIZE CONNECTED ORGANIZER
USER’S MANUAL
MODEL PDA293
TABLE OF CONTENTS
1. Introduction.............................................................................................................................3
2. Description of Parts................................................................................................................3
3. Description of the Main-Menu-Display Icons.....................................................................4
4. Battery Installation / Replacement.......................................................................................4
5. Initialization............................................................................................................................5
6. Getting Started........................................................................................................................6
The Easy-Touch Stylus..........................................................................................................6
7. System Setup...........................................................................................................................6
Key Tones..............................................................................................................................7
Time Format..........................................................................................................................7
Date Format...........................................................................................................................7
Screen Contrast......................................................................................................................7
Menu Display.........................................................................................................................8
Memory Status......................................................................................................................8
Change Password..................................................................................................................8
Delete Records.......................................................................................................................8
About.....................................................................................................................................9
8. Data Synchronization With PC.............................................................................................9
9. Data backup/restore from Memory key (Optional)............................................................9
10. The Phonebook ......................................................................................................................9
Categories ...........................................................................................................................10
CreateANew Record...........................................................................................................10
Browsing Phonebook Records.............................................................................................11
Viewing or Editing Existing Phonebook Records...............................................................11
Search...................................................................................................................................11
Lock ....................................................................................................................................12
11. Notepad .................................................................................................................................13
Create a New Note..............................................................................................................13
12.1 E-Mail....................................................................................................................................13
Create New E-Mail..............................................................................................................13
Delete E-Mail......................................................................................................................14
Edit E-Mail In The Outbox..................................................................................................14
View E-Mail.........................................................................................................................14
Search..................................................................................................................................14
Reply E-Mail........................................................................................................................14
12.2 Web site Bookmark..............................................................................................................15
Mark a Web Site Address....................................................................................................16
13. Home/World Time................................................................................................................16
Choosing a Home City........................................................................................................16
To Enter or Edit the Home Date and Time..........................................................................16
Choosing World Time City..................................................................................................17
Daily Alarm.........................................................................................................................18
1

ENGLISH
FRENCH
GERMAN
ITALIAN
SPANISH
ENGLISH
FRENCH
GERMAN
ITALIAN
SPANISH
PORTUGUESE
PORTUGUESE
14. Calculator .............................................................................................................................18
Calculations.........................................................................................................................18
Metric Conversions.............................................................................................................19
Currency Conversions.........................................................................................................20
15. Calendar ...............................................................................................................................20
Viewing Past or Future Dates...............................................................................................21
Daily Scheduler...................................................................................................................21
Erasing Past Schedules........................................................................................................22
Anniversary Lists and Holiday Lists...................................................................................22
16. Reset Button..........................................................................................................................23
17. Maintenance.........................................................................................................................23
18. Specifications.........................................................................................................................23
1. INTRODUCTION
Congratulations on your purchase of the Credit card size connected organizer (PDA293).
A multi-function device, this product provides seven primary functions.
Phonebook
Stores individual names, phone numbers, addresses, and other information in twelve text-field categories.
Notepad
Stores message information and important need-to-remember notes.
Web site Bookmark
Stores Web Site addresses and related information.
Home /World Time Clock
A current-date calendar, local-time clock, and world-time clock for 100 major cities around the world.
Calculator
A 10 digit standard numerical calculator with metric and currency exchange including EURO conversions.
Calendar and Daily Scheduler
A daily planner and scheduler that highlights important dates or specific blocks of time.
PC Sync/Memory Key*
Another feature of your PDA293 is its PC connective capabilities. With a cradle, data can be sychronized
with PC; or using Memory Key device to instantly back up your data for retrieval anytime.
* Memory Key device is an optional accessory.
Using touch-screen technology, primary functions can be accessed in one step.
Unlike conventional databanks that utilize extensive keyboards, your PDA293 simplifies data input.
Using an Easy-Touch Stylus, functional sequences are fast and simple to follow.
Large easy-to-read display icons enhance the product’s user friendliness.
As a final note, take time to read this manual. Understanding the many features of your PDA293 should
increase the unit’s usefulness and help to avoid mistakes that may otherwise result in lost data.
2. DESCPRITION OF PARTS
1. Liquid Crystal Display (LCD) and Easy-Touch Display Buttons
• Large Touch-Screen Display with easy-to-read icons
• Touch-sensitive functional buttons
2. [ ] On/Off Button
Activates and deactivates the unit
3. [ ] Escape Button
Exits to the previous display
32

ENGLISH
FRENCH
GERMAN
ITALIAN
SPANISH
ENGLISH
FRENCH
GERMAN
ITALIAN
SPANISH
PORTUGUESE
PORTUGUESE
4. [ ] Page-Up Button
Scrolls upwards through records
5. [ ] Page-Down Button
Scrolls downwards through records
6. [ ] Delete Button
Erases information
7. [ ] Edit Button
Edits records or specific text fields
8. [ ] Enter Button
Confirms an action
9. [ ] Menu Button
Access to Main Menu Display
10.Easy-Touch Stylus
For use when making selections, creating and editing a record.
11. Battery Compartment
Main: Two CR2025 3V lithium cells
12.Reset Button
Resets the unit
13.Cradle
Connect with PC for data synchronization
3. DESCRIPTION OF MAIN MENU DISPLAYICONS
The Main Menu Display has eight (8) icons
Phonebook Notepad
Calculator Calendar
Clock Bookmark
PC Sync/Memory key* System Setup
* Memory key device is an optional accessory.
4. BATTERYINSTALLATION/REPLACEMENT
If the batteries become low in the course of normal use, an alert appears on the organizer screen describing
the low battery condition.
4
1. Turn off the unit.
2. Open one of the battery doors according to the indication on the back of the unit.
3. Take out the old battery.
4. Insert a new CR2025 lithium battery into the battery compartment.
5. Close the battery doors.
6. Repeat step 2 to step 5 to replace the other battery.
7. Reset the unit if necessary.
CAUTION:
- Make sure to TURN OFF the unit before battery replacement.
- Replace the batteries one by one to avoid data loss (such as phonebook and calendar).
Read “To retain all records and entries after replacing batteries or pressing reset button” inside chapter
INITIALIZATION at once after battery replacement.
5. INITIALIZATION
After battery installation or pressing the reset button (by tip of an unfolded paper clip), the following
initialization screen will be displayed.
CAUTION:
- Make sure to TURN OFF the unit before bat tery replacement or pressing reset button.
To retain all records and entries after replacing batteries or pressing reset button:
1. Use the Easy-Touch Stylus to press [No]. It tells your organizer to start over again .All records and
entries stored in your organizer are retained.
5

ENGLISH
FRENCH
GERMAN
ITALIAN
SPANISH
ENGLISH
FRENCH
GERMAN
ITALIAN
SPANISH
PORTUGUESE
PORTUGUESE
2. After initialization, user will be asked to set the date and time.
To reset the system from data and program corruption:
CAUTION: All records and entries stored in your organizer are erased. Never press [Yes] to reset
the system unless pressing [No] did not solve your problem before.
1. Under normal circumstances, you will not have to press [Yes] to reset the system. On rare occasions,
however, your organizer may no longer respond to the touch screen and program function. In this case,
you need to press reset button and then tap [Yes] to get your organizer to running again.
Note : After resetting the system, perform a PC sync operation to restore your data previously
synchronized with your computer next PC sync.
2. After restart, user will be asked to set the date and time.
6. GETTING STARTED
To turn on the unit:
Use the Easy-Touch Stylus to touch [ ] On / Off.
To enter the Main Menu Display (at any time):
Touch [ ] Menu.
To select a particular function:
Touch your desired function on the Main Menu Display.
To exit a function:
Touch [ ]
To turn off the unit:
Touch [ ] On / Off.
Note: If there is no operation for about 3 minutes, the unit will turn off automatically.
7. SYSTEM SETUP
Initially take a few minutes to personalize the system. Properly setting up the system before use will
improve the functionality. The System Setup menu have 9 components: Key Tone, Time Format, Date
Format, Screen Contrast, Menu Display, Memony Status, Change Password, Delete Records and About.
To access the System Setup menu:
1. In the Main Menu Display, touch [ ] , the System Setup menu will be display.
6
2. Touch the desired item to highlight it or touch [ ] or [ ] to scroll upwards or downwards.
3. Touch the highlighted item again or [ ] Enter to access the function.
KEY TONES
When the key tone function is activated, a confirmation beep sound will be output as the Easy-Touch
Stylus touches the screen.
To activate/deactivate the Key Tone:
1. Enter System Setup and select the [Key Tone].
2. Touch [on] or [off] to activate or deactivate the key tone.
TIME FORMAT
User can select 12 hour or 24 hour format for the Home/World time clock.
To select the hour display format
1. Enter the System Setup menu and select ‘Time Format’
2. Select the desired format by touching on the corresponding position.
3. To confirm the selection, touch the corresponding position again or touch [ ] Enter.
4. To abort the selection, touch [ ] Escape.
DATE FORMAT
User can select different date display formats and separators.
Three date display formats: DD/MM/YEAR, MM/DD/YEAR and YEAR/MM/DD. Four separators: ‘/’,
‘-’, ‘.’ and ‘,’.
To select the date display format and separator
1. Enter the System Setup menu and select ‘Date Format’.
2. Touch the current date format or separator position, a pop up menu with the corresponding items will
be displayed.
3. Select the desired format by touching on the corresponding position.
4. To confirm the selection, touch the corresponding position again or touch [ ] Enter.
5. To abort the selection, touch [ ] Escape.
6. Touch ‘OK’ to save the settings or touch ‘CANCEL’ to abort the selection.
SCREEN CONTRAST
Select “Screen Contrast” in the System Setup menu to adjust the contrast of the display.
7

ENGLISH
FRENCH
GERMAN
ITALIAN
SPANISH
ENGLISH
FRENCH
GERMAN
ITALIAN
SPANISH
PORTUGUESE
PORTUGUESE
Direct touch on the contrast bar or touch the left/right icon to alter the contrast level.
Touch [ ] Enter to confirm or
Touch [ ] Escape to cancel the operation.
MEMU DISPLAY
The Main Menu Display can be shown in icon or text format.
To select your desired format:
1. Touch the desired item to highlight it or touch [ ] or [ ] to scroll upwards or downwards.
2. Touch the highlighted item again or [ ] Enter to access the function.
MEMORY STATUS
Inside the memory status, you can view the numbers of entries of each individual application and the
percentage of free memory space.
CHANGE PASSWORD
Your organizer comes with a Security application so that unauthorized users cannot view the entries you
wish to protect. A password can be any combination of numbers or letters to a total of eight characters.
Once the password is saved, user will be prompted to enter the password before accessing locked
information.
IMPORTANT
Do not forget a password. If a password is lost or forgotten, locked information can not be accessed.
To prevent losing information, memorize or store a password in safe place.
CAUTION: Pressing reset button and tap [Yes] on the screen deletes all records and password in
your organizer; however, you can restore all synchronized data at the next PC sync operation.
To change or input a new password:
1. Enter System Setup and select [Change Password].
2. User will be asked to input the Old Password. (If no password is currently in use, user will be asked to
input a New Password instead of the Old Password).
Note: For more information about the usage of the on screen keyboard, please refer to the section Create
A New Record located in the Phonebook section of this manual.
3. Touch [ ] Enter to confirm, user will then be asked to input the password again for re-confirmation
purpose.
DELETE RECORDS
User can delete all the records in a selected category.
8
To delete all the records of a category:
1. Enter the System Setup menu and select [Delete Records].
2. Apop up menu will be displayed with six items: Phonebook, Notepad, Web site, Schedule,
Anniversary and Holiday.
3. Select the desired category by double click the item or [ ] Enter position.
4. A re-confirmation screen will be displayed, select ‘YES’ to confirm the deletion.
5. To cancel the deletion, select ‘NO’ or [ ] Escape.
ABOUT
It shows you the system version number and total memory size.
8. DATA SYNCHRONIZATION WITH PC
This unit is designed to communicate with IBM compatible personal computers (PC). Data can be entered
on the PC or on the PDA293 unit. After the data synchronization process, both the data in PC and the
PDA293 unit will be updated automatically.
To synchronize data with a PC:
1. Connect the cradle unit to PC’s serial port through a 9 or 25 pin connector (make sure 3 AAA size
batteries are installed in the cradle).
2. Remove the rubber connector at the left side of the PDA293 unit.
(User can place the rubber connector on the cradle as indicated)
3. Plug the unit in the cradle. The LED on the cradle will be turned on when the connection between the
cradle and PDA293 unit is correct. Otherwise, please check the connection or batteries again.
4. In the Main Menu Display, touch [ ] PC Sync/Memory key icon.
5. Then select [ ] PC sync.
6. Select ‘YES’ and touch [ ] Enter or touch ‘YES’ two times.
7. The message “In Progress...” will be displayed.
8. Select the ‘Easy-Sync’ icon on the PC.
9. If error message is displayed, please check the connection of the cable and try again.
10.Touch the highlighted bar or [ ] Enter to confirm the selection.
Remark: User is needed to setup the ‘Easy-Sync’ software on the PC prior to the data synchronization.
9. DATA SYNCRONIZATION WITH MEMORY KEY(OPTIONAL)
The Memory Key is an optional accessory to instantly back up your data for retrieval anytime. Read the
instruction manual of the Memory Key for detail.
10. PHONEBOOK [ ]
The phonebook is where names, telephone numbers, addresses, and other pertinent information related to
an individual is kept. A sequence of steps will direct the user to input the appropriate
information in a particular field.
9

ENGLISH
FRENCH
GERMAN
ITALIAN
SPANISH
ENGLISH
FRENCH
GERMAN
ITALIAN
SPANISH
PORTUGUESE
PORTUGUESE
To enter Phonebook Mode:
1. In the Main Menu Display, touch [ ] Phonebook
There are 4 function icons on the display.
1: [ ] Category 2: [ ] Lock
3: [ ] New Record 4: [ ] Search
To enter one of the phonebook’s four (4) subsections:
1. Touch the appropriate icon.
[] CATEGORIES
Phonebook data is divided into three categories: Business, Friends, Others. In addition, an special
category ‘All’ is provided to display all the data within the categories.
Note: The default category is ‘All’after system reset.
To select a subdirectory:
1. Enter Phonebook Display and touch [ ] Category to view a pop-up menu with the name and icon
of the four categories.
2. Touch one of the four categories to highlight it or touch [ ] or [ ] to move upwards or downwards
through the pop-up menu.
3. Touch the highlighted category again or touch [ ] Enter to accept the choice.
If there is no record for the selected category, the message ‘No Record’ will be displayed.
[ ] CREATE A NEW RECORD
The Phonebook contains twelve text fields for which information can be stored. Input information into
desired fields.
The fields are: Name, Telephone Number, HomeAddress, Company Name, Company Telephone Number,
Company Address, Company Fax Number, Email Address, Mobile Phone Number, Job Title, Birthday,
and Remark.
To insert a new record:
1. Touch [ ] to start editing a new record.
10
Note: There are three keyboard maps, each with a specific use.
Touch [ABC] or [abc] to toggle between small and capital letters.
Touch [123] before entering numerical digits or symbols.
Touch [ä] or [Ä] to input European accent characters.
2. Touch the desired letters on the keyboard.
3. Touch [ ] Enter to access Telephone Number Edit field.
4. Input the telephone number or touch [ ] Enter to carry on to the next field.
5. Carry on, in the same manner inputting information into the remaining fields.
6. In the Remark field, which is the last field of the record, input information specific to that person.
7. When finished, touch [ ] Enter.
8. User will be prompted to security lock function, select ‘YES’ to password protect the record.
Note: It is not necessary to work through all of the fields. Enter the desired information and then touch
[ ] Escape to enter the Phonebook display.
BROWSING PHONEBOOK RECORDS
After inputting or editing a record, the user can browse the different fields.
To browse within a record:
1. Touch [ ]Page Up or [ ]Page Down to scroll through the fields within a record.
VIEWING OR EDITING EXISTING PHONEBOOK RECORDS
Records in the Phonebook can be displayed or edited at any time.
Note: The system categorizes records as subgroups that are either protected or unprotected. When first
entering Phonebook, by default, the system will display the unprotected records.
To display locked records:
Touch [ ] Lock and enter the password.
To view or edit a Phonebook record:
1. Touch [ ]Phonebook to enter the phonebook list.
2. Touch [ ] Page Up or [ ]Page Down to scroll the list.
3. Touch the desired item to highlight it.
4. Touch the highlighted item or [ ] Enter to browse the record’s fields.
5. Touch [ ] Page Up or [ ] Page Down to scroll through the fields.
6. Touch [ ] Edit and follow the procedure as outlined in the section CREATE A NEW RECORD.
[ ] SEARCH
A record can be identified and located by inputting a few key words/characters of the record.
To search for a record with only a few key words/characters:
1. Touch [ ] Phonebook.
2. Select the desired category or the ‘All’ category.
3. Touch [ ] Search.
11

ENGLISH
FRENCH
GERMAN
ITALIAN
SPANISH
ENGLISH
FRENCH
GERMAN
ITALIAN
SPANISH
PORTUGUESE
PORTUGUESE
4. Input the key word.
5. Touch [ ] Enter to start the search.
6. The result(s) will be displayed.
7. Touch [ ] Escape to exit.
Note about editing a record in [ ] Search:
1. Locate the record by highlighting it.
2. Touch [ ] Enter and follow the procedure as outlined in the section, VIEWING OR EDITING
EXISTING PHONEBOOK RECORDS.
[ ] LOCK
Information can be classified as protected or unprotected.
Information that has been protected requires a password before it can be accessed.
For information and instructions on how to create a password refer to SECURITYACCESS in the section
SYSTEM SETUP.
Note: The system categorizes records as subgroups that are either protected or unprotected. When first
entering Phonebook, by default, the system will display the unprotected records.
To display locked records:
Touch [ ] Lock and enter the password.
To protect a record:
1. In Phonebook Display, locate and highlight the record that is to be protected.
2. Touch the record again or touch [ ] Enter.
3. Touch [ ] Lock.
4. If [on] is not highlighted, touch [on] to highlight it.
5. Touch [ ] Enter.
The record is now locked and will require a password to access the information.
To unprotect information:
1. In Phonebook Display, access the locked record by entering the password.
2. Locate and highlight it.
3. Touch the record again or touch [ ] Enter.
4. Touch [ ] Lock.
5. Touch [off] to unlock the information.
6. Touch [ ] Enter or touch [OFF] again.
The record is now unlocked and no password is required to access the information.
To select a protected record:
1. Touch [ ] lock to access a protected records list.
2. Input the password.
3. Locate the record to highlight it.
4. Touch the highlighted item or [ ] Enter.
Note: If the password has never been setup, refer to SYSTEM SETUP for information on setting or
changing a password.
The password entered must correspond exactly to the password (case sensitive) as it was entered in
System Setup.
To change an entry from the protected category to the unprotected category, the user should:
1. In Phonebook Display access the locked record by entering the password.
2. Touch [ ] Lock and follow the procedure as listed above.
12
11. NOTEPAD [ ]
Important information can be kept as a note or message in Notepad Mode.
To access Notepad Mode:
1. In the Main Menu Display, touch [ ] Notepad.
Note: Lock, Create a new record, and Search functions are similar to those mentioned at the Phonebook
section.
CREATE A NEW NOTE RECORD
Information or a note can be entered and stored as a note in Notepad.
To insert a new note:
1. Touch [ ] Notepad to enter Notepad Mode.
2. Touch [ ] Create to enter the title field.
3. Input a title for the note. A title can be up to 20 characters.
4. Touch [ ] Enter to confirm and to enter the note field.
5. Input the note or message.
6. Touch [ ] Enter to browse the information.
7. Touch [ ] Escape.
8. Touch Security [ON] to protect the information or [OFF] to keep information unprotected.
The selection becomes highlighted.
9. Touch [ ] Enter to accept.
Note: To edit the record, touch [ ] Edit after browsing the record, and follow the procedure as outlined
in the section CREATING ANEW RECORD.
12.1 E-MAIL [ ]
To access your e-mail program, first tap the [ ] Web icon on the main menu and then the
[ ] e-mail icon. The screen will display the three folders Inbox, Outbox and Sent with the number of
messages in each folder.
You can use the arrows on the right of the screen to scroll between the folders and then tap the folder you
want to open. Or simply tap the folder twice to open it.
[ ] CREATE NEW E-MAIL
1. To send an e-mail, open the Outbox and tap the [ ] at the bottom right of the screen.
2. The screen prompts you to enter the recipient [ ].
13

ENGLISH
FRENCH
GERMAN
ITALIAN
SPANISH
ENGLISH
FRENCH
GERMAN
ITALIAN
SPANISH
PORTUGUESE
PORTUGUESE
3. Use the keyboard at the bottom of the screen to input the e-mail address of the person you want
to write to.
4. You can input a maximum of 80 characters.
5. Then tap [ ] ENTER from the functions on the left side of the PDA.
6. The screen prompts you to enter any recipients you wish to send copies of the e-mail to[ ].
7. The Cc field can contain a maximum of 80 characters.
8. Tap [ ] ENTER.
9. The screen prompts you to enter the subject [ ].
10.The subject field can contain a maximum of 40 characters.
11. Tap [ ] ENTER.
12.The screen prompts you to enter your message [ ].
13.The text body can contain a maximum of 243 characters.
14.Tap [ ] ENTER. The record will be saved to the Outbox folder.
Note: While you are writing your e-mail, you can exit by tapping [ ] Escape. Your e-mail will
be saved as a record in the Outbox, so that you can return to it later using the Edit function.
[ ] DELETE E-MAIL
1. You can delete a message in the folders Inbox, Outbox and Sent by accessing it and then tap
ping the [ ] DEL key.
2. If you delete an e-mail message in your PDA e-mail application, your next PC Sync operation
will also delete the e-mail in your e-mail application on your PC. So you never have to delete the
same e-mail twice.
[ ] EDIT E-MAILIN THE OUTBOX
1. You can edit a message in the Outbox by accessing it and then tapping the [ ] EDIT key.
2. The screen will take you through all the steps outlined above, and you can edit any part using the
keyboard.
3. The PDA then asks you whether you want to save the record to the Outbox folder. Tap yes or no
as you require.
Note: There are no functions to edit or create e-mails in the Inbox and Sent folders.
VIEW E-MAIL
1. To read your messages in any of the folders, simply tap on the message.
2. In the Inbox, unread messages are highlighted in bold font. Messages in normal font have
already been read. If you read a message in your PDA e-mail application and leave it in your
Inbox, your next PC Sync operation will mark it as read in your e-mail application on your PC.
3. You can go back to the previous screen at any time by tapping the ESC function key on the left of
the PDA.
Note: E-mails with long message texts are truncated when downloaded from a PC. This reduces the
time it takes to synchronise the PDA293 and the e-mail application.
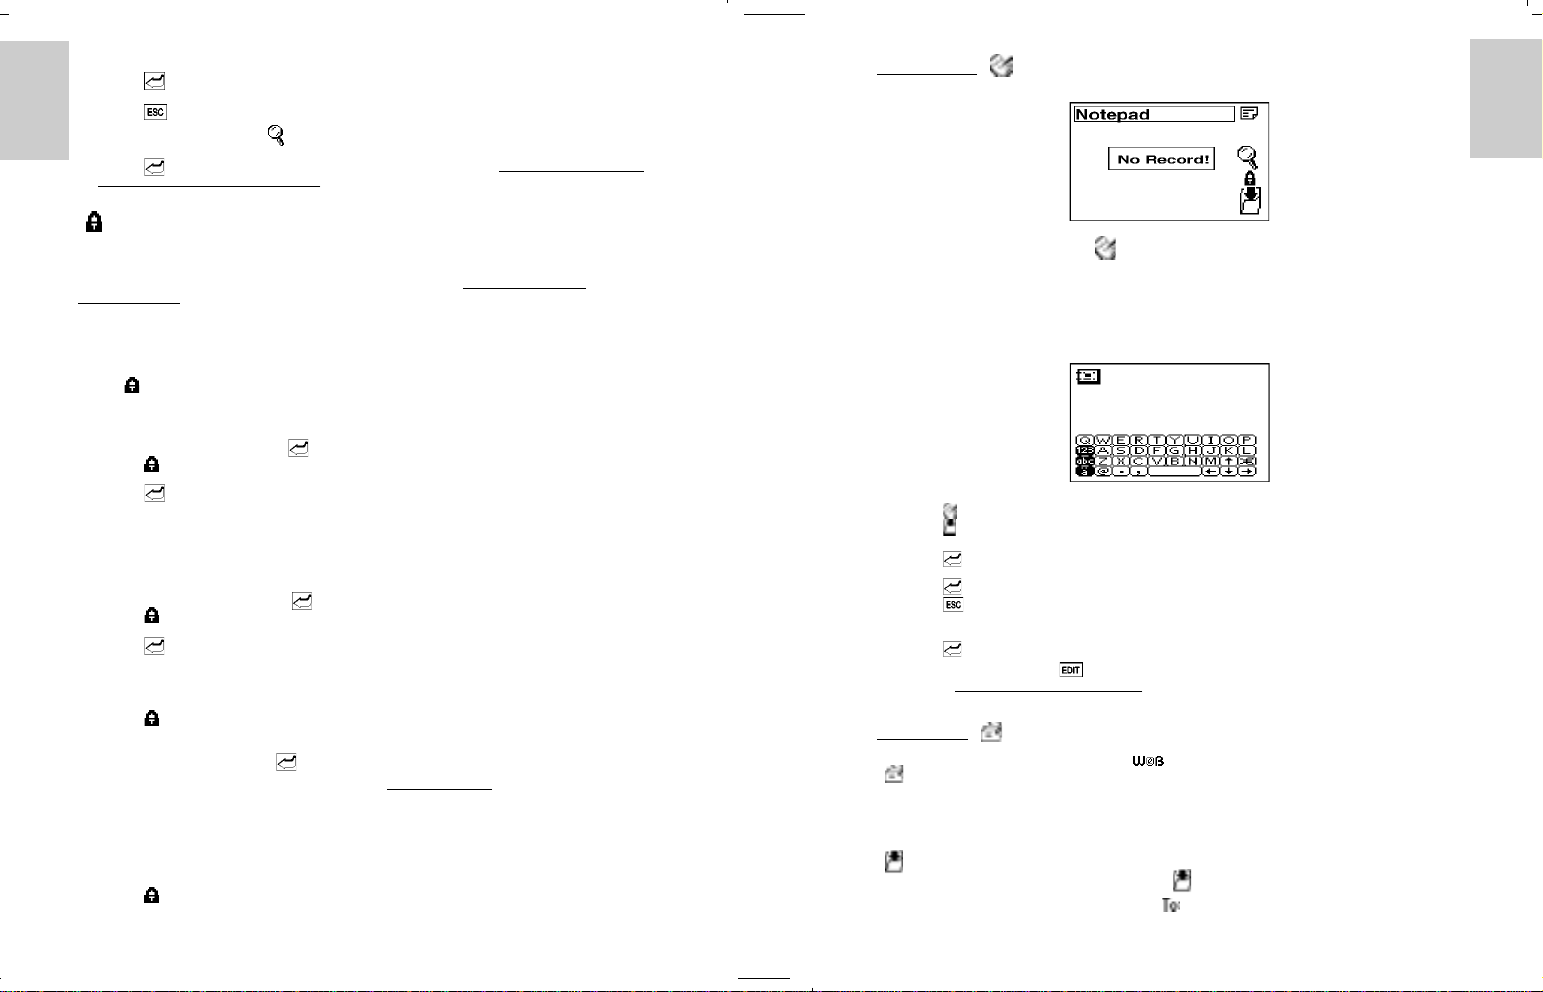
[ ] SEARCH
To search for a message in a folder, tap the search icon [ ]. The screen prompts you to enter a keyword
or an index using the keyboard.
REPLY E-MAIL -[ ] Reply to sender or [ ] Reply All
1. To reply to a message in the Inbox, open the message by tapping on it and then tap [ ] Reply
to sender or [ ] Reply All on the right of the screen.
2. Tap [ ] to send a reply message to the sender.
14
3. The screen will then lead you through the procedure for sending e-mails outlined above, but will
have already filled in the recipient [ ] and the subject [ ] with “Re:”. You have to enter
the other recipients you wish to send copies of the e-mail to in the Cc field [ ]
4. Tap on the [ ] to send a reply message to all addresses.
5. Similarly, the screen will then lead you through the procedure for replying to e-mails outlined
above, but will have already filled in the recipient [ ], any other recipient [ ] and the
subject [ ] with “Re:”.
6. The Cc field can contain a maximum of 80 characters. When there are more than 80 characters,
the excess e-mail addresses will be cut off.
Note: While you are writing your e-mail, you can exit by tapping [ ] Escape. Your e-mail will be
saved as a record in the Outbox, so that you can return to it later using the Edit function.
Reply e-mail address table: -
Inbox e-mail Reply to sender Inbox e-mail Reply to all addresses
From From
To To - Sender’s “From” address To To - Sender’s “From” address
already filled in already filled in
Cc Cc - Enter manually Cc Cc - “To” and “Cc” addresses
already filled in
Subject Subject - Added with “Re:” Subject Subject - Added with “Re:”
Notes on PC synchronisation with PDA293
• In your e-mail application on your PC, it is a good practice to regularly file or backup your
e-mails from your Inbox, Outbox and Sent to other folders or files. This can reduce the duration
of synchronization and save the memory for e-mail in the PDA.
• Please check the on-line help file of the “Intellisync®for PDA293” software for the PIMs that are
supported with the e-mail function and that can be synchronised using Intellisync®.
• E-mails can be synchronised using Intellisync®only, not with Easy-sync.
• The Inbox and Outbox folders will synchronise by default, while the Sent folder will only
synchronise if that is specified by the user manually.
• If you have deleted an e-mail on your PDA, this e-mail will also be deleted from your PC after
synchronisation.
• Mail in your PDA Outbox does not contain a “From” field. Intellisync®will add the default user
address to this field after synchronisation.
• It is not possible to download attachments from your PC to your PDA. Intellisync®will remove
the attachments during synchronisation.
• When downloading e-mail to your PDA293, e-mails with long message texts are truncated as
follows:
- “To” : 80 characters
- “Cc” : 80 characters
- “Subject” : 40 characters
- “Body” : 243 characters
• When there are more than 80 characters in the “To” and “Cc” fields, the excess e-mail addresses
will be cut off.
12.2 WEB SITE BOOKMARK [ ]
The bookmark feature is ideal for storing Web Site addresses and related information about a Web Site.
To access Bookmark:
1. In the Main Menu Display, touch [ ] Bookmark.
Note: Lock, Create a new record, and Search functions are similar to those mentioned at the Phonebook
section.
15

ENGLISH
FRENCH
GERMAN
ITALIAN
SPANISH
ENGLISH
FRENCH
GERMAN
ITALIAN
SPANISH
PORTUGUESE
PORTUGUESE
To enter the current time:
1. Touch the Time icon to edit the time. Work from left to right along the time settings or select a specific
digit to edit.
2. For 12-hour format, touch the ‘AM’ or ‘PM’ icon to toggle a.m. or p.m.
3. Enter the time by selecting the appropriate time digits.
4. Touch [ ] Enter when finished or [ ] Escape to cancel the setting.
CHOOSING WORLD TIME CITY
1. Select [ ] World Time.
2. Choose the desired World time city as the same procedure stated in CHOOSING AHOME CITY.
Wold Time City List
17
MARK A WEB SITE ADDRESS
To mark a Web Site address:
1. Touch [ ] Bookmark.
2. Touch [ ] Create to enter the address field.
3. Input the address for the web site.
4. Touch [ ] Enter to confirm and to enter the description.
5. Input a description or note pertaining to the Web Site.
6. Touch [ ] Enter to confirm and to enter the Web Site type.
7. Input the Web Site type.
8. Touch [ ] Enter to confirm and view the information.
9. Touch [ ] Escape to exit.
10.Touch Security [ON] to protect the information or [OFF] to keep information unprotected.
11. Touch [ ] Enter to accept.
Note: To edit the record, press [ ] EDIT after browsing the record, and follow the procedure as
outlined above.
13. HOME/WORLD TIME [ ]
The Home time display has an analog clock icon with a moving hour, minute and second hand.
The current Home/World time city is displayed at the first line of the screen.
To access Home/World Time
1. In the Main Menu Display, touch [ ] Clock.
CHOOSING HOME CITY
Determine Home City and then set the current local time and date for that location.
To enter the current time of a home city:
1. In Home/World Time Display, touch the icons to toggle between the Home and World time.
2. Select [ ] Home Time.
3. Touch the current city (at the 1st line of screen) to display a pop-up menu that contains an index of 100
world cities.
4. Touch [ ] Page Up or [ ] Page Down to display a new page.
5. Find the appropriate city from the list of 100 cities.
6. Highlight the appropriate city.
7. Touch the highlighted selection or [ ] Enter to accept.
8. Touch [ ] Daylight Saving icon to activate/deactivate the daylight saving function.
TO ENTER OR EDIT THE HOME DATE AND TIME
Once a Local City has been selected, the current date and time can be entered.
To enter the current date:
1. Touch the Date icon to edit the current date. Work from left to right along the date settings or select a
specific character to edit.
2. Touch [ ] Enter when finished or [ ] Escape to cancel the setting.
16

ENGLISH
FRENCH
GERMAN
ITALIAN
SPANISH
ENGLISH
FRENCH
GERMAN
ITALIAN
SPANISH
PORTUGUESE
PORTUGUESE
DAILYALARM
A daily alarm can be set to activate at a given time.
To set the daily alarm:
1. Touch the [ ]Alarm icon in the Home / World Time display.
2. Touch [On] to activate the alarm and set the desired alarm time.
3. Enter the desired alarm time. Work from left to right along the time settings.
4. Touch [ ] Enter when finished or [ ] Escape to cancel the setting.
14. CALCULATOR [ ]
The calculator can perform standard numerical calculations, metric conversions, and currency exchange
including EURO conversions.
To access Calculator Mode:
In the Main Menu Display, touch [ ] Calculator.
CALCULATIONS
Like many standard calculators, this device can make calculations by adding, subtracting, multiplying,
and dividing. The calculator has a memory function and square root calculations.
To enter the Calculator Display:
Touch [ ] Calculator on the top bar to enter the Calculator Display.
To solve arithmetic calculations:
1. Touch the numerical key map to enter the digits.
2. Touch [=] to do the calculations.
[ ] METRIC CONVERSION
There are 5 categories of units that metric / imperial conversions can be made : Length, Area, Weight,
Temperature and Volume.
To convert measurements between Metric and Imperial units:
1. In Calculator Mode touch [ ] Metric Conversion on the top bar to enter the Metric Conversion
Display.
2. Touch the category list to select and highlight the desired units for conversion or use the [ ] or
[] to move upwards or downwards to select the desired conversion.
Note: To initiate a conversion, the user needs to first specify the original unit and the target unit to be
calculated.
3. Touch the line starting with [>] and select the original unit of measurement.
4. Touch the line starting with [<] and select the target unit of measurement.
5. Input the value to be converted.
6. Touch [=] to obtain the conversion.
To reverse a conversion:
1. Touch [ ] icon to revert the conversion.
Metric Conversion Factors Table
18 19

ENGLISH
FRENCH
GERMAN
ITALIAN
SPANISH
ENGLISH
FRENCH
GERMAN
ITALIAN
SPANISH
PORTUGUESE
PORTUGUESE
[ ] CURRENCY CONVERSION
The unit provides 19 currencies (include 12 Euro fixed rate) plus 4 user editable currencies from which
currency conversions can be made.
To set a currency rate:
1. Touch [ ] Currency Conversion (located on the first line of display) to enter Currency Conversion
Display.
2. Touch [Rate] to edit the currency rate.
To convert a given amount of currency to another currency:
1. Touch [ ]Currency Conversion on the first line of display to enter the Currency Conversion Display.
2. Touch the line starting with [>] and select the source currency. Use the [ ] or [ ] to move upwards
or downwards to select the desired currency.
3. Touch the line starting with [<] to select the target currency.
Again, use the [ ] or [ ] to move up or down to select the desired currency.
4. Input the value to be converted.
5. Touch [=] to get the conversion result.
15. CALENDAR [ ]
Use the Calendar in the same way that a day timer or scheduler is used to organize and manage individual
schedules.
To access Calendar Mode:
1. In the Main Menu Display, touch [ ] Calendar.
The Calendar Display has 4 function icons.
1: [ ] Schedule 2: [ ] Delete Past Schedule record
3: [ ] Anniversary 4: [ ] Holiday Reminder
VIEWING PAST OR FUTURE DATES
Past and future date can be viewed in a variety of ways.
To view a past or future month in the current year:
1. Enter [ ] Calendar Mode.
2. Touch [ ] Page Up to select the previous calendar months.
3. Touch [ ] Page Down to select future calendar months.
An alternate method of viewing past or future date:
1. Touch the month and year position on the screen.
2. Input the date.
3. Touch [ ] Enter to confirm.
[ ] DAILY SCHEDULER
Use the Daily Scheduler to manage various activities during a given day, for example, schedule
appointments or indicate an important time.
To input Daily Schedules:
1. In Calendar Mode, locate the desired day.
2. Touch the day or [ ] Daily Schedule.
Note: If no schedules have been made for that day, a“No Record” message will be displayed .
3. Touch the time bar at the top of the display to enter the time duration of the appointment. Touch the
arrows at each end to locate the appropriate time.
4. Touch the appropriate position (1 hour duration) to identify the beginning of the time period.
20 21

ENGLISH
FRENCH
GERMAN
ITALIAN
SPANISH
ENGLISH
FRENCH
GERMAN
ITALIAN
SPANISH
PORTUGUESE
PORTUGUESE
5. Touch the appropriate finishing position to identify the end of the time period.
6. Input a title for the time period.
7. Touch [ ] Enter.
8. Touch [off] for no alarm and [on] if an alarm is required to sound at the beginning of the time period.
9. Touch [ ] Enter, then followed by [ ] Escape to return to the Daily Schedule Display.
To view a schedule:
1. Touch the desired date in Daily Schedule Display.
Note: If schedules have been selected for a particular day, the date on the calendar will be indicated with
<S> symbol (at the bottom of display). A holiday is indicated with <H> and anniversary dates are
indicated with <A>.
2. Touch the scheduled time that needs to be viewed.
3. Touch [ ] Enter.
[ ] ERASING PAST SCHEDULES
Pasted schedule records can be erased in one step.
To erase pasted schedules:
1. In Calendar Display, press [ ] Erasing Past Schedules.
2. Press [Yes] to erase past schedules and [No] to keep past schedules.
3. Press [ ] Enter to process.
[ ] ANNIVERSARY LISTS AND [ ] HOLIDAY LISTS
Special dates such as anniversaries, holidays, or other days of importance can be entered into the Data
Bank.
To enter a special date:
1. Touch [ ] Anniversary to enter the Anniversary Display, or [ ] Holiday to enter the Holiday
Display.
2. Touch [ ]Create new record and enter the day and month of the special date.
3. Input a title for the special occasion.
4. Touch [ ] Enter.
5. Input a note or information related to the occasion.
6. Touch [ ] Enter to view the information followed by [ ] Escape to return to the special date list.
Note: Once a special date has been selected, the date will be indicated on the calendar.
16. RESET BUTTON
The RESET button is located at the back of the unit.
To reset the unit, place a blunt point in the RESET hole at the back of the unit and press once.
CAUTION: To avoid data loss, always read the INITIALIZATION chapter first before you press
the reset button.
17. MAINTENANCE
When handled properly, this unit is engineered to give you years of satisfactory service. Here are a few
product care instructions:
• Do not immerse the unit in water. If the unit comes in contact with water, dry it immediately with a soft
lint-free cloth.
• Do not clean the unit with abrasive or corrosive materials. Abrasive cleaning agents may scratch the
plastic parts and corrode the electronic circuit.
• Do not subject the unit to excessive: force, shock, dust, temperature, or humidity.
Such treatment may result in malfunction, a shorter electronic life span, damaged batteries, or distorted
parts.
• Do not tamper with the unit’s internal components. Doing so will terminate the unit’s warranty and
may cause damage. The unit contains no user-serviceable parts.
• Only use new batteries as specified in this instruction manual. Do not mix new and old batteries as the
old batteries may leak.
18. SPECIFICATIONS
PDA293 unit
Size: 54.5 x 84.5 x 6.8 mm
Weight: 45g (including batteries)
LCD Dimensions: 33mm x 51mm
Battery Type: Two CR2025 Lithium cells
PDA293 cradle
Size: 60 x 98 x 15.5 mm
Weight: 128g (including batteries)
Battery Type: Three AAA size batteries
22 23
Table of contents
Other Oregon Scientific Organizer manuals