Return Photo
Video Document
album/video
Speed Control:
30%/60%/100% Altitude Hold
Gravity Sensor Control Enable Flight
More Settings 360°Flips&Rolls
One-key Start
One-key Landing
Camera Reverse VR Display
Headless Mode One-key Reset
Emergency Stop Flight Planning
Left JoystickRight Joystick
Left/Right Rotation
Fine-tuning
Left/Right Sideward
Fine-tuning
Forward/Backward
Fine-tuning
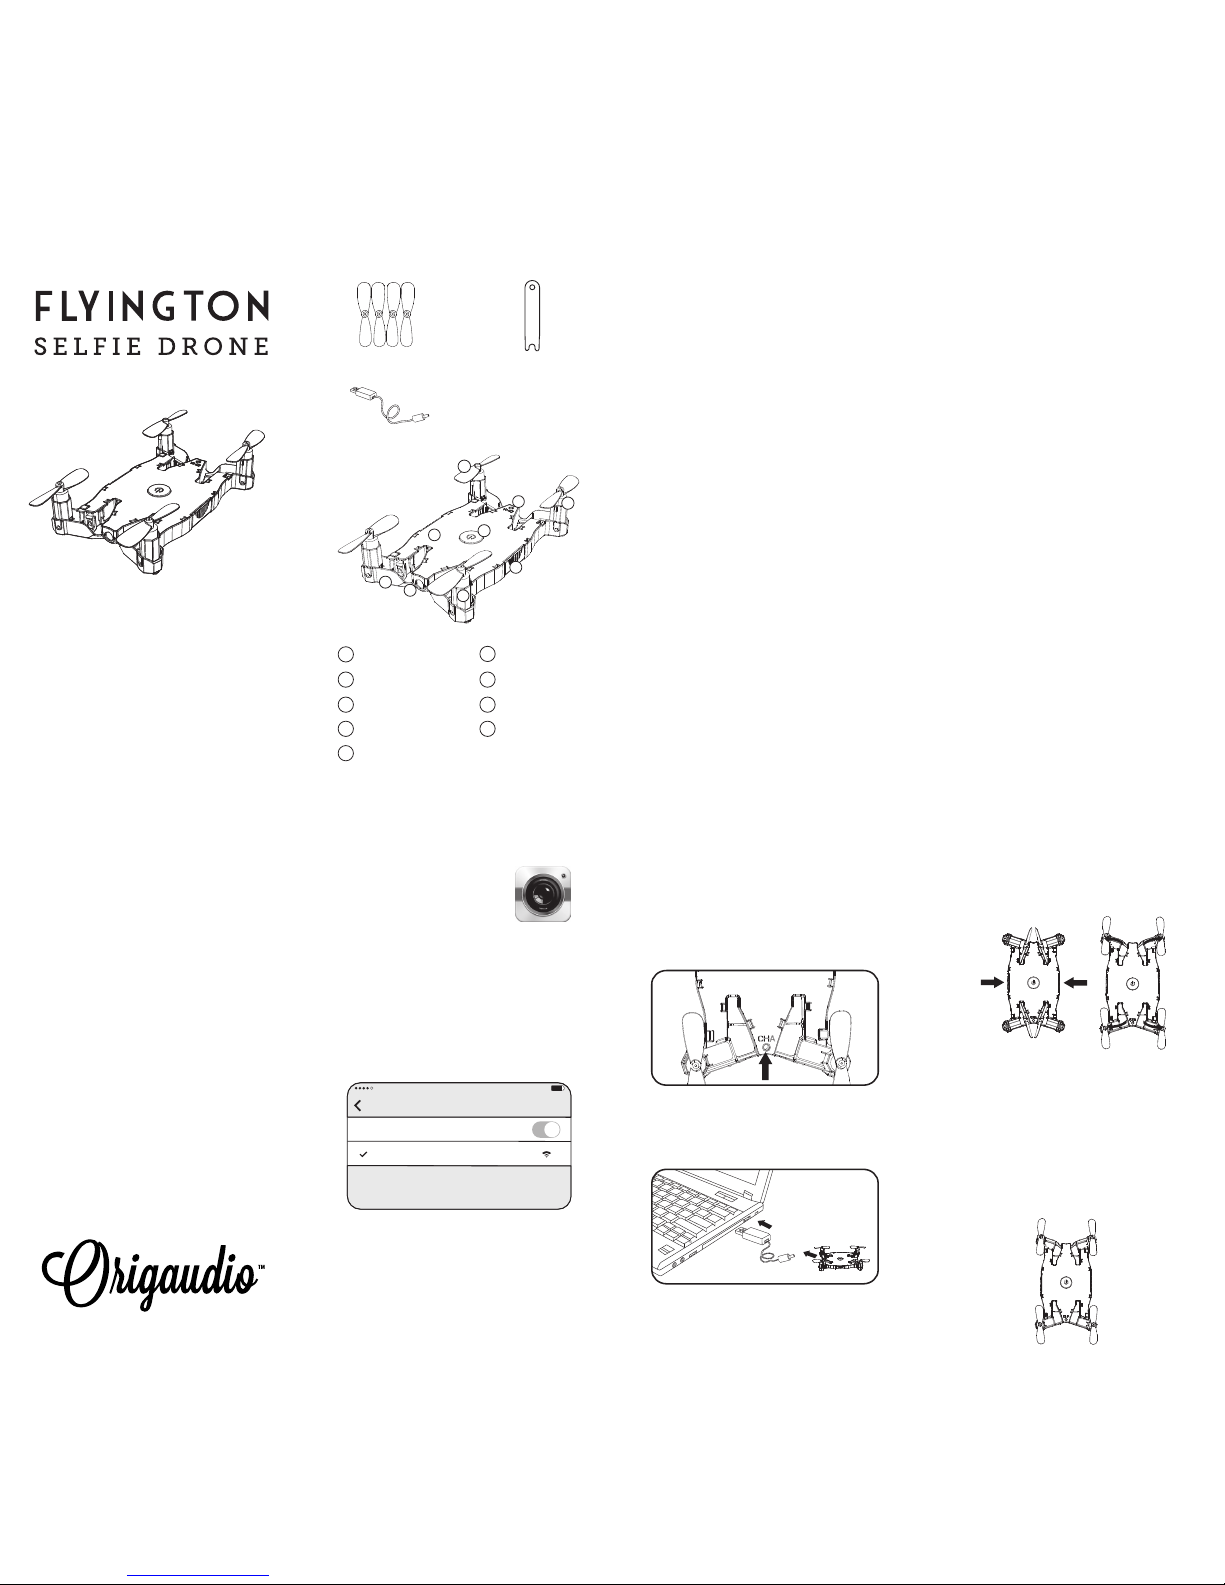
1. After connecting to the app, press the
On/Off button to display the steering
wheel controls and enable ight.
2. Activate Altitude Hold to pair remote
control frequency and hover the drone at a
stable height. The altitude will be held at the
height of which you release the left joystick
in ascent/descent action.
Use the LEFT joystick to control the ight
altitude and rotate left/right.
Ascent
Descent
Turn Right
Turn Left
Backward
Forward
Right Side
Flight
Left Side
Flight
When the drone is more than 10 feet high,
click the 360 Flips & Rolls button (9) and
pull the right joystick to any direction to
make the drone ip/roll that direction.
Right Flips
and Rolls
Left Flips
and Rolls
Front Flips
and Rolls
Back Flips
and Rolls
1. Return to Previous Screen
2. Take a Picture
3. Start/End Video
4. Photo/Video Documents Album
5. Speed Control: 30%/60%/100%
6. Altitude Hold (Yellow = on)
7. Gravity Induction Mode
8. Show/Hide Steering Wheel
9. 360 Flips and rolls
10. One-key Start Propellers
11. One-key Landing
12. Emergency Stop
13. Left Joystick (throttle; height)
14. Right Joystick (rudder; direction)
15/16. Left/Right Rotation Fine-Tuning
17/18. Left/Right Sideways Fly Fine-Tuning
19/20. Forward/Backward Fine-Tuning
21. More Settings
22. Camera Reverse (Flips camera upside down)
23. VR Display
24. Headless Mode
25. One-Key Calibration
1
2
We recommend activating and ying with
this setting, especially for beginners.
2
3
1
2
2
33
1 1
If the drone rotates or yaws, use the
"Fine-Tuning" buttons (15-20) to correct
and adjust the movement of the drone.
Left Rotation
Fine-tuning
Right Rotation
Fine-tuning
Forward
Fine-tuning
Backward
Fine-tuning
Left Sideward
Fine-tuning
Right Sideward
Fine-tuning
Flips & Rolls
Taking Photos and Video
Lift Off/Landing
To Lift Off:
1. Press the One-Key Start button.
To Land:
• Press the One-Key Down button (11) one
time and wait for the Flyington to slowly
lower and automatically turn off its motor.
• Alternatively, you can slowly decrease the
throttle to lower the drone, and press the
emergency stop button (12) when it is less
than 1 foot off the ground.
Lift Off/Landing cont.
Lift Off continued:
2. Slowly slide your nger upwards on the
left joystick (see Figure 1, 13) to increase
the throttle and lift the drone off the ground.
3. To decrease throttle and lower the drone,
slide nger downwards on the left joystick.
Please Note:
•
Fly the drone at least 1 foot off the ground.
When too close to the ground,
it creates a
vortex that makes ight unstable.
• If you receive an incoming phone call
while ying, the Flyington will slowly
auto-land and close the app interface.
• If you crash-land: 1. Please practice and
improve your ying skills to avoid damage.
2. You may need to close and re-open the
app and re-pair the Flyington to your device.
Gravity Sensor Control
Activate Gravity Sensor Control (7) to y
without using the joysticks. Keep your thumb
on the right joystick, and tilt your phone in
any direction for remote control ight.
Joystick Controls
Use the RIGHT joystick to control the forward,
backward, and left/right sideways ight.
Fine-Tune Controls
• Master your ying skills before taking
seles with the Flyington. (Novice sele
drone operators may be more focused on
working that Tyra Banks “smize” instead
of avoiding the tree that’s awfully close…)
• Make sure Altitude Hold (6) is activated
so your drone will stabilize and hover. The
button turns yellow to indicate it is on.
• Use the joysticks and ne-tuning buttons
to y and position the drone to the desired
spot for your sele.
• Use the app interface on your mobile
device to view what the camera is capturing.
• Press the camera button (2) to snap the
picture. It will go straight to your phone’s
photo album and the Documents
Photo/Video Album (4).
• To take a video, press the video camera
button and it will begin recording.
Headless Mode
Activate Headles Mode (24) to y easily
without knowing the direction your
Flyington is facing. Drone movements will
be relative to the app interface controls.
App Interface App Interface: Figure 1
1 2
16 12 1715 18
9
10
13
11 20
14
19
3 4 5 6 7 8
21
22
23
24
25


 user manual")