
Content
Product Profile...............................................................................................................................................3
Introduction..................................................................................................................................................3
Main Features .............................................................................................................................................3
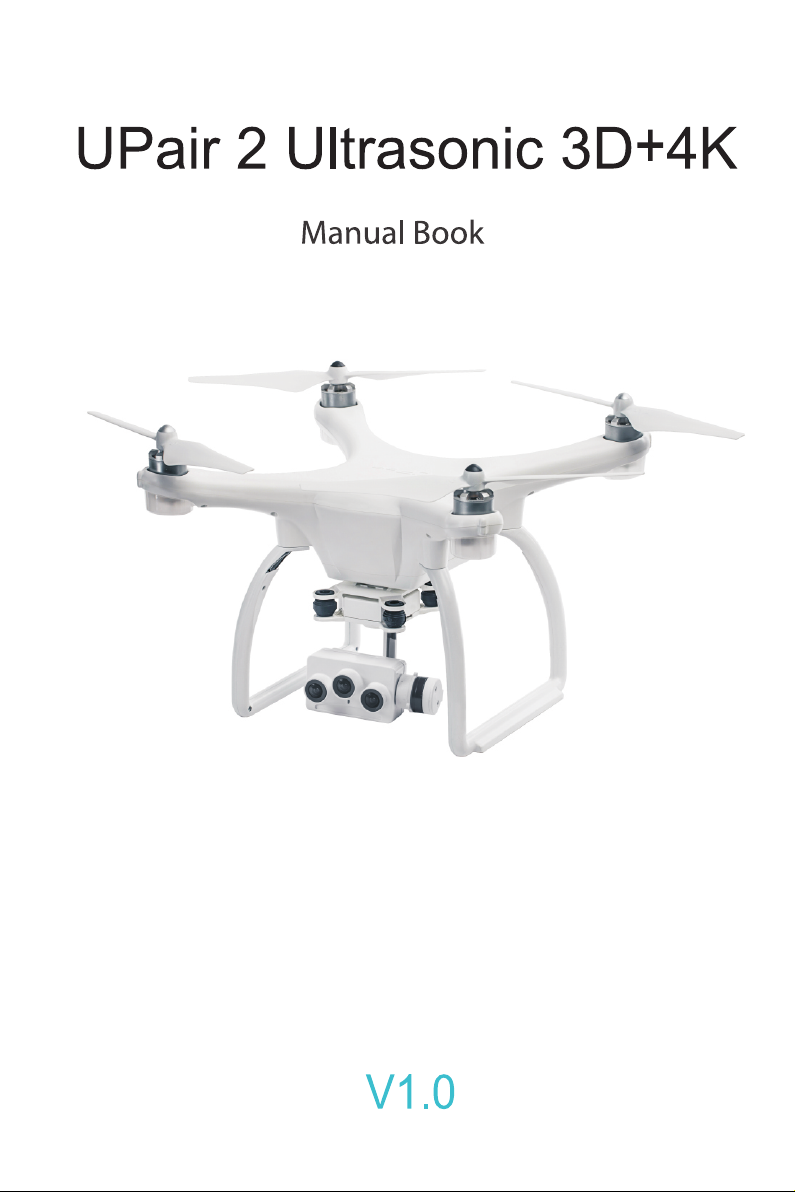
Aircraft.............................................................................................................................................................4
Aircraft Profile..............................................................................................................................................4
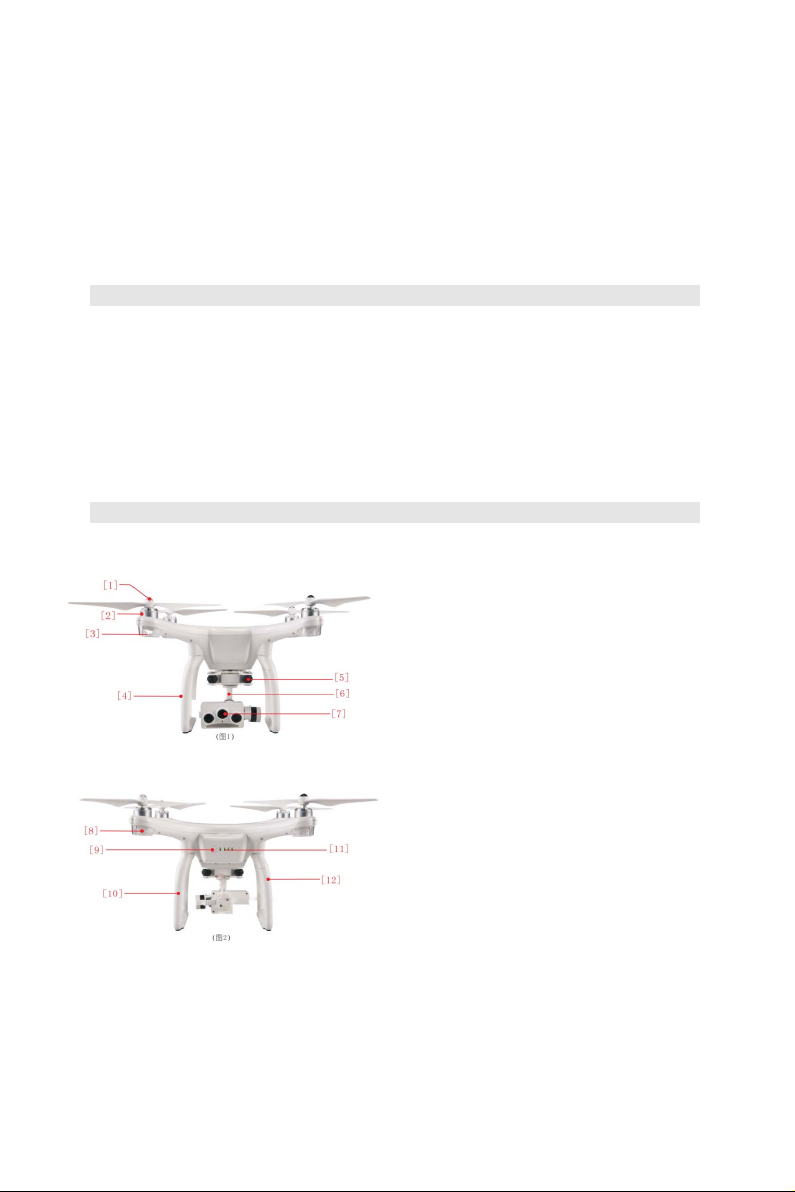
Aircraft Diagram..........................................................................................................................................4
Parameters..................................................................................................................................................5
Auoto-return Home......................................................................................................................................5
Flight Data ...................................................................................................................................................6
Flight Mode..................................................................................................................................................6
Propellers.....................................................................................................................................................7
Battery.............................................................................................................................................................7
Introduction..................................................................................................................................................8
Parameters..................................................................................................................................................8
Basic Fuctions And Charging.....................................................................................................................8
Remote Controller.........................................................................................................................................9
Remote Controller Profile...........................................................................................................................9
Remote Controller And Real Time FPV...................................................................................................10
Using The Remote Controller...................................................................................................................10
Charging The Remote Controller.............................................................................................................12
Operating Aircraft......................................................................................................................................12
Smart Return Home Button......................................................................................................................13
Camera..........................................................................................................................................................13
Camera Profile ..........................................................................................................................................13
Camera SD Card Interface.......................................................................................................................14
Gimbal ...........................................................................................................................................................15
Gimbal Profile............................................................................................................................................15
UPAIR APP Main Screen.............................................................................................................................15
Connecting To A Mobile Device...............................................................................................................16
Camera Interface ......................................................................................................................................16
1


 user manual")