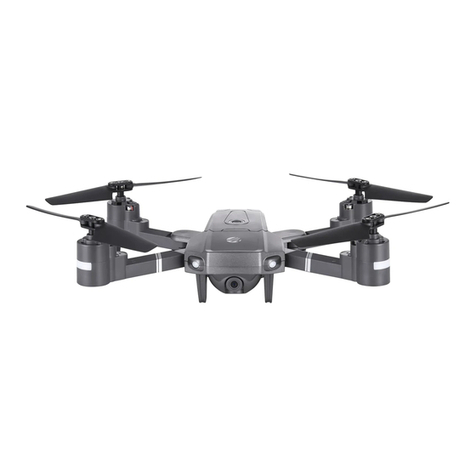
Vivitar AEROVIEW DRC-446 User manual

DRC-446
USER’S MANUAL

1
PRE-FLIGHT CHECKLIST
Before attempting to fly your drone, make sure that you have done all of the following:
Inserted 4 AA Batteries in Your Remote
See page 7 of this manual for more information.
Charged Your Drone’s Battery
See page 8 of this manual for more information.
Checked That the Propellers are Firmly Attached
See page 21 of this manual for more information.
Calibrated Your Drone with the Remote Control
See page 9 of this manual for more information.
Calibrated Your Drone’s Gyroscope
See page 9 of this manual for more information.
Completed the Compass Calibration Process
See page 9-10 of this manual for more information.
Unlocked Your Drone
See page 11 of this manual for more information.
WARNING!
Failure to calibrate your drone before flight can lead to
severe flight malfunctions and potential damage to your
drone. Always fly carefully!

2
Thank you for purchasing the Vivitar AeroView GPS Video Drone, item DRC-446. The included
remote controlled aircraft is designed specifically for outdoor flying. In order to get the best
possible results, please read this user’s manual carefully before using. In addition, be sure to keep
this manual in a safe place for future reference.
-2.4Ghz Remote Control System and WiFi App Control
-GPS Location Lock
-Follow Me Technology via App
-Full HD Camera with Live Video Feed, Real Time Transmission
-Real Time Viewing
-GPS Tracking
-1000ft Range
-Approximately 12 Minute Flight Time
1. Introduction
2. Features

3
3. Important Safety Precautions
When using your Vivitar AeroView GPS Video Drone, basic safety precautions should always be
followed, including the following:
1. Do not allow children or the infirm to operate your drone without adult supervision. For safety
purposes, only allow experienced pilots aged 14 and up fly your drone.
2. To avoid choking hazards, keep all small parts and pieces away from children.
3. Your drone is not a toy. Makes sure that it is properly assembled before use, and operated
safely.
4. Keep your drone away from obstacles, crowds, power lines, trees, and bodies of water while it is
in flight. Always fly your drone in a wide open spacious environment. Avoid flying your drone
directly above people or animals. Maintain a 7ft (2m) distance from the aircraft when taking off
and landing.
5. Only use your drone in a dry environment. Your drone is composed of sophisticated electronic
components and parts. To avoid damage to your drone, please keep your drone away from water
and moisture. Use a soft dry cloth to wipe the surface of your drone and keep it clean.
6. Beginner and novice level pilots should practice flying with experienced pilots until suitably
experienced in flight.
7. To ensure safety, only use the included parts when using your drones.
8. Make sure to keep your ears and eyes protected when using your drone. When your drone’s
blades are spinning, make sure to keep people and objects at a distance from rotating parts.
9. Keep your drone away from excessive heat or flames, especially while charging the battery.
10. Please recycle or dispose of your drone properly based on the laws and rules of your municipali-
ty. Contact local recycling facilities and/or the manufacturer of your drone for further information.

4
Weight: 650g
Battery: 7.4V 2000mAh Lithium Polymer Battery
Height: 185mm
Diameter: ~350mm
Charging Time: ~5 hours
Flying Time Per Charge: ~12 minutes
4. Package Contents
5. Specifications
-Mobile Phone Holder -Rechargeable Battery -Remote Control -Fisheye HD Camera
-Replacement
Propellers
-Screwdriver
-Landing Gear -Protection Rings -Charging Adapter

5
Camera Lens
ON/OFF Switch
Motor
Propeller
Protection Ring
Landing Gear
Upper Shell
Lower Shell
6. A Quick Look at Your Drone

6
7. A Quick Look at Your Remote Control
One Key Take Off
One Key Return
Headless Mode
Throttle Stick
(ascend, descend/turn left, turn right) Directional Control Stick
(forward, back/shift left, shift right)
Speed
(30% : Slow)
Speed
(60% : Medium)
Speed
(100% : Fast)
ON/OFF Button
One Key Landing
Orbital Shot
Geomagnetic Calibration

7
Use a screwdriver to open up the battery compartment located on the rear of your remote control.
Insert 4 AA 1.5V batteries, making sure that the batteries are inserted with the correct polarity (+,-)
as displayed in the battery compartment.
Once the batteries are inserted, put the battery compartment cover back on the battery compart-
ment, and use a screwdriver to close it securely.
-Do not mix rechargeable and non-rechargeable batteries.
-Do not mix old and new batteries or different types of batteries.
-Remove exhausted batteries and dispose of them based on the rules of your local
municipality.
-Remove the batteries from your remote control if it will not be in use for an extended
period of time.
8. Inserting Batteries Into Your Remote Control

8
Use the included charging adapter to charge your drone’s battery.
Charging takes about five hours to complete.
-It is recommended to use a 5V, 1-2A charger (not included) to charge your battery.
-Do not leave the charger unattended in the presence of children.
-Do not expose the battery to excessive heat or flames.
-While charging your battery, keep it away from flammable materials.
9. Charging Your Drone’s Battery
Battery
Charging Adapter
(red) = Charging Adapter Plugged In
(blinking red) = Battery Charging
(off) = Battery Fully Charged

9
-It is recommended to use a 5V, 1-2A charger (not included) to charge your battery.
-Do not leave the charger unattended in the presence of children.
-Do not expose the battery to excessive heat or flames.
-While charging your battery, keep it away from flammable materials.
Calibrating Your Drone with Your Remote Control
-Pull the throttle stick all the way down and then push it all the way up.
-When the LED lights on the rear legs of your drone are solid blue and
the LED lights on the front legs of your drone are solid red then your
drone is synchronized with your remote control and ready to fly.
-When the LED lights on the rear legs of your drone are solid green and
the LED lights on the front legs of your drone are solid red then your
drone is in GPS mode.
Calibrating Your Drone’s Internal Gyroscope
Calibrate your drone’s internal gyroscope to ensure smooth and
balanced flight. Before you start, make sure your drone is placed on a
flat, stable surface.
-Pull the throttle stick and the directional stick all the way down and to
the left simultaneously. Release them after about 2-3 seconds.
-The LED lights on the rear legs of your drone will turn blue and green
and start blinking rapidly. The LED lights on the front legs of your drone
will turn red and start blinking rapidly while synchronizing.
-The LED lights on the rear legs of your drone will turn solid blue, and
the LED lights on the front legs of your drone will turn solid red to
indicate that your drone’s internal gyroscope is calibrated.
Aircraft Compass Calibration
The aircraft compass calibration allows your drone to be tracked over
GPS. Before you start, make sure your drone is placed on a flat, stable
surface.
-Press the Geomagnetic Calibration button on the remote control.
To power on your drone, slide the ON/OFF switch on the bottom of your drone to the ON position.
To power on your remote control, press the ON/OFF button.
Once your drone and remote control are powered on, follow the calibration steps below in order to
prepare your drone for flight.
10. Calibrating Your Drone (Preparing for Flight)
Table of contents
Other Vivitar Drone manuals


