67
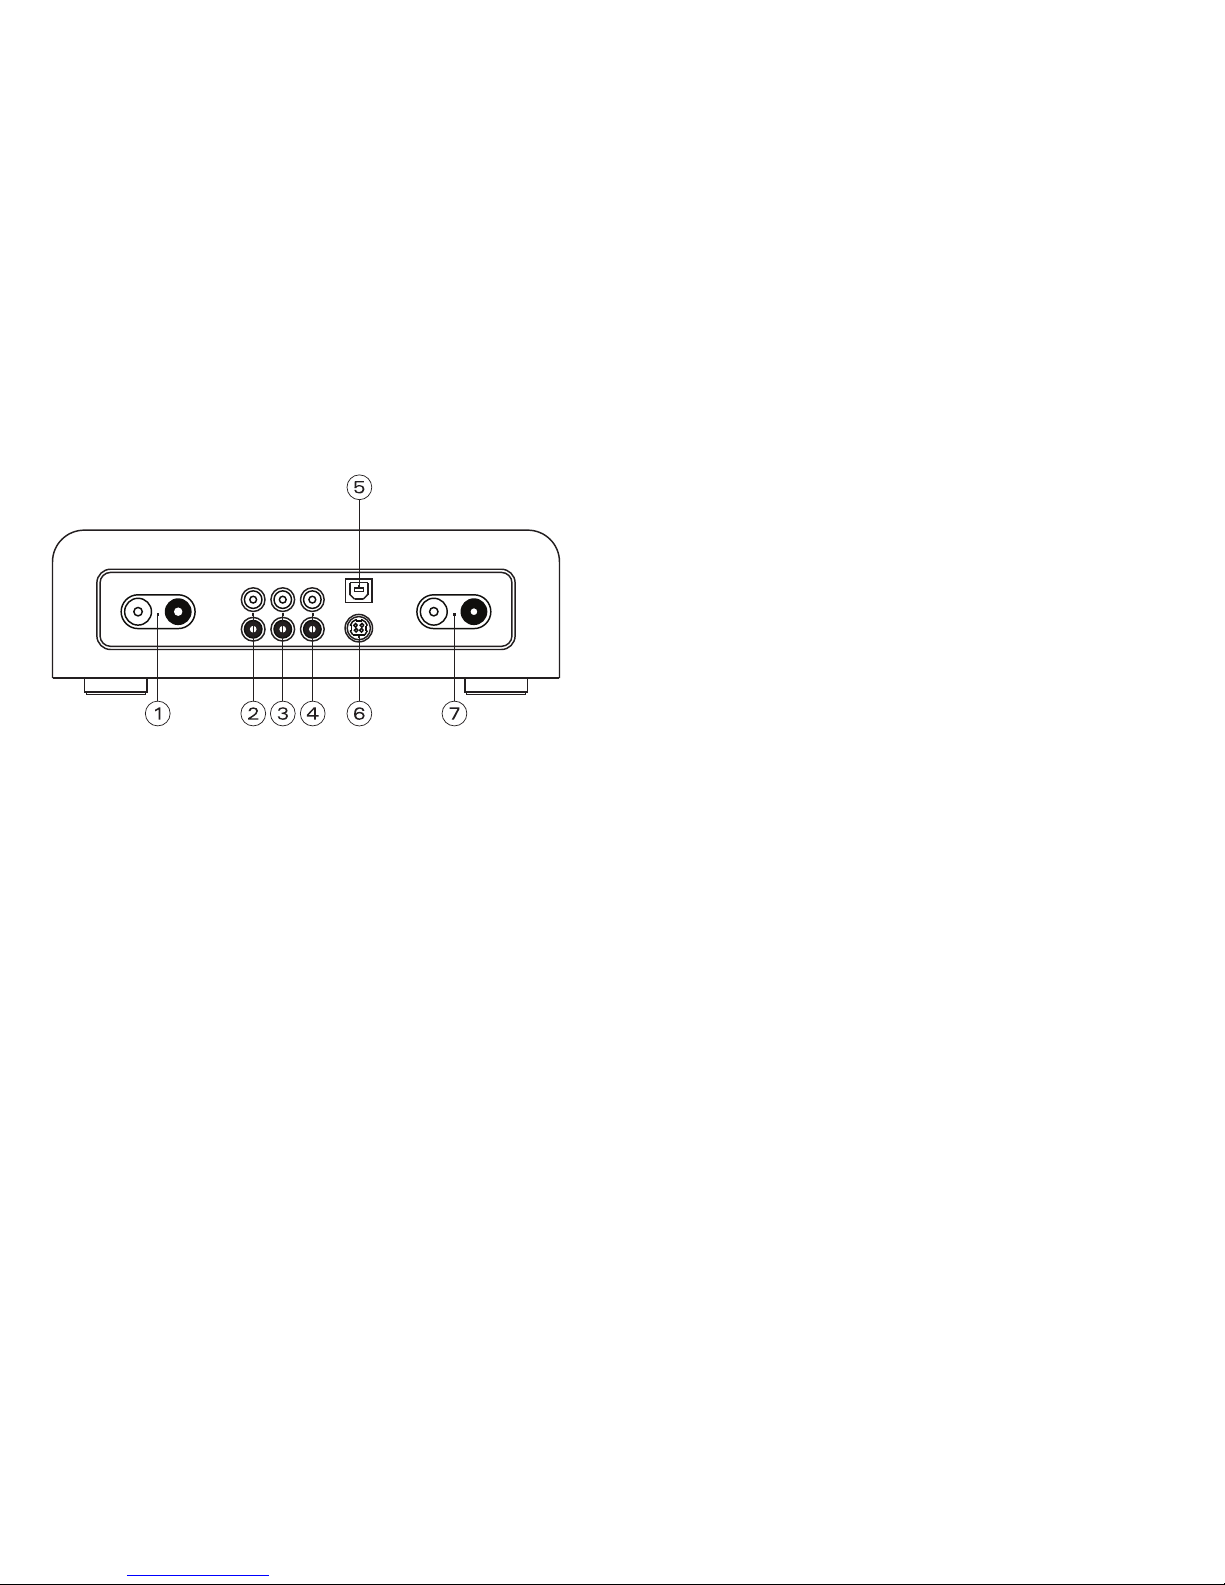
Front panel layout
1 - Power status LED
When the amplier is rst powered on the LED is illuminated red to indicate the
powering up phase, this lasts for approximately two seconds. Once the amplier has
successfully completed its powering up phase, the LED changes to a blue color to
indicate the amplier is successfully powered on.
If the speaker button is in its depressed position to disable speaker output, the LED
changes color to pink, to indicate audio will only be output to the headphone jack.
2 - Power button
Pressing this button once turns power to the amplier on and the button becomes
depressed. To turn the power to the amplier off press the button again and the
button will return to its extended position.
3 - Gain button
The gain for the device can be set to either high or low, by pressing the button in so
it is in a depressed state gain will be set to high, to set gain to low press the button
again to return the button to its extended position.
4 - Audio balance adjuster
The audio balance adjuster can be used to adjust the balance of the audio between
the two audio output channels. By turning the adjuster to the right the balance will
moved to the left channel and by turning the adjuster to the right the balance will
move to the right. For equal balance adjust the centerline indicator to the middle.
5 - Volume adjuster
The volume adjuster allows control of the volume of audio that the amplier outputs.
By setting the centerline indicator to the left-most position the audio volume will be
muted. The audio volume progressively increases as the adjuster is turned until it
reaches the right-most position where the volume is at its maximum level.
6 - Input selector
The input selector allows one of the four available audio inputs to be selected. To
select an audio input turn the selector so the centerline indicator is directed towards
the desired audio input.
7 - Speaker button
The speaker button allows the speaker output to be enabled or disabled. By pressing
the speaker button once the buttons becomes depressed and speaker output will be
disabled. If the the button is pressed again the speaker output will be enabled and the
button will return to its extended position.
8 - Headphone jack
The 6.35mm TRS headphone jack allows a pair of headphones that have the standard
6.35mm connector to be plugged into the amplier, and be used as an audio output.