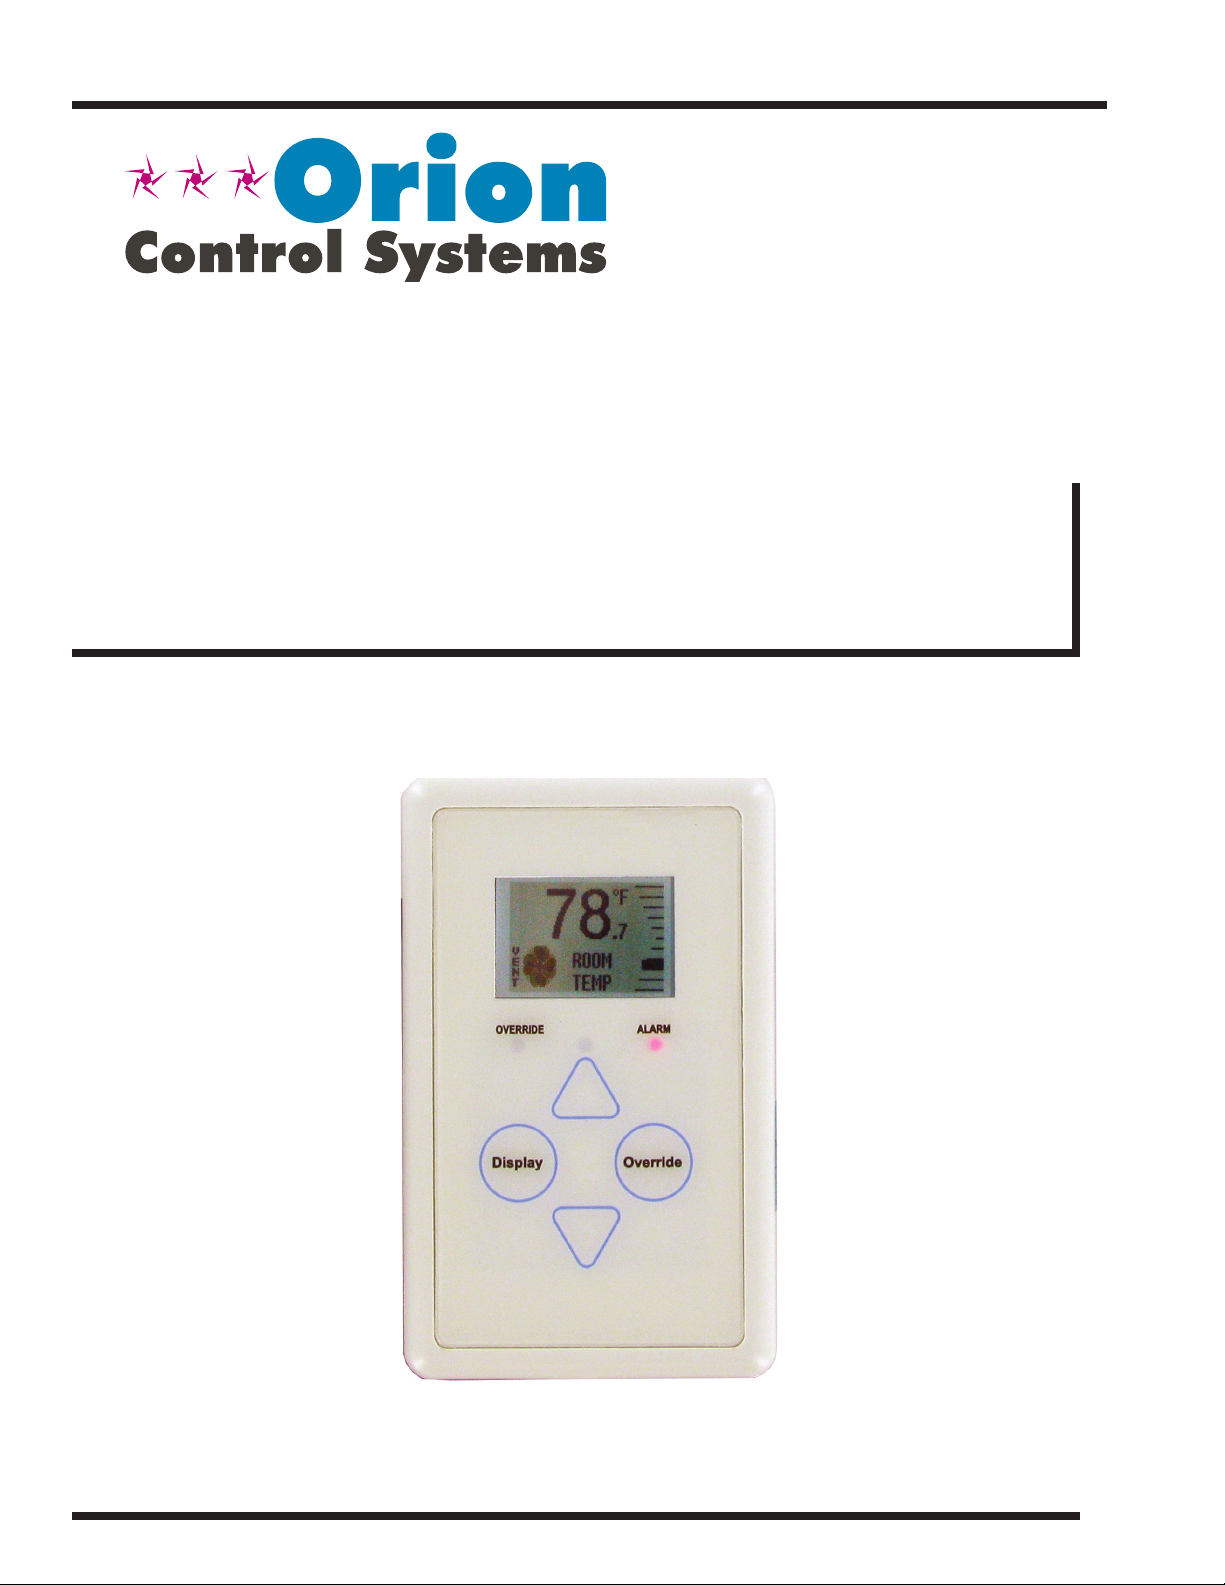
Digital Room Sensor Technical Guide
APPENDIX
9
LCD Backlight Test Screens
To select the third option—
BACKLT—touch <Override>
while at the Sensor Configuration
& Test Screen (Figure 11). This
option allows you to control
when the LCD backlight turns
on and off . You can confi gure the
backlight to stay on at all times,
remain off at all times, or to come
on when any button is touched on
the sensor.
To exit this screen, touch <Dis-
play>.
Thermistor Averaging Screen
To select the fourth and fi nal op-
tion—THRM AVG—, while at
the Sensor Configuration & Test
Screen (Figure 11), touch simul-
taneously below the <Display>
and <Override> buttons. (See
Figure 10 which shows where to
touch to access this option.)
This option allows you to set the
rate—from 1-15 seconds—at
which the sensor takes a new
temperature reading. Touch <>
to increase the number of seconds
and touch <> to decrease the
number of seconds.
To exit this screen, touch <Dis-
play>.
NOTE: The sensor takes the average of the last 10 readings based
on the number that is entered in this screen. For example,
if you want a 3-second sample, the sensor will take the
average of the last 10 readings every 3 seconds over a
30-second span. Therefore, if you have your sensor next
to an outside doorway, you would want to enter a higher
number for your sample to give a more accurate read-
ing for the room temperature in case the outside door is
opened often.
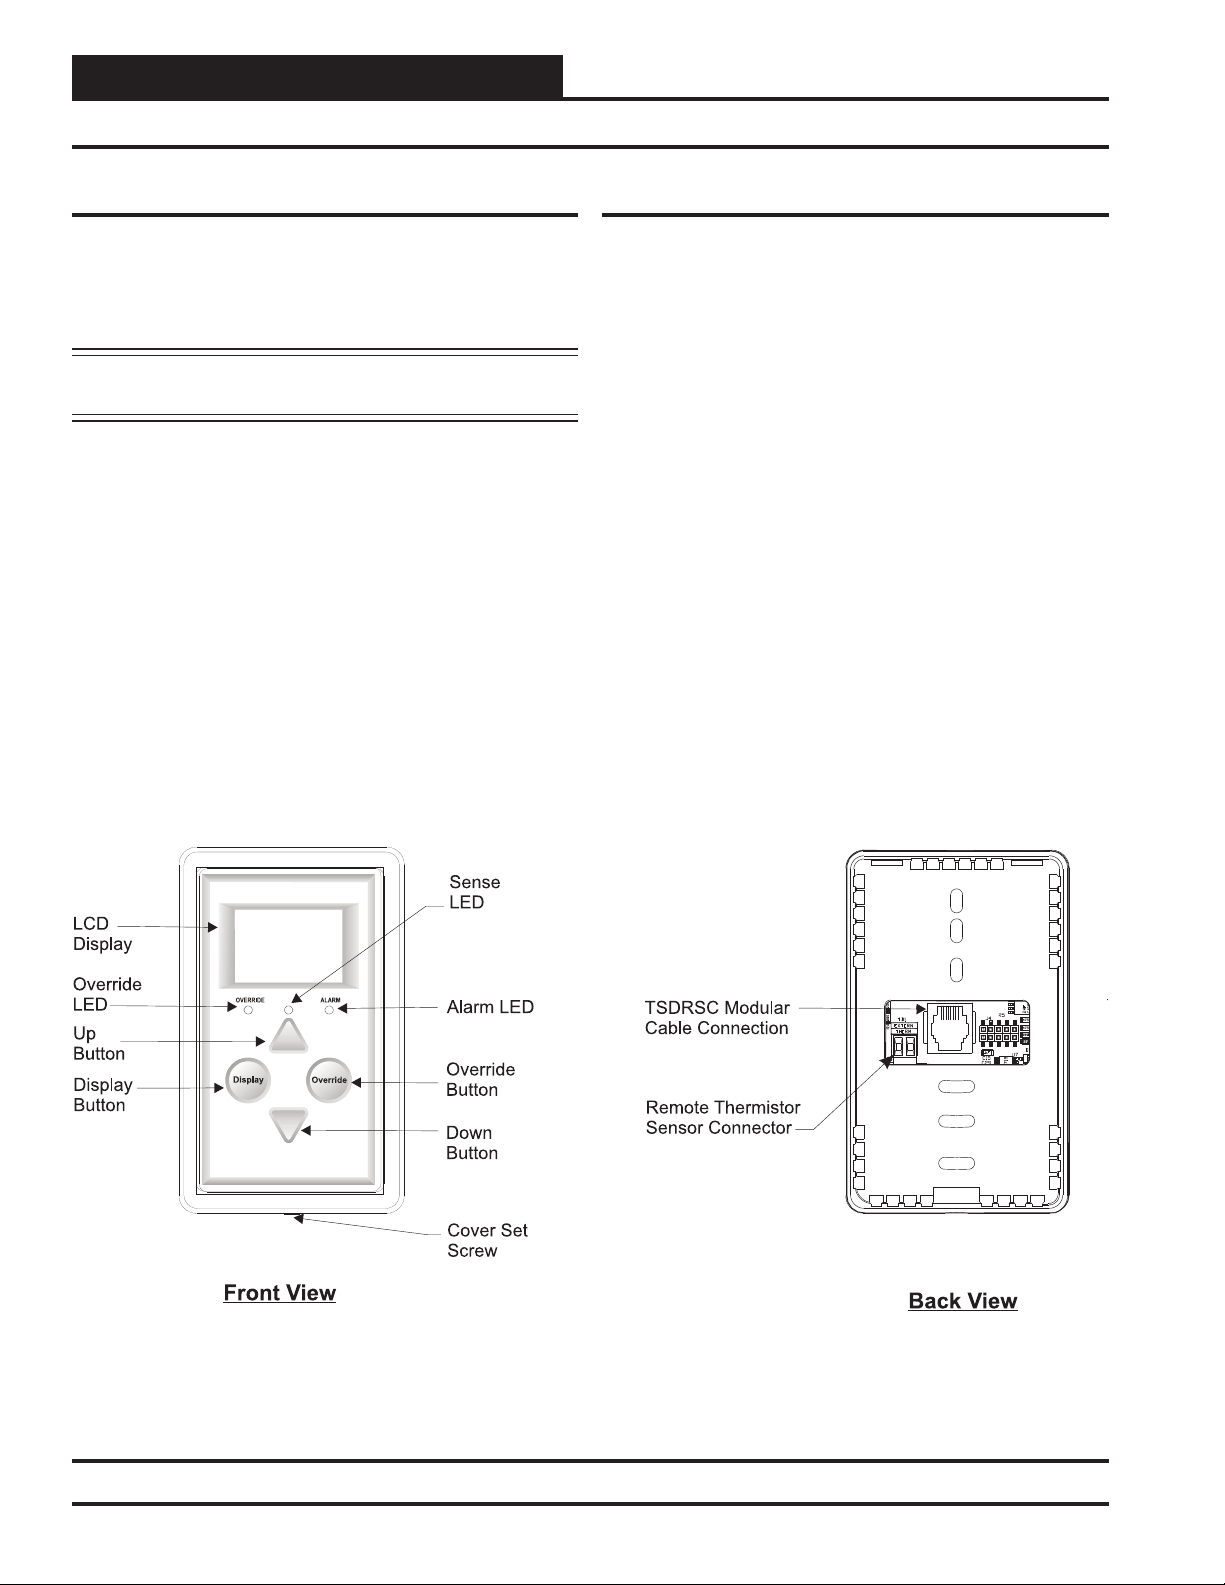
Sensor Configuration and Test Screens
Figure 14: Backlight Test
& Confi guration Screen
Figure 15: Temperature
Averaging Screen
Display Options - Temperature/Setpoint
To access the Display Options
Screen, while at the Thermistor
Averaging Screen, (Figure 15),
touch the <Override> button.
This option allows you to set the
main screen display. Touch <>
to display the Cooling/Heating
Setpoint on the Main Display
Screen. Touch <> to display
the current room temperature on
the Main Display Screen. The
default is temperature.
If the Setpoint option is chosen,
when the unit is in the Cooling
Mode, the Cooling Setpoint
will appear on the Main Display
Screen. When the unit is in the
Heating Mode, the Heating Set-
point will appear on the Main
Display Screen. When the unit
is in Unoccupied Mode or Vent
Mode, the setpoint that appears
on the Main Display Screen will
be half way between the Cooling
and Heating Setpoint.
To exit this screen, touch
<Display>.
Figure 16: Address
Screen
DSPLY OPTIONS
TEMPERATURE
UP = SETPOINT
DOWN = TEMP