manuals.online logo
Brands
  1. Home
  2. •
  3. Brands
  4. •
  5. Orion Technology
  6. •
  7. Security Camera
  8. •
  9. Orion Technology GST-5994i User manual

Orion Technology GST-5994i User manual

WDR INDOOR DOME
NETWORK CAMERA
Quick Guide
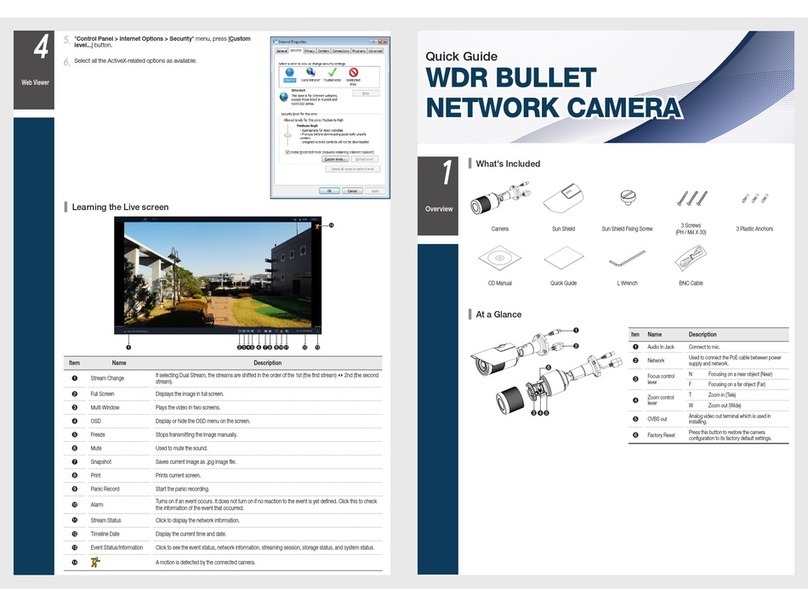
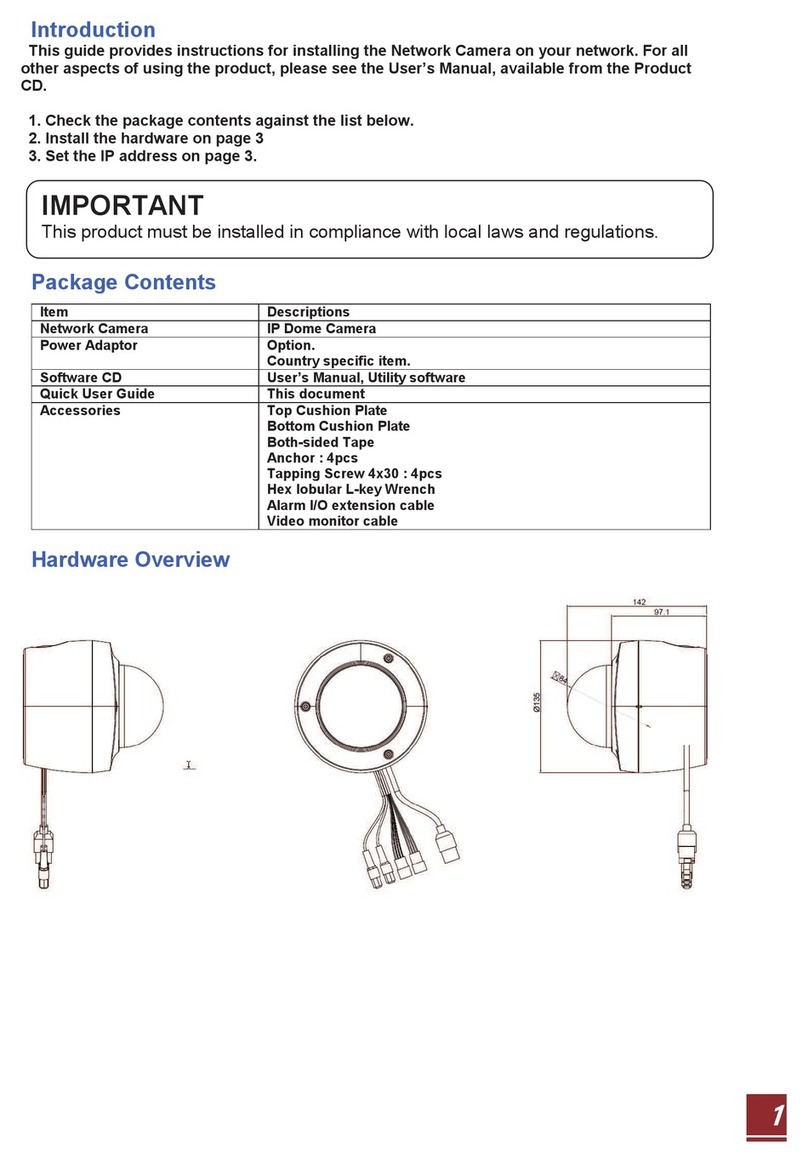
 What's Included
Camera Wrench T20 AUDIO + ALARM common
cable CD Manual Quick Guide
Screw (2ea)
(TH / M4 X 30) Anchor (2ea) DC/AC Power Cable 2pin Terminal Block BNC Cable
 At a Glance
4
Web Viewer
Item
Name Description
a
CVBS Analog video out terminal which is used in
installing.
b
Control Button
Used to change format, restart the camera,
and reset to factory default depending on its
operating method.
- To change analog format : Press and hold for
less than 5 seconds.
- To restart the camera : Press and hold for
more than 5 seconds.
- To reset to factory default : Press and hold for
more than 10 seconds.
c
Micro SD Card Slot Allows a Micro SD card to be inserted.
d
Network Used to connect the PoE cable between power
supply and network.
e
Power Connector
(AC24V / DC12V) Used to connect to a power cable.
f
Audio / Alarm In/
Out terminal
-
Alarm In/Out terminal : Connect alarm in/out signal.
- Audio In : Connect to mic.
- Audio Out terminal : Connect to speaker.
Item Name Description
a
MFZ setup Move to the MFZ screen. Manually sets the zoom/focus of the lens.
b
Stream Change If selecting Dual Stream, the streams are shifted in the order of the 1st (the first stream) <2nd (the second
stream).
c
Full Screen Displays the image in full screen.
d
Multi Window Plays the video in two screens.
e
OSD Display or hide the OSD menu on the screen.
f
Freeze Stops transmitting the image manually.
g
Mute Used to mute the sound.
h
Duplex Audio Delivers the sound to the camera by using a microphone connected to a PC.
i
Snapshot Saves current image as .jpg image file.
j
Print Prints current screen.
k
Panic Record Start the panic recording.
l
Alarm Turns on if an event occurs. It does not turn on if no reaction to the event is yet defined. Click this to check
the information of the event that occurred.
m
Stream Status Click to display the network information.
n
Storage Information Displays the storage information of the Micro SD Card.
o
Date/Time Display the current time and date.
p
Event Status/Information Click to see the event status, network information, streaming session, storage status, and system status.
q
A motion is detected by the connected camera.
 Learning the Live screen
1
Overview
ca b def g ij lmn o ph k
q
d e f
a b c
2
Installation
 Web Viewer
1.
Security page (Internet Explorer) is displayed. Click <Continue to this website (not recommended).>.
2.
Enter your ID and password in the ID input window.

Default User ID : ADMIN
Password : 1234
3.
You should run the activities after installing corresponding Active-X.
4.
If the Active-X installation window does not appear in the top right area for a
long time (longer than 1 minute), change the “Internet Options”settings.
5.
"Control Panel > Internet Options > Security" menu, press [Custom
level...] button.
6.
Select all the ActiveX-related options as available.
 Connecting to External Device
Installation monitor
Connect the video output cable of the network camera with the installation monitor.
You can watch the video input from the installed camera in the monitor.
J
You should not use the installation monitor continuously as it is only designed to check the video output during the camera installation process.
Connecting with power supply
Connect the PoE (Power Over Ethernet) cable between the power supply and the network port.
J
If your network camera is installed as standalone setup, the power should be supplied by PoE Hub.
Connecting to the network
To connect with a PC ina local network
If you connect the network camera with a PC in the same network, you can perform monitoring and setting process by using the PC's Web
Viewer.
1.
Connect the network port on the back panel with a router or hub.
2.
Connect a local PC with a router or hub.
3.
Enter the address in “http://IP address:web service port”format in address window of the web browser or dedicated software
program at local PC.

Ex : http://192.168.0.23:80 web service port is set as 80 by factory default. You can modify the port number in Network Setup screen.
4.
Enter your ID and password to log in. You can watch the monitoring screen after login.
J
You must register your login password when accessing for the first time.
To change your password, refer to "How to connect".
To connect with a PC in remote network
You can access the network camera from your PC through the internet.
1.
Connect router's network port directly with static IP LAN cable or with the ADSL modem.
2.
If using a router, you should configure the port forwarding settings.

You can get relevant support from your router manufacturer or qualified installation company for how to configure the port forwarding of your
router.

When you access the network camera from your PC via internet, make sure to access the following site.
 How to connect to the camera
Since the network settings of your network camera are not configured by factory default, you cannot access to WebRA. To configure your
network, run the “MDload”in CD to check the IP and access to your camera.
1.
Press <Search> button to search for the network camera linked to your
network.
2.
The search results are displayed if finished. You can distinguish your network
camera(s) by checking its model information. Click your desired apparatus
whose network settings you want to configure in the list.
3.
Select “DHCP”or “STATIC”for <Network Type> in bottom left. If selecting
“STATIC”, enter the values for IP Address, Subnet Mask, Gateway, and DNS
information, and then press <Apply>.
4.
The list is automatically updated in a moment. Check if all the values look
correct and finish the network environment settings.
 Installing
Installing on the ceiling
You can install the camera on the ceiling, and then adjust and fix its angle.
1.
Find a suitable location on the ceiling to install the camera.

It must be installed in a place where it can bear the camera's weight.

It is recommended to inject silicon into the gap between the camera and the ceiling for secure waterproofing.
2.
Fix the camera main body onto the ceiling using the screws provided.
Installing on a surface
You can install the camera on a wall, and then adjust and fix its angle.
1.
Find a suitable location on the wall to install the camera.

It must be installed in a place where it can bear the camera's weight.
2.
Fix the camera main body onto the wall using the screws provided.

It is recommended to inject silicon into the gap between the camera and the wall for secure waterproofing.
4
Web Viewer
3
Connecting
Other Orion Technology Security Camera manuals

Orion Technology H.264 Mega-Pixel User manual

Orion Technology

Orion Technology H.264 Mega-Pixel User manual

Orion Technology OR-S7010i User manual

Orion Technology

Orion Technology OR-S7010i User manual

Orion Technology X30 User manual

Orion Technology

Orion Technology X30 User manual

Orion Technology OR-3234i User manual

Orion Technology

Orion Technology OR-3234i User manual

Orion Technology OR-4534i User manual

Orion Technology

Orion Technology OR-4534i User manual

Orion Technology IC110HF011PT13 User manual

Orion Technology

Orion Technology IC110HF011PT13 User manual

Orion Technology GST-894i User manual

Orion Technology

Orion Technology GST-894i User manual

Popular Security Camera manuals by other brands

ETVAX 46226.310E Installation and operation manual

ETVAX

ETVAX 46226.310E Installation and operation manual

Panasonic WV-TW310L Specifications

Panasonic

Panasonic WV-TW310L Specifications

Axis P1204 installation guide

Axis

Axis P1204 installation guide

LevelOne FCS-5051 Specifications

LevelOne

LevelOne FCS-5051 Specifications

Canon VB-H43 Operation guide

Canon

Canon VB-H43 Operation guide

Moog Videolarm IP ReadyTM Series Video Alarm FDP75C12N Product instructions

Moog Videolarm

Moog Videolarm IP ReadyTM Series Video Alarm FDP75C12N Product instructions

Speco VLED24T3W Series quick start guide

Speco

Speco VLED24T3W Series quick start guide

FUVISION S30 user manual

FUVISION

FUVISION S30 user manual

Dahua DH-HAC-EB2401P user manual

Dahua

Dahua DH-HAC-EB2401P user manual

Ganz PixelPro ZN-MB260M user manual

Ganz

Ganz PixelPro ZN-MB260M user manual

Honeywell HD70PX Specifications

Honeywell

Honeywell HD70PX Specifications

TP-Link TL-SC3430 Quick installation guide

TP-Link

TP-Link TL-SC3430 Quick installation guide

CIS VCC-GC20V41PCL Product specification & operational manual

CIS

CIS VCC-GC20V41PCL Product specification & operational manual

Vivotek FD8164 user manual

Vivotek

Vivotek FD8164 user manual

Toa C-CV14-CS Specifications

Toa

Toa C-CV14-CS Specifications

Eneo VK-1321/PIR instruction manual

Eneo

Eneo VK-1321/PIR instruction manual

AVer FD2000 installation guide

AVer

AVer FD2000 installation guide

OpenEye OE-C2012B4-S user manual

OpenEye

OpenEye OE-C2012B4-S user manual

manuals.online logo
manuals.online logoBrands
  • About & Mission
  • Contact us
  • Privacy Policy
  • Terms and Conditions

Copyright 2025 Manuals.Online. All Rights Reserved.