5. If you wish to ne tune the focus further, a Bahtinov mask is
an ideal method of focusing with Orion StarShoot Capture,
as it is quite an accurate method using medium brightness
stars. Contact Orion or search for Bahtinov mask on
www.telescope.com for more details, and to purchase a
Bahtinov mask for your specic telescope.
Your First Lunar/Planetary Image
The moon is perhaps the easiest object to get your rst image,
as it is very bright, and easy to nd. Planets are also easier than
nebulae to capture, since you’ll be streaming a video le, and can
use programs such as Registax to process the video le.
1. Go to the Options menu, click preferences, and under the
Record heading, choose a directory location for your saved
les, naming convention of your choice, and make sure the
le type is set to AVI.
2. In the Capture and Resolution window pane, check Video
Mode, uncheck auto exposure, and use the Exposure Time
slider to nd an exposure that looks good. Planets do well
with lots of short exposures, so if the exposure time is too
long, experiment with raising the gain, and lowering the
exposure value.
3. When ready to record, press the record button and press it
again when your video is the desired length. In the Options
menu, under Record preferences, you can set limits to time
of the video, as well as number of frames.
4. You can then load your AVI le into a 3rd party program
such as RegiStax, in order to process the lunar or planetary
details present in the video le.
Auto Exposure can be used if desired, but manually adjusting the
exposure values provides the best control over the image. Check
the “Auto Exposure box, and drag the box over an area you wish
the system to measure.You can resize the box accordingly. Then
set the Exposure Target, and the system will try to keep the expo-
sure close to that target exposure value by adjusting the exposure
time automatically.
Imaging with a Mono camera
One shot color cameras are relatively easy to get a nal image from
because there is less processing involved. But color chip cameras
suffer from less sensitivity to light than a monochrome camera does.
The reason is due to the Bayer Matrix over the chip. The pixels are
arranged in squares of alternating colors (for example -- an RGGB
arrangement in the SS 6.3mp Color).This means that for every four
pixels in a square, only one of them is sensitive to red light, and only
one to blue. But in a monochrome chip, every pixel sees ALL of the
photons of light across the visible spectrum. The result is a much
more sensitive chip.This is much more versatile, because you can
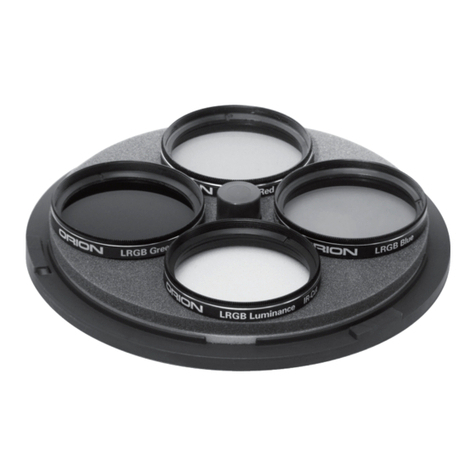
put any kind of lter in front of the camera, depending on the wave-
length of light you want to capture.You may also wish to consider
a lter wheel to simplify the process of switching lters between
exposures.
Conversion Gain
Along the left hand pane is a window for conversion gain, and
options (if your specic camera supports both options) for LCG
and HCG -- low and high options. LCG provides the largest dynam-
ic range in your images at the expense of a bit more noise. HCG
can lower the noise at the expense of compressing the dynamic
range. When in doubt, start in LCG mode, and your images will
turn out ne. But if you are autoguiding, and do not care about
lower dynamic range, switching to HCG and raising the gain a
few points will help pull out some fainter guide stars from the
background noise. The ASCOM driver also includes LCG/HCG
settings when in 3rd party control programs
ASCOM Driver
The ASCOM driver allows the camera to be used with any of
the programs listed above, along with any others that support
ASCOM cameras. Please download the ASCOM platform from
ascom-standards.org rst and then make sure to install the cam-
era ASCOM driver from Orion’s website.When in 3rd party camera
control programs, the camera gain settings can be controlled in
the ASCOM setting window for the camera. Open the ASCOM
camera settings, adjust the gain, and experiment with exposures
as detailed above.One last thing to note, some programs may use
a percentage for gain, others may use the actual gain numbers. If
the gain range is 0-100, it’s using a percentage of total gain.
4. Using the SS Mini as an
Autoguider
The StarShoot Mini cameras have the ability to act as an autogu-
ider to correct for small imperfections in the mount’s tracking qual-
ity. These imperfections can arise from various sources including
periodic error due to the nature of the gearing, and poor polar
alignment which causes a slow drift of the image. Autoguiding
is essential for any long exposure image of the sky, especially at
longer focal lengths.
Mount
An equatorial mount with dual axis motors and an RJ-12 autoguide
port is required. Just about any equatorial mount equipped with an
autoguide port will work with the StarShoot Mini.The Mini is “ST-4”
compatible which uses the same pin out conguration as the rst
generation CCD autoguiders. Most computerized goto mounts
also have this autoguide port. For short exposure deep space
photography (typically 45 seconds or less) the StarShoot Mini
can successfully guide with a computerized altitude-azimuth or
fork mounted telescope (as long as it includes an autoguide port),
popular among computerized Schmidt-Cassegrain telescopes.
However, guided exposures longer than one minute in an altitude-
azimuth mount will cause eld rotation to occur in the image, so
an EQ mount is recommended instead.
PHD2 Guiding Software
The SS Mini along with the use of PHD2 Guiding (Push Here
Dummy) software makes the task of autoguiding simple and easy
to setup.The latest version of PHD2 can be found at:
https://openphdguiding.org/
Also, before setting up the StarShoot Mini as an Autoguider, make
sure you have downloaded and installed the ASCOM Platform
(located at ascom-standards.org), followed by the StarShoot
ASCOM driver (available on the Orion support page for your cam-
era). PLEASE make sure to install the ASCOM platform BEFORE
you install the ASCOM camera driver, otherwise Windows will
return an error because it cannot nd the proper ASCOM directo-
ries to install this driver.
5
