6
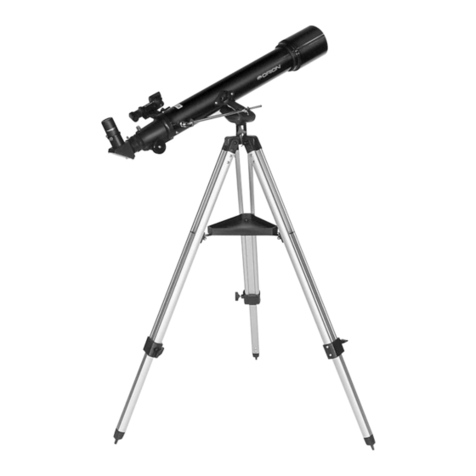
Your Aristocrat 60mm comes with a 25mm focal length Plössl
eyepiece that provides 36x magnification. The Aristocrat can
accept any 1.25" eyepiece (the most common eyepiece bar-
rell diameter). Orion also makes several brass eyepieces that
will provide different magnifications for your Aristocrat 60mm.
To calculate magnification, or power, of a telescope-eyepiece
combination, simply divide the focal length of the telescope by
the focal length of the eyepiece:
Telescope Focal Length (mm) = Magnification
Eyepiece Focal Length (mm)
For example, the Aristocrat 60mm, which has a focal length of
900mm, used in combination with the 25mm eyepiece, yields
a magnification of
900mm = 36x
25mm
Whatever you choose to view, always start by inserting your
lowest power (longest focal length) eyepiece to locate and
center the object. Low magnification yields a wide field of
view, which shows a much larger area in the eyepiece. This
makes finding and centering an object much easier. Trying to
find and center objects with higher power (narrow field of
view) is like trying to find a needle in a haystack!
5. Terrestrial Viewing
Your Aristocrat 60mm excels in terrestrial daytime viewing. It
employs a correct-image finder scope and a correct-image
diagonal to provide views that are right-side up. This will allow
you to comfortably view nature, vistas, boats, etc. Do not view
through a closed window or bug screen as they will cause
distortions to your images. Stick with magnifications below
100x, since at higher powers images rapidly lose sharpness
and quality due to “heat waves” caused by sun-heated air.
Remember to aim well clear of the Sun, as the unfiltered
rays of the sun through the telescope can cause permanent
eye damage.
6. Astronomical Viewing
The Aristocrat 60mm was designed primarily for terrestrial
daytime viewing, but it can be used for astronomy. We recom-
mend using an optional 90° star diagonal when viewing the
night sky.
What to Expect
So what will you see with your telescope? You should be able
to see bands on Jupiter, the rings of Saturn, craters on the
Moon, the waxing and waning of Venus, and several bright
deep-sky objects. Do not expect to see color as you do in
NASA photos, since those are taken with long-exposure cam-
eras and have “false color” added. Our eyes are not sensitive
enough to see color in deep-sky objects except in a few of the
brightest ones.
What about tracking?
As you view objects in the night sky, you will notice that they
slowly move out of the telescope’s field of view. This is due to
the rotation of the earth. To keep an object in the telescope’s
field of view (to “track” it), you will need to make small adjust-
ments to the altitude and azimuth position of the telescope.To
move the telescope in azimuth (left/right), unlock the azimuth
lock knob and turn the telescope a very slight amount. To
move the telescope in altitude (up/down) loosen the altitude
lock lever and make the needed adjustment.
Remember that you are seeing these objects using your own
telescope with your own eyes! The object you see in your eye-
piece is in real-time, and not some conveniently provided
image from an expensive space probe. Each session with
your telescope will be a learning experience. Each time you
work with your telescope it will get easier to use, and stellar
objects will become easier to find. Take it from us, there is big
difference between looking at a well-made full-color NASA
image of a deep-sky object in a lit room during the daytime,
and seeing that same object in your telescope at night. One
can merely be a pretty image someone gave to you. The other
is an experience you will never forget!
Objects to Observe
Now that you are all set up and ready to go, one critical deci-
sion must be made: what to look at?
A. The Moon
With its rocky surface, the Moon is one of the easiest and
most interesting targets to view with your telescope. Lunar
craters, marias, and even mountain ranges can all be clearly
seen from a distance of 238,000 miles away! With its ever-
changing phases, you’ll get a new view of the Moon every
night. The best time to observe our one and only natural satel-
lite is during a partial phase, that is, when the Moon is NOT
full. During partial phases, shadows are cast on the surface,
which reveal more detail, especially right along the border
between the dark and light portions of the disk (called the
“terminator”). A full Moon is too bright and devoid of surface
shadows to yield a pleasing view. Make sure to observe the
Moon when it is well above the horizon to get the sharpest
images.
Use an optional Moon filter to dim the Moon when it is very
bright. It simply threads onto the bottom of the eyepieces
(you must first remove the eyepiece from the focuser to attach
a filter).You’ll find that the Moon filter improves viewing comfort,
and also helps to bring out subtle features on the lunar sur-
face.
