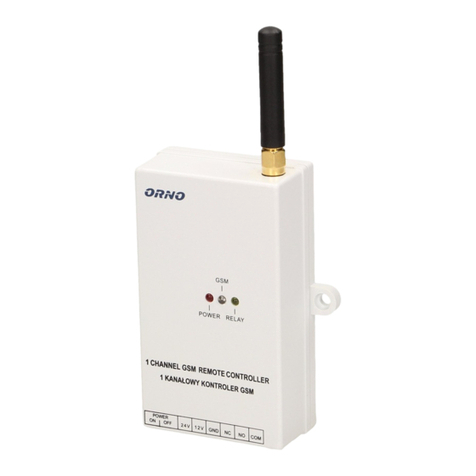
Orno OR-WE-504 User manual

OR-WE-504
Jednofazowy wskaźnik zużycia energii elektrycznej
Single-phase electricity consumption indicator
Einphasige Stromverbrauchsanzeige
ORNO-LOGISTIC Sp. z o.o.
ul. Rolników 437
44-141 Gliwice, POLAND
tel. (+48) 32 43 43 110
Instrukcja obsługi
Operating manual
Bedienungs- und Montageanleitung
(PL) WAŻNE
Przed rozpoczęciem korzystania z urządzenia, należy zapoznać się z niniejszą instrukcją obsługi oraz zachować ją na przyszłość. Dokonanie samodzielnych napraw
i modyfikacji skutkuje utratą gwarancji. Producent nie odpowiada za uszkodzenia mogące wyniknąć z nieprawidłowego montażu czy eksploatacji urządzenia. Z uwagi na fakt, że dane techniczne
podlegają ciągłym modyfikacją, Producent zastrzega sobie prawo do dokonywania zmian dotyczących charakterystyki wyrobu oraz wprowadzania innych rozwiązań konstrukcyjnych nie
pogarszających parametrów i walorów użytkowych produktu. Najnowsza wersja instrukcji do pobrania na stronie www.support.orno.pl. Wszelkie prawa do tłumaczenia/interpretowania oraz prawa
autorskie niniejszej instrukcji są zastrzeżone.
Wskaźnik powinien być instalowany przez wykwalifikowany personel – osoby posiadające wiedzę w zakresie znakowania i uziemienia urządzeń elektrycznych oraz znające przepisy dotyczące
bezpieczeństwa. Nieodpowiednia instalacja i użycie może grozić porażeniem lub pożarem.
1. Nie używaj urządzenia niezgodnie z jego przeznaczeniem.
2. Wskaźnik należy przechowywać w suchym pomieszczeniu.
3. Nie zanurzaj urządzenia w wodzie i innych płynach.
4. Nie instaluj i nie obsługuj urządzenia gdy uszkodzona jest obudowa.
5. Nie modyfikuj urządzenia i nie dokonuj samodzielnych napraw.
6. Należy używać jedynie narzędzi izolowanych.
7. W celu uniknięcia porażenia prądem lub uszkodzenia wskaźnika przy każdej zmianie układu połączenia wyłączyć napięcie zasilania.
8. Przed podłączeniem napięcia zasilania upewnij się, że wszystkie przewody podłączone są prawidłowo.
(EN) IMPORTANT!
Before use of the device, read this service manual and keep it for future. Repairs and modifications carried out by yourselves result in the guarantee invalidation. The manufacturer is not liable for
damages that can get out of improper device installation or operation. In view of the fact the technical data are subject to continuous modifications, the Manufacturer reserves the right to make
changes in the product characteristics and to introduce another constructional solutions that do not deteriorate the product parameters and use values. The latest version of the manual can be
downloaded from www.support.orno.pl. Any rights to translate / construe and the copyright of this manual are reserved. The indicator should be installed by a qualified personnel - persons having
knowledge on marking and grounding the electrical appliances and knowing regulations concerning safety. Improper installation can make a risk of electric shock or fire.
1. Do not use the device contrary to its intended use.
2. The indicator shall be stored in a dry room.
3. Do not immerse the device in water or another fluids.
4. Do not install nor operate the device with damaged housing.
5. Do not modify the device nor repair it by yourselves.
6. Use only insulated tools.
7. To avoid electric shock or indicator damage, switch off the supply voltage before any change of the connection system.
8. Before connection of the supply voltage, make sure that all conductors are connected properly.
(DE) WICHTIG!
Bevor Sie das Gerät in Betrieb nehmen, lesen Sie bitte diese Bedienungsanleitung und bewahren Sie sie zum späteren Nachschlagen auf. Jegliche Reparaturen oder Änderungen durch den Benutzer
führen zum Erlöschen der Garantie. Der Hersteller haftet nicht für Schäden, die durch unsachgemäße Montage oder Bedienung des Gerätes entstehen können. Aufgrund ständiger Änderungen
technischer Daten behält sich der Hersteller das Recht vor, Änderungen an den Produkteigenschaften vorzunehmen und andere konstruktive Lösungen einzuführen, welche die Parameter und
Nutzwerte des Produkts nicht verschlechtern. Die neuste Version der Anleitung kann unter www.support.orno.pl. heruntergeladen werden. Alle Übersetzungs-/Auslegungsrechte und Urheberrechte
dieser Anleitung sind vorbehalten. Der Indikator sollte von einer Elektrofachkraft installiert werden, die mit der Kennzeichnung und Erdung von elektrischen Geräten und den Sicherheitsvorschriften
vertraut ist. Unsachgemäße Installation und Betrieb können zu einem Stromschlag oder Brand führen.
1. Verwenden Sie das Gerät bestimmungsgemäß.
2. Der Indikator ist in einem trockenen Raum aufzubewahren.
3. Tauchen Sie das Gerät nicht in Wasser oder andere Flüssigkeiten.
4. Installieren und betreiben Sie das Gerät nicht, wenn das Gehäuse beschädigt ist.
5. Ändern Sie das Gerät nicht und reparieren Sie es nicht selbst.
6. Nur isolierte Werkzeuge verwenden.
7. Um einen Stromschlag oder eine Beschädigung das Gerät zu vermeiden, schalten Sie die Stromversorgung bei jeder Änderung der Schaltung ab.
8. Vor Anschluss der Stromversorgung stellen Sie sicher, dass alle Kabel korrekt angeschlossen sind.
Każde gospodarstwo jest użytkownikiem sprzętu elektrycznego i elektronicznego, a co za tym idzie potencjalnym wytwórcą niebezpiecznego dla ludzi i środowiska odpadu, z tytułu obecności w sprzęcie niebezpiecznych substancji,
mieszanin oraz części składowych. Z drugiej strony zużyty sprzęt to cenny materiał, z którego możemy odzyskać surowce takie jak miedź, cyna, szkło, żelazo i inne.
Symbol przekreślonego kosza na śmieci umieszczany na sprzęcie, opakowaniu lub dokumentach do niego dołączonych oznacza, że produktu nie wolno wyrzucać łącznie z innymi odpadami. Oznakowanie oznacza jednocześnie, że sprzęt
został wprowadzony do obrotu po dniu 13 sierpnia 2005 r. Obowiązkiem użytkownika jest przekazanie zużytego sprzętu do wyznaczonego punktu zbiórki w celu właściwego jego przetworzenia. Informacje o dostępnym systemie
zbierania zużytego sprzętu elektrycznego można znaleźć w punkcie informacyjnym sklepu oraz w urzędzie miasta/gminy. Odpowiednie postępowanie ze zużytym sprzętem zapobiega negatywnym konsekwencjom dla środowiska
naturalnego i ludzkiego zdrowia!
Each household is a user of electrical and electronic equipment, and hence a potential producer of hazardous waste for humans and the environment, due to the presence of hazardous substances, mixtures and components in the
equipment. On the other hand, used equipment is valuable material from which we can recover raw materials such as copper, tin, glass, iron and others. The weee sign placed on the equipment, packaging or documents attached to it
indicates the need for selective collection of waste electrical and electronic equipment. Products so marked, under penalty of fine, cannot be thrown into ordinary garbage along with other waste. The marking means at the same time
that the equipment was placed on the market after August 13, 2005. It is the responsibility of the user to hand the used equipment to a designated collection point for proper processing. Used equipment can also be handed over to the
seller, if one buys a new product in an amount not greater than the new purchased equipment of the same type. Information on the available collection system of waste electrical equipment can be found in the information desk of the
store and in the municipal office or district office. Proper handling of used equipment prevents negative consequences for the environment and human health!
Jeder Haushalt ist ein Anwender von Elektro- und Elektronikgeräten und damit ein potenzieller Erzeuger von Abfällen, die für Mensch und Umwelt aufgrund des Vorhandenseins von gefährlichen Stoffen, Gemischen und Komponenten
in den Geräten gefährlich sind. Andererseits sind Altgeräte ein wertvoller Rohstoff, aus dem Rohstoffe wie Kupfer, Zinn, Glas, Eisen und andere zurückgewonnen werden können. Das Symbol der durchgestrichenen Mülltonne auf der
Verpackung, dem Gerät oder den dazugehörigen Dokumenten, weist auf die Notwendigkeit der getrennten Sammlung von Elektro- und Elektronikaltgeräten hin. Auf diese Weise gekennzeichnete Produkte dürfen unter Strafe nicht
zusammen mit anderen Abfällen entsorgt werden. Die Kennzeichnung weist gleichzeitig darauf hin, dass die Geräte nach dem 13 August 2005 in Verkehr gebracht wurden. Es liegt in der Verantwortung des Benutzers, die Altgeräte zur
ordnungsgemäßen Behandlung an eine dafür vorgesehene Sammelstelle zu bringen. Informationen über das verfügbare System zur Sammlung von Elektroaltgeräten finden Sie in der Informationsstelle des Ladens und im
Magistrat/Gemeindeamt. Ein sachgemäßer Umgang mit Altgeräten verhindert negative Folgen für die Umwelt und die menschliche Gesundheit!
06/2021
WYMIARY/ DIMENSIONS/ ABMESSUNGEN

2
Instrukcja obsługi
Operating Manual
Bedienungs- und Montageanleitung
CHARAKTERYSTYKA
DESCRIPTION
BESCHREIBUNG
OR-WE-504 jest 1-fazowym elektronicznym
urządzeniem do dokonywania wskazań w jednostkach
metrycznych (kWh) lecz nie służącym do dokonywania
pomiarów rozliczeniowych. Służy do wskazań energii
elektrycznej prądu przemiennego jednofazowego
w układzie bezpośrednim i rejestracji pobranej energii
elektrycznej z możliwością zdalnego odczytu rejestrów
grupy wskaźników poprzez przewodową sieć standardu
RS-485 obsługujący standardowy protokół Modbus.
Specjalny układ elektroniczny pod wpływem
przepływającego prądu i przyłożonego napięcia
generuje impulsy w ilości proporcjonalnej do pobieranej
energii elektrycznej. Pobór energii w fazie sygnalizowany
jest miganiem LED. Liczba impulsów jest przeliczana na
energię pobraną a jej wartość wskazywana jest przez
wyświetlacz LCD.
OR-WE-504 is a 1-phase electronic indication device
in metric units (kWh) but not for billing measuring. It
is used for direct indication of single phase AC
electricity and registration of consumed electricity
with the possibility of remote reading of registers of a
group of indicators through a wired network standard
RS-485 supporting a standard Modbus protocol.
Under the influence of flowing current and applied
voltage, a special electronic system generates
impulses proportional to the amount of electricity
consumed. The power consumption in the phase is
indicated by LED flashing. The number of pulses is
converted into energy consumption and its value is
indicated by the LCD display.
OR-WE-504 ist ein 1-phasiges elektronisches
Anzeigegerät in metrischen Einheiten (kWh), aber nicht
zum Abrechnungsmessungen. Es dient zur direkten
Anzeige von einphasigem Wechselstrom und zur
Registrierung des verbrauchten Stroms mit der
Möglichkeit der Fernablesung von Registern einer
Gruppe von Anzeigern über ein kabelgebundenes
Netzwerk Standard RS-485, das ein Standard-Modbus-
Protokoll unterstützt. Unter dem Einfluss von fließendem
Strom und angelegter Spannung erzeugt ein spezielles
elektronisches System Impulse, die proportional zur
verbrauchten Strommenge sind. Die Leistungsaufnahme
in der Phase wird durch Blinken der LED angezeigt. Die
Anzahl der Impulse wird in verbrauchte Energie
umgewandelt, und ihr Wert wird auf dem LCD-Display
angezeigt.
WŁAŚCIWOŚCI
PROPERTIES
EIGENSCHAFTEN
Prąd rozruchowy – najniższa wartość prądu obciążenia,
którą wskaźnik wykrywa i rejestruje.
Prąd minimalny – najniższa wartość prądu obciążenia,
którą wskaźnik rejestruje zgodnie z normą.
Prąd bazowy – określa wartość prądu, przy którym
procentowy błąd pomiarowy jest bliski zeru.
Prąd maksymalny – to maksymalny prąd, jakim możemy
stale obciążać wskaźnik energii elektrycznej.
Starting current- the lowest value of the load current
that is detected and registered by the indicator.
Minimum current - the lowest value of the load
current that is detected and registered by the
indicator.
Base current - specifies the current value when
percentage measurement error is near zero.
Maximum current - the permissible maximum current
to load the electric energy indicator constantly.
Anlaufstrom – der niedrigste Wert des Laststroms, den
vom Indikator erfasst und aufzeichnet.
Mindeststrom - der niedrigste Wert des Laststroms, den
vom Indikator gemäß der Norm aufzeichnet.
Referenzstrom - bestimmt den Wert des Stroms, bei dem
der prozentuale Messfehler nahe Null liegt.
Grenzstrom - der zulässige maximale Strom, um den
Indikator für elektrische Energie konstant zu belasten.
MONTAŻ
INSTALLATION
MONTAGE
1. Odłącz zasilanie rozdzielni.
2. Zamocuj wskaźnik na standardowej szynie DIN
35mm.
3. Odchyl pokrywy zacisków podłączeniowych
urządzenia.
4. Podłącz obwód prądowy zgodnie ze schematem
podłączenia:
- fazę wejściową podłącz do zacisku 1 (L-IN),
- do zacisku N podłącz przewód neutralny,
- obwód mierzony lub pojedynczy odbiornik
podłączyć do zacisku 2 (faza wyjściowa) L-OUT oraz
przewód neutralny (nie musi to być bezpośrednio
styk N we wskaźniku, a np. szyna N w rozdzielnicy),
- zaciski 23 i 25 podłączyć do sieci RS-485.
5. Zamknij pokrywy zacisków urządzenia.
1. Disconnect the power supply to the switchboard.
2. Fix the indicator on a standard 35mm DIN rail.
3. Fold back the connection terminal covers of the
device.
4. Connect according to the circuit diagram:
- connect the input phase to terminal 1 (L-IN),
- connect the neutral wire to the N terminal,
- connect the measured circuit or a single consumer to
terminal 2 (output phase) L-OUT and the neutral wire
(it does not have to be directly the N contact in the
indicator, but e.g. the N-rail in the distribution board),
- connect terminals 23 and 25 to the RS-485 network.
5. Close the terminal covers of the device.
1. Trennen Sie die Stromversorgung der Schalttafel.
2. Montieren Sie das Anzeigegerät auf einer Standard-
DIN-Schiene (35mm).
3. Klappen Sie die Abdeckungen der Anschlussklemmen
am Gerät zurück.
4. Schließen Sie den Stromkreis gemäß dem Schaltplan
an:
- Schließen Sie die Eingangsphase an Klemme 1 (L-IN) an,
- Schließen Sie den Nullleiter an die Klemme N an,
- Schließen Sie den gemessenen Stromkreis oder einen
einzelnen Verbraucher an die Klemme 2 (Ausgangsphase)
L-OUT und den Nullleiter an (es muss nicht direkt der N-
Kontakt im Messgerät sein, sondern z.B. die N-Schiene
im Verteiler),
- verbinden Sie die Klemmen 23 und 25 mit dem RS-485-
Netzwerk.
5. Schließen Sie die Klemmenabdeckungen am Gerät.
SCHEMAT PODŁĄCZENIA/ CIRCUIT DIAGRAM/ ANSCHLUSSPLAN
1: L-IN – Napięcie wejściowe/ Input voltage/ Eingangsspannung
3: L-OUT – Napięcie wyjściowe/ Output voltage/ Ausgangsspannung
N – Zacisk neutralny/ Neutral terminal/ Neutrale Klemme
23: Zacisk A magistrali RS485
24: Zacisk G magistrali RS485
25: Zacisk B magistrali RS485
Uwaga: Zaciski 23.24.25 odpowiadają A, G, B.
Jeżeli konwerter komunikacyjny RS485 nie ma portu G, nie ma potrzeby podłączania go.
Dla przewodu zerowego, można podłączyć jeden port N lub połączyć oba.
Note: Terminals 23, 24, 25 correspond to A, G, B.
If the communication converter RS485 has no G port, no connection is needed.
For the neutral conductor, you can connect one N port or connected the both.
Achtung: Die Klemmen 23.24.25 entsprechen A, G, B.
Wenn der RS485-Kommunikationskonverter keinen G-Port hat, muss er nicht angeschlossen werden.
An einen Neutralleiter muss ein N-Port angeschlossen werden oder beide mössen verbunden werden.
Wyświetlane pozycje na wyświetlaczu LCD:
A - Prąd/Current/Strom

3
ZDALNY ODCZYT/REMOTE READOUT/FERNAUSLESEN
PODŁĄCZENIE
CONNECTION
VERBINDUNG
Połączenie pomiędzy protokołem MODBUS-RTU oraz aplikacją
realizowane jest za pośrednictwem stadardowego kowertera USB
RS485.
Połączenie pomiędzy konwerterem, a wskaźnikiem OR-WE-504
powinno być wykonane za pomocą dwużyłowego przewodu
komunikacyjnego dostosowanego do standardu RS485.
The connection between the MODBUS-RTU protocol and the
application is realized via standard USB RS485 coupler.
Connection between the converter and the indicator OR-WE-
504 should be made using a two-wire communication cable
adapted to the RS485 standard.
Die Verbindung zwischen MODBUS-RTU-Protokoll und
Applikation wird über einen Standard-USB-RS485- Konverter
realisiert.
Verbindung zwischen dem Konverter und dem Indikator OR-WE-
504-Anzeige sollte über ein zweiadriges Kommunikationskabel
erfolgen, das an den RS485-Standard angepasst ist.
OBSŁUGA PROGRAMU/PROGRAMME OPERATION/PROGRAMMBETRIEB
Do odpowiedniej konfiguracji i odczytywania wartości z
wskaźnika potrzebne jest wcześniejsza instalacja
oprogramowania, które należy pobrać bezpłatnie ze strony
internetowej: www.support.orno.pl
For proper configuration and reading of values from the
indicator, you need to install software in advance, which can
be downloaded free of charge from the website:
www.support.orno.pl
Für die korrekte Konfiguration und das Ablesen der Werte vom
Indikator müssen Sie eine Software installieren, die Sie kostenlos
von der Website www.support.orno.pl herunterladen können.
Przed rozpoczęciem pracy z programem należy skonfigurować
połączenie programu z konwerterem RS-485. W tym celu należy
podłączyć do komputera konwerter.
Za pośrednictwem menadżera urządzeń lub w panelu sterowania
należy sprawdzić jaki numer portu COM został przyporządkowany
do konwertera.
Po uruchomieniu aplikacji na ekranie komputera wyświetlone
zostanie główne okno programu.
W celu połączenia się komputera ze wskaźnikiem należy kliknąć w
polecenie Serial port not connect.
Before working with the software, it is necessary to configure
the connection between the software and the RS-485
converter. To do this, connect the converter to the computer.
Using the device manager or the control panel, check what
COM port number has been assigned to the converter.
After starting the application, the main program window will be
displayed on the computer screen.
In order for the computer to connect to the indicator, click on
Serial port not connect.
Bevor Sie mit der Software arbeiten, ist es notwendig, die
Verbindung zwischen der Software und dem RS-485-Konverter zu
konfigurieren. Schließen Sie dazu den Konverter an den Computer
an.
Prüfen Sie im Gerätemanager oder in der Systemsteuerung,
welche COM-Port-Nummer dem Konverter zugewiesen wurde.
Nach dem Starten der Anwendung wird das
Hauptprogrammfenster auf dem Bildschirm des Computers
angezeigt.
Damit der Computer eine Verbindung mit dem Anzeigegerät
herstellen kann, klicken Sie auf Serieller Anschluss nicht verbinden.
Następnie należy poprawnie skonfigurować połączenie wpisując
wartości, takie jak pokazano na rysunku poniżej.
Uwaga: Należy wybrać odpowiedni port COM, pod który został
przypisany twój konwerter.
Then configure the connection correctly by entering the
values as shown in the figure below.
Important: You must select the correct COM port to which
your converter is assigned.
Konfigurieren Sie dann die Verbindung korrekt, indem Sie Werte
wie in der Abbildung unten dargestellt eingeben.
Wichtig: Wählen Sie den entsprechenden COM-Port, dem Ihr
Konverter zugeordnet ist.
Typ
Type
Typ
OR-WE-504
Stała wskaźnika imp/kWh
Indicator constant
Anzeigekonstante
1000
Ustawienie stałej wskaźnika
Indicator constant settings
Anzeigekonstante (Einstellungen)
x
Wyjście impulsowe S0
Pulse output S0
S0 Ausgang
x
Protokół RS485, Modbus-RTU
✓
Niebieskie Podświetlenie
Blue Backlight
Blaue Hinterleuchtung
x
Podtrzymanie pamięcią
Memory support
Speicher-Unterstützung
EPROM
Tryb pomiaru
Measuring mode
Messmodus
Moc czynna
Active power
Wirkleistung
✓
Wielotaryfowość
Multi-tariffs
Multi-Tarife
x
PARAMETRY TECHNICZNE/TECHNICAL DATA/ TECHNISCHE DATEN
OR-WE-502
Napięcie znamionowe
Częstotliwość
Rated voltage
Frequency
Nennspannung
Frequenz
230V~, 50Hz
Prąd rozruchowy (Ist)
Prąd min. (lmin)
Prąd bazowy (lb)
Prąd maks. (lmax)
Starting current
Min. current
Base current
Max. current
Anlaufstrom
Mindeststrom
Referenzstrom
Grenzstrom
0,001A
0,25A
5A
80A
Klasa dokładności
Accuracy class
Genauigkeitsklasse
1
Wyświetlacz LCD
LCD
LCD
LCD 5+1 = 12345,1 kW
Temperatura robocza
Working temperature
Betriebs
temperatur
-20~45℃
Wilgotność
maksymalna
Maximum humidity
Maximale Luftfeuchtigkeit
≤75%, max 95%
Materiał
Materials
Werkstoffe
PBT / PC
Stopień ochrony
Protection level
Schutzart
IP20
Maks. Przekrój
przewodów
przyłączeniowych
Max. cross-section of cables
Max. Querschnitt der
Anschlusskabel
35 mm2
Montaż
Installation
Montage
Na szynę/ DIN rail / DIN-Shine TH-35
Szerokość
Width
Breite
1 moduł/module/Module 19,5mm
Waga netto
Net weight
Nettogewicht
0,12kg

4
W celu zaakceptowania ustawień naciśnij OK, jeśli połączenie
zostanie aktywowane, ikona Serial port not connect zmieni się
na Serial port connect.
Press OK to accept the settings, if the connection is activated
the Serial port not connect icon will change to Serial port
connect.
Drücken Sie OK, um die Einstellungen zu übernehmen. Wenn
die Verbindung aktiviert ist, ändert sich das Symbol "Serial port
not connect" in "Serial port connect".
Kolejnym krokiem jest uzupełnienie pola “groupBox2”.
We wszystkie pola Input należy wpisać wartości jakie pokazane
są na rysunku (jeżeli został zmieniony adres ID wskaźnika należy
wpisać poprawną wartość), a następnie odczytać przyciskiem
read. Jeśli operacja została wykonana popra wnie, wczytane
zostaną informacje na temat dotychczasowych pomiarów energii
oraz w prawym dolnym rogu pojawi się komunikat
"Communication Succesfully!”
Uwaga: Przed przystąpieniem do montażu należy bezwzględnie
odłączyć zasilanie. Instalacji urządzenia powinien dokonać
wykwalifikowany elektryk!
The next step is to complete the field "groupBox2".
In all Input fields, enter the values as shown in figure (if the
indicator ID address has been changed, the correct value must be
entered), and then read them using the read button. If the
operation has been performed correctly, the information about
the energy measurements so far will be loaded and the message
"Communication Successfully!" will appear in the lower right
corner.
Important: It is necessary to disconnect the power supply before
installation. The device should be installed by a qualified
electrician!
Der nächste Schritt ist das Ausfüllen des Feldes "groupBox2".
Geben Sie in alle Eingabefelder die Werte ein, wie in der
Abbildung gezeigt (wenn die Adresse der Indikator-ID geändert
wurde, muss der korrekte Wert eingegeben werden), und lesen
Sie sie dann mit der Taste "Lesen" aus. Wenn der Vorgang korrekt
durchgeführt wurde, werden die Informationen über die
bisherigen Energiemessungen eingelesen und die Meldung
"Kommunikation erfolgreich!" erscheint in der unteren rechten
Ecke.
Wichtig: Trennen Sie vor der Installation unbedingt die
Spannungsversorgung. Das Gerät sollte von einer
Elektrofachkraft installiert werden!
W celu zmiany adresu ID wskaźnika należy w polu Options
wybrać “Meter adress”. Następnie wpisać nowy adres poniżej
oraz zawierdzić przyciskiem SET.
To change the ID address of the indicator, select "Meter
address" in the Options field. Then enter the new address below
and confirm with the SET button.
Um die ID-Adresse des Indikators zu ändern, wählen Sie
"Zähleradresse" im Feld Optionen. Geben Sie dann unten die
neue Adresse ein und bestätigen Sie mit der SET-Taste.
Other Orno Controllers manuals
Popular Controllers manuals by other brands

Enterasys
Enterasys C5110 quick reference

Franke
Franke AQUA802 Installation and operating instructions

Meridian
Meridian DSW user guide

Compur Monitors
Compur Monitors Statox 501 Operation instructions

ITW Dynatec
ITW Dynatec DPC2 Operation and service manual

Lynxspring
Lynxspring JENEsys Edge 414 installation guide