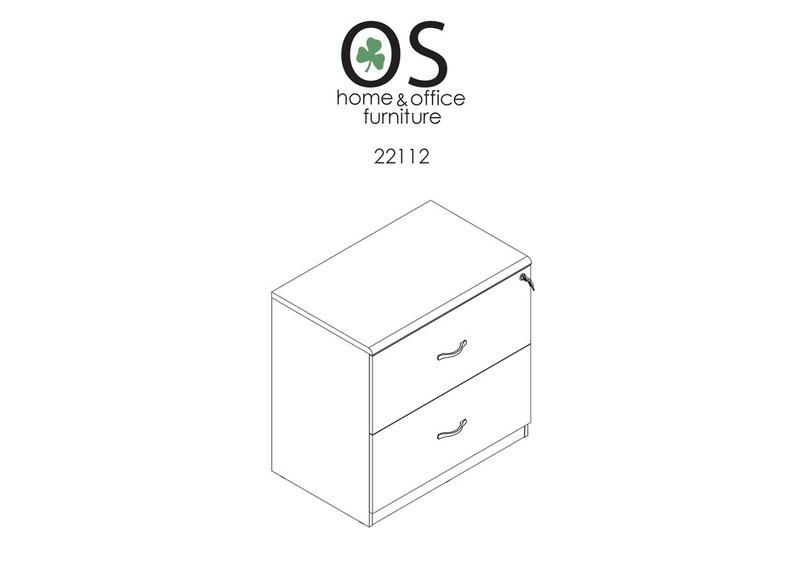
OS 22110 User manual

OS
home office
furniture
&
22110
Stop !!
If you are planning to combine this item with either one or two of model 22111
drawer extension units, set aside these instructions and use the instructions
provided with model 22111.

2
Thank you for purchasing this quality product. Please be sure to check all packing
material carefully for small parts which may have came loose inside the carton
during shipment. Count all parts and hardware and compare with the parts list to
be sure all parts are present. If any parts are missing or damaged, phone, fax or
email to our Customer Service Department. For efficient and speedy service
please indicate the model number and code letter of part(s) needed.
If you have any damaged or missing parts please contact us at:
OS Home & Office Furniture
1011a Gulf
Lamar, MO 64759
417 682 5522
417 682 5524 fax
IMPORTANT NOTE: Follow instructions listed below in proper sequence as
numbered to assure fast, easy and correct assembly.

(W) x 2
drawer pull
(X) x 4
3/4”round-head screw
(Y) x 37
big cam bolt
(Aa) x 48
1 1/4”x 3/8”dia wood
dowel with ridges
(Z) x 37
big cam lock
(Cc) x 4
small cam lock
(Dd) x 8
1 1/4”x 1/4”dia wood
dowel with ridges
(Ff) x 1
left hanger glide
(Ee) x 12
5/8”round-head screw
(Ii) x 4
glue
(Hh) x 8
1 3/8”flat-head screw
(Gg) x 1
right hanger glide
(Jj) x 14
pvc cap
(Bb) x 4
small cam bolt
(Kk) x 25
plastic cap
hardware
(Ll) x 1
screwdriver
3
(Mm) x 8
sponge cushion
(Nn) x 4
metal plate
(Oo) x 4
1/4”round-head screw

ITEM DESCRIPTION QUANTITY
4
A
left upright
right upright
back panel
right partition
key board
monitor platform
small left top shelf
small right top shelf
small left upright
small right upright
back panel
divider panel
left back rail
small back support rail
drawer front
left partition
big top shelf
drawer left side
drawer right side
drawer back
drawer bottom
drawer pull
3/4”round-head screw
big cam bolt
right back rail
big cam lock
1
1
1
2
1
1
1
1
1
1
1
2
2
1
2
2
2
2
4
1
2
2
2
4
37
37
48
A
B
C
D
E
F
G
H
I
J
K
L
N
Q
S
T
V
M
O
P
R
U
W
X
Y
Z
Aa
BC
D
EF
H
I
JK
M
L
4
Bb
small cam lock 4
Cc
G
N
Q
8
Dd 1 1/4”x 1/4” dia wood
dowel with ridges
12
Ee 5/8”round-head screw
1
Ff left hanger glide
1 1/4”x 3/8”dia wood
dowel with ridges D
L
M
O
O
O
O
P
N
R x2
T x2 U x2
S x2
V x2
right hanger glide 1
Gg
1 3/8”flat-head screw 8
Hh
glue 4
Ii
pvc cap 14
Jj
plastic cap 25
Kk
small cam bolt
screwdriver 1
Ll
sponge cushion
Mm 8
metal plate
Nn 4
1/4”round-head screw
Oo 4

1. 2. 3.
4. 5.
how to use the cam lock system
180º
5

step 1.
(Y) x 4
big cam bolt
B
E
D
(Z) x 4
big cam lock
(Aa) x 4
1 1/4”x 3/8”dia wood
dowel with ridges
(li) glue
Ii
(Kk) x 4
plastic cap
Jj
Aa
ZKk
Y
(Jj) x 7
pvc cap
Jj
1.Attach left upright B to back panel D as shown.
2.Attach left partition E to back panel D as shown.
3.Tighten all cams.
6

step 2.
7
Aa
Y
C
D
F
(Y) x 4
big cam bolt
(Z) x 4
big cam lock
(Aa) x 4
1 1/4”x 3/8”dia wood
dowel with ridges
Kk
(Kk) x 4
plastic cap
Z
(Jj) x 7
pvc cap
Jj
Jj
(li) glue
Ii
1.Attach right upright C to back panel D as shown.
2.Attach right partition F to back panel D as shown.
3.Tighten all cams.

step 3.
C
D
F
B
E
D
(Y) x 3
big cam bolt
(Z) x 3
big cam lock
(Aa) x 2
1 1/4”x 3/8”dia wood
dowel with ridges
Y
Aa
(Kk) x 3
plastic cap
Z
Kk
Ii
(li) glue
1.Attach big cam bolts Y to panel F as shown.
2.Insert big cam locks Z and dowels Aa to panel E as shown.
3.Carefully align fasteners and secure part F to part E.
3.Tighten all cams.
8

step 4.
9
(Ff) x 1
left hanger glide
(Gg) x 1
right hanger glide
1.Attach metal plate (Nn) to the left and right hanger glides using screws (Oo).
Ff Gg
(Nn) x 4
metal plate
(Oo) x 4
1/4”round-head screw
Nn
Nn
Oo
Oo
Nn
Nn
Oo
Oo

step 5.
10
(Ee) x 4
5/8”round-head screw
1.Attach keyboard shelf G to the right and left hanger glides as shown using screws Ee.
Gg
Ff
G
Bottom Side
Front Edge
Ee

step 6.
(Ee) x 8
5/8”round-head screw
Ee
1.Install big cam bolts Y to underside of big top shelf A as shown.
2.Attach keyboard assembly to underside of big top shelf A as shown.
11
(Y) x 12
big cam bolt
G
A
Y
Y
Y

step 7.
12
A
C
D
F
B
E
D
(Aa) x 10
1 1/4”x 3/8”dia wood
dowel with ridges
(Z) x 12
big cam lock
(Kk) x 12
plastic cap
Aa
Z
Kk
1.Install big cam locks (Z) and glue dowels (Aa) into parts B,D,E,F,D,and C.
2.With a helper, carefully place big top shelf (A) onto base of unit.
3.After making sure the big top shelf (A) is properly seated over all cam bolts and dowels, tighten all of the big cam locks (Z).
Ii
(li) glue

step 8.
1. Attach left back rail (P) to small left upright (L) and small right upright (M) with hardware as shown.
2. Attach right back rail (Q) to small left upright (L) and small right upright (M) with hardware as shown.
M
L
P
M
L
Q
(Y) x 4
big cam bolt
(Dd) x 4
1 1/4”x 1/4”dia wood
dowel with ridges
(Z) x 4
big cam lock
Y
Z
Dd Dd
Z
Y
Ii
13
Ll
(li) glue

step 9.
1. Glue divider panels (O) to left back rail (P) with dowels (Aa).
2. Glue divider panels (O) to right back rail (Q) with dowels (Aa).
14
O
OO
O
M
LM
L
(Aa) x 4
1 1/4”x 3/8”dia wood
dowel with ridges
Aa Aa
Ii
(li) glue
P
Q

1. Install big cam bolts (Y) to the underside of small left top shelf (J) and small top shelf (K).
2. Glue dowels (Aa) into parts L,O and M.
3. Place back panel (N) in groove.
4.Carefully place left top shelf (J) onto assembly making sure back panel (N) is aligned in both
top and bottom grooves.Fasten cams using special screw driver (Li).
5. Repeat process for right top shelf (K).
step 10.
J
K
N
N
(Y) x 8
big cam bolt
(Z) x 8
big cam lock
(Aa) x 12
1 1/4”x 3/8”dia wood
dowel with ridges
L
L
M
M
O
O
O
O
Z
Z
Aa
Y
Aa
Y
15
Ll
(li) glue

16
step 11.
JK
A
(Aa) x 8
1 1/4”x 3/8”dia wood
dowel with ridges
Aa
Ii
1.Place dowels (Aa) into holes on big top shelf (A) - these holes are for location only.The glue is optional.
2. Place assemblies (J) and (K) on unit as shown.
(li) glue

step 12.
H
I
(Y) x 2
big cam bolt
(Z) x 2
big cam lock
Z
(Kk) x 2
Y
Kk
17
1.Attach parts (I) to platform (H) using cam bolts and cam locks.
2.Tighten cam locks.

step 13.
18
(Aa) x 4
1 1/4”x 3/8”dia wood
dowel with ridges
H
Aa
Ii
1.Using dowels and glue attach part H to desk.
(li) glue

step 14.
(Cc) x 4
small cam lock
(Dd) x 4
1 1/4”x 1/4”dia wood
dowel with ridges
(Hh) x 8
1 3/8”flat-head screw
(Bb) x 4
small cam bolt
Dd
X2
S
T
U
V
(W) x 2
drawer pull
(X) x 4
3/4”round-head
screw
W
X
Cc
Bb
Hh
R
Hh
19
Ii
(li) glue
1. Attach small cam bolts (Bb) and dowels (Dd) to drawer front (R) using glue.
2.Attach drawer pull (W) to drawer front.
3.Attach drawer left side (T) to drawer back (U) using screws (Hh).
4.Repeat for drawer right side.
5.Slide drawer bottom (V) into groove.
6.Install small cam locks (Cc) and glue dowels (Dd) into drawer sides.
7.Attach drawer front (R) to drawer using glue and tighten cam locks.

1. Place sponge cushions on the underside of drawer sides.
20
step 15.
081 °
(Mm) x 8
sponge cushion
V
Mm
X2
Other OS Indoor Furnishing manuals
Popular Indoor Furnishing manuals by other brands

Regency
Regency LWMS3015 Assembly instructions

Furniture of America
Furniture of America CM7751C Assembly instructions

Safavieh Furniture
Safavieh Furniture Estella CNS5731 manual

PLACES OF STYLE
PLACES OF STYLE Ovalfuss Assembly instruction

Trasman
Trasman 1138 Bo1 Assembly manual

Costway
Costway JV10856 manual