IMPORTANT SAFETY INSTRUCTIONS
Thank you for purchasing the Sonno XT-2 Leather GravZero Recliner. Before using your chair, please
take some time to read the contents of this instrution manual for greater user experience.
Please continue to use this manual as a reference guide. When using an electrical appliance, basic precautions should always be followed, including the following:
• Always unplug this appliance from the electrical outlet immediately after using and before cleaning.
• Never use pins or other metallic fasteners with this appliance.
•Carefully examine the covering before each use. Discard the appliance if the covering shows any
sign of deterioration, such as checking, blistering, or cracking.
•Keep Dry-Do not operate in a wet or moist condition.
• An appliance should never be left unattended when plugged in. Unplug from outlet when not in use,
and before putting on or taking off parts.
• Close supervision is necessary when this appliance is used by, on, or near children, invalids,
or disabled persons.
• Use this appliance only for its intended use as described in this manual. Do not use attachments
not recommended by the manufacturer.
dropped or damaged, or dropped into water. Return the appliance to a service center for examination
• Never operate this appliance if it has a damaged cord or plug, if it is not working properly, if it has been
• Do not carry this appliance by supply cord or use cord as a handle.
• Keep the cord away from heated surfaces.
• Never operate the appliance with the air openings blocked. Keep the air openings free of lint, hair,
• Never drop or insert any object into any opening.
• Do not use outdoors.
• Do not operate where aerosol (spray) products are being used or where oxygen is being administered.
• To disconnect, turn all controls to the off position, then remove plug from outlet.
• Keep children away from extended foot support.
•Use heated surfaces carefully. May cause serious burns. Do not use over insensitive skin areas or
• Do not operate under blanket or pillow. Excessive heating can occur and cause fire, electric shock,
or injury to persons.
and repair.
and the like.
may be dangerous.
in the presence of poor circulation. The unattended use of heat by children or incapacitated persons
Sonno XT-2 Leather
GravZero Recliner
TABLE OF CONTENTS
Safety Instructions 01-02
04
09-11
12
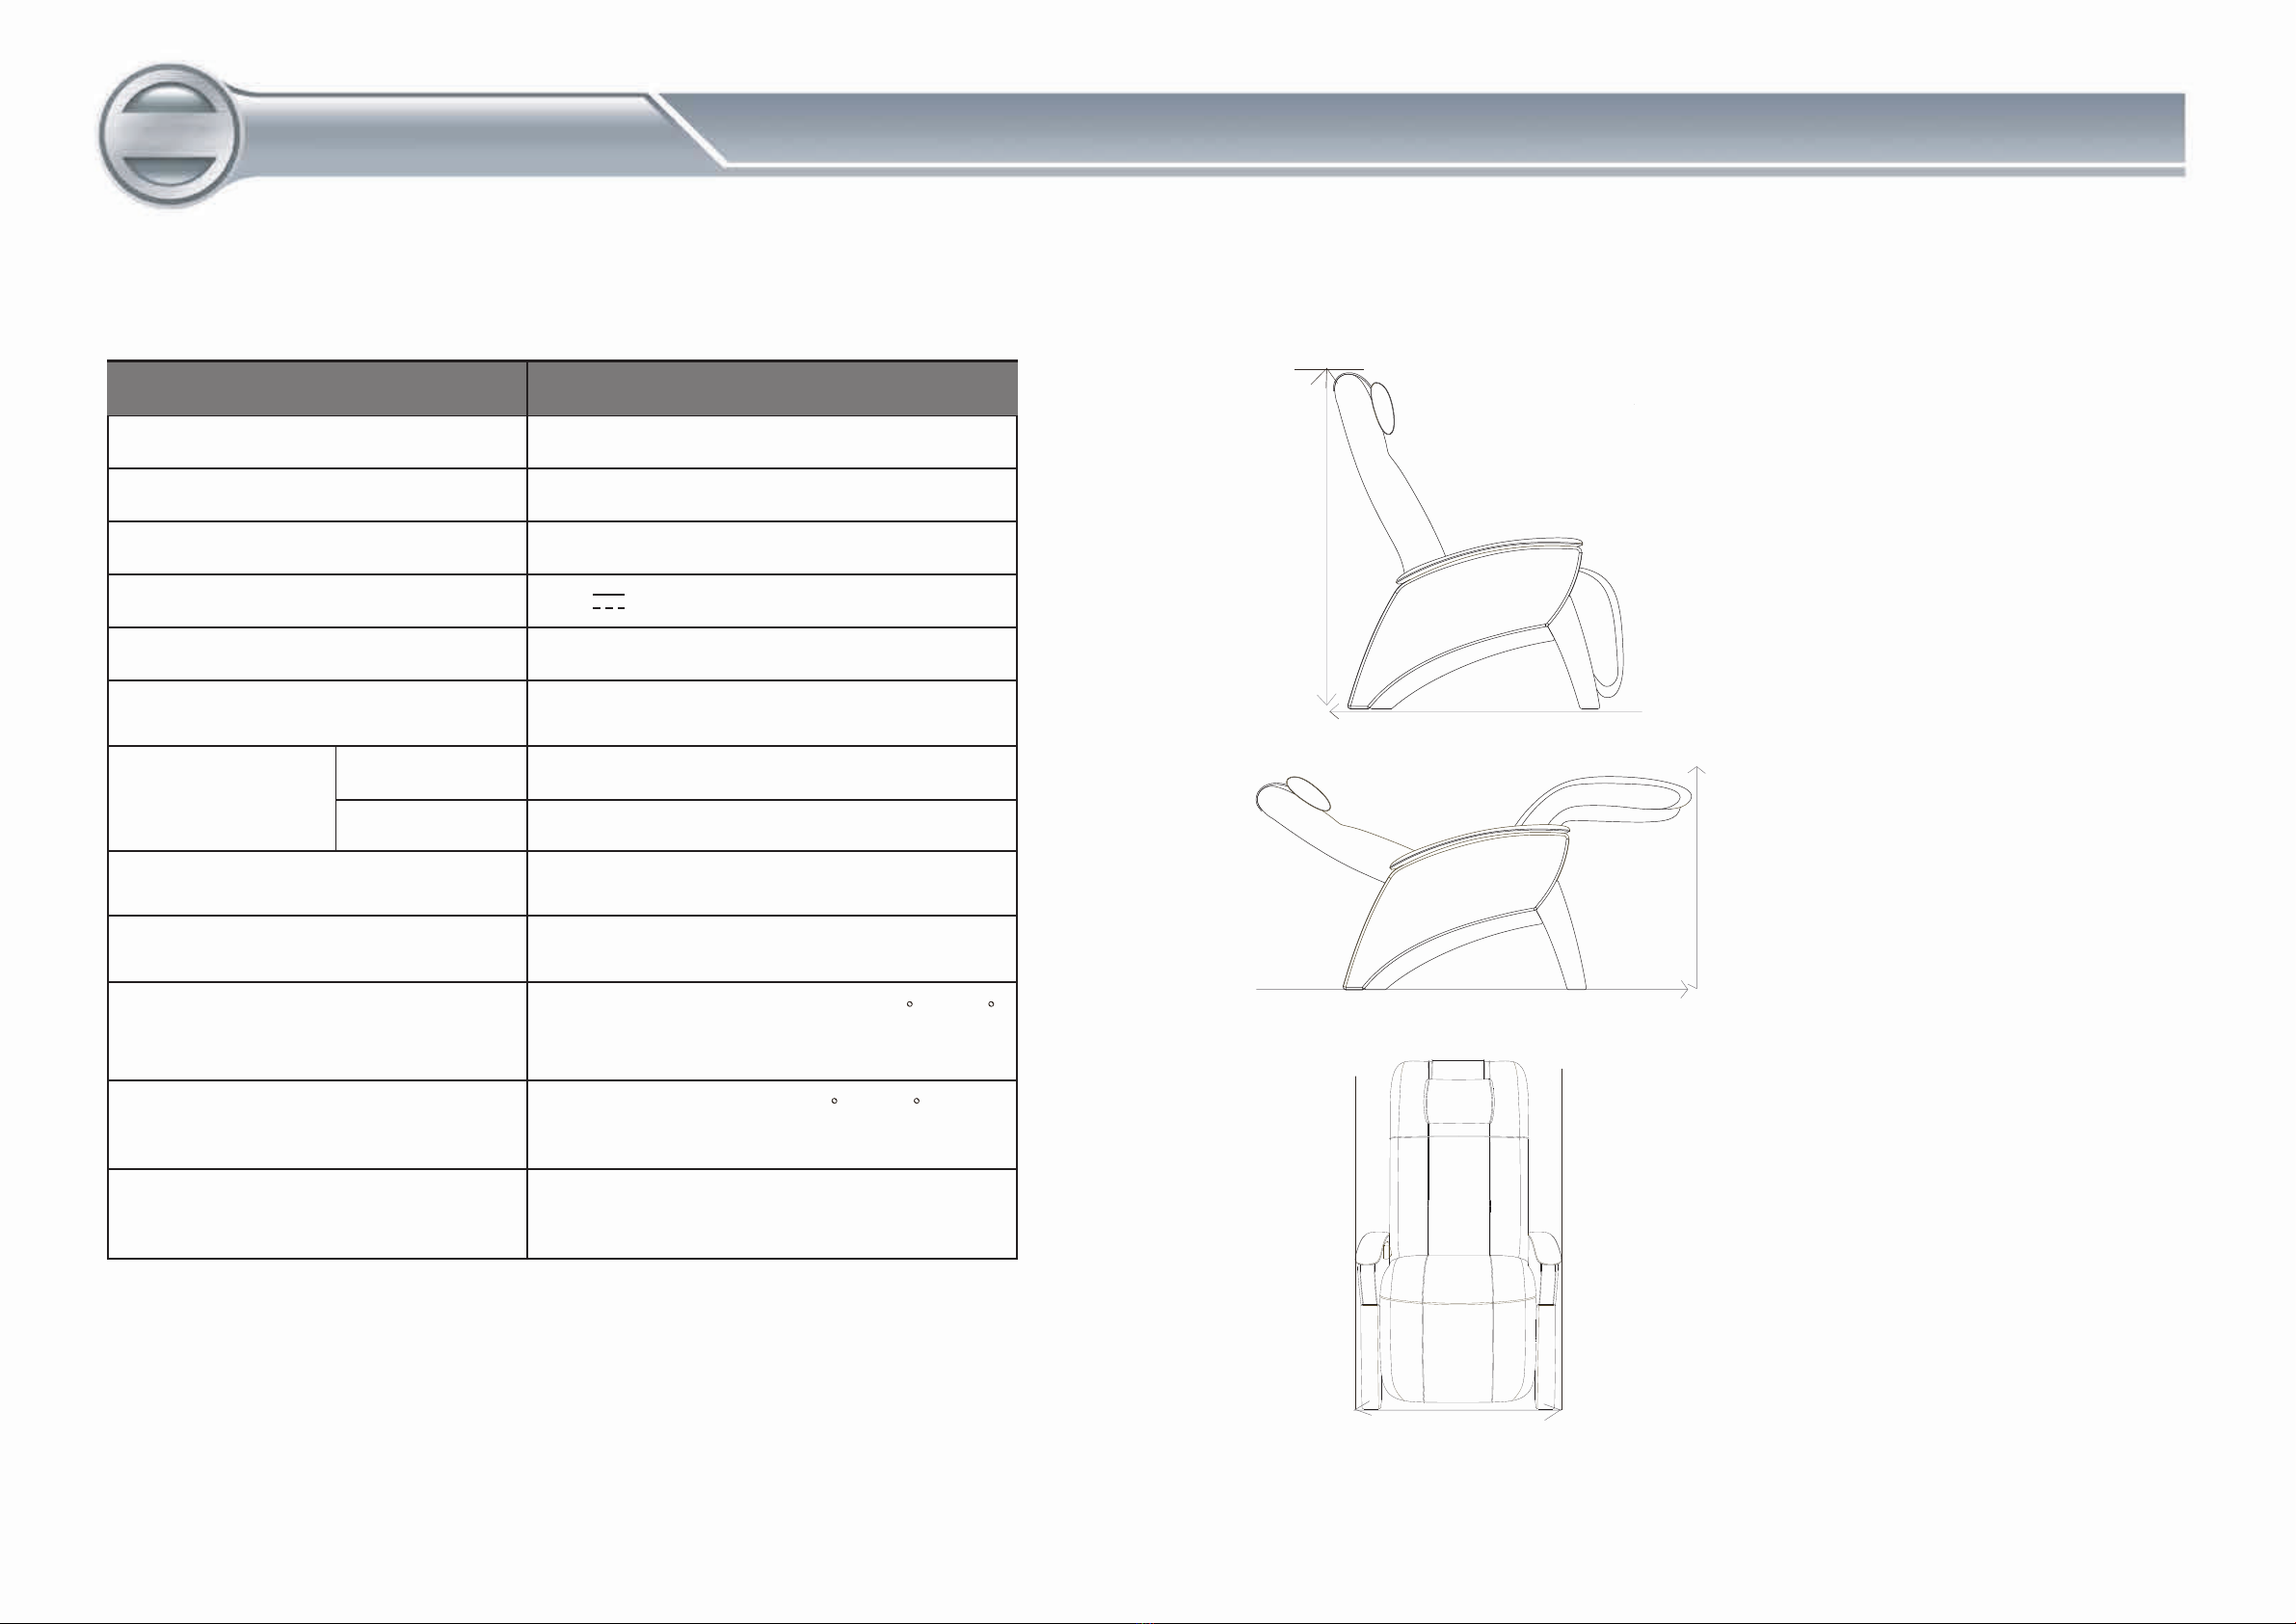
Chair Specifications
Operation Guides
Maintenance Procedure
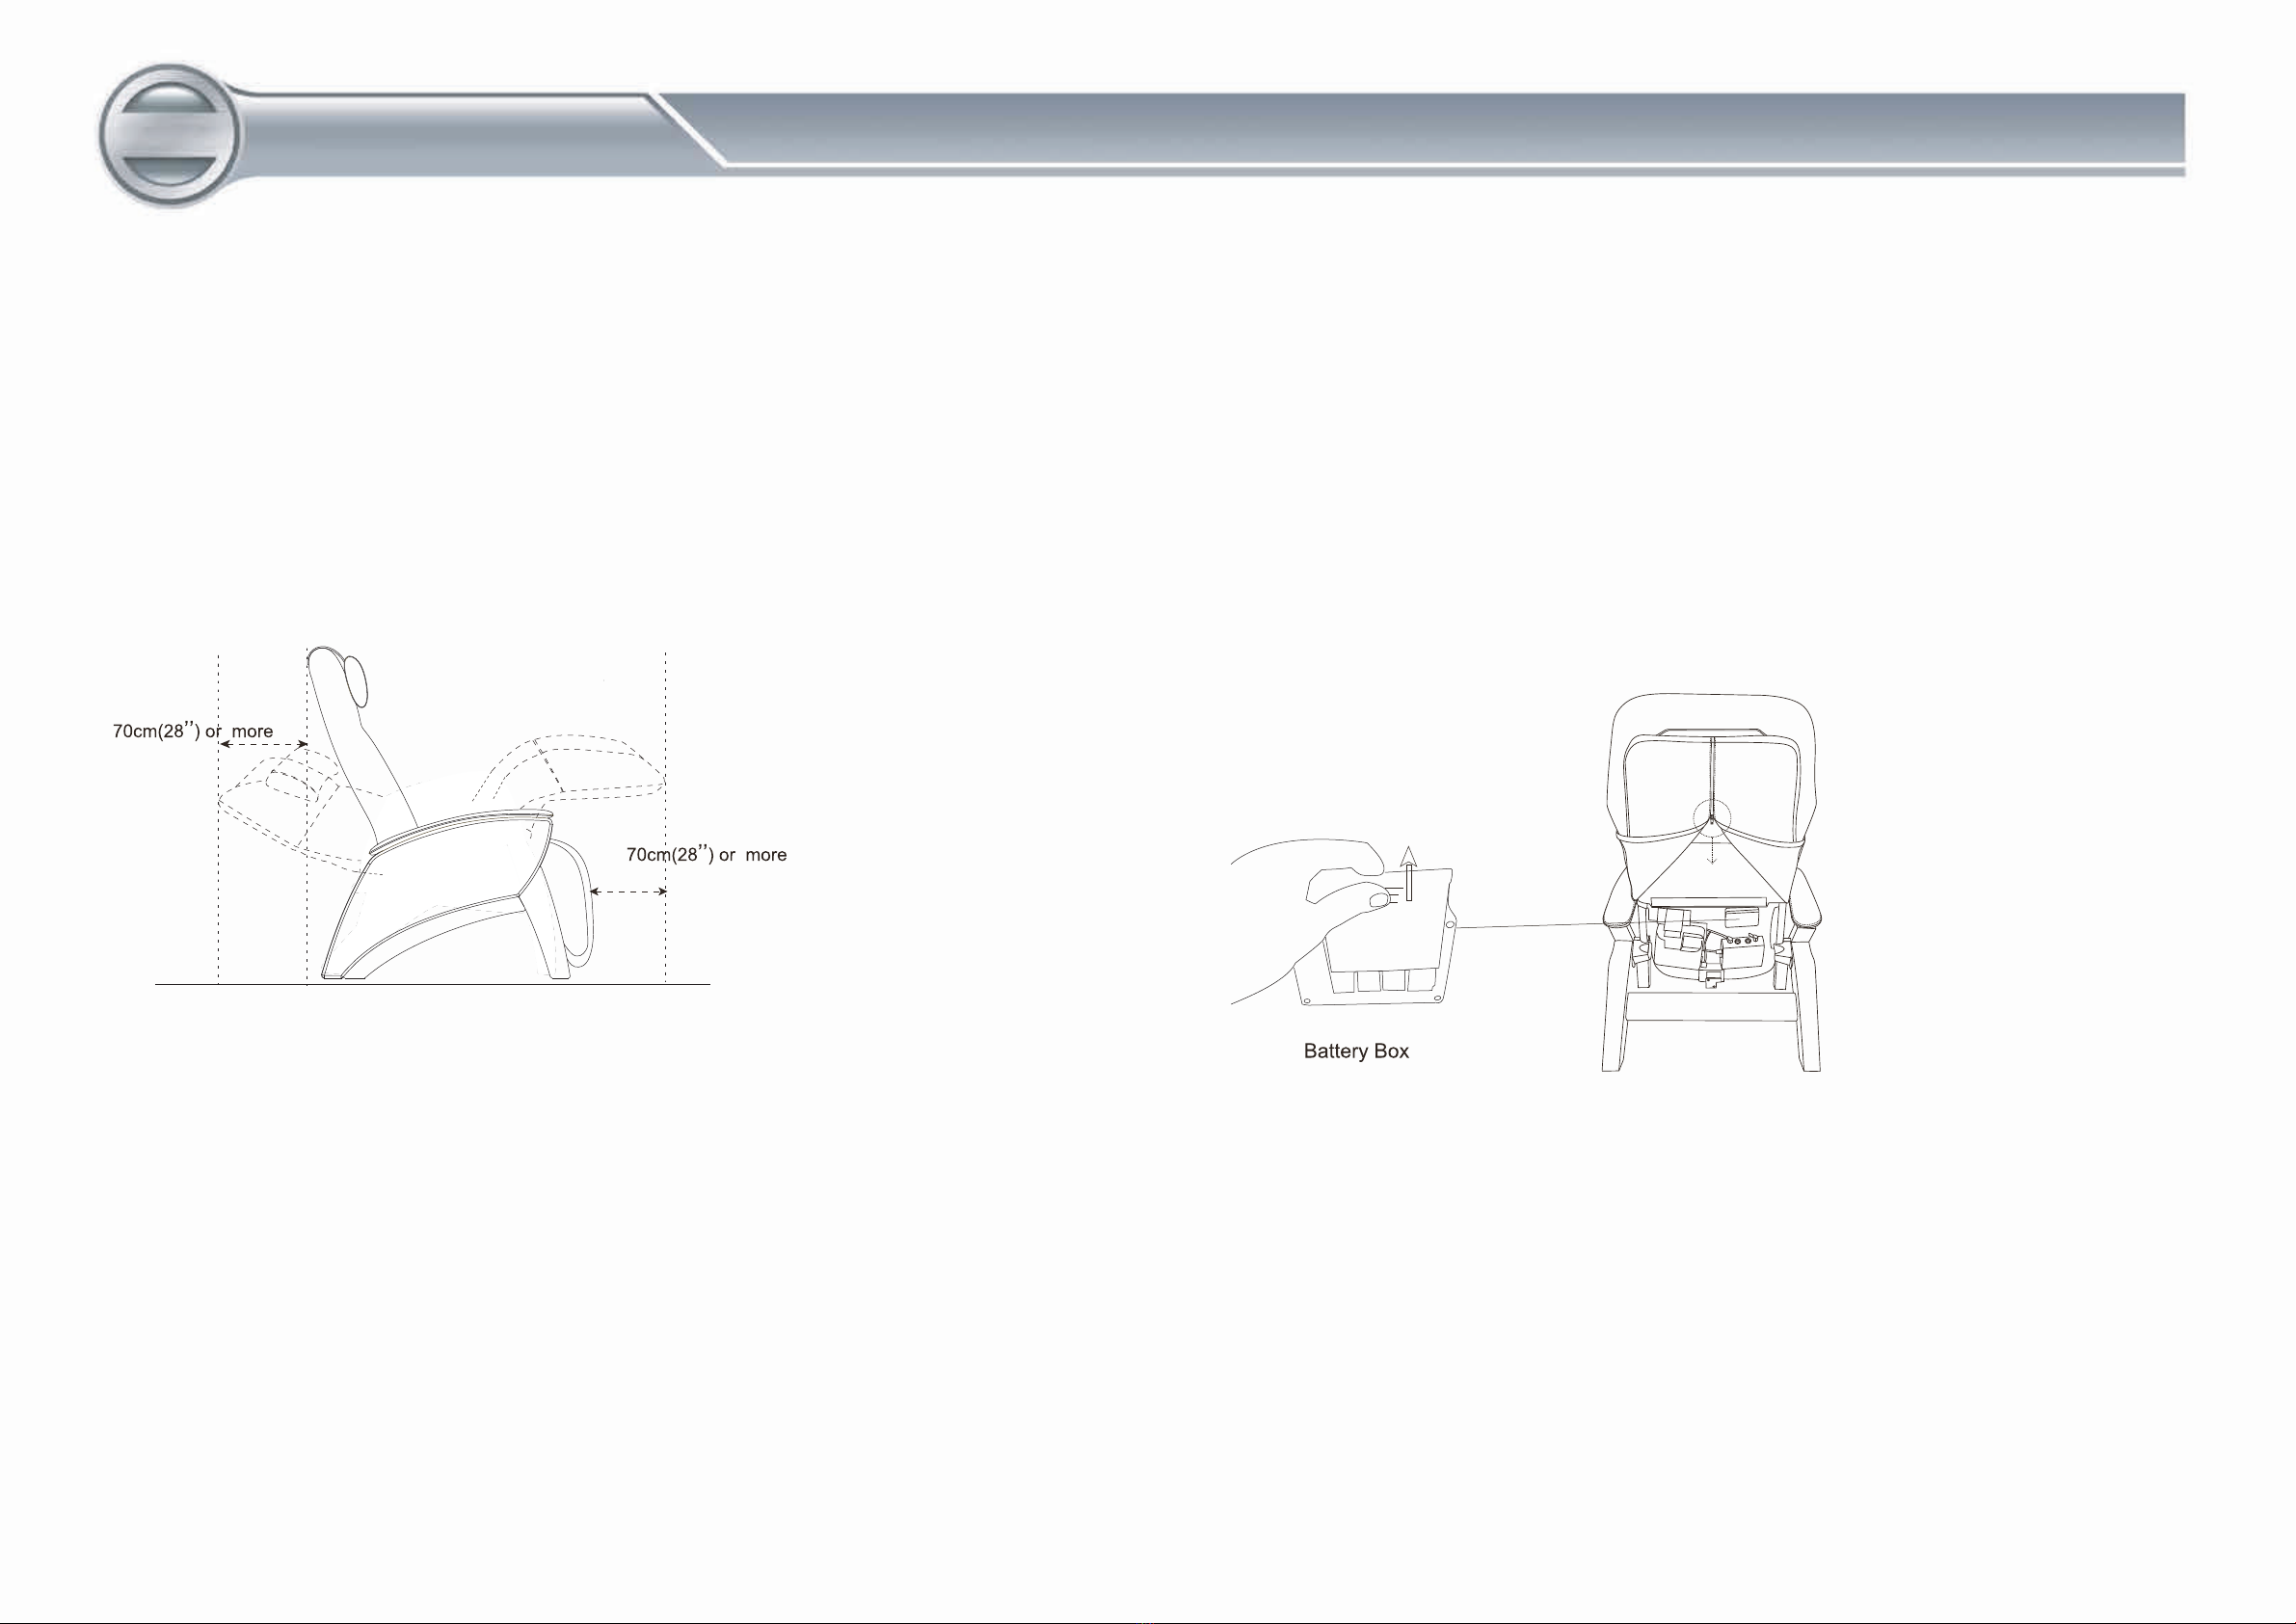
08Preparations Prior to Use
13Troubleshooting
05Chair Dimensions
06Placing The Chair
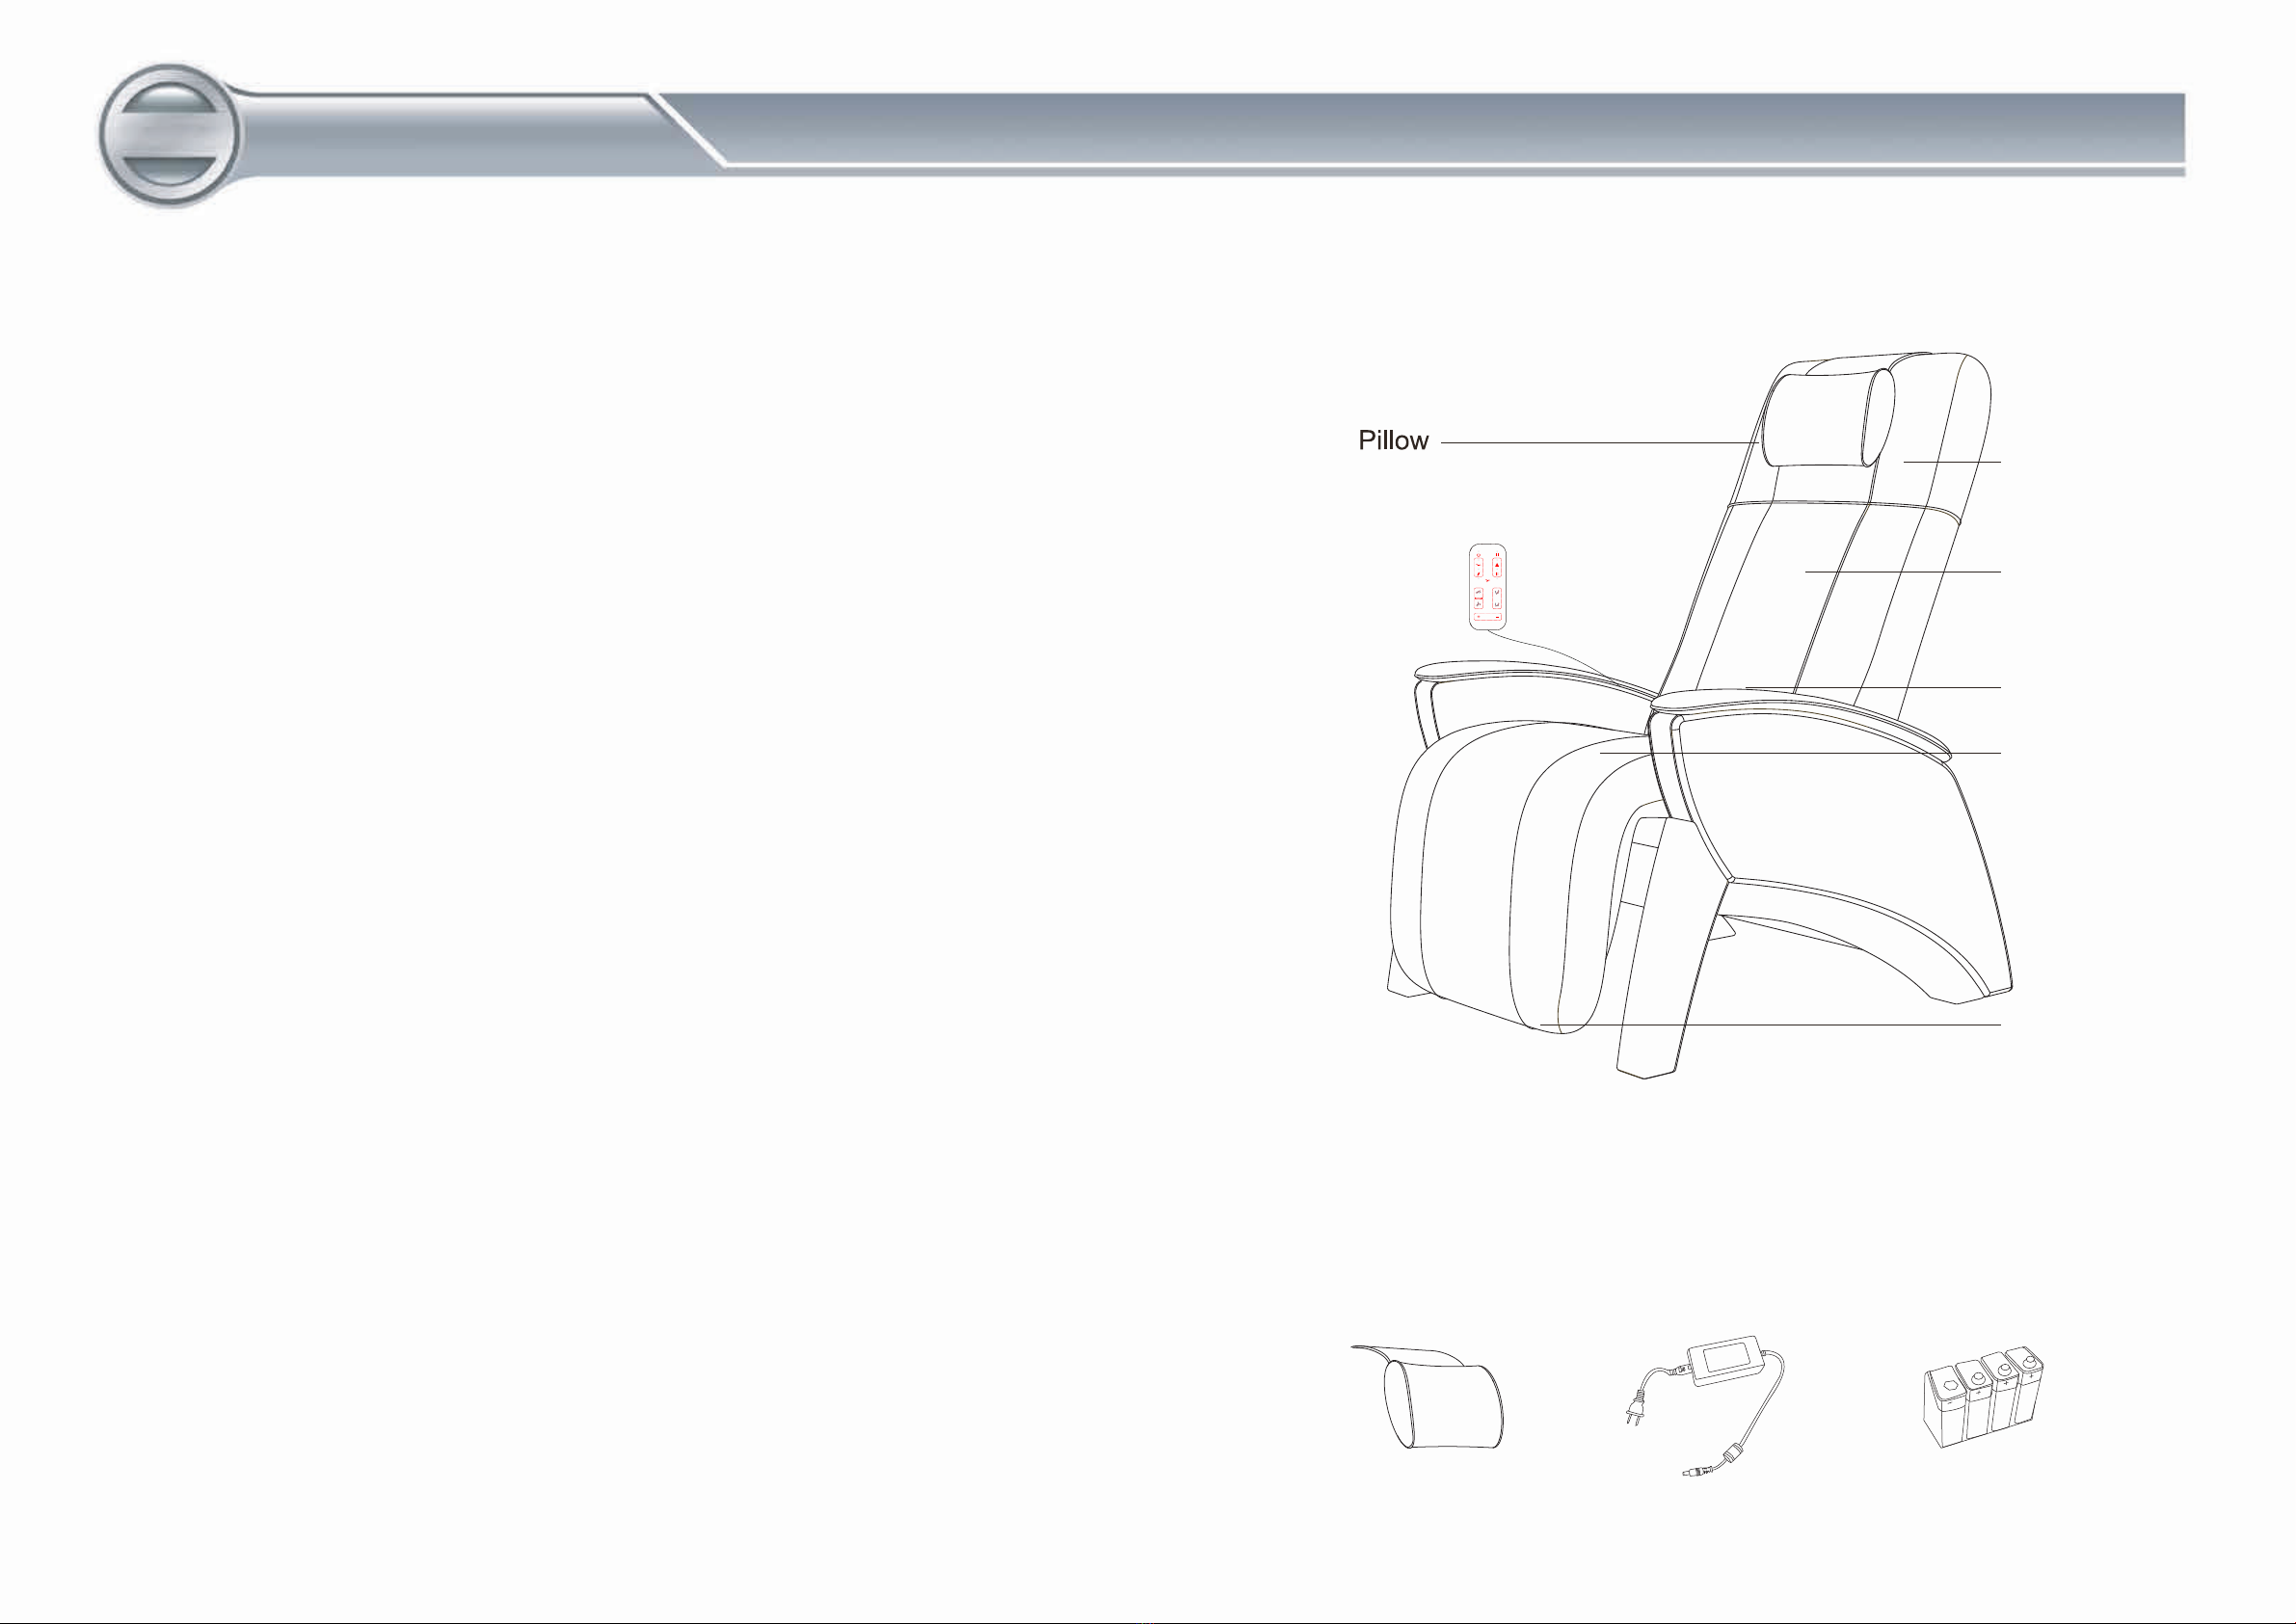
03Chair Components
Please ensure that you read these safety instructions before using your AG-7100R Hale Air Comfort
ZG-Recliner.
This chair is intended for use only as described in this manual;
While assembling the chair components, please ensure that the chair is not connected to any power
source;
Once fully assembled and intending to use the chair, please ensure that the power plug of the chair
is securely inserted into a properly fitted electrical socket;
Unplug the chair from the electrical source when not in use or cleaning;
If the power is cut for any reason, please ensure that the power switch of the chair is in the off
position and unplug the chair's power lead from the electrical socket, in order to prevent the risk of
short circuit or damage to the chair when the power is restored;
If you notice any tear to the fabric of the chair and /or any of the chair's internal mechanisms are
visible, do not use until you have contacted the Servicing Department;
If the electrical cord of the massage chair is damaged or frayed, it must be replaced by either the
manufacturer, the service agent or a qualified electrician;
Please keep the chair's power cord away from external heat sources;
Do not wind the power core around the chair itself, as this may cause damage or malfunction;
Do not use the AG-7100R outdoors or place the chair where it may be exposed to direct sunshine for
prolonged periods or place near a heater or where temperatures may reach high levels or where
there is high humidity and water vapor such as bathroom;
Do not attempt to insert any foreign objects into any part of the chair's structure;
Any tampering with the internal components of this chair may result in electric shock or malfunction;
Should any liquids be spilt on the chair while in operation, please terminate functioning immediately
to prevent the risk of short circuiting and resume using the chair only when it is in a clean and dry
condition;
To prevent the risk of injury, do not use the AG-7100R when you yourself are wet and never attempt
to plug or unplug the power source with wet hands;
Close and continuous supervision is necessary should children or disable persons use this chair and
the heat function should not be used to alleviate the chance of possible discomfort;
Do not operate with any of the chair's openings blocked;
No more than one person at a time should use this chair;
To prevent the risk of injury or damage to the chair do not attempt to sit or stand on the back rest or
leg rest;
Do not allow children or pets to play on or around the chair;
Please consult your doctor prior to operation, if you have any doubts about using this chair of if you
Read all instructions before using (this appliance).
To reduce the risk of electric shock:
DANGER-
To reduce the risks of burns, fire, electric shock or injury to persons:
WARNING-