Otima VGS4C-RT4-B User manual

VGS4-RT4-B
1/8 V0.1
Digital Surveillance System
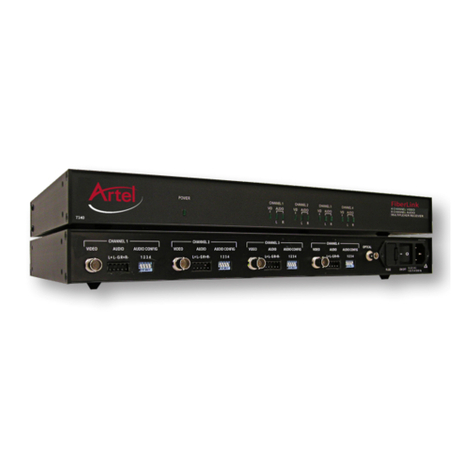
VGS4C-RT4-B Embedded Standalone System
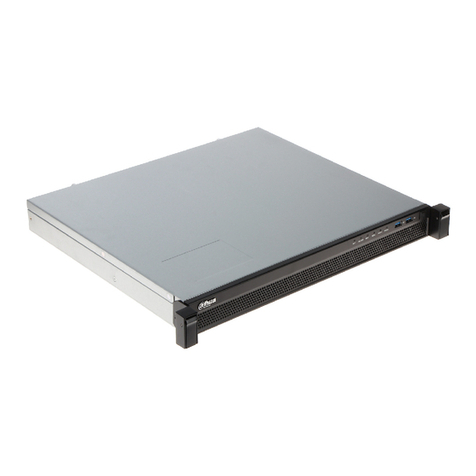
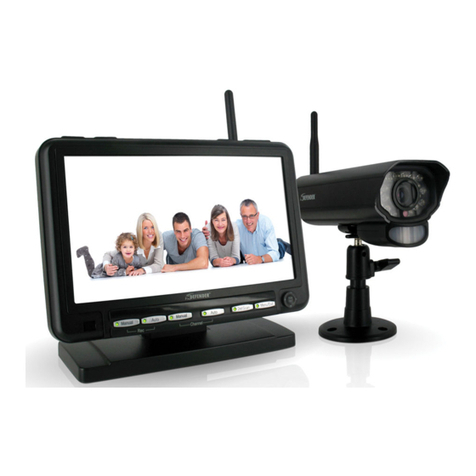
VGS4C-RT4-B Embedded Standalone System is OTIMA’s new Digital Surveillance System. Its
designing purpose is for easy operation, high stability and long recording time. This provides high security
and simple handling for users.
VGS4C-RT4-B Embedded Standalone System uses the latest H.264 compression technique to increase
picture quality and sensitivity while reduce recorded file sizes to achieve the purpose of long recording time.
VGS4C-RT4-B Embedded Standalone System uses the high speed DSP as the core of handling images to
reach the highest recording speed of 30fps/sec/channel (NTSC) or 25fps/sec/channel (PAL).
Hardware Specification:
zVideo In: 4 BNC Video In jacks to connect 4 video signals.
zAudio In: 4 RCAAudio In jacks to connect 4 audio signals.
zVideo Out: 1 BNC Video Out jack to connect to a TV monitor for video monitoring.
zAudio Out: 1 RCAAudio Out jack to connect to speaker for audio monitoring.
zVGA Out (Optional): Can connect to a VGA monitor.
zAlarm Input (Optional): 4 Alarm Input points to detect loop circuit open/short.
zReplay Output (Optional): 4 Relay Output points to control output devices.(AC 110V/12A、AC
250V/7A、DC 30V/7A)
zHard Disk Interface: Support Single IDE Hard Disk.
zCF Memory Card Interface: Support CF memory card for images backup.
zPower: 100 ~ 240VAC 60/50Hz 1.2Ainput,DC 12V 4A (Maximum) output
zWeight: 2.8 Kg approx.
zSizes: 195W X 265D X 65H (mm)
Function Specification:
zCompression Technology: H.264 Hardware Real Time compression.
zNTSC: Resolution 640 x 480 pixels; Max. Recording / Monitoring speed 4 channels 120fps/sec.
zPAL: Resolution 704 x 576 pixels; Max. Recording / Monitoring speed 4 channels 100fps/sec.
zImage Compression Rate: Dynamic Compression Rate = 40:1~240:1 (Automatic changes depends
on the images moving situation);Average Dynamic Compression Rate = 40:1~2400:1.
zRecording Quality: 10 levels of recording quality adjustment.
zAudio Recording: 24Kbps ADPCM audio recording mode. Synchronize with video recording.
zLive Audio Monitoring: Support Live Audio Monitoring.
zMonitor Display: Full screen, 4 split windows display and Autoscan display mode.
zPlayback (Search) Mode: Playback search mode according to recording date and file time.
zPlayback Display: Full screen and 4 split windows display.
zPlayback speed: Fast Forward x2, x4, x6, x8, 1/2, 1/4, 1/6, 1/8, single frame playback, pause,
forward / backward skip.
zBackup files playback function: Files backed up to CF memory cards can be read from PC by
software.
zSoftware Update: Can update software from our website. Update software through CF memory
card.

Control Panel Button:
Quad Display: When recording or playback, monitor will be displayed as a quad display when
this button is pressed.
Selection: This button is for selecting an item. This button is pressed to confirm all the
selection made or setting items.
Channel 1: When recording or playback, channel 1 will be displayed as full screen when this
button is pressed.
Up: When under functional setting, this button is the up button for functional selection.
+: Press the button when setup, it will increase the number for the setup item or change
upward.
Channel 2: When recording or playback, channel 2 will be displayed as full screen when this
button is pressed.
Down: When under functional setting, this button is the down button for functional selection.
Next page: Next page button under file list or date list selection.
Channel 3: When recording or playback, channel 3 will be displayed as full screen when this
button is pressed.
Left: When under functional setting, this button is the left button for functional selection.
-: Press the button when setup, it will decrease the number for the setup item or change
downward.
Channel 4: When recording or playback, channel 4 will be displayed as full screen when this
button is pressed.
Right: When under functional setting, this button is the Right button for functional selection.
Last page: Last page button under file list or date list selection.
Setup: Entering the setup menu for system setup. (Recording needs to be stopped before
entering the setup menu.)
Saved Setup: This button needs to be pressed to save all the setting information and exit the
setup pages when each setup is finished..
Stop: System will stop recording/playback when this button is pressed.
ESC: When setting up or making selection, this button will cancel the setting or selection and
esc and return to the last page.
R
ecord: This button is pressed to activate recording when system is not under setting or
playback mode.
Play: When stop recording, pressing of this button will playback image files.
Pause: Pressed to pause the playing of the file. Pressed again to playback files again.
Skip Backward: When under playback mode, press button and will skip backward
once. By pressing the 2 buttons continually the images will skip backward continually.
Playback back to normal when these buttons are released.
+
Skip Forward: When under playback mode, press button and will skip forward
once. By pressing the 2 buttons continually the images will skip forward continually.
Playback back to normal when these buttons are released.
+
+
Single Frame Playback: When playback images, each single frame will be playback once by
pressing and . By pressing the 2 buttons continually, images will be playback as
slow speed forward. Speed back to normal when “Play” button is pressed
+
Playback Speed: When playback images, Press the button the speed is playback at x2 of normal
speed. Pressing and buttons again will changes the speed as followed x4、
x6、x8、/2、/4、/6、/8、x1. By pressing the “Play” button will back to normal speed.
Playback LED: This playback LED will be on when playback.
VGS4-RT4-B
2/8 V0.1

Record LED: This record LED will be on when recording.
System Setup:
When stop recording or playback, pressed the button on the control panel to enter the setup page. Using
or to select the setup items; Pressed the to save the setting and exit from the setup pages. Each
setting is described as follow:
SETUP V0.A0527
1.TIME
2.DISPLAY
3.CAMERA
4.SYSTEM
5.INPUT/OUPUT
6.ADVANCE
7.FILE COPY
1. TIME:
Time setup page as follow. You can setup DATE, TIME and TIME ZONE. Use 、and
to select setup items and use 、to change field and 、to change the number of
setup. Press to save setting.
TIME SETUP
1.DATE 2005-04-28
2.TIME 14:41:38
3.TIME ZONE GMT+00
TIME ZONE: Select according to time zone. Etc Taiwan, China as GMT +8
2. DISPLAY:
DISPLAY SETUP is used to setup the information displaying on the screen, including SYSTEM
TIME, CAMERA NAME and SYSTEM STATUS (HDD available and total space). Use 、
and to select items and use 、to modify value. Press to save setting.
DISPLAY SETUP
1.SYSTEM TIME ON
2.CAMERA NAME OFF
3.SYSTEM STATUS ON
3. CAMERA:
CAMERA SETUP includes CONFIG. SETUP and CAMERA NAME SETUP. For camera name
setup, use 、and to select camera, then use 、to change character column, and
VGS4-RT4-B
3/8 V0.1

use 、to edit characters. You can setup a maximum of 14 numbers or alphabets (Number 0-9,
Alphabet A-Z). Press to save setting.
CAMERA NAME AND CONFIG SETUP
1.CONFIG SETUP
2.CAMERA1 CAMERA1----------
3.CAMERA2 CAMERA2----------
4.CAMERA3 CAMERA3----------
5.CAMERA4 CAMERA4----------
CONFIG. SETUP
CONFIG SETUP includes ENABLE CAMEARA, ENABLE AUDIO RECORDING, ENABLE
VIDEO LOST and DEFAULT functions. (Change between On and OFF). Every camera can
modify its BRIGHTNESS, CONTRAST, SATURATION and HUE. (Setting value between
0-255). Use 、and to select setup items and use 、to change field and 、
to change the number of setup. Press to save setting. Note: Brightness, contrast,
saturation and hue can not be set when default is set as ON. Please disable the default to OFF before
setting.
CONFIG SETUP CAM1 CAM2 CAM3 CAM4
1.ENABLE ON ON ON ON
2.AUDIO OFF OFF OFF OFF
3.VIDEO LOST ON ON ON ON
4.BRIGHTNESS 128 128 128 128
5.CONTRAST 128 128 128 128
6.SATURATION 128 128 128 128
7.HUE 128 128 128 128
8.DEFAULT ON ON ON ON
4. SYSTEM SETUP
SYSTEM SETUP includes HOST NAME, VIDEO MODE (NTSC or PAL), RECORD SPEED
(30, 15,10,5,3,2,1) VIDEO QUALITY (1-10), SCAN INTERVAL (Setting as OFF, 1-99sec) and
AUTO RECORD functions. Use 、and to select setup items and use 、to
change field and 、to change the number of setup. Press to save setting.
SYSTEM SETUP
1.HOST NAME STANDALONE-------
2.VIDEO MODE NTSC
3.RECORD SPEED 30
4.VIDEO QUALITY 10
5.SCAN INTERVAL 10
6.AUTO RECORD OFF
VGS4-RT4-B
4/8 V0.1

AUTO RECORD: When this function is activated, system will automatically start recording when
system starts or when the system has no operation for 3 minutes or more.
SCAN INTERVAL: When scan interval is not set as OFF, and the system is under recording or
monitoring mode. If single channel full screen is display, this function will automatically activated;
Scan 4 channels automatically and each interval according to setting.
5. INPUT SETUP:
INPUT SETUP is use to setup Input Trigger Level as HIgh level and LOw level. You can also set
the OUTPUT relay when input point is triggered. Set as NO for the output point then the reply will
have no change, set as HI for output short circuit or LO output open circuit. Use 、and
to select setup items and use 、to change field and 、to change the number of
setup. Press to save setting.
INPUT SETUP IN1 IN2 IN3 IN4
1.TRIGGER TYPE LO HI LO HI
2.OUTPUT1 NO LO HI LO
3.OUTPUT2 LO HI LO NO
4.OUTPUT3 HI NO NO HI
5.OUTPUT4 LO HI LO HI
6. ADVANCE SETUP:
ADVANCE SETUP includes LOGOUT (logout without recording), LOGOUT AND RECORD
(You will need to enter password to operate the system or setting), PASSWORD, UPDATE
FIRMWARE and FORMAT HDD functions. Use 、and to select setup items and
use 、to change field and 、to change the number of setup. Press to save setting.
ADVANCE SETUP
1.LOGOUT
2.LOGOUT AND RECORD
3.PASSWORD ----------------
4.UPDATE FIRMWARE
5.FORMAT HDD
UPDATE FIRMWARE: This system is updating firmware using CF memory card. Please copy the
latest firmware to CF card, under ADVANCE SETUP page, select UPDATE FIRMWARE, then
inset the CF card in to the slot and press . System will copy the new firmware into the
system. System will need to restart for the new firmware to work.
FORMAT HDD: Under ADVANCE SETUP, select FORMAT HDD and press . System will
delete all the recorded data. Please take noted to avoid losing of data.
Note: When password is set, you will need the password to login, system reboot, or entering the
ADVANCE SETUP page. Please remember the password to avoid any inconvenience for future
VGS4-RT4-B
5/8 V0.1

operations.
7. FILE COPY:
Detail information will be described below.
Record:
Before activate record, you will need to finish setup of TIME and CAMERA SETUP to make sure the
recording time is correct. Camera setup is to set the camera for video and audio recording to avoid
error.
There are 2 ways to activate recording. One is by pressing the record button, then the system will
start recording. The other way is by activate the Auto Record function from the System Setup. Then
the system will automatically start recording when system starts or when the system has no operation for
3 minutes or more.
You can press 、 、 or to display full screen of Camera 1, Camera 2, Camera 3 and
Camera 4. Press to return to quad display.
Playback:
Record need to be stopped before playback images. Press Playback button to select the playback
file. When Playback button is press, the following will be shown:
PLAYBACK
1.START DATE 2005-05-03
2.START TIME 12:00:00
Playback by appointed time: Press playback button, the above page will be shown. Use
、and to select date and time, and use 、to select column, and then use 、
to modify time and date. Press playback button again to playback the 4 video images of the
appointed time.
Playback by Date List search: Press playback button, the above page will be shown. Press
and the DATE LIST will be shown as below:
DATE LIST
2005-05-03
2005-05-02
2005-05-01
2005-04-30
2005-04-29
Press 、button to select date or 、button to switch DATE LIST page. (When date list is
VGS4-RT4-B
6/8 V0.1

more than 10, will separate into different pages); Press to confirm playback file date; the
following date list will be shown after confirmation.
FILE LIST : 2005-05-3
START TIME END TIME LENGTH
12:00:02 13:00:01 450.2M
11:00:03 12:00:02 465.8M
10:00:05 11:00:03 455.2M
09:00:01 10:00:05 467.6M
08:00:02 09:00:01 458.2M
System will list all the files of the appointed date, Press 、to select the playback time or 、
button to switch file list page. (When file list is more than 10, will separate into different pages). Press
again to playback the file appointed.
When playback, You can press 、 、 or to display full screen of Camera 1, Camera 2,
Camera 3 and Camera 4. Press to return to quad display.
When playback, press the + or + button to skip backward and forward. System
will be back to normal playback speed when these buttons is released.
When playback, press the button to pause and press again to start playback.
When playback, press the + button to playback a single frame. System will be back to normal
playback speed when buttons is pressed..
When playback images, pressing the + buttons the speed is playback at x2 of normal speed.
Pressing the + buttons again will changes the speed as followed x4、x6、x8、/2、/4、/6、
/8、x1.
FILE COPY:
This system uses CF memory cards for FILE COPY. Before doing so, please make sure that your CF
memory card has enough space available. Following the steps below to select the files that needed to
backup. Insert the CF memory card in to the CF card slot for File copy.
To increase the file backup speed, it is suggest formatting your CF memory cards in your PC before
doing File Copy. (Please backup the information in your CF card before formatting).
Select the FILE COPY function under Setup menu, the below will be shown:
DATE LIST
2005-05-03
2005-05-02
2005-05-01
2005-04-30
2005-04-29
Press 、button to select the FILE DATE that needed to be copied, or press 、button
to switch date list page. (When date list is more than 10, will separate into different pages). Press
VGS4-RT4-B
7/8 V0.1

after selected and the following will be shown:
FILE LIST : 2005-05-3
START TIME END TIME LENGTH
12:00:02 13:00:01 450.2M
11:00:03 12:00:02 465.8M
10:00:05 11:00:03 455.2M
09:00:01 10:00:05 467.6M
08:00:02 09:00:01 458.2M
System will list all the file of that selected date, by pressing 、to selected the time file that needs
to backup, or press 、to switch FILE LIST page. (When date list is more than 10, will separate
into different pages). Press after selected and the following will be shown:
FILE COPY : 2005-05-03
1.START TIME 11:00:03
2.END TIME 12:00:02
CAMERA1
CAMERA2
CAMERA3
CAMERA4
buttons to select START TIME and END TIME. And use
VGS4-RT4-B
8/8 V0.1
Use and to、 、
to confirm and then pressselect column and use to adjust time. Press to、 、
select camera needs to be backup. And press again to copy files on CF memory card.
Note: When system is copying files, it is cut and saved according to the set start time and end time to CF
memory card. No need to save the files in whole to save times and memory space of your CF memory
card.
Files backed up to CF memory cards can be playback from PC using Software program
Table of contents
