1
Instructions for Assembling and Operating
Parts in the Kit
Things you will need
Phillips screwdriver (#1) 4 newsize AA
alkaline or manganese batteries
※ Do not use nickel batteries, oxyride
batteries, or rechargeable batteries
such as nickel cadmium batteries to
avoid the risk of dissolution of parts or
ignition in case of a short circuit and
other mistakes.
CAUTION
Please read the following instructions before assembling
this kit
●Use caution when handling some pointed parts. Improper use may cause injury.
●To avoid the risk of suffocation, use caution not to swallow small parts such as screws.
●The point of the antenna is shaped like a hook. Use caution not to scratch your fingers with it
and be injured. Also, use caution not to prick eyes with it.
Four size AA batteries are required. Improper use of the batteries may cause the generation of
heat, explosions or leaks. The following precautions should be taken:
●Do not use rechargeable batteries such as nickel cadmium batteries, cadmium batteries, or
oxyride batteries to avoid the risk of dissolution of parts or ignition in case of the short circuit
and other mistakes.
● Ensure that the positive and negative terminals on the batteries are facing the right way.
● If liquid that leaked from batteries gets in an eye, rinse it well in a lot of water immediately and
consult a doctor. When liquid stick to skin or clothes, wash it up with water immediately.
●Remove batteries after an experiment.
★レPlease read the assembly instructions and cautions carefully before using the kit.
★レInstructions and cautions in this booklet should always be followed for safety. Do not use any
materials that have become damaged or deformed while in use.
★レRemove batteries after using the kit and keep these away from babies and children.
Note for screwing
The screws in the kit are
the type of screws that
carve a slot in the plastic
when driven in. A #1 Philips
screwdriver is the right size
to use. When screwing,
press a screwdriver to a
screw vertically and turn
firmly. The right proportion
of the power is 70 % for
press and 30% for turn. A
precision screwdriver is
difficult to turn, so use a
small screwdriver that has a
grip with a diameter of
about 2cm.
actual size
of a #1
screwdriver
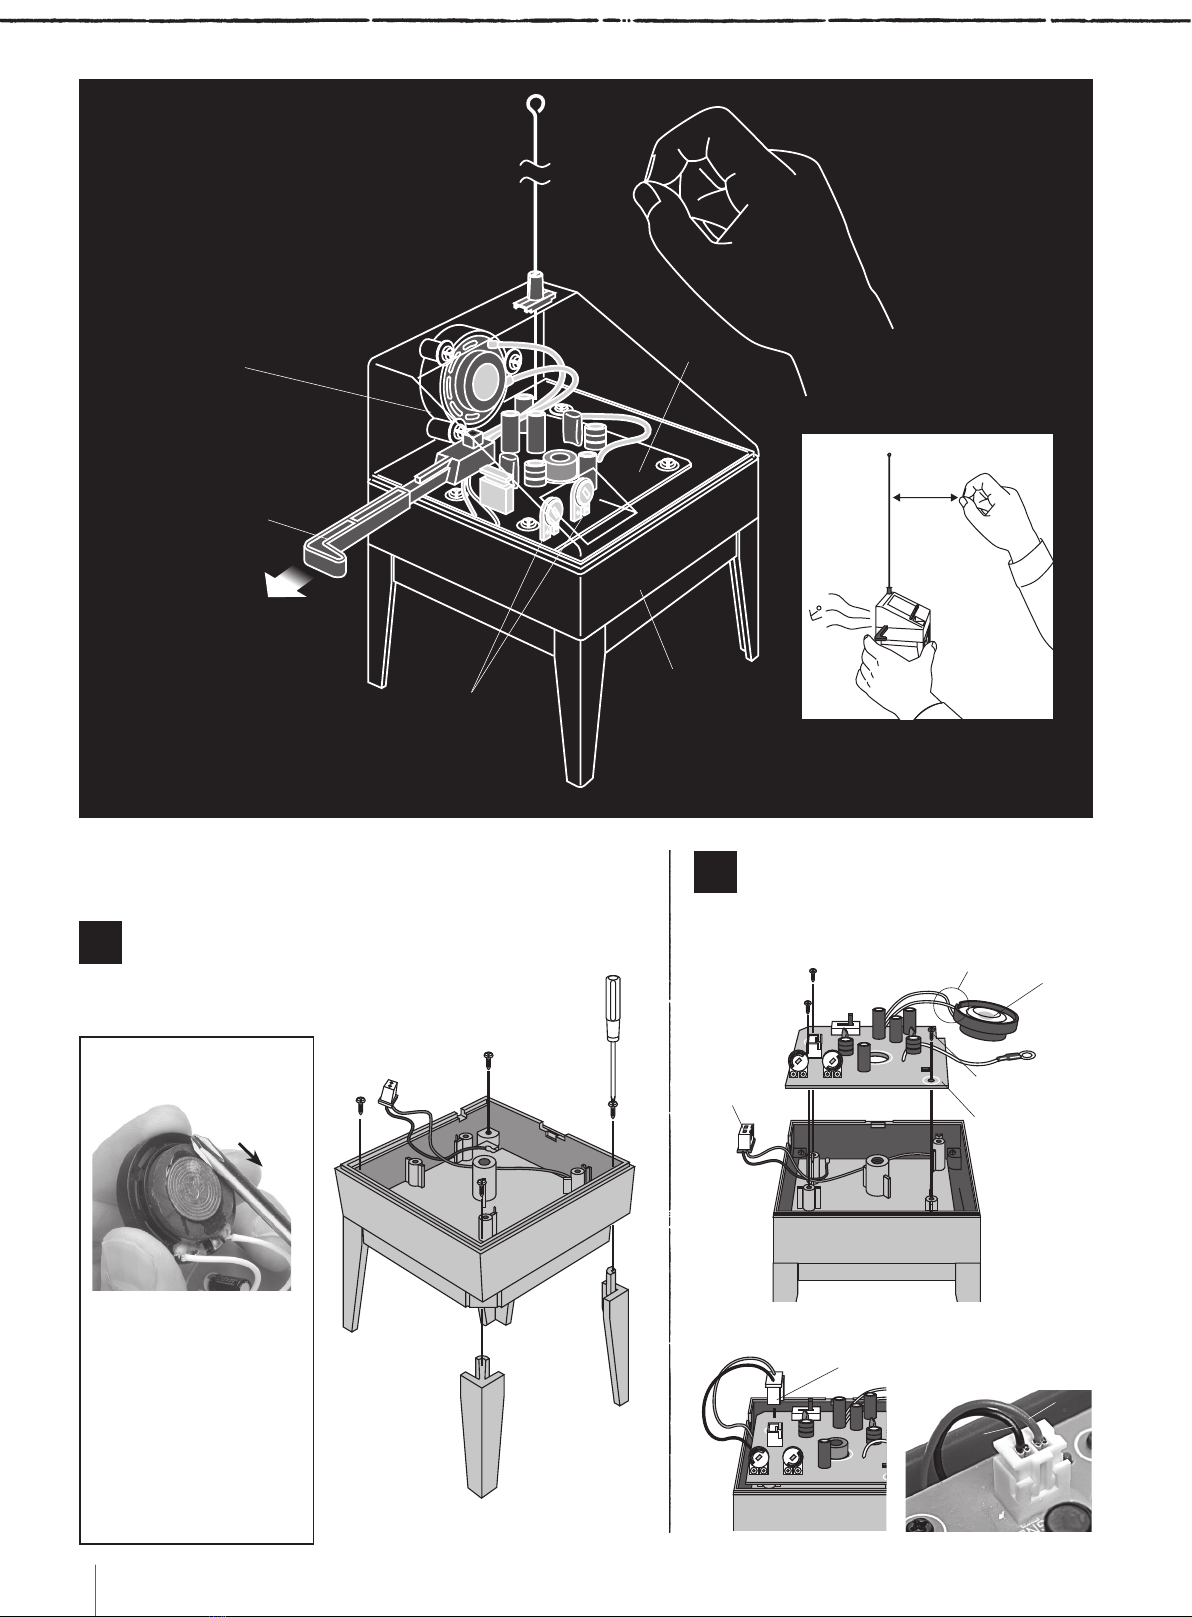
InstructionsforAssemblingandOperating
small screw
(7)
screw with collar
(4)
large screw
(1)
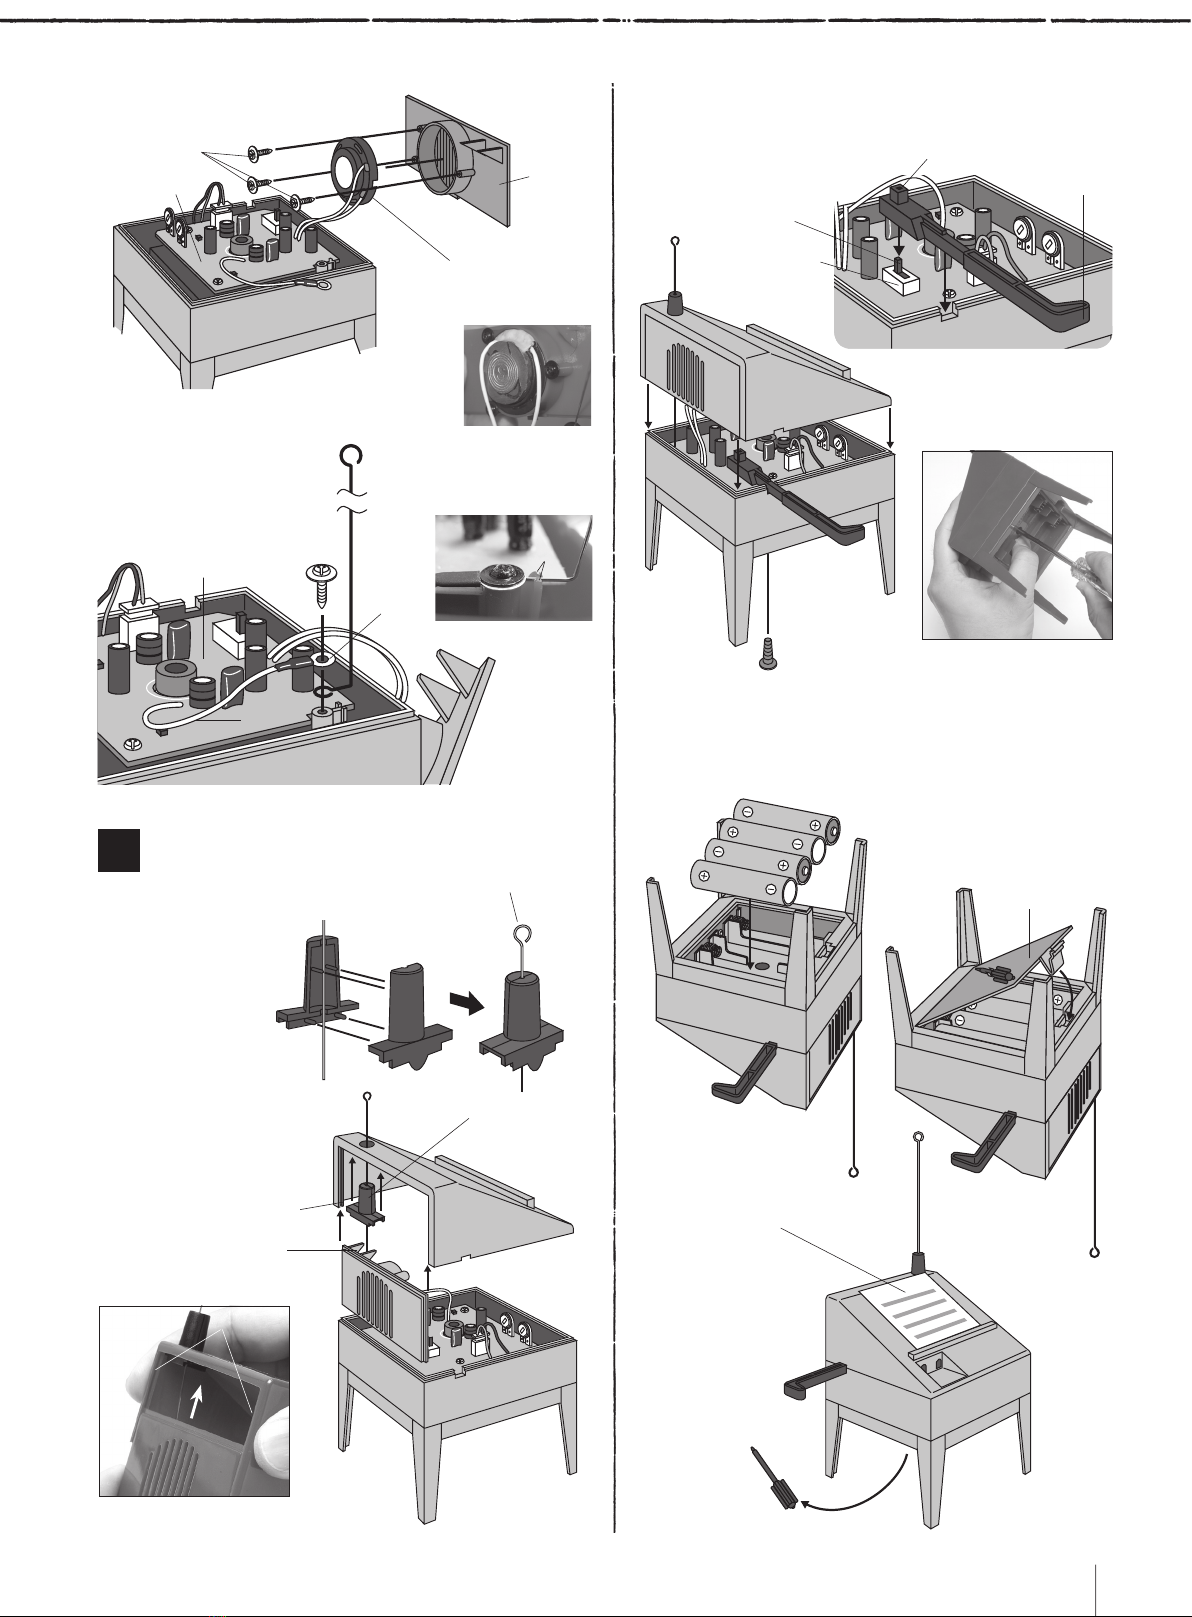
upper body lower
body
leg (4)antenna holder A
antenna holder B
switch lever
back body
antenna
circuit board (already set)
battery box lid
tuning stick
Takes about 20
minutes for assembling
(The circuit board is already set.
No need of soldering.)
The plastic materials used in this kit
●body (rear upper lower), battery box
lid, legs: ABS (red)
●antenna holder A and B, switch lever,
tuning stick: POM (black)
●circuit board: phenol resin
☆Vinyl chloride resin is used for the
covers of the lead wires.
The metallic materials used in this kit
●antenna: stainless steel
●screw, metal contact: iron
speaker
(covered with
a cardboard)
Remove transparent protection films on
the lower body before assembling.
Theremin mini
Термен = (Theremin in Russian)