En-6 D.120.000.V0
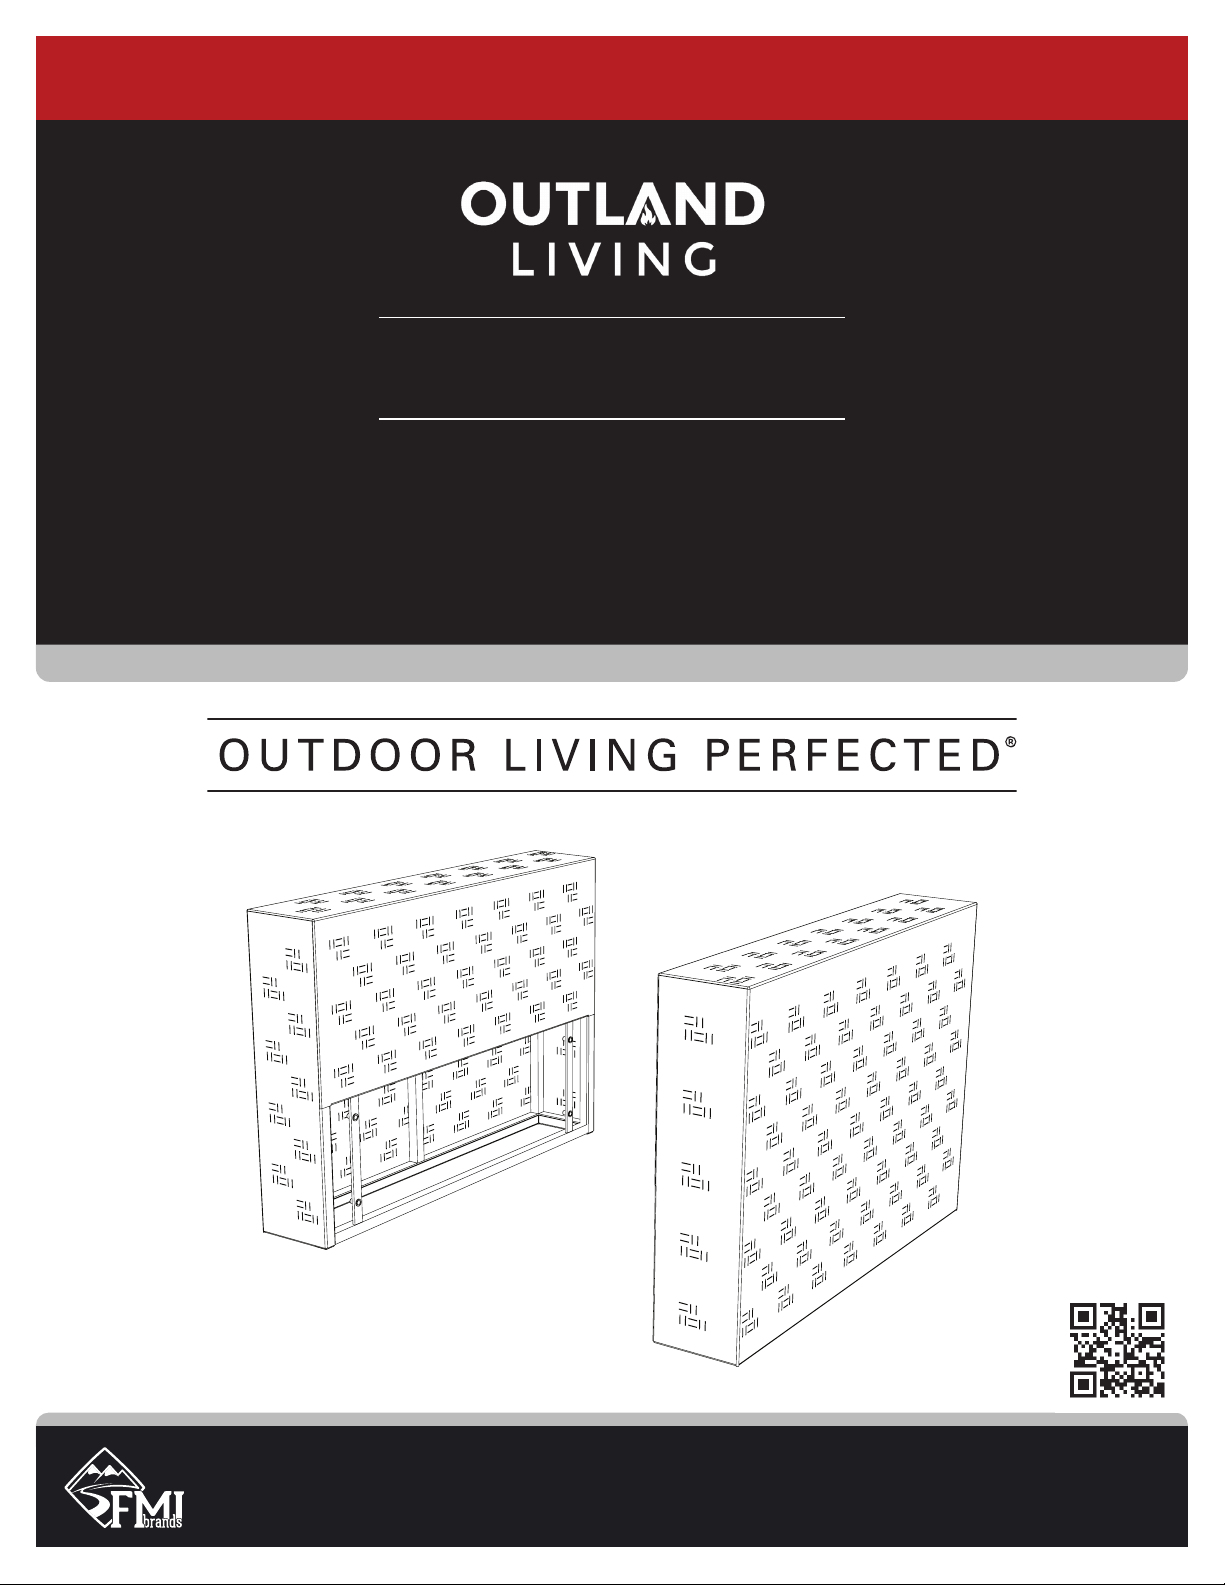
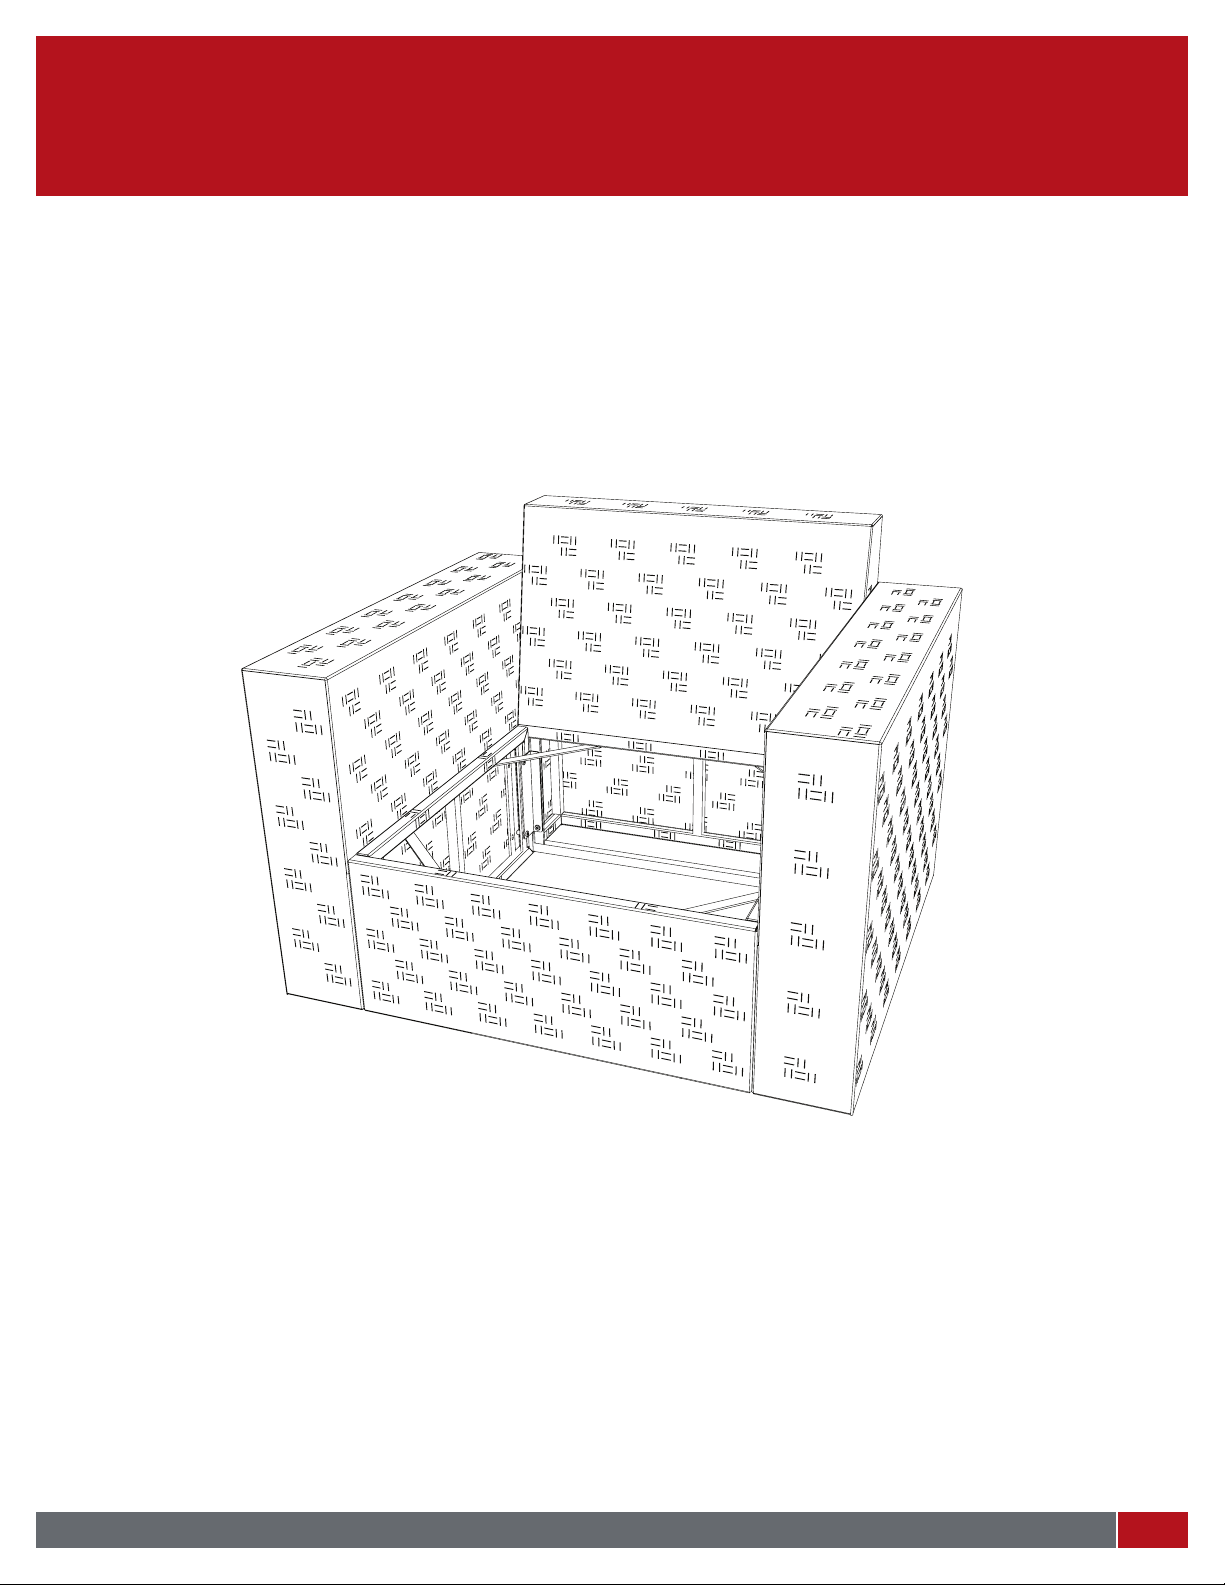
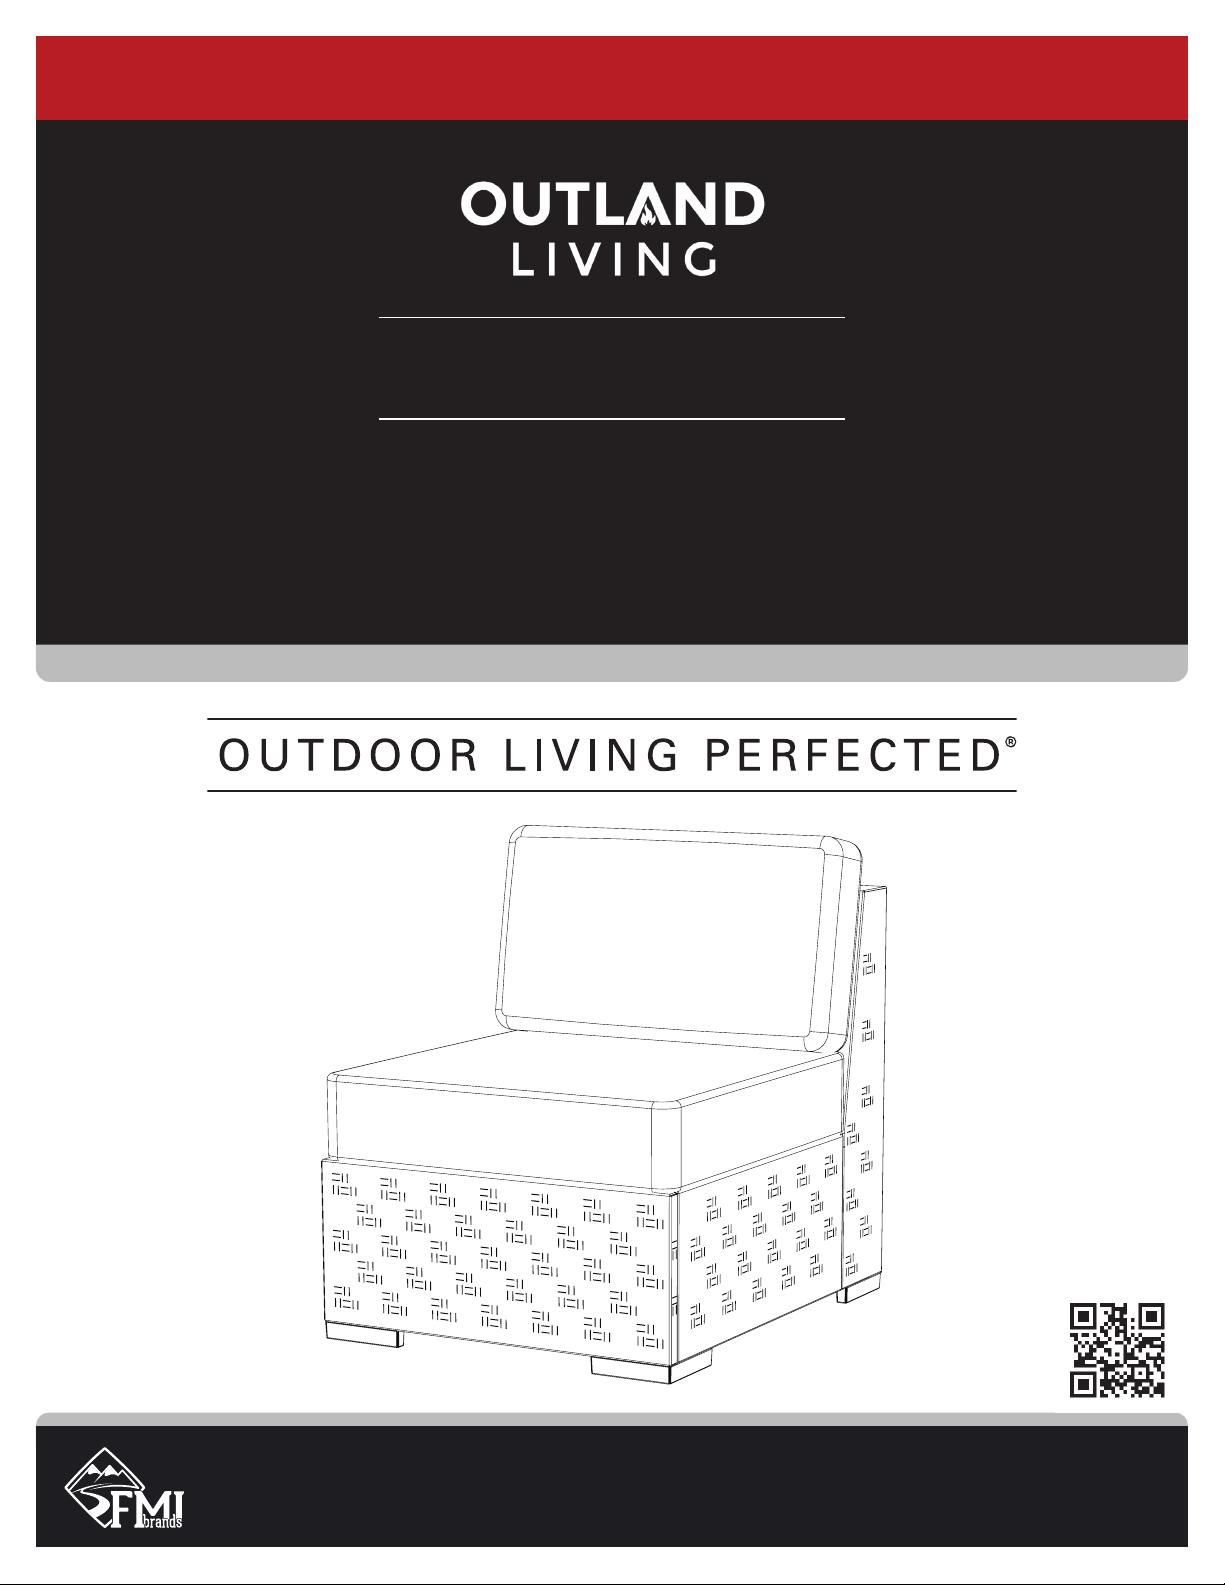
OUTLAND LIVING ®• SUNSHINE COAST • MODULAR OUTDOOR FURNITURE SYSTEM • ARM RESTS • OLSC-120
Owner & Safety Manual
®
SECTION 3: MAINTENANCE
ATTENTION:
The furniture cushion covers are removable and
washable, but can be challenging to put back on.
When replacing the covers, smooth the cushion interior
batting to prevent lumps.
IMPORTANT!
Do NOT use petroleum based, alcohol based, flammable
or corrosive cleaning products on or near the furniture.
Doing so may destroy the wicker resin material!
If in doubt, test a small inconspicuous section first.
OUTLAND LIVING Outdoor Furniture is meant for outdoor use
and requires periodic maintenance to keep it in good condition.
The all-weather resin wicker weave is made from 100% new
high-density polyethylene. HDPE is commonly recyclable, BPA
and Phthalate free and identified as the #2 plastic resin, the same
material as milk jugs.
Should any part of the wicker furniture become soiled or dirty,
wash down with soap and water. Use a soft brush and/or
non-abrasive cloth. Use only water-based cleaners.
The furniture frame is made from durable powder coated
aluminum. Rust should not be an issue.
The screw fasteners are made from 304 stainless steel.
Routinely check fasteners to ensure they are firmly tightened.
Cover and/or store your furniture to protect it from the elements,
between seasons, or when not in use.
Ensure the seat cushion mesh is facing down for water drainage.
Congratulations for purchasing OUTLAND LIVING outdoor
modular furniture components featuring cushions made from
premiere SUNBRELLA®brand performance materials.
• Sunbrella fabrics are made from strong, durable Acrylic.
• Sunbrella fabrics are water, mold and mildew resistant.
• Sunbrella fabrics resist sun fading and are UV protective.
• Sunbrella fabrics are stain resistant and easy to clean.
CUSHION CARE (taken from Sunbrella literature)
• Hand Washing (with or without removing the cushion cover):
Prepare a solution of 1/4 cup mild soap per gallon of lukewarm
water. Let soak into fabric. Use a sponge or very soft bristle
brush to lightly agitate the stain. Heavier stains may require
pre-soaking. Rinse thoroughly to remove all soap residue
and allow fabric to air dry.
• Machine Washing: First, carefully remove the covering.
Close all zippers. Machine wash in cold water on the delicate
cycle with normal amounts of mild laundry detergent.
For severe mold or mildew, add 1 cup of bleach. Allow fabric
to air dry. Sunbrella fabrics do not promote mildew growth,
however, mildew may grow on dirt and other foreign
substances if not removed from the fabric.
For more information and tips on cushion cleaning, removing
specific types of stains, and warranty allowable surface
retreatment, visit sunbrella.com/how-to-clean-sunbrella-fabric.
Claims on Sunbrella performance fabrics are managed under
separate warranty with Sunbrella. For more information on the
Sunbrella 5 year material warranty, visit sunbrella.com/warranty.