manuals.online logo
Brands
  1. Home
  2. •
  3. Brands
  4. •
  5. OVE
  6. •
  7. Plumbing Product
  8. •
  9. OVE PALOMA 22 User manual

OVE PALOMA 22 User manual

1
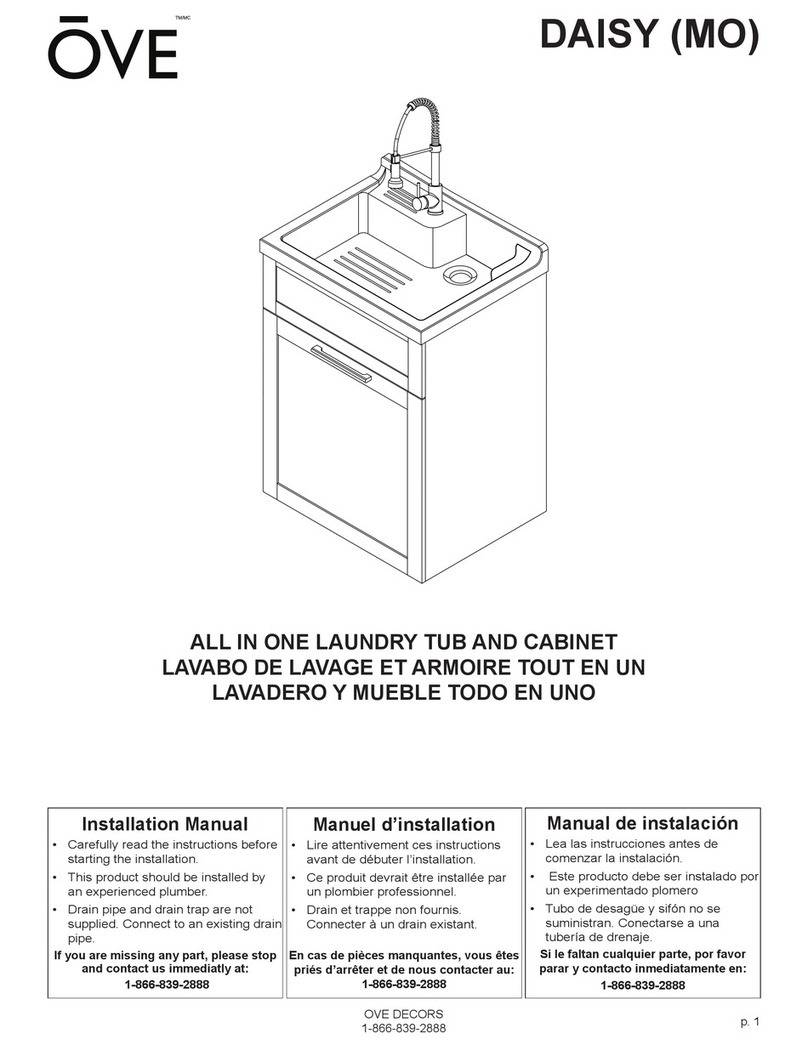
ALL IN ONE LAUNDRY TUB AND CABINET
LAVABO DE LAVAGE ET ARMOIRE TOUT EN UN
LAVADERO Y MUEBLE TODO EN UNO
Installation Manual
• Carefully read the instructions before
starting the installation.
• This product should be installed by
an experienced plumber.
• Drain pipe and drain trap are not
supplied. Connect to an existing drain
pipe.
If you are missing any part, please stop
and contact us immediatly at:
1-866-839-2888
9 a.m. - 5 p.m., EST, Monday - Friday
English and French speaking
representatives available
Manual de instalación
• Lea las instrucciones antes de
comenzar la instalación.
• Este producto debe ser instalado por
un experimentado plomero
• Tubo de desagüe y sifón no se
suministran. Conectarse a una
tubería de drenaje.
Si le faltan cualquier parte, por favor
parar y contacto inmediatamente en:
1-866-839-2888
9 am. – 5 pm., HDE, Lunes a Viernes.
Representantes disponibles para
inglés y francés
Manuel d’installation
• Lire attentivement ces instructions
avant de débuter l’installation.
• Ce produit devrait être installée par
un plombier professionnel.
• Drain et trappe non fournis.
Connecter à un drain existant.
En cas de pièces manquantes, vous êtes
priés d’arrêter et de nous contacter au:
1-866-839-2888
Lundi au vendredi de 9 h 00 à 17 h 00 HNE.
Représentants disponibles en
Anglais et Français
OVE DECORS
1-866-839-2888
UTILITY SINK WITH FAUCET
ÉVIER UTILITAIRE AVEC ROBINET
LAVADERO DE USO GENERAL CON GRIFO
ITM. / ART. 1367218
56.0cm
22 in / po
45.8cm
18 in / po
85.5cm
33.7 in / po
26.2cm
10.3 in / po
45.1cm
17.7 in / po
10.7cm
4.2 in / po
5.6cm
2.2 in / po
IMPORTANT, RETAIN FOR FUTURE REFERENCE: READ CAREFULLY
IMPORTANT, CONSERVER POUR CONSULTATION FUTURE : LIRE AVEC ATTENTION
IMPORTANTE, LO GUARDE PARA FUTURAS CONSULTAS: LEA DETENIDAMENTE
2
PARTS / PIÈCES / PIEZAS
TOOLS REQUIRED / OUTILS REQUIS / HERRAMIENTAS NECESARIAS
NOT INCLUDED / NON FOURNI / NO INCLUIDO
Level
Niveau
Nivel
Measuring Tape
Ruban à mesurer
Cinta medidora
Adjustable wrench
Clé ajustable
Llaves ajustables
Screwdriver
Tournevis
Destornillador
Silicone
Silicone
Silicona
Screwdriver
Tournevis
Destornillador
PART #
# DE PIÈCE
PARTE #
DESCRIPTION DESCRIPTION DESCRIPCIÓN
QUANTITY
QUANTITÉ
CANTIDAD
ABasin Lavabo Lavabo 1
B Fake Drawer Faux Tiroir Cajón Falso 1
CHandle Poignée Manija 3
DDoor (left) Porte (gauche) Puerta (izquierda) 1
EDoor (right) Porte (droite) Puerta (derecha) 1
F Hinge Charnière Bisagra 4
GFaucet Robinet Grifo 1
HFlange Flange Brida 1
INut Écrou Tuerca 1
JCounterweight Contrepoids Contrapeso 1
KRubber washer Rondelle Arandela de caucho 1
LSink Strainer Égouttoir Colador 1
MSink Basket Drain Desagüe 1
NRubber gasket Joint d’étanchéité Junta de goma 1
OPaper gasket Joint en papier Junta de papel 1
PLocknut Contre-écrou Contratuerca 1
QTop hat gasket Joint chapeau Junta tapa 1
RSink basket nut Écrou du drain Tuerca del desagüe 1
A
B
DE
C
F
G
K
J
I
H
L
M
N
P
Q
R
O
3
HANDLES INSTALLATION / INSTALLATION DES POIGNÉES / INSTALACIÓN DE LAS MANIJAS
Use a at head screwdriver to unlock the Counterweight (J).
Utiliser un tournevis à tête platte pour ouvrir le Contrepoids (J).
Utilice un destornillador de cabeza plana para abrir el
Contrapeso (J).
Completely remove the Flange (H) and the Nut (I).
Retirer la Flange (H) et le l’Écrou (I).
Retire completamente la Brida (H) y la Tuerca (I).
#2-1 #2-2
#1-1 #1-2
C
C
G
J
I
H
FAUCET INSTALLATION / INSTALLATION DU ROBINET / INSTALACIÓN DEL GRIFO
DO NOT open the drawer until you have removed the faucet box from behind the vanity.
NE PAS ouvrir le tiroir avant d’avoir retirer la boîte du robinet par l’arrière de la vanité.
NO ABRIR el cajón hasta que no se haya la caja del grifo que se encuentra debajo del armario.
4
Red - Hot water supply
Blue - Cold water supply
Rouge - alimentation d’eau chaude
Bleu - alimentation d’eau froide
Rojo – Suministro de agua caliente.
Azul – Suministro de agua fría
HOT
COLD
HOT
COLD
Screw the Counterweight (J) back on the hose. Place the bottom
of the Counterweight at 13 3/4” (350mm) from the end of the
hose. A red mark on the hose will help you locate this spot.
Replacer le Contrepoids (J) sur le boyau. Placer le bas du
Contrepoids à 13 3/4” (350mm) du bout du boyau. Une marque
rouge est apposé an de vous indiquer cet endroit.
Vuelva a colocar el Contrapeso (J) en la manguera. Coloque la
parte inferior del contrapeso 13 3/4” (350mm) desde el extremo
de la manguera. Una marca roja se ja para indicar este lugar.
Connect the ex tube to the hose with the Rubber Washer (K).
Connecter le tuyau exible au robinet avec la Rondelle (K).
Conecte el tubo exible al grifo con la Arandela de caucho (K).
#2-7
#2-6#2-5
J
K
Tighten the Nut (I) with a wrench.
Serrer le l’Écrou (I) avec une clé à molette.
Apriete la Tuerca (I) con una llave.
#2-4#2-3
I
H
Install the faucet onto the sink.
Installer le robinet sur le lavabo.
Instale el grifo en el lavadero.
COLD
HOT
HOT
COLD
13 3/4” (350mm)
Make sure to completely shut o󰀨 your water inlet before continuing. Connect hot and cold water supply lines (Not supplied) to the
brass tting of the faucet.
Assurez-vous de complètement couper votre arrivée d’eau avant de continuer. Conneter l’alimentation d’eau chaude et froide (Non
fourni) aux raccords de tuyauterie en laiton.
Asegúrese de apagar completamente la entrada de agua antes de continuar. Conecte la línea de suministro de agua caliente y agua
fría (No incluido) a los acoples de bronce del grifo.
5
Apply a ring of silicone under the Sink Basket lip (M).
Appliquer silicone en dessous du Drain (M).
Aplica silicón por debajo del Desagüe (M).
Insert the Sink Basket in the sink’s hole.
Insérer le Drain dans le trou lavabo.
Inserte el Desagüe en el oricio del fregadero.
Place the Rubber Gasket (N) and the Paper Gasket (O) under the
sink, onto the Sink Basket (M). Tightly screw the Locknut (P) to x
the basket in place.
Placer le Joint d’étanchéité (N) et le Joint en papier (O) sous le
lavabo, sur le Drain (M). Visser et serrer le Contre-écrou (P) an de
xez le Drain en place.
Coloque la Junta de goma (N) y la Junta de papel (O) debajo
del fregadero, sobre el Desagüe (M). Atornille rmemente la
Contratuerca (P) para arreglar el desagüe en su lugar.
DRAIN INSTALLATION / INSTALLATION DU DRAIN / INSTALACIÓN DEL DESAGÜE
#3-2
#3-1
M
M
L
#3-3
#3-4
Slide the Sink Basket Nut (R) on top of your piping tailpiece.
Place the Top Hat Gasket (Q) on top of the tailpiece.
Glisser le l’Écrou du drain (R) sur votre tuyau. Placer le Joint
chapeau (Q) au dessus du tuyau.
Deslice el Tuerca del desagüe (R) encima de su tubo de
desagüe. Colocar la Junta tapa (Q) en la parte superior del tubo
de desagüe.
#3-5
Vissez l’écrou du drain (R) sur le dessous du drain (M). Installez
votre p-trap à votre tuyau de drainage, en suivant les pratiques
de plomberie standards.
Atornille la Tuerca del desagüe (R) en la parte inferior del
Desagüe (M). Instale la trampa en la manguera de drenaje,
prácticas de plomería estándar.
Tailpiece (NOT SUPPLIED)
Tuyau (NON FOURNI)
Tubo de desagüe (NO INCLUIDO)
P-Trap & Piping (NOT SUPPLIED)
P-Trap & Tuyauterie (NON FOURNI)
P-Trap & Tubería (NO INCLUIDO)
Tighten the Sink Basket Nut (R) onto the
threaded part of the Sink Basket (M). Install
your p-trap to your drain pipe, following
standard plumbing practices.
N
O
P
M
6
GARANTIE LIMITÉE DE 1 AN
Cette garantie s’applique aux meubles-lavabo
du DISTRIBUTEUR installés pour une utilisation
résidentielle ou commerciale.
Le DISTRIBUTEUR garantie que, quand installés
selon les instructions d’installation, les meubles-
lavabo sont exemptes de défauts de fabrication.
Nous garantissons votre satisfaction avec chacun
de nos meubles-lavabo. Si un meuble-lavabo
n’est pas satisfaisant à cause d’un défaut visuel
apparent, veuillez simplement le retourner dans son
emballage d’origine chez votre détaillant, AVANT
L’INSTALLATION, pour un échange.
Cette garantie s’applique uniquement à l’acheteur
ainsi qu’au site d’installation et n’est pas
transférable.
INFORMATION SUR LA COUVERTURE DE
VOTRE GARANTIE
En outre des exclusions et des restrictions décrites
précédemment, les présentes garanties limitées ne
couvrent pas les dommages résultant des causes
suivantes:
▶Meubles-lavabo installés avec un défaut visuel
évident.
▶Défauts ou dommages des meubles-lavabo
provoqués par l’installation qui ne se conforme
pas aux instructions mentionnés dans les
informations d’installation des meubles-lavabo
du DISTRIBUTEUR.
▶Défauts ou dommages des meubles-lavabo
provoqués par des incidents graves (ex. feu,
brûlures).
▶Dommages provoqués par une inondation, par
une fuite de tuyaux, de robinets, etc, jusqu’à
et incluant des inondations ou des dommages
provoqués par des catastrophes naturelles.
POUR UN SERVICE SUR LA GARANTIE
• Pour émettre une réclamation, veuillez
communiquer avec le DISTRIBUTEUR au plus
tard 30 jours suivant la date de la découverte
d’un défaut, au 1-866-839-2888.
• Une preuve d’achat, tel que la facture est
demandée lors d’une requête d’un service sur
la garantie.
• Le DISTRIBUTEUR se réserve le droit
d’assigner un représentant pour inspecter le
meuble-lavabo pour analyse.
• Aucun distributeur, détaillant, installateur,
représentant, agent ou employé associé
directement ou indirectement au
DISTRIBUTEUR ne peut, d’aucune façon,
modier ou bonier les conditions, exclusions,
ou restrictions écrites des présentes garanties
limitées.
LA SEULE SOLUTION FOURNIE PAR
CETTE GARANTIE EST LA RÉPARATION
OU LE REMPLACEMENT DES PRODUITS
DÉFECTUEUX.
CETTE GARANTIE NE COUVRE PAS LE
COÛT DE LA POSE OU DU DÉMONTAGE DU
NOUVEAU PRODUIT.
OVE DECORS
1-866-839-2888
TADA DE 1 AÑO
Esta garantía se aplica a los muebles de lavabo
del DISTRIBUTOR instalado para usos comercial y
residencial.
El DISTRIBUTOR garantiza que, cuando son
instalados según las Prácticas reconocidas de la
industria de la plomería, los muebles de lavabo
están libres de defectos de fabricación por un
periodo de un (1) año a partir de la fecha de
compra.
Garantizamos su satisfacción con cada mueble de
lavabo. Si un mueble de lavabo no es satisfactorio
debido a un defecto visual, sólo tiene que
devolverlo en su empaque original a su vendedor,
ANTES DE LA INSTALACIÓN, para que sea
remplazado.
Esta garantía se aplica únicamente al comprador y
al sitio de instalación originales y no es transferible.
INFORMACIÓN ACERCA DE LA
COBERTURA DE SU GARANTÍA
Esta garantía no cubre daños o fallas atribuidos a:
▶Muebles de lavabo instalados con defectos
visuales obvios.
▶Defectos o daños en muebles de lavabo
causados por instalación no conforme con las
estrictas instrucciones detalladas las Prácticas
reconocidas de la industria de la plomería.
▶Defectos o daños causados por accidentes
severos (ejemplo, incendio, quemaduras).
▶Daño causado por inundación o
aguas estancadas de tubería, grifos o
electrodomésticos con fuga de agua, etc.,
hasta e incluyendo inundaciones y cualquier
daño causado por acto de la naturaleza.
PARA SERVICIOS BAJO GARANTÍA
• Para hacer una reclamación, contacte el
DISTRIBUTOR a más tardar 30 días después
de la fecha de descubrimiento o detección del
defecto, en el 1-866-839-2888.
• Es obligatorio presentar una prueba de
compra, tal como la factura de venta al
solicitar servicio bajo garantía.
• El DISTRIBUTOR se reserva el derecho de
designar un representante para inspeccionar
el mueble de lavabo para nes de análisis.
• Ninguna persona no autorizada, instalador,
vendedor, agente o empleado del
DISTRIBUTOR o ningún representante tiene
el derecho de asumir ninguna responsabilidad
a nombre del DISTRIBUTOR con relación a la
venta de este producto, ni tiene la autoridad
para aumentar o alterar las obligaciones o
limitaciones de esta garantía.
EL ÚNICO REMEDIO PROPORCIONADO POR
ESTA GARANTÍA ES LA REPARACIÓN O EL
REMPLAZO DE PRODUCTOS DEFECTUOSOS.
ESTA GARANTÍA NO CUBRE COSTOS DE
DESINTALACIÓN NI DE INSTALACIÓN DEL
NUEVO PRODUCTO. LA GARANTÍA SERÁ
NULA SI ESTE ARTÍCULO ES INSTALADO CON
DEFECTOS VISUALES OBVIOS.
LIMITED 1 YEAR WARRANTY
This warranty applies to the DISTRIBUTER vanities
installed for commercial and residential use.
The DISTRIBUTER warrants that, when installed in
accordance with the Recognized Plumbing Industry
Practice, the vanities are free of manufacturing
defects for a period of one (1) year from the date of
purchase.
We guarantee your satisfaction with each vanity.
Should any vanity not meet your satisfaction due to
a visual defect, simply return it to your retailer with
the original packaging, PRIOR TO INSTALLATION,
for a replacement.
This warranty applies only to the original purchaser
and installation site and is not transferable.
INFORMATION ABOUT YOUR WARRANTY
COVERAGE
This warranty does not cover damages or failure
attributable to:
▶Vanities installed with obvious visual defects.
▶Defects or damages to vanities caused
by installation that does not comply
strictly with the instructions set forth in the
DISTRIBUTOR’s installation manual.
▶Defects or damage to vanities caused by
severe accidents (e.g., re, burns).
▶Damage caused by ooding or standing
water from leaking pipes, faucets, household
appliances, etc; up to and including ooding
and any damage caused by acts of God.
FOR WARRANTY SERVICE
• To make a claim, contact the DISTRIBUTER
no later than 30 days following the date of
discovery or detection of defect, at 1-866-839-
2888.
• Proof of purchase, such as the bill of sale is
mandatory when requesting warranty service.
• The DISTRIBUTER reserves the right to
designate a representative to inspect the
vanity for analysis.
• No unauthorized person, installer, dealer,
agent or employee of th DISTRIBUTER or
any representative is entitled to assume
any liability on behalf of the DISTRIBUTER
relating to the sale of this product or has the
authority to increase or alter the obligations or
limitations of this warranty.
THE SOLE REMEDY PROVIDED BY THIS
WARRANTY IS THE REPAIR OR REPLACEMENT
OF DEFECTIVE PRODUCTS.
THIS WARRANTY DOES NOT COVER THE COST
OF REMOVAL OR INSTALLATION OF NEW
PRODUCTS. THE WARRANTY WILL BE VOID
IF THIS ITEM IS INSTALLED WITH OBVIOUS
VISUAL DEFECTS.

This manual suits for next models

1

Other OVE Plumbing Product manuals

OVE BREEZE B14 User manual

OVE

OVE BREEZE B14 User manual

OVE MYLA MO-6660 User manual

OVE

OVE MYLA MO-6660 User manual

OVE Daisy User manual

OVE

OVE Daisy User manual

OVE ADENA DSH User manual

OVE

OVE ADENA DSH User manual

OVE OJV-59 User manual

OVE

OVE OJV-59 User manual

OVE LENI Guide

OVE

OVE LENI Guide

OVE ATHENA MILLY User manual

OVE

OVE ATHENA MILLY User manual

OVE AMY 60 TD User manual

OVE

OVE AMY 60 TD User manual

OVE ATHENA User manual

OVE

OVE ATHENA User manual

OVE COLTON MO-6625C User manual

OVE

OVE COLTON MO-6625C User manual

Popular Plumbing Product manuals by other brands

Kohler KT6908 installation guide

Kohler

Kohler KT6908 installation guide

Hans Grohe iControl mobile 15942000 Instructions for use/assembly instructions

Hans Grohe

Hans Grohe iControl mobile 15942000 Instructions for use/assembly instructions

Axor Montreux 16534XX1 Installation instructions / warranty

Axor

Axor Montreux 16534XX1 Installation instructions / warranty

Kohler HYTEC ACR3769/LT installation instructions

Kohler

Kohler HYTEC ACR3769/LT installation instructions

Forbes Marshall FMSTR34 Installation and maintenance manual

Forbes Marshall

Forbes Marshall FMSTR34 Installation and maintenance manual

Lefroy Brooks K1-1210 Installation, operating,  & maintenance instructions

Lefroy Brooks

Lefroy Brooks K1-1210 Installation, operating, & maintenance instructions

Hansgrohe Axor Citterio 39115 1 Series Installation/User Instructions/Warranty

Hansgrohe Axor

Hansgrohe Axor Citterio 39115 1 Series Installation/User Instructions/Warranty

Hans Grohe Monsoon II 1jet 04466000 Assembly instructions

Hans Grohe

Hans Grohe Monsoon II 1jet 04466000 Assembly instructions

Laufen THERMOFIT installation instructions

Laufen

Laufen THERMOFIT installation instructions

American Standard Ravenna 0044.000 Specification sheet

American Standard

American Standard Ravenna 0044.000 Specification sheet

VADO ALTITUDE TAB-148/2WO-ALT-CP installation guide

VADO

VADO ALTITUDE TAB-148/2WO-ALT-CP installation guide

Elkay LKEC2012 Installation & owner's manual

Elkay

Elkay LKEC2012 Installation & owner's manual

Grohe 92646000 Service manual

Grohe

Grohe 92646000 Service manual

Kohler K-7776 installation guide

Kohler

Kohler K-7776 installation guide

Lefroy Brooks M1-1027 Installation, operating,  & maintenance instructions

Lefroy Brooks

Lefroy Brooks M1-1027 Installation, operating, & maintenance instructions

Lefroy Brooks M1-1015 Installation, operating,  & maintenance instructions

Lefroy Brooks

Lefroy Brooks M1-1015 Installation, operating, & maintenance instructions

Kohler K-8211 Installation and care guide

Kohler

Kohler K-8211 Installation and care guide

Bravat F14691C Products Installation Instructions

Bravat

Bravat F14691C Products Installation Instructions

manuals.online logo
manuals.online logoBrands
  • About & Mission
  • Contact us
  • Privacy Policy
  • Terms and Conditions

Copyright 2025 Manuals.Online. All Rights Reserved.