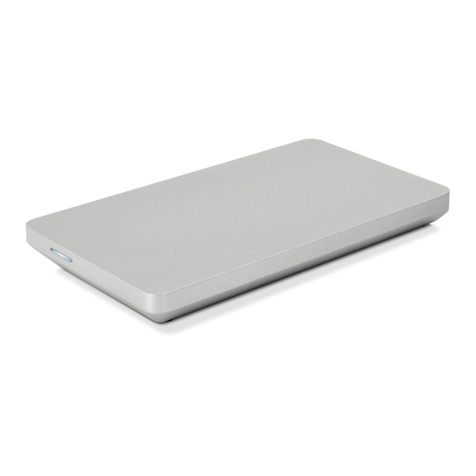
OWC MINISTACK STX User manual

MINISTACK STX
USER GUIDE

TABLE OF CONTENTS
INTRODUCTION
1.1 System Requirements .....................................................................................3
1.2 Supported Drives .............................................................................................3
1.3 Package Contents............................................................................................3
1.4 About This Manual...........................................................................................3
1.5 Front View ........................................................................................................4
1.6 Rear View .........................................................................................................4
1.7 OWC Drive Guide..............................................................................................4
1.8 Usage Notes.....................................................................................................5
INSTALLATION
2.1 Assembly..........................................................................................................6
SUPPORT RESOURCES
3.1 Troubleshooting...............................................................................................7
3.2 Online Resources.............................................................................................7
3.3 About Data Backup..........................................................................................7
3.4 Contacting Technical Support ........................................................................7
TABLE OF CONTENTS

03
1.1 SYSTEM REQUIREMENTS
Works with any Apple silicon Mac or iPad with Thunderbolt (USB-C), Apple ‘Intel’ Mac with Thunderbolt 3,
or any Thunderbolt 4 PC. Works as a USB-C hub with SATA storage on any USB-A (with USB-C to USB-A
adapter or cable sold separately) or USB-C equipped Mac, iPad, Chromebook, Android device, or PC.
- macOS 11.1 or later for Thunderbolt hosts
- macOS 10.14.6 or later for USB hosts
- Windows 10 or later
- Linux
- iPadOS 14.1 or later
- Chrome OS
- Android 11 or later
1.2 SUPPORTED DRIVES
- (1) 2.5-inch or 3.5-inch SATA 6Gb/s SSD or HDD
- (1) NVMe M.2 SSD 2280
1.3 PACKAGE CONTENTS
1.4 ABOUT THIS MANUAL
The images and descriptions may vary slightly between this manual and the unit shipped. Functions and
features may change depending on the rmware version. The latest product details and warranty information
can be found on the product web page. OWC’s Limited Warranty is not transferable and subject to limitations.
INTRODUCTION
INTRODUCTION
Not Shown:
Power Supply and Cable
miniStack STX Thunderbolt 4 Cable Quick Start Guide

04
1.5 FRONT VIEW
A. OWC logo LED – Glows white when there
is power but no data connection or when
the device enters Sleep mode. The logo will
glow blue when there is power and an active
data connection.
B. SATA drive activity – Glows green when there
is a power and data connection. Flashes green
when there is data access (read/write).
C. NVMe M.2 SSD activity – Glows blue when
there is a power and data connection. Flashes
blue when there is data access (read/write).
1.6 REAR VIEW
D. ClingOn mounting points – if you are using
one or more OWC ClingOn anchors
to secure the Thunderbolt device cable(s),
affix them here.
E. Thunderbolt 4 ports – connect compatible
Thunderbolt 4 or Thunderbolt 3 devices.
F. Thunderbolt 4 host port – Use this port
to connect the miniStack STX to a host.
G. DC power in – connect the included power
supply here.
H. Kensington Security slot – connect
a Kensington security tether here.
INTRODUCTION
A
C
F G
B
D H
E
1.7 OWC DRIVE GUIDE
These directions apply if you purchased the miniStack STX with drive pre-installed. Follow the steps below
to use the OWC Drive Guide utility to format your miniStack STX for macOS or Windows. If you installed your
own drives, please use the formatting method you are most familiar with or review our Mac & PC Formatting
page: owcdigital.com/support/formatting
A. Power on the miniStack STX and plug it into to your computer using one of the included
data cables. If you prefer to use a different formatting utility, do so at this time and skip
the rest of these steps.
B. The disk will mount and your operating system will display it as “OWC SETUP”.
Open the disk icon to view its contents.
C. Double-click the OWC Drive Guide application. Follow the simple on-screen instructions
to complete the formatting process. Once the formatting is finished the drive is ready to use.

05
1.8 USAGE NOTES
For the safe removal of your drive and to ensure that no data is lost, always eject or unmount the
corresponding disk(s) from your operating system before powering off. You can use the methods described
below to safely unmount your disk(s).
- macOS:
- Drag the icon for the disk you wish to unmount to the trash can; OR
- Right-click the disk icon on the desktop, then click “Eject”; OR
- Highlight the disk on your Desktop and press Command-E.
- Windows:
- Go to the System Tray (located in the lower right corner of your screen). Click on the “Eject” icon
(a small green arrow over a hardware image).
- A message will appear, detailing the devices that the “Eject” icon controls, i.e., “Safely remove...”
Click on this prompt.
- You will then see a message that says, “Safe to Remove Hardware.” It is now safe to disconnect
the miniStack STX from the computer.
- The steps above are applicable to Windows 10 build 1803 and earlier. If you are using Windows
10 build 1809 (October 2018) or later, you can eject the drive by clicking the ‘Show hidden items’
menu in the Taskbar, then clicking ‘Safely Remove Hardware and Eject Media’, and last select the
‘Eject’ option for this volume.
INTRODUCTION

06INSTALLATION
2.1 ASSEMBLY
This section describes the process of installing drives into the miniStack STX. If you purchased the miniStack
STX with drives pre-installed, please proceed to section 1.7 OWC Drive Guide. The Installation video can be
watched by visiting go.owc.com/ministackstx/install.
Required Tools: Philips PH02 Driver
INSTALLATION
1. Place the miniStack STX upside-down and remove the four
screws on the bottom side of the outer case.
2. While gripping the miniStack place it right-side up with the OWC
logo facing forward. Slowly life the top case off from back
to front. NOTE: There is a cable clipped inside to the outer case
and connected near the NVMe M.2 SSD circuit board. Opening
slowly helps prevent unintendedly disconnecting the cable.
3. Carefully remove the cable from the routing clip. Then carefully
disconnect the cable by pulling on the cable connector near
the NVMe M.2 SSD circuit board. Please do not directly pull
on the cable.
4. Drive Installation (Note: Either a 3.5-inch or 2.5-inch drive
and a NVMe M.2 SSD can be installed.)
A. Place the 3.5-Inch drive into the chassis and connect
into the SATA connector on the circuit board. Make sure
the drive is fully seated. Secure the drive from the inside
using the included HDD Mounting Screws. Turn over the
miniStack and further secure the drive using the HDD
Mounting Screws.
B. Place the 2.5-Inch drive into the chassis and connect
into the SATA connector on the circuit board. Make sure
the drive is fully seated. Turn over the miniStack and
further secure the drive using the SSD Mounting Screws.
C. Remove the NVMe M.2 SSD mounting screw and insert
a NVMe M.2 SSD fully into the connector at a slight angle.
Press the NVMe M.2 SSD down so the drive’s notch fits
around the mounting post. Secure the drive by using the
NVMe M.2 SSD mounting screw that was first removed.
5. Carefully place the cable back into the cable routing clip.
Then carefully connect the cable back into the connection
near the NVMe M.2 SSD circuit board.
6. Place the top case back on the miniStack from front to
back and while gripping, flip the unit upside down. Secure
the miniStack by using the four removed case screws.
7. Move onto Mac & PC Formatting found in Section 3.2
to complete the setup of the miniStack STX drive(s).
3
4a
4b
5
4c

07SUPPORT RESOURCES
3.1 TROUBLESHOOTING
- Begin troubleshooting by verifying that the power cable is connected to the miniStack STX
and to a power source. If the power cable is connected to a power strip, make sure that the power
switch on the strip is turned on. Then, verify that the Thunderbolt 4 cable is properly plugged into
the computer and the host port on the miniStack STX.
- If the miniStack STX is still not working properly, try connecting to another computer or using
another Thunderbolt 4 cable. If you are still experiencing problems, consult Section 3.4 for OWC
technical support contact information.
3.2 ONLINE RESOURCES
- Data Migration: owcdigital.com/migrating-your-mac-os-x-installation-to-a-new-drive
- Mac & PC Formatting: owcdigital.com/support/formatting
- Installation Video: go.owc.com/ministackstx/install
- Product Overview Page: https://eshop.macsales.com/shop/owc-ministack-stx
3.3 ABOUT DATA BACKUP
To ensure that your les are protected and to prevent data loss, we strongly suggest that you keep
two copies of your data: one copy on your OWC miniStack STX and a second copy on your internal
drive or another storage medium, such as an optical backup, or on a second external storage unit. Any
data loss or corruption while using the miniStack STX is the sole responsibility of the user, and under
no circumstances may OWC, its parent, partners, afliates, ofcers, employees, or agents be held liable
forloss of the use of data including compensation of any kind or recovery of the data.
3.4 CONTACTING TECHNICAL SUPPORT
SUPPORT RESOURCES
Phone: M–F, 8am–6pm CT
1.866.692.7100 (N. America) | +1.815.338.4751 (Int’l)
Chat: M–F, 8am–6pm, Sat 9am–5pm CT
www.owc.com/support
Email: Answered within 48 hours
www.owc.com/support

CHANGES:
The material in this document is for information purposes only and subject to change without notice.
While reasonable efforts have been made in the preparation of this document to assure its accuracy, OWC,
its parent, partners, afliates, ofcers, employees, and agents assume no liability resulting from errors or
omissions in this document, or from the use of the information contained herein. OWC reserves the right
to make changes or revisions in the product design or the product manual without reservation and without
obligation to notify any person of such revisions and changes.
FCC STATEMENT:
Warning! Modications not authorized by the manufacturer may void the user’s authority to operate this device.
NOTE: This equipment has been tested and found to comply with the limits for a Class A digital device,
pursuant to Part 15 of the FCC Rules. These limits are designed to provide reasonable protection against
harmful interference when the equipment is operated in a commercial environment. This equipment
generates, uses, and can radiate radio frequency energy and, if not installed and used in accordance with the
instruction manual, may cause harmful interference with radio communications. Operation of this equipment
in a residential area is likely to cause harmful interference, in which case the user will be required to correct
the interference at his own expense.
WARRANTY:
The miniStack STX has a 3 Year OWC Limited Warranty if it was bundled with a drive.
OWC miniStack STX enclosures that do not ship with a drive have a 1 Year OWC Limited Warranty.
For up-to-date product and warranty information, please visit the product web page.
COPYRIGHTS AND TRADEMARKS:
No part of this publication may be reproduced, stored in a retrieval system, or transmitted in any form
or by any means, electronic, mechanical, photocopying, recording or otherwise, without the prior written
consent of OWC.
© 2022 Other World Computing, Inc. All rights reserved. miniStack, OWC, and the OWC logo are
trademarks of New Concepts Development Corporation, registered in the U.S. and/or other countries.
Mac and macOS are trademarks of Apple Inc. Thunderbolt and the Thunderbolt logo are trademarks
of Intel Corporation or its subsidiaries in the U.S. and/or other countries. All other marks may be the
trademark or registered trademark property of their owners.
OWCMANMSSTX – 12.2.2021
Table of contents
Other OWC Network Hardware manuals
Popular Network Hardware manuals by other brands

Keysight
Keysight 11612A Operating and service manual

Bridgeworks
Bridgeworks Tamar FCSAS102800 user manual

WatchNet
WatchNet ENM-04 POE Quick connection guide

Matrix Switch Corporation
Matrix Switch Corporation MSC-HD44S product manual

IBASE Technology
IBASE Technology FWA8207 Series user manual

Juniper
Juniper MX150 quick start guide