How to perform UV-C sanitizing in manual mode
To perform UV-C (ultraviolet light) sanitizing ONLY follow these
instructions.
Open the lid of the device by pushing the large “OPEN” button on
the front of the device.
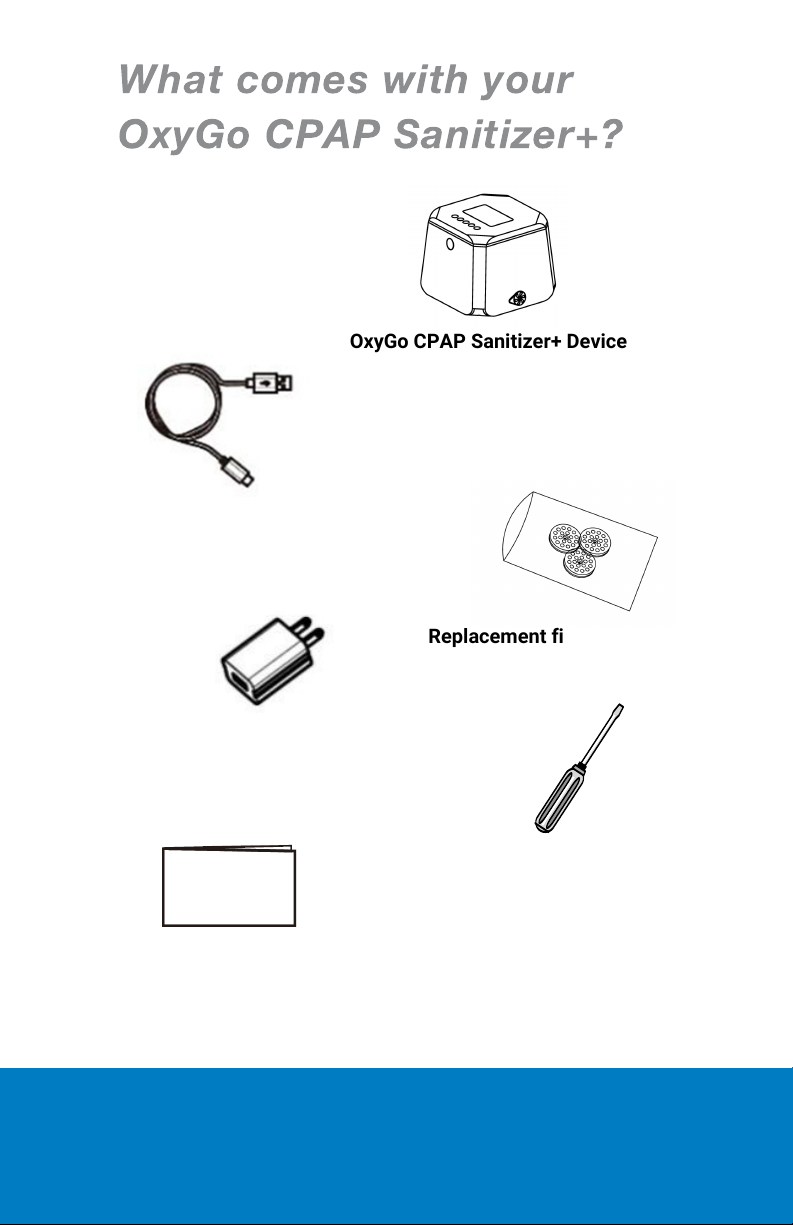
Place items to be sanitized using UV light into the chamber of the
OxyGo CPAP Sanitizer+. These items can include CPAP masks and
hoses, remote controls, toothbrushes, combs, pens, and any other
item to be sanitized that will fit inside of the chamber. NOTE: For
best results, avoid stacking items when placing them into the
chamber to allow for maximum UV exposure on all surfaces.
Once all items to be sanitized are inside the chamber, close the lid
of the OxyGo CPAP Sanitizer+.
Press the Start/Pause button on the lid of the OxyGo CPAP
Sanitizer+ to turn the device on.
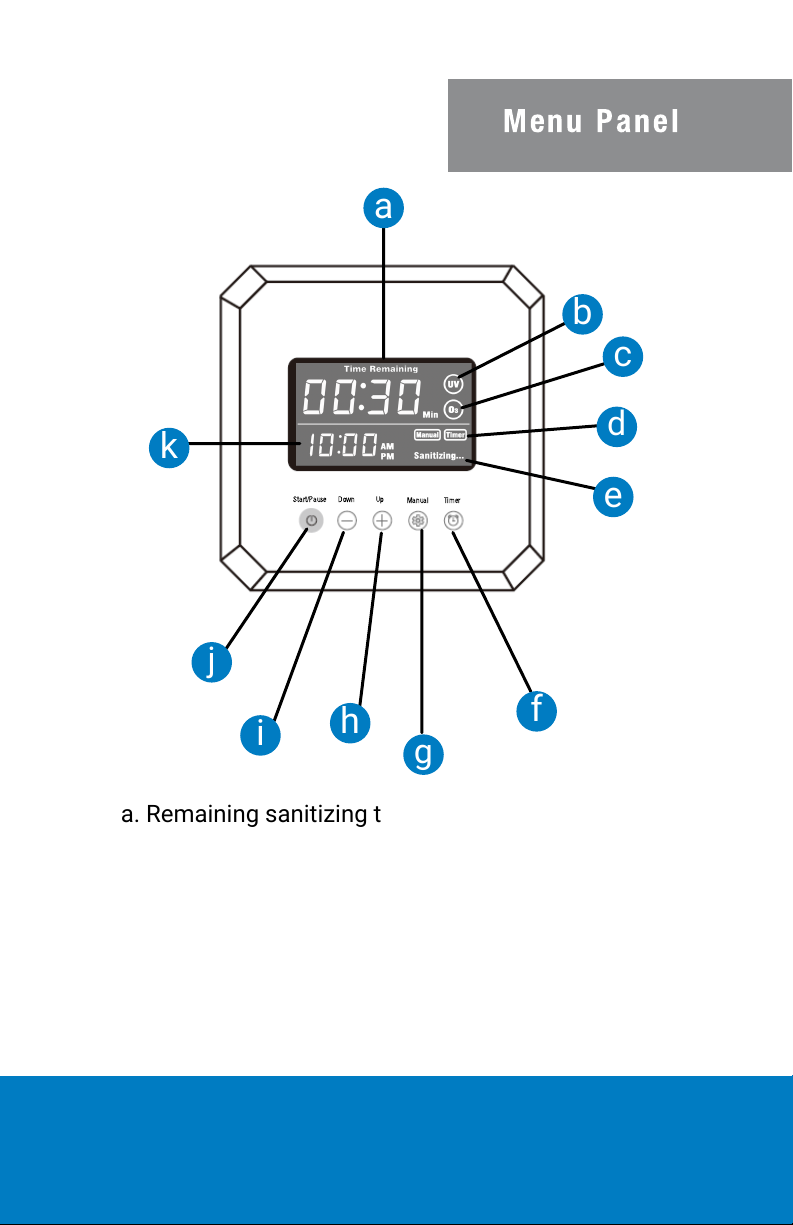
Press the manual button to change the desired mode. Press the
manual button until the UV symbol is shown in the upper right
corner of the display. The UV symbol should be the only symbol
shown in this area.
The UV mode can run for 5, 10, or 15 minutes. To choose the
length of time, press the + or – button to adjust to desired length of
minutes. When the desired length is selected stop pressing the
button and allow the number to remain on the screen. NOTE: While
a 5-minute cycle is usually sufficient to thoroughly sanitize most
items, you may choose a longer cycle when sanitizing larger or
multiple items.
Press the Start/Pause button to begin the UV cycle.
Once pressed the clock will count down the time until the end of
the cycle.
When the cycle is completed 4 dashes will appear on the screen to
show that the cycle is complete.
Open the lid by pressing the large Open Button on the front of the
device and safely remove the items.
1.
2.
3.
4.
5.
6.
7.
8.
9.
10.
8
Manual Mode Settings