Oypla HOME 3226 User manual

Page 1
Manual Version: v1.0
Model Code: 3226
Oypla.com LLP / www.oypla.com
User Manual
Model Code: 3226
Contents
1Front Cover
-
2Safety
Instructions
-
2Warning
Instructions
-
3Operating
Instructions
-
5Cleaning and
Maintenance
-
6 Problem-Cause-
Solution
-
6Back Cover
End
Electric Submersible
Pump

Page 2
Manual Version: v1.0
Model Code: 3226
Oypla.com LLP / www.oypla.com
Contents
1Front Cover
-
2Safety
Instructions
-
2Warning
Instructions
-
3Operating
Instructions
-
5Cleaning and
Maintenance
-
6 Problem-Cause-
Solution
-
6Back Cover
End
Safety Instructions
Notice: Ensure you read and fully understand instructions before use
While every attempt is made to ensure the highest degree of protection in all equipment, we cannot
guarantee freedom from injury. The user assumes all risk of injury due to use. All merchandise is sold
on this condition, which no representative of the company can waive or change.
Make sure all fastenings are tightly in
place and that everything is in order
before using the product. This should
be checked periodically by an adult.
This product is intended for outdoor
use only.
Do not carry the pump by its
electrical power cable, or outlet pipe.
Only carry by the built-in handle.
This product is not a toy, and is only
to be used for its designated
purpose.
Do not carry out alterations or
modifications to this product.
To protect against electrical shock,
do not immerse cord, plug or any
part of this appliance in water or any
other liquid.
Do not exceed the maximum
submersible depth of 7m.
The pump must be supplied through
a residual current device (RCD)
having a rated residual operating
current not exceeding 30mA.
Do not use product when people are
in the water.
Ensure the power supply to the
socket into which the appliance is
plugged, is in accordance with the
rating label on the appliance and that
the socket is earthed.
Do not leave product in water that
may freeze.
When the appliance is not in use,
always unplug from the mains socket.
Do not discard any of the packaging
until you have checked that you have
all of the parts and fitting required.
This product is not intended for use
by persons (including children) with
reduced physical, sensory and mental
capacities, or lack of experience and
knowledge, unless they have been
given supervision or instruction
concerning use of the product by
persons responsible for their safety.
Do not use to pump chemicals, fuels,
salt water or inflammable, corrosive,
explosive or dangerous liquids.
If the product is damaged or has any
defects, please contact
⚠Submerging the power cord, plug
or any other part of the appliance into
water or any other liquid is extremely
dangerous and can cause electrically
shocks. Do not do this at any time.
⚠Do not use this product to pump
chemicals, fuels, salt water or any
dangerous liquids. Doing so may lead to
product failure and/or personal injury.
Warnings

Page 3
Manual Version: v1.0
Model Code: 3226
Oypla.com LLP / www.oypla.com
Parts List:
-If you are missing any of the below parts, please contact [email protected]
-Please be aware that you will be referring to this parts list throughout the assembly
process
-Please refer to the diagram below for instructions on how to operate your product.
1
Behind Cover
2
Switch
3
Nut
4
Output tie-in
5
Base
Contents
1Front Cover
-
2Safety
Instructions
-
2Warning
Instructions
-
3Operating
Instructions
-
5Cleaning and
Maintenance
-
6 Problem-Cause-
Solution
-
6Back Cover
Operating Instructions
5
2
3
4
1
• Your submersible pump is
designated for the circulation of
water with maximum temperature
of 35°C.
• This pump may not be used for
other fluids, especially motor fuels,
cleaning fluids, and other chemical
products!
INSTALLATION INSTRUCTIONS
The submersible motor pump is installed as either of the following:
-In a stationary position with a fixed pipeline.
-In a stationary position with a flexible hose pipe.
PLEASE NOTE: You should never install the pump by suspending it
unsupported from its delivery pipe or power cable. The submersible
motor pump must be suspended from the specially provided handle
or be placed on the bottom of the shaft. To guarantee that the pump
works properly, the bottom of the shaft must be kept free of sludge
and dirt of all kinds.

Page 4
Manual Version: v1.0
Model Code: 3226
Oypla.com LLP / www.oypla.com
Contents
1Front Cover
-
2Safety
Instructions
-
2Warning
Instructions
-
3Operating
Instructions
-
5Cleaning and
Maintenance
-
6 Problem-Cause-
Solution
-
6Back Cover
If the level of water sinks too far, any sludge in the shaft will dry out
quickly to stop the pump from starting up. It is necessary, therefore,
to check the submersible motor pump regularly (by carrying out start
up tests).
The floater is adjusted in a way that the pump can immediately be
started.
NOTE: The pump shaft should have minimum dimensions of
40x40x50cm, so that the floating switch can move freely.
MAINS SUPPLY
Your new submersible pump is equipped with a shockproof plug
according to regulations. The pump is designed to be connected to a
230V~, 50Hz safety socket.
Make sure that the socket is sufficiently secured (min.6Amp.) and is
in excellent condition. Introduce the plug into the socket and the
pump is ready to go.
IMPORTANT NOTE: If the mains cable or plug suffers any damage
from external action, repairs to the cable are prohibited.
NOTE: This work may only be performed by a qualified electrician or
customer service.
AREAS OF USE
This pump is used primarily as cellar pump. When installed in a shaft,
this pump provides protection from flooding.
They are also used wherever water has to be moved from one place
to another, e.g. in the home, agriculture, horticulture, plumbing and
many other applications.
SETTING TO WORK
After having read these instructions carefully, you can set your pump
to work, reconsidering the following item:
• Check if the pump rests on the ground of the shaft.
• Check if pressure cord has been attached properly.
• Check if electrical connection is 230V~, 50Hz.
• Check if socket is in good condition.
• Make sure that the water and humidity can never come to the
mains supply.
• Avoid pump running dry.

Page 5
Manual Version: v1.0
Model Code: 3226
Oypla.com LLP / www.oypla.com
Contents
1Front Cover
-
2Safety
Instructions
-
2Warning
Instructions
-
3Operating
Instructions
-
5Cleaning and
Maintenance
-
6 Problem-Cause-
Solution
-
6Back Cover
CLEANING & MAINTENANCE
Please refer to the instructions below in regards to cleaning and maintaining your product.
Remove the mains plug before all
maintenance work.
In the event that the pump is often
transported in the course of
operation, it should be cleaned out
with clear water after every use.
Remove deposits on the floater with
clear water.
All fibrous particles which may have
built-up inside the pump housing
should be removed with a water jet.
Every 3 months the shaft ground
should be cleaned from mud.
In case of stationary installation, the
function of the loading switch should
be checked every 3 months.
The submersible pump is an approved, maintenance free high quality
product, which is subject to severe final controls.
We recommend, regular inspection and maintenance to ensure long
equipment life and uninterrupted operation.
SETTING THE ON/OFF SWITCHING
POINT
• The ON/OFF switching point can be infinitely adjustment facility. For this
purpose you must first slacken the screw. The switching differential can be
infinitely adjusted by extending or shortening the floating cable.
Automatic Operation
Before you put the pump into operation, please check the following:
• The float switch must be installed so that the level of the ON operating
point and the level of the OFF operating point can be reached easily and with
little force. To check this, place the pump in a vessel filled with water, raise
the float switch carefully by hand and then lower it again. As you do so, note
whether the pump switched on and off.
• Make sure that the distance between the float switch head and the
latching holder is not too small. Proper operation is not guaranteed if the
gap is too small.
When you set the float switch, make sure that it does not touch the base
before the pump switches off.
CAUTION: Risk of dry-running.

Page 6
Manual Version: v1.0
Model Code: 3226
Oypla.com LLP / www.oypla.com
Problem
Cause
Solution
Pump does not start
-Power supply not connected
-Floater does not switch
-Check power supply
-Raise position of floating switch
No flow
-Inlet sieve is clogged
-Pressure hose in bent
-Clean inlet sieve water jet
-Reset hose
Pump does not switch off
-Floater cannot sink down
-Place pump properly on shaft
ground
Insufficient flow
-Inlet sieve is clogged
-Reduced pumping capacity by
dirty and abrasive water
-Clean inlet sieve
-Clean pump and replace worn-
out parts
Pump switches of after short
operating period
-Thermal cut-out stops pumps due
to dirty water
-Water too hot. Thermal-cut-out
stops pump
-Remove mains plug. Clean pump
and shaft
-Make sure that a water
temperature of max.35℃is not
exceed
Contents
1Front Cover
-
2Safety
Instructions
-
2Warning
Instructions
-
3Operating
Instructions
-
5Cleaning and
Maintenance
-
6 Problem-Cause-
Solution
-
6Back Cover
PROBLEM-CAUSE-SOLUTION
Table of contents
Popular Water Pump manuals by other brands
TapFlo
TapFlo T/TX30 IOM manual

JABSCO
JABSCO 31595-009 manual

MASTERLUBE
MASTERLUBE Minimaster PMM2CD troubleshooting guide
Grundfos
Grundfos TPE 2 Series Installation and operating instructions

Pfeiffer Vacuum
Pfeiffer Vacuum HiCube Classic Series operating instructions
Annovi Reverberi
Annovi Reverberi AR 503 AP instruction manual
Laing
Laing Ultracirc S1 Series Installation and operating instructions

vacuubrand
vacuubrand ME 8SI Instructions for use
BASEPUMP
BASEPUMP RB750-EZ installation guide
Kremlin-Rexson
Kremlin-Rexson PMP 150 Documentation
Rocker
Rocker 300C instruction manual
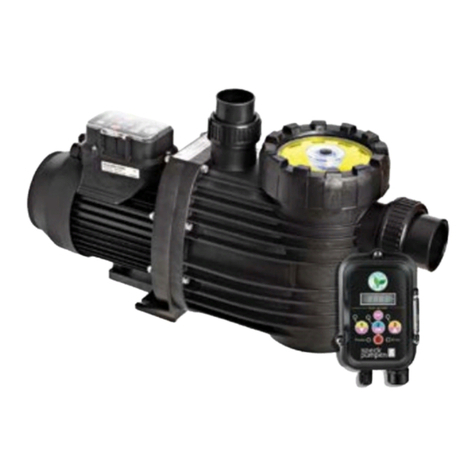
Legend
Legend ECO-TOUCH VS Installation and operation manual


