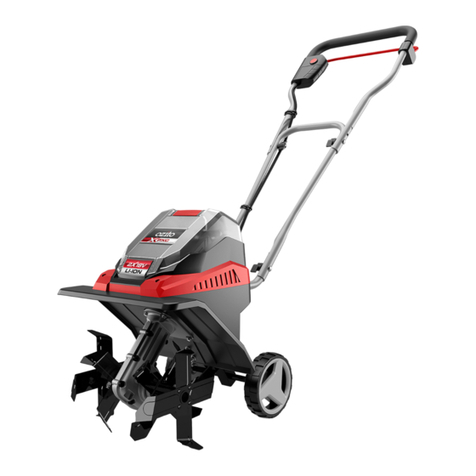
Ozito OZTIL750WA User manual

Electric Tiller
285mm 750 Watt
Operation Manual
2 Year Replacement Warranty
OZTIL750WA
CAUTION: Read this operation manual before using this tool.
To view the full range visit: www.ozito.com.au
1209
OZTIL750WA Manual.qxd 12/15/09 2:22 PM Page 1

Input: 230 - 240V ~ 50Hz
Rated power: 750W
No load speed: 400/min
Working width: 285mm
Max. working depth: 240mm
Noise level: 93 dB(A)
Weight: 7.5kg
Features: Wide Upper Handle
Safety Lock-Off Switch
Compact Design
Lightweight
1. Switch cordset
2. Safety lock-off button
3. Switch lever
4. Extension cord restraint
5. Upper handle
6. Lower handle
7. Motor cordset
8. Lower handle bracket
9. Motor housing
10. Fender
11. Guard
12. Tines
12
10
2
SPECIFICATIONS - MODEL NO. OZTIL750WA
5
6
1
2
4
3
8
11
9
8
7
OZTIL750WA Manual.qxd 12/15/09 2:22 PM Page 2

3
TABLE OF CONTENTS
SPECIFICATIONS …………………………………………
TABLE OF CONTENTS…………………………………...
INTRODUCTION…………………………………………
SAFETY INSTRUCTIONS………………………………..
ASSEMBLY ………………………………………………
OPERATION ………………………………………………
MAINTENANCE …………….……………………………
CONTENTS ………………………………………………
WARRANTY……………………………………………….
Page 2
Page 3
Page 4
Page 4
Page 8
Page 9
Page 11
Page 14
Page 15
OZTIL750WA Manual.qxd 12/15/09 2:22 PM Page 3

INTRODUCTION
SAFETY INSTRUCTIONS
4
Congratulations on purchasing an Ozito Tiller. We aim
to provide quality tools at an affordable price. We hope
you will enjoy using this tool for many years.
Your Tiller OZTIL750WA has been designed for tilling soft
to medium soils to break up compacted soil, mulching,
blending soil and weeding. Please note that this product
is not designed to be used in clay or hard ground
conditions. It is intended for DIY use only.
Warning! When using mains-powered equipment, basic safety precautions,
including the following, should always be followed to reduce risk of fire,
electric shock, personal injury and material damage.
Read and understand the manual prior to operating this tool.
Save these instructions and other documents supplied with this tool for
future reference.
The electric motor has been designed for 230V and 240V only. Always check that
the power supply corresponds to the voltage on the rating plate.
Note: The supply of 230V and 240V on Ozito tools are interchangeable for
Australia and New Zealand.
This tool is double insulated in accordance with AS/NZS 3100: 2002;
therefore no earth wire is required.
If the supply cord is damaged, it must be replaced by an electrician or a power
tool repairer in order to avoid a hazard.
Note: Double insulation does not take the place of normal safety precautions when
operating this tool. The insulation system is for added protection against injury
resulting from a possible electrical insulation failure within the tool.
Using an Extension Lead
Always use an approved extension lead suitable for the power input of this tool.
Before use, inspect the extension lead for signs of damage, wear and ageing.
Replace the extension lead if damaged or defective. When using an extension lead
on a reel, always unwind the lead completely. Use of an extension lead not suitable
for the power input of the tool or which is damaged or defective may result in a risk
of fire and electric shock.
ELECTRICAL SAFETY
OZTIL750WA Manual.qxd 12/15/09 2:22 PM Page 4

!
!
5
GENERAL
Warning! Read all instructions. Failure to follow all instructions listed below
may result in electric shock, fire and/or serious injury. The term “Power Tool”
in all of the warnings listed below refers to your mains operated (corded)
power tool or battery operated (cordless) power tool.
SAVE THESE INSTRUCTIONS
1) WORK AREA
a) Keep work area clean and well lit. Cluttered and dark areas invite accidents.
b) Do not operate power tools in explosive atmospheres, such as in the
presence of flammable liquids, gases, or dust. Power tools create sparks which
may ignite the dust or fumes.
c) Keep children and bystanders away while operating a power tool. Distractions
can cause you to lose control.
2) ELECTRICAL SAFETY
a) Power tool plugs must match the outlet. Never modify the plug in any way.
Do not use any adapter plugs with earthed (grounded) power tools.
Unmodified plugs and matching outlets will reduce risk of electric shock.
b) Avoid body contact with earthed or grounded surfaces such as pipes,
radiators, ranges and refrigerators. There is an increased risk of electric shock if
your body is earthed or grounded.
c) Do not expose power tools to rain or wet conditions. Water entering a power
tool will increase the risk of electric shock.
d) Do not abuse the cord. Never use the cord for carrying, pulling or
unplugging the power tool. Keep cord away from heat, oil, sharp edges or
moving parts. Damaged or entangled cords increase the risk of electric shock.
e) When operating a power tool outdoors, use an extension cord suitable for
outdoor use. Use of a cord suitable for outdoor use reduces the risk of
electric shock.
3) PERSONAL SAFETY
a) Stay alert, watch what you are doing and use common sense when operating a
power tool. Do not use a power tool while you are tired or under the influence
of drugs, alcohol or medication. A moment of inattention while operating power
tools may result in serious personal injury.
b) Use safety equipment. Always wear eye protection. Safety equipment such as
dust mask, non-skid safety shoes, hard hat, or hearing protection used for
appropriate conditions will reduce personal injuries.
c) Avoid accidental starting. Ensure the switch is in the off position before
plugging in. Carrying power tools with your finger on the switch or plugging in
power tools that have the switch on invites accidents.
d) Remove any adjusting key or wrench before turning the power tool on. A
wrench or a key left attached to a rotating part of the power tool may result in
personal injury.
OZTIL750WA Manual.qxd 12/15/09 2:22 PM Page 5

6
GENERAL (cont.)
e) Do not overreach. Keep proper footing and balance at all times. This
enables better control of the power tool in unexpected situations.
f) Dress properly. Do not wear loose clothing or jewellery. Keep your hair,
clothing and gloves away from moving parts. Loose clothes, jewellery or
long hair can be caught in moving parts.
g) If devices are provided for the connection of dust extraction and
collection facilities, ensure these are connected and properly used. Use of
these devices can reduce dust related hazards.
4) POWER TOOL USE AND CARE
a) Do not force the power tool. Use the correct power tool for your
application. The correct power tool will do the job better and safer at the rate
for which it was designed.
b) Do not use the power tool if the switch does not turn it on and off. Any
power tool that can not be controlled with the switch is dangerous and must
be repaired.
c) Disconnect the plug from the power source before making any
adjustments, changing accessories, or storing power tools. Such preventive
safety measures reduce the risk of starting the power tool accidentally.
d) Store idle power tools, unplugged & out of the reach of children and do not
allow persons unfamiliar with the power tool or these instructions to operate
the power tool. Power tools are dangerous in the hands of untrained users.
e) Maintain power tools. Check for misalignment or binding of moving parts,
breakage of parts and any other condition that may affect the power
tools operation. If damaged, have the power tool repaired before use.
Many accidents are caused by poorly maintained power tools.
f) Keep cutting tools sharp and clean. Properly maintained cutting tools with
sharp cutting edges are less likely to bind and are easier to control.
g) Use the power tool, accessories and tool bits etc., in accordance with
these instructions and in the manner intended for the particular type of
power tool, taking into account the working conditions and the work to
be performed. Use of the power tool for operations different from intended
could result in a hazardous situation.
h) This appliance is not intended for use by persons (including children) with
reduced physical, sensory or mental capabilities, or lack of experience and
knowledge, unless they have been given supervision or instruction concerning
use of the appliance by a person responsible for their safety.
i) Children should be supervised to ensure that they do not play with
the appliance.
5) SERVICE
a) Have your power tool serviced by a qualified repair person using only
identical replacement parts. This will ensure that the safety of the power tool
is maintained.
b) If the supply cord is damaged, it must be replaced by the manufacturer, its
service agent or similarly qualified persons in order to avoid a hazard.
OZTIL750WA Manual.qxd 12/15/09 2:22 PM Page 6

7
• Only use an extension cable that is suitable for outdoor work. Keep it away from
the cutting area, damp, wet or oily surfaces, surfaces with sharp edges and heat
and fuels.
• Be aware of extension cord while operation. Be careful not to trip over cord.
Always guide the cord away from tines at all times.
• The power supply cable should be checked regularly and before using it each
time, make sure the cable is not damaged or worn out. If the cable is not in good
condition, do not use the machine. Have the cable replaced by an electrician or
qualified person.
• Do not operate the machine near underground electric cables, telephone lines,
pipes or hoses.
• Take extra care when walking backwards as there is a possibility that you may stumble.
• Do not operate the machine on a slope that is too steep for safe operation. When
on slopes, slow down and make sure you have good footing. Always work at right
angles to the slope and maintain a safe and firm stance.
•Only work when visibility is good.
• Before starting the machine, make sure tines are not touching foreign objects and
must be completely free to move.
• Grip the upper handle firmly with both hands. Never operate the machine with
one hand.
•Be aware that the machine may unexpectedly bounce upward or jump forward if
the tines should strike extremely hard, packed soil, frozen ground, or buried
obstacles such as large stones, roots or stumps.
• Do not put hands, feet or any body part or clothing in the vicinity of rotating tines.
• Only guide the machine at walking pace. Do not over reach. Maintain proper
footing and balance at all times.
•If the machine strikes a foreign body, examine the machine for signs of damage
and carry out any necessary repairs before restarting and continuing to work.
• If the machine should start to vibrate abnormally, switch off the motor and check
for the cause immediately. Vibration is generally a warning of trouble.
• Hold the upper handle to lift the machine to move it from one place to another.
• Do not drag the machine over hard ground like concrete or paved paths or up &
down steps.
• Never use the machine when it is raining. Try to prevent it from getting wet or
being exposed to humidity. Do not leave it outside overnight.
• Wear sturdy working shoes and long trousers to protect your legs. Never operate
the machine while barefoot or wearing inappropriate footwear such as thongs
or sandals.
• Always switch off the machine, disconnect the plug and wait until the machine
stops before carrying out maintenance or cleaning work. Caution! Tines continue
to rotate after switching off.
• Use caution when cleaning or performing maintenance on the machine. Wear
protective clothing such as gloves when performing maintenance.
ADDITIONAL SAFETY RULES FOR TILLERS
OZTIL750WA Manual.qxd 12/15/09 2:22 PM Page 7

8
Attaching the lower handle (6)
Insert the lower handle (6) to lower handle brackets (8) and fix it by the two
supplied bolts and nuts.
Upper handle (5)
Slide the extension cord restraint (4) onto the upper handle (5).
Connect to the lower handle (6) by inserting the supplied bolts and wing nuts.
To adjust the height of the tiller, select either of the 2 sets of holes on the
lower handle (6).
Use the supplied two cable clips to hold cable.
ASSEMBLY
Fig. 1
OZTIL750WA Manual.qxd 12/15/09 2:22 PM Page 8

9
OPERATION
Starting
Connecting the mains
Loop the extension cord through the extension cord restraint
(4) as shown in Fig.2. Plug the switch cordset (1) into the
extension cord.
Starting up
• Press the lock-off button (2) of the switch assembly, hold
and then pull the switch lever (3) against the bar. The
motor will start and the tines will begin to rotate.
• Keep the switch lever (3) depressed while releasing the
safety lock-off button (2).
• To stop the tiller, release the switch lever (3) and it automatically stops the motor.
Tips
• Water the work area prior to commencing tilling operation.
• Move the tiller to the work area prior to starting the motor.
•Hold the tiller firmly while switching it on. The tines will pull the tiller forward
during operation.
• Hold the upper handle (5) securely, walk backwards slowly and allow the tines (12)
to dig into the work area.
• For breaking sod or deep tilling, allow the tines to pull the tiller forward to the end
of your arm's reach, then firmly pull the tiller back towards you. By repeatedly
allowing the tiller to move forward and then pulling back to you, the tiller will be
most effective.
•If the tiller digs deep enough to stay in one spot, gently rock the tiller side to side
to start the tiller moving forward again.
• For preparing seed bed, we
recommend using one of the
tilling patterns.
Tilling Pattern A - Make two passes
over area to be tilled, the second at
a right angle to the first.
Tilling Pattern B - Make two passes
over area to be tilled, the second
overlapping the first.
• To prevent tripping take particular
care when moving backwards and
when pulling the tiller.
• Always let the tines rotates at top speed; do not work in such a way as to overload
the tiller.
• Never pass the tiller over the extension cord; make sure it is always in a safe
position behind your back.
• When working on inclines always stand diagonally to the incline in a sturdy, safe
stance. Do not work on extremely steep slopes.
Fig. 3
Fig.2
OZTIL750WA Manual.qxd 12/15/09 2:22 PM Page 9

10
•OPERATION (cont.)
Transport
Caution! Before transporting the tiller, switch off the motor.
The tines and machine may be damaged even if you move the tiller with the motor
switched off, e.g. over solid ground. Prevent the tines from touching the ground by
carrying out the tiller by the lower handle (6).
Clearing tines of foreign objects
During operation, a stone or root could become lodged in the tines, or tall grass or
weeds may become wrapped around the tine shaft.
To clear the tines, switch off the tiller. Unplug the tiller, and dislodge or remove any
obstacles from the tines or tine shaft.
To ease removal of tall grass or weeds that are wrapped around the tine shaft, remove
one or more of the tines from the tine shaft. See Tine Removal and Installation in
the manual.
a) No power at power supply
b) Extension cord defective
c) Switch & cordset
assembly defective
a) Check the power supply and fuses
b) Repair or replace extension cord
c) Arrange for repair by an electrician or
power tool repairer
a) Tines are jammed
b) Loose bolts or nuts
a) Disconnect power and determine cause
b) Tighten all components. Arrange for
inspection by power tool repairer if
noise persists
a) Tines damaged or worn
b) Working depth too large
a) Replace blades or arrange for inspection
by power tool repairer
b) Adjust for correct working depth
a) Working depth too small
b) Worn tines
a) Adjust for correct working depth
b) Replace or arrange for inspection by
power tool repairer
Motor does not start
Abnormal noise
Abnormal vibrations
Poor scarification results
Fault Possible Cause Remedy
•TROUBLE SHOOTING GUIDE
OZTIL750WA Manual.qxd 12/15/09 2:22 PM Page 10

MAINTENANCE
Before carrying out any maintenance operations, disconnect the power supply
by disconnecting the plug from the extension cable.
Prior to each time the application is used
• Check all electrical cables for signs of damage or ageing. Replace the cable if it is
cracked, split or otherwise damaged.
• Check the condition of the cutting cylinder, and ensure that all threaded
connections are securely tightened.
• If the tines are blunt, have a power tool repairer inspect the tiller.
Once per season
• Lubricate the tines and shaft.
• At the end of the season, have the tiller checked and serviced at a power
tool repairer.
Cleaning
Caution! Always clean the tiller after use. Failure to carry out proper cleaning can
result in damage to the tiller or cause it to malfunction.
Warning! Injury can occur during work on the tines. Wear protective gloves.
Whenever possible, clean the tiller straight after you have finished using it.
• Clean the underside of the housing around the tines, guard shield and fender
with a stiff brush. Then, using a soft cloth dampened with a mild soap and water
mixture wipe the underside. Never splash with water!
• To remove soil and debris from the tines and transmission, use a stiff brush or a
dampened cloth.
• Clean the motor housing vents, and remove any remaining grass or dirt.
•Once cleaned, wipe the tine and shaft dry and apply a light coat of oil.
Tines Removal and Installation
Worn tines results in poor
performance and overloads
the motor.
Check the condition of the tines
prior to use. Sharpen or replace
the tines when necessary. It is
recommended that this be done
by a power tool repairer.
Caution! Disconnect the mains
and wear protective gloves.
Fig. 4
11
OZTIL750WA Manual.qxd 12/15/09 2:22 PM Page 11

To remove the complete tines from the shaft:
• Remove the lock pin from the end of the shaft.
• Take off the outer tine set from shaft.
• Remove the lock pin and take off the inner tine set from tine shaft.
•Reverse above steps to install tines.
Change tines from bracket
Replacing a damaged tine:
• Loosen the screws from one side while hold the lock nuts from other side.
• Take off the damaged tine and replace with the new one.
Checking transmission lubricant
Drain screw plug (a) Fig. 5 is located on the right side of transmission housing.
• Lay the tiller on its left side and clean the transmission to prevent dirt and
debris before remove the
drain screw.
• Using a hex key 5mm to
unscrew the plug and
empty the grease from
the transmission.
• Fill up by using a grease
gun with a high-quality,
automotive-grade grease
until it begins to seep out
around the edge of the
hole of the nozzle.
• If necessary, disassemble tines.
• Reinstall the drain screw plug.
Storage
The tiller should be stored in a dry and clean place and out of reach of children.
During extended periods of storage, ensure that the tiller is protected against
corrosion and frost.
At the end of the season, or if the tiller is not to be used for longer than a month:
•Clean the tiller.
• Wipe over all metal surfaces with an oil-impregnated cloth to protect them
from corrosion, or spray a fine coat of oil onto them from a can.
• Fold the upper handle (5) down, and store it in a suitable place.
Note: Ozito Industries will not be responsible for any damage or injuries caused by
repair of the tiller by an unauthorised person or mishandling or mistreatment of
the tool.
MAINTENANCE (cont.)
12
Fig. 5 a
OZTIL750WA Manual.qxd 12/15/09 2:22 PM Page 12

DESCRIPTION OF SYMBOLS
13
VVolts Hz Hertz
~Alternating current WWatts
/min Revolutions or
reciprocation per minute
Double insulated
n
o No load speed
Warning
Danger! - Rotating blades
Read operator’s manual
before use
Keep hands and feet out of
openings while machine in running
Beware of debris being ejected
from the planer thickness
Keep bystanders away.
Disconnect the power and
remove the plug from the power
supply before caring out any
maintenance. Keep the extension
cord away from the tines.
Do not expose to or
operate in the rain.
Wear eye and
ear protection
Blade continues to rotate
after the machine is
switched off. Wait until
all machine components
have completely stopped
before touching them.
Wear safety footwear when
operating this machine
Beware of servering toes
or hands. Do not put
hands or feet near a
rotating blade.
Switch off and remove
plug from mains before
adjusting, cleaning or if
the cord is entangled
or damaged.
Sound power level
Regulator compliance mark
OZTIL750WA Manual.qxd 12/15/09 2:22 PM Page 13

14
AUSTRALIA (Head Office)
1 - 23 Letcon Drive, Bangholme, Victoria, Australia 3175
Telephone: 1800 069 486
Facsimile: +61 3 9238 5588
Website: www.ozito.com.au
1 x Tiller OZTIL750WA
1 x Bolt & nut pack
1 x Operation manual
Power tools that are no longer usable should not be
disposed of with household waste but in an environmentally
friendly way. Please recycle where facilities exist. Check with
your local council authority for recycling advice.
Recycling packaging reduces the need for landfill and raw
materials. Reuse of recycled material decreases pollution in the
environment. Please recycle packaging where facilities exist.
Check with your local council authority for recycling advice.
•CARING FOR THE ENVIRONMENT
•CONTENTS
•OZITO INDUSTRIES PTY LTD
OZTIL750WA Manual.qxd 12/15/09 2:22 PM Page 14

WARRANTY
THIS WARRANTY FORM AND CONFIRMED BUNNINGS REGISTER RECEIPT SHOULD
BE RETAINED BY THE CUSTOMER AT ALL TIMES
The warranty is only made available by returning the product to your nearest
Bunnings Warehouse with a confirmed Bunnings register receipt.
PURCHASED FROM:________________________________________________
DATE PURCHASED: ________________________________________________
2 YEAR REPLACEMENT WARRANTY
Your Ozito tool is guaranteed for a period of 24 months from the ORIGINAL date of
purchase under the following conditions: Professional, trade or high frequency use
will VOID this warranty.
WARNING
The following actions will result in the warranty being void.
• If the tool has been operated on a supply voltage other than that specified on
the unit.
• If the tool shows signs of damage or defects caused by or resulting from abuse
accidents or alterations.
• If the tool has been disassembled or tampered with in any way.
Note: Warranty excludes consumable parts such as carbon brushes, batteries,
sanding pads, blades, discs, drill bits, collets and router bits.
YOUR WARRANTY FORM SHOULD BE RETAINED
BY YOU AT ALL TIMES.
SHOULD YOU HAVE ANY QUESTIONS PRIOR TO
RETURNING YOUR PRODUCT FOR WARRANTY OR
REPAIR PLEASE TELEPHONE OUR CUSTOMER
SERVICE HELPLINE:
Australia 1800 069 486
New Zealand 0508 069 486
TO ENSURE A SPEEDY RESPONSE PLEASE HAVE THE MODEL NUMBER
AND DATE OF PURCHASE AVAILABLE. AN OZITO CUSTOMER SERVICE
REPRESENTATIVE WILL TAKE YOUR CALL AND ANSWER ANY QUESTIONS
YOU MAY HAVE RELATING TO THE WARRANTY POLICY OR PROCEDURE.
OZTIL750WA Manual.qxd 12/15/09 2:22 PM Page 16
Other manuals for OZTIL750WA
1
Table of contents
Other Ozito Tiller manuals
Popular Tiller manuals by other brands

Agri-Fab
Agri-Fab 45-0365 Assembly instructions

Simplicity
Simplicity 1600199 Operator's manual

Poulan Pro
Poulan Pro 194800 Operator's manual

Caravaggi
Caravaggi Ario 100 Series Use and maintenance instruction manual

Coopers of Stortford
Coopers of Stortford 6672 instruction manual

CGC
CGC 933506 parts manual