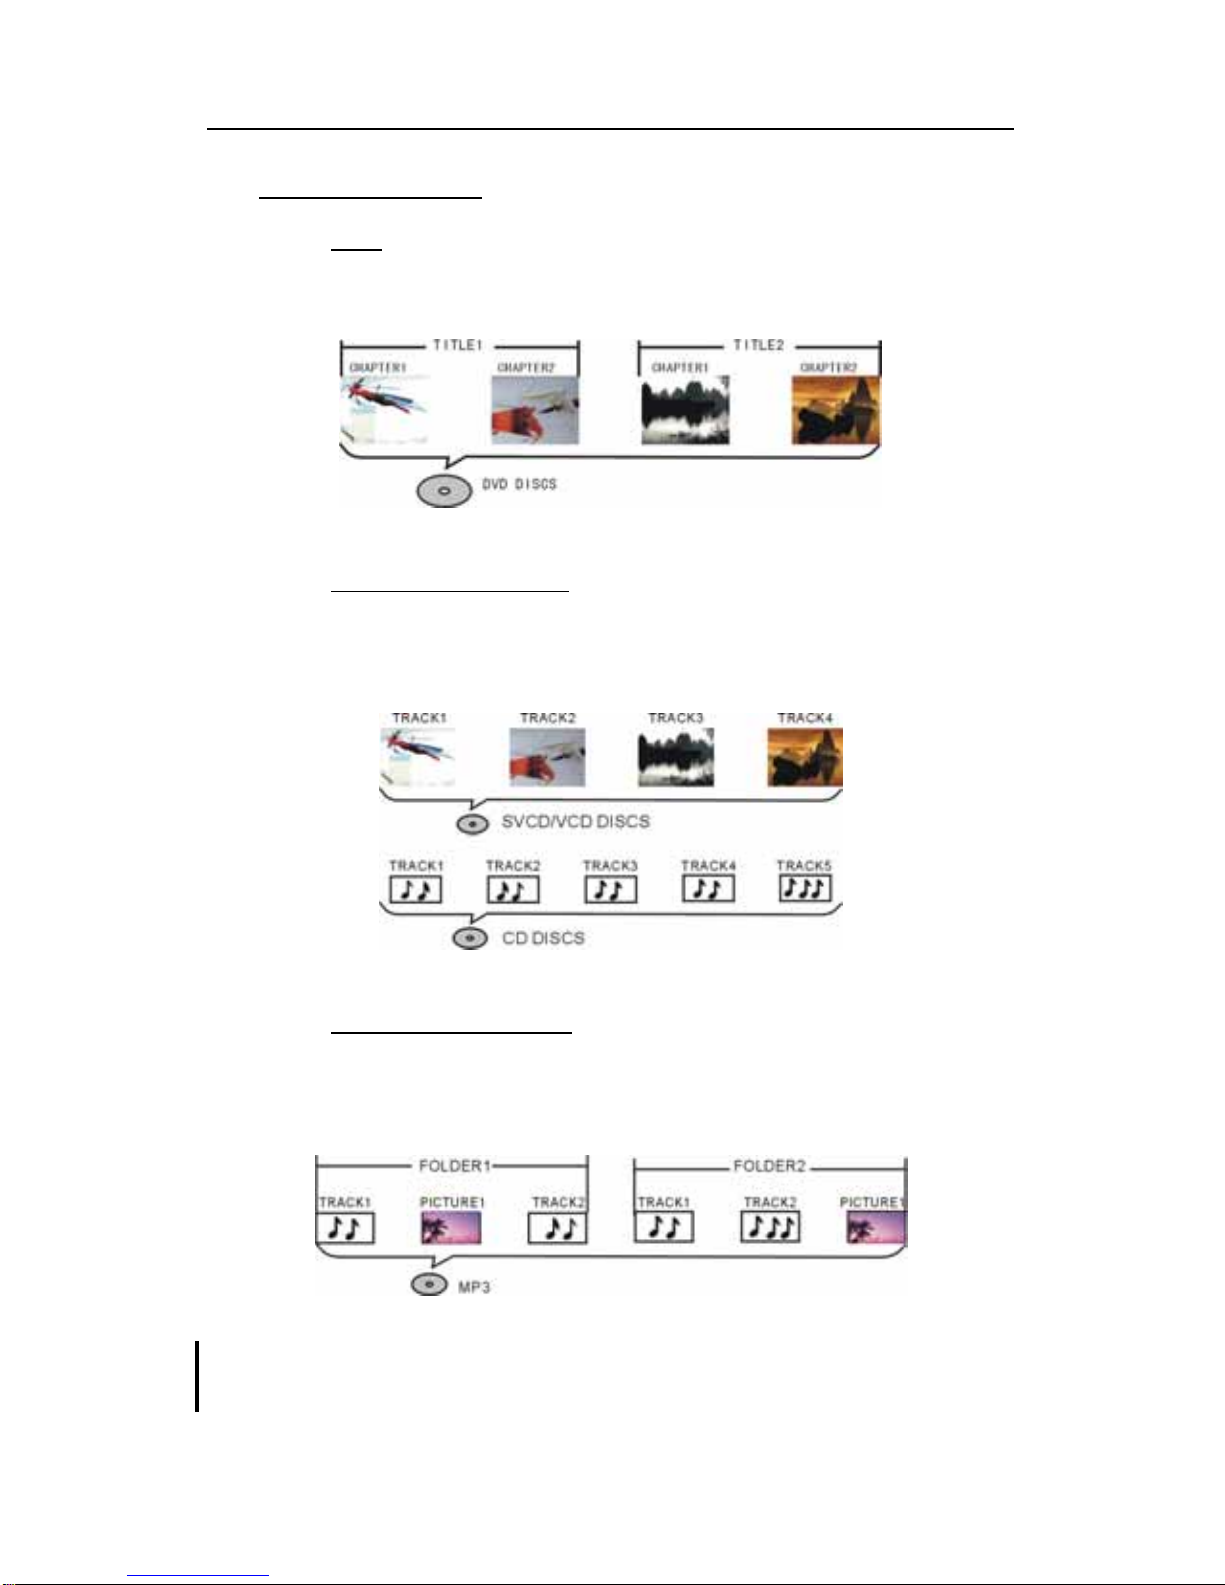
Easy DVD User's Guide
I. Notices
COPYRIGHT NOTICE
Packard Bell Easy DVD User’s Guide. Copyright© 2004 NEC Computers International
B.V. All Rights Reserved. No part of this manual may be reproduced or
transmitted, in any form or by any means, whether electronic, chemical, manual
or otherwise, including but not limited to photocopying, recording, or information
storage and retrieval systems, for any purpose without prior written permission of
NEC Computers International B.V.
Copyright© 1996, 2003 Digital Theater Systems, Inc. All Rights Reserved.
DISCLAIMER
NEC Computers International B.V. specifically disclaims all warranties, either
express or implied, including, but not limited to, implied warranties of
merchantability and fitness for a particular purpose with respect to this product
and documentation.
Updates to software and hardware components are made regularly. Therefore
some of the instructions, specifications and pictures in this documentation may
differ slightly from your particular situation. All items described in the
documentation supplied with the product are for illustration purposes only and
may not apply to your particular situation. No legal rights or entitlements may be
obtained from descriptions made in the documentation. NEC Computers
International B.V. reserves the right to revise or make changes or improvements to
this product or documentation at any time without obligation to notify any person
of such revisions or improvements.
In no event shall NEC Computers International B.V. be liable for any consequential
or incidental damages, including but not limited to loss of business profits or any
other commercial damages, arising out of the use of this product.
TRADEMARKS
Packard Bell is a registered trademark of NEC Computers International B.V. All
other company or product names are trademarks, registered trademarks or service
marks of their respective owners.
Manufactured under license from Dolby Laboratories. “Dolby”, "Pro Logic", and the
double-D symbol are trademarks of Dolby Laboratories. Manufactured under
license from Digital Theater Systems, Inc.
DTS and DTS Digital Surround are trademarks of Digital Theater Systems, Inc.
protected by U.S. and other world-wide patents issued and pending.
3