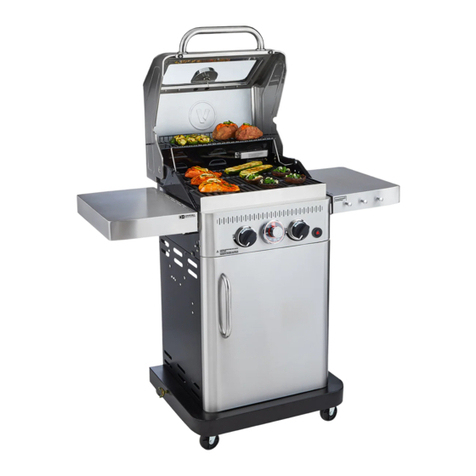
Paderno VIDA Essence Series User manual

Essence Series
User Manual
Last updated
WZ - Dec 16, 2020
SERIAL NO. N° DE SÉRIE
Your feedback is important to us.
Share your experience by writing a review
at www.canadiantire.ca

2

3
paderno.com | 1-800-263-9768
Table of Contents
Checklist ................................................. 04
Installation .............................................. 06
BBQ Mode lighting instructions............... 12
Oven Mode lighting instructions ............ 13
Lighting with a match or barbecue lighter .. 14
Lighting the side burner.......................... 15
Shutdown procedure .............................. 15
Resolving ignition issues......................... 16
Proper burner flame pattern .................. 16
Blocked burner venturi ............................ 17
Flashback fire ........................................... 17
Grease fire ................................................ 17
TempASSURED Technology™.................. 18
Grilling guide .......................................... 19
Direct and indirect cooking ................... 20
Seasoning cooking grates ...................... 22
Regular maintenance regime ................. 23
Storing your barbecue ........................... 25
Troubleshooting ...................................... 26
Warning ................................................... 28
Service .................................................... 29
Warranty .................................................. 30
Getting Started
Operation
Prevention
Start Grilling
Care and Maintenance
Customer Support
Table of contents

4
CAUTION:
Read and follow all safety statements, assembly instructions, and
user directions before attempting to assemble and cook.
INSTALLER OR
ASSEMBLERCONSUMER
This manual should be kept with the barbecue at all times.
WARNING:
Failure to follow all of the Manufacturer’s instructions could result
in hazardous ires, explosions, property damage, serious personal
injury or even death.
Follow all leak check procedures carefully prior to operation of
barbecue, even if the barbecue was dealer assembled. Do not try to
light this barbecue without reading the Lighting Instructions section
of this manual. See Operations—Lighting Instructions, Page 12.
DANGER:
IF YOU SMELL GAS:
A. Shut o gas to the barbecue.
B. Extinguish any open lame.
C. Open lid.
D. If odour continues, stay away from the barbecue and
immediately call your gas supplier or your ire department.
WARNING:
Do not store or use gasoline or other lammable liquids or
vapours in the vicinity of this or any other barbecue.
WARNING:
An LP cylinder not connected for use shall not be stored in the
VICINITY of ANY OTHER barbecue.
CAUTION:
In direct sun and in operation, the stainless steel and painted
steel parts can become very hot. Use extreme caution.
Checklist
This barbecue is for outdoor use only
Getting started
READ and UNDERSTAND the owner’s manual and safety instructions.
DO NOT position or operate barbecue under overhang or unprotected construction, against a wall, near
aluminum siding, windows or fencing.
CHECK that the regulator is correctly centred to the LP tank valve.
DO NOT cross thread this connection as it may result in a gas leak, ire or explosion.
PERFORM LEAK TEST on all connections as speciied in this user manual. Leak checks should be performed
on all new barbecues even if assembled by an assembler or gas technician.
BEFORE OPENING THE GAS SUPPLY, ensure the lid is open and all control knobs are in “OFF” position.
Follow the PROPER LIGHTING PROCEDURE as outlined in this manual. Failure to perform proper lighting
steps will result in the following: diiculty lighting, low or irregular lames and other performance issues.
Beware of HOT SURFACES including lid, lid handle, side tables and control panel. Wear protective gloves
while barbecuing.
Remove and clean the grease tray and heat distribution plates to avoid grease ires and lareups.
Remove and clean the burners to avoid lashback ires caused by spider webs and blockages.
Ensure that the barbecue is on a level surface.
For your family’s safety, please check the following:
THIS MANUAL MUST REMAIN WITH YOUR BARBECUE AT ALL TIMES.

5
paderno.com | 1-800-263-9768
DON’T leave your barbecue unattended
while in operation.
DON’T obstruct the low of combustion and
ventilation air to the barbecue.
DON’T move the barbecue during use.
DON’T attempt to light burner with lid closed.
A buildup of non-ignited gas inside a closed
barbecue is hazardous.
DON’T block ventilation holes in the sides or
back of barbecue.
DON’T use charcoal or ceramic briquettes in this
gas barbecue.
DON’T use while under the inluence of drugs or
alcohol.
DON’T cover barbecue with a cover while still
hot or in operation.
DON’T allow children or pets to play anywhere
near the barbecue.
NOTE: Installation must conform with local codes or, in the absence of local codes, with either the National Fuel Gas Code, ANSI Z223.1/NFPA
54, Natural Gas and Propane Installation Code, CSA B149.2 or Propane Storage and Handling Code, ANSI A 119.2/NFPA 1192 and CSA Z240 RV
Series, Recreational Vehicle Code, as applicable.
DON’T use in enclosed spaces such as
carport, garage, porch or covered patio.
DON’T place barbecue against a wall or
other solid structure.
DON’T use this barbecue on a boat or
recreational vehicle.
DO position your barbecue on a
level surface.
DO always keep the area around
this barbecue clean and clear
of any and all combustible
materials, such as: gasoline or
other inlammable liquids, paper
or oily rags.
DO position the barbecue at least 36” (91.44 cm)
from any dwelling or building.
Need-to-know Safety
Getting started
CHOOSING A LOCATION
DO set up the barbecue outdoors
in a well-ventilated area.
Safe operation
DO complete a leak-test and safety check
before use.
DO check parts before lighting.
DO keep this safety manual with your
barbecue for reference.
DO always disconnect the regulator or gas
hose before moving the barbecue.
DO turn o all burners and close your
barbecue lid if a grease ire occurs. Keep lid
closed until the ire is out.
DO turn o the gas source after use.
DOs and DONTs
Grill safety check lists
DON’T store
any spare LP
(propane)
cylinder, full or
empty, under
or near your
barbecue.

6
Getting started
Installation
Important information about LP gas & regulator connections
What is liquid petroleum (LP) gas?
Liqueied petroleum gas, also called LP gas, liquid propane or propane is non-toxic, odourless and
colourless when produced. For your safety, LP gas has been given an odour (similar to rotten cabbage) so
that it can be detected.
LP gas is highly lammable and may ignite unexpectedly when mixed with air.
LP Cylinder inspection
1. Conirm that the cylinder shut-o valve is fully closed, by turning clockwise (see image A).
2. Conirm that the cylinder valve is the proper Type 1 mating (see image B).
3. Inspect the cylinder valve, including the internal rubber seal for damage or debris (see image C).
If damaged, return cylinder to local retailer.
LP CYLINDER VALVE REQUIREMENTS:
LP gas supply cylinder must be constructed and marked in accordance with the speciications for LP gas cylinders of
the Canadian Standard for Cylinders, Spheres and Tubes for Transportation of Dangerous Goods and Commission, CAN/
CSAB339; or LP gas Cylinders of the U.S. Department of Transportation (D.O.T), as applicable.
Propane Cylinder must not exceed 20 lb (9.1 kg) capacity, approximately 18¼ inches (46.35 cm) high and
12¼ inches (31.1 cm) in diameter. The LPG capacity is approximately 47 lb 10 oz (21.6 kg) water capacity or as stated by the
manufacturer.
Shut-o valve with a correct cylinder valve output as speciied in current standards. ANS Z21.582018/CSA1.62018 Outdoor
Cooking Gas Appliances.
Type-1 mating (CGA 810) compatible with this barbecue. The type 1 valve is easily recognized by the large ACME external
threads on the outside of the valve.
Safety relief valve with direct connection to the vapour space of the cylinder.
UL listed Overill Protection Device (OPD). This OPD safety feature is identiied by a unique triangular hand wheel. Use only
LP cylinders equipped with this type of valve.
A device for vapour withdrawal.
A collar to protect the LP cylinder shut-o valve.
A ring on the bottom of the LP cylinder to secure it to the support assembly.
Equipped with a dust cap for the cylinder valve outlet, which must be used whenever the cylinder is not in use.
Cylinders must have a D.O.T. certiication (A) and a testing date (B) that is within ive years of current use.
B CA

7
paderno.com | 1-800-263-9768
Getting started
Installation
Pressure regulator (See image A)
This barbecue is designed to operate on LP gas at a pressure
of 2.74 kPa (11 water column). A regulator preset to this
pressure is supplied with your barbecue. Replacement
regulators must be as speciied by Vida by PADERNO™
(UL-listed Type 1 (CGA 810) Cylinder connection device as
described in the latest edition of ANSI Z21.81).
Safety features
All Vida by PADERNO™ barbecues are designed to be used
with an LP gas cylinder equipped with the new QCC1 Quick
Closing Coupling system, which includes the following
safety features required by the Canadian Standards
Steering Committee and the American National Standards
Institute(ANSI):
• Gas will not low until a positive connection has been made.
• A thermal element built into the regulator will shut the low
of gas between 240° to 300°F (115° to 149°C).
• When activated, a Flow Limiting Device will restrict the
low of gas to 10 cubic feet per hour. See Regulator Flow
Limiting Device Activated (PAGE 9).
REGULATOR
NIPPLE
HAND WHEEL
A
ATTENTION: LEAK TEST MUST BE REPEATED EACH TIME THE LP CYLINDER IS EXCHANGED OR REFILLED.
A B
All factory-assembled connections have been thoroughly checked for gas leaks and the burners checked for proper
combustion and lame characteristics. Always perform a thorough Leak Check following assembly, installation of a new
cylinder and on an annual basis.
LEAK TESTING THE LP CYLINDER, HOSE & REGULATOR AND MANIFOLD CONNECTIONS
Before you begin:
1. You will need a paint brush OR spray bottle with a mild soap (20%) and water (80%) solution.
2. Turn all grill control knobs to “OFF”.
3. Ensure that the regulator is tightly connected to LP cylinder.
C
Checking for gas leak

8
Getting started
Installation
Leak test:
1. Brush or spray soapy solution onto all connections shown (see image A).
2. Slowly open LP cylinder shut-o valve by turning hand wheel counterclockwise, while checking for bubbles.
3. If “growing” bubbles appear, there is a leak.
a. If the leak is at the cylinder (see image B), turn cylinder shut-o valve clockwise to the “CLOSED” position. DO NOT OPERATE THE
BARBECUE. Disconnect the cylinder and return the cylinder to your local retailer.
b. If the leak is at the regulator or manifold connections (see image C), turn cylinder shut-o valve clockwise to the “CLOSED” position.
Re-tighten connections and repeat steps 1 and 2.
c. If leaks cannot be stopped do not try to repair. Call for replacement parts. Order new parts by contacting Vida by PADERNO™
Customer support 18002639768.
4. If bubbles do not appear, leak check is complete. Turn the LP cylinder shut-o valve clockwise to close.
NOTE: SOME LEAK TEST SOLUTIONS MAY BE SLIGHTLY CORROSIVE. ALL CONNECTIONS SHOULD BE RINSED WITH WATER AFTER CHECKING FOR LEAKS.
Regulator low limiting device activated (propane models)
If you are experiencing any of the following performance issues, you may have activated the low limiting feature in your regulator:
• Burners not getting hot enough.
• Low or incomplete burner lames.
• Low gas pressure.
• Diiculty lighting all burners or burners not staying lit.
CAUTION: IF YOU HEAR A RUSHING SOUND, TURN GAS OFF IMMEDIATELY. THERE IS A LEAK AT THE CONNECTION. CORRECT
BEFORE PROCEEDING.
CAUTION: A FROSTY REGULATOR INDICATES GAS OVERFILL. IMMEDIATELY CLOSE LP CYLINDER VALVE AND CALL LOCAL LP GAS
DEALER FOR ASSISTANCE.
WARNING: DO NOT SMOKE DURING LEAK TEST.
DO NOT USE AN OPEN FLAME TO CHECK FOR GAS LEAKS.
BARBECUE MUST BE LEAK TESTED OUTDOORS IN A WELLVENTILATED AREA, AWAY FROM IGNITION SOURCES. DURING LEAK TEST,
KEEP YOUR BARBECUE AWAY FROM OPEN FLAMES OR SPARKS.
CAUTION: IF IT IS EVIDENT THERE IS EXCESSIVE ABRASION OR WEAR OR THE HOSE IS CUT, IT MUST BE REPLACED PRIOR TO THE
BARBECUE BEING PUT INTO OPERATION. THE REPLACEMENT HOSE ASSEMBLY SHALL BE THAT SPECIFIED BY THE MANUFACTURER.

9
paderno.com | 1-800-263-9768
Getting started
Installation
Resetting the regulator low limiting feature (propane barbecues):
1. With all control knobs in the “CLOSED” position and the cylinder shut-o valve in the “CLOSED” position, open the barbecue lid.
2. Disconnect the regulator from the LP cylinder.
3. Turn all control knobs to the # 10 setting / ( ) max. position and let stand for 13 minutes, allowing all excess gas in the gas
manifold to dissipate.
4. Turn all control knobs back to the “OFF” position.
5. With the barbecue lid still OPEN, reconnect the regulator to the LP cylinder. Do not cross thread the connection. Hand-tighten only.
6. Check all connections to ensure that a positive seal has been made.
7. Slowly open the LP cylinder shut-o valve.
NOTE: IF THE LP CYLINDER IS OPENED TOO QUICKLY, THE FLOW LIMITING DEVICE IN THE REGULATOR WILL ACTIVATE, LIMITING THE FLOW OF GAS
FROM THE LP CYLINDER.
8. Wait approximately 30 seconds for the regulator pressure to stabilize.
9. Turn the irst control knob to the # 10 setting / ( ) max. position.
10. Press the electronic ignition button or use the match and match holder or a barbecue lighter to ignite the burner.
NOTE: AVOID ACTIVATING THE FLOW LIMITING FEATURE IN THE REGULATOR BY FOLLOWING THE PROPER LIGHTING AND SHUTDOWN PROCEDURES
AND PERFORMING A COMPLETE LEAK TEST AND SAFETY CHECK TO ENSURE THAT THERE ARE NO LEAKS IN THE SYSTEM.
Removing the cylinder:
Before disconnecting the LP cylinder:
1. Turn “OFF” all control knobs and close the LP cylinder shut-o valve.
2. Turn the regulator coupling nut counterclockwise by hand only - do not use tools to disconnect.
3. Install safety cap onto LP cylinder check valve. Always use cap supplied with cylinder.
Failure to use safety cap as directed may result in serious personal injury and/or property damage.
Reilling the LP cylinder:
• Use only licensed and experienced dealers.
• Ensure that the dealer checks and tests the cylinder for leaks after illing.
• LP dealer must purge new cylinder before illing.
• Dealer should NEVER ill LP cylinder more than 80% of LP cylinder volume. Volume of propane in cylinder will vary by temperature.
• Do not release liquid propane (LP) gas into the atmosphere. This is a hazardous practice.
• To remove gas from LP cylinder, return to the licensed dealer.
• Never reill an expired or unregulated cylinder.
• Never connect an unregulated or expired cylinder to this barbecue.

10
Getting started
Installation
Storage & handling of LP cylinder
WARNING:
• ALTHOUGH YOUR LIQUID PROPANE CYLINDER MAY APPEAR TO BE EMPTY, GAS MAY STILL BE PRESENT AND THE CYLINDER
SHOULD BE TRANSPORTED AND STORED ACCORDINGLY, WITH THE SHUTOFF VALVE IN THE “CLOSED” POSITION.
• WHEN TRANSPORTING AND STORING THE CYLINDER, MAKE SURE IT IS IN AN UPRIGHT POSITION NOT ON ITS SIDE AND
SECURE.
• NEVER EXPOSE THE CYLINDER TO DIRECT SUNLIGHT OR EXCESSIVE HEAT, WHERE TEMPERATURES CAN REACH 125° F
51.7° C.
• DO NOT SMOKE AROUND CYLINDER, ESPECIALLY WHEN TRANSPORTING IN A VEHICLE.
• A DENTED OR RUSTY CYLINDER MAY BE HAZARDOUS AND SHOULD BE CHECKED BY YOUR PROPANE SUPPLIER.
• LP CYLINDERS MUST ALWAYS BE HANDLED WITH EXTREME CARE.
• PLACE DUST CAP ON CYLINDER CHECK VALVE WHENEVER THE CYLINDER IS NOT IN USE.
• DO NOT STORE AN LP CYLINDER IN ENCLOSED SPACES SUCH AS A CARPORT, GARAGE, PORCH, COVERED PATIO OR
OTHER BUILDING. MAKE SURE THE STORAGE AREA HAS A LOT OF VENTILATION.
• DO NOT STORE AN LP CYLINDER IN AN AREA WHERE CHILDREN PLAY.
• AN OVER FILLED OR IMPROPERLY STORED CYLINDER IS A HAZARD DUE TO POSSIBLE GAS RELEASE FROM THE SAFETY
RELIEF VALVE. THIS COULD CAUSE AN INTENSE FIRE OR EXPLOSION WITH RISK OF PROPERTY DAMAGE, SERIOUS INJURY
OR DEATH.
WARNING: IF THE ABOVE INSTRUCTIONS ARE NOT COMPLETELY ADHERED TO, IT COULD CAUSE A FIREEXPLOSION,
RESULTING IN DEATH OR SERIOUS INJURY OR PROPERTY DAMAGE.
DANGER: ALWAYS TURN THE LP CYLINDER SHUTOFF VALVE TO “CLOSED” WHEN THE BARBECUE IS NOT IN USE. NEVER
STORE A SPARE LP CYLINDER, EMPTY OR FULL, INSIDE THE BARBECUE CART OR NEAR THE BARBECUE. IF YOU SEE, SMELL
OR HEAR GAS ESCAPING, IMMEDIATELY GET AWAY FROM THE LP CYLINDERBARBECUE AND CALL YOUR FIRE DEPARTMENT.
DO NOT INSERT ANY TOOL OR FOREIGN OBJECT INTO THE VALVE OUTLET OR SAFETY RELIEF VALVE. YOU MAY DAMAGE
THE VALVE AND CAUSE A LEAK. LEAKING PROPANE MAY RESULT IN EXPLOSION, FIRE, SEVERE PERSONAL INJURY
OR DEATH.
Natural gas requirements
• Consult a Certiied Gas Technician to ensure that the home supply line is suitable for a 3/8” natural gas supply line, capable of an
input of up to 85,000 BTUs.
• All gas supply plumbing must be carried out by a Certiied Gas Technician, in accordance with provincial authorities having
jurisdiction and in accordance with CAN/CGA 1B149.1 & 2 installation code requirements.
• A shut-o valve must be installed between the barbecue and the natural gas supply line.
• When conducting pressure test always isolate the barbecue from the gas supply piping system by disconnecting the barbecue and
closing its individual manual shut-o valve.
• The gas supply piping system should be tested at pressures which exceed 1/2 psi (3.5kPa).
• All gas supply plumbing must be able to supply 7” water column to the barbecue WITH ALL BURNERS IN OPERATION.
NOTE: ONLY FOR CUSTOMERS WHO HAVE PURCHASED THE CONVERTIBLE VALVE SYSTEM KIT MODEL 8522614.

11
paderno.com | 1-800-263-9768
Getting started
Installation
Natural gas requirements
For your convenience all Vida by PADERNO™ Models include the Convertible Valve System™, which makes converting your barbecue
from Propane to Natural Gas simple. NOTE: You will need A CONVERTIBLE VALVE SYSTEM KIT – sold separately (Model 8522614).
Natural gas requirements
The burner lame pattern is the key indicator of proper or improper
function within the cook system. When the burners are performing
correctly you will see a speciic lame pattern. All burner ports should be
2.5 cm/ 1” lame on “HIGH” with orange tips, light blue centre, with a darker
blue lame at the base of the burner port (see image A).
Performance issues: If you are experiencing any of the following
• Large, unruly or irregular orange burner lames.
• The smell of gas in conjunction with irregular lames.
• Low temperatures or uneven heat.
shut down your barbecue and perform a leak test. If a leak is not detected,
ensure that you are following the proper lighting instructions on page 12.
Connecting your barbecue to the natural gas source.
Coat pipe nipple with gas-resistant telon tape or pipe dope.
Tighten quick connect coupling onto pipe nipple that leads to natural gas supply (see image B).
With the natural gas supply valve “OFF”, connect the natural gas hose to the quick connect socket. Push the sleeve back on the quick
connect socket (see image C) and insert the plug until the sleeve snaps forward, locking the plug into the quick connect socket. Be sure
to leak test these connections prior to use.
PIPE
NIPPLE
SUPPLY
VALVE
NATURAL GAS
SUPPLY
58” QUICK CONNECT
SOCKET
PLUG
GAS
HOSE
B
OFF PUSH SLEEVE BACK TO ATTACH
C
FIRE HAZARD: DO NOT ROUTE THE NATURAL GAS HOSE INSIDE OF THE BARBECUE CART.
*KIT SOLD SEPARATELY
HIGH
LOW
A

12
5. Push in and turn both lighting burner control knobs counterclockwise to the # 10 setting / ( ) max. position (see image A1 and A2).
6. Press the electronic ignition button. If the burners do not light, turn the control knobs to the “0”/ “OFF” position and wait ive minutes to
allow the gas to clear before attempting to light again or follow match lighting instructions.
7. 4BURNER MODEL ONLY. To light burners #2 and #3, you must push in and turn control knobs counterclockwise to the
#10 setting / ( ) max. position and hold for 5 seconds to allow the thermocouple time to heat up (see image B).
Operation
Operation
Before lighting
1. Open the lid.
2. ALL control knobs must be set to “0” / “OFF.”
3. Gas supply must be “Closed.”
4. SLOWLY, open the LP cylinder valve counterclockwise. Wait 15 seconds for pressure to stabilize.
ATTENTION: IF YOU RELEASE THE CONTROL KNOB TOO SOON, THE BURNER FLAME FOR BOTH BURNER #2 AND BURNER #3
WILL EXTINGUISH.
BBQ Mode lighting instructions
All burners will function in BBQ Mode. The control knob must be in BBQ Mode ( ).
A1
A2
B

13
paderno.com | 1-800-263-9768
5. Push in and turn both lighting burner control knobs counterclockwise to the # 10 setting / ( ) max. position (see image A1 and A2).
6. Press the electronic ignition button. If the burners do not light, turn the control knobs to the “0”/ “OFF” position and wait ive minutes to
allow the gas to clear, before attempting to light again or follow match lighting instructions.
7. Push in and turn the TempASSURED Technology™ control knob counterclockwise to the desired oven temperature and close the
lid. Preheat for 10 minutes (depending on ambient temperature) before positioning food on the grill (see image B).
Operation
Before lighting
1. Open the lid.
2. ALL control knobs must be set to “0” / “OFF.”
3. Gas supply must be “Closed.”
4. SLOWLY, open the LP cylinder valve counterclockwise. Wait 15 seconds for pressure to stabilize.
Operation
A1
A2
Oven Mode lighting instructions -
Only use the far left and far right burners in Oven Mode ( ).
ATTENTION: TO CHANGE THE TEMPASSURED OVEN SETTING, YOU WILL NEED
TO PUSH IN AND TURN THE CONTROL KNOB EACH TIME, TO SET THE DESIRED
TEMPERATURE. WHEN THE KNOB IS RELEASED THE TEMPERATURE IS LOCKED.
TIP: Before setting the TempASSURED Technology™ control
knob, ensure that your lighting burner control knobs are set to
#10 setting / ( ) max. position, for best performance.
B
Turn TempASSURED Technology™
control knob counterclockwise .
IMPORTANT 4BURNER MODEL ONLY:
IN OVEN MODE , BURNER #2 AND BURNER #3 WILL NOT FUNCTION. BURNERS
MUST REMAIN IN THE “0” “OFF” POSITION.
BURNER #2 AND BURNER #3 INCLUDE A THERMOCOUPLE AND SAFETY SHUTOFF
VALVE THAT WILL RESTRICT THE USE OF BOTH BURNERS WHEN THE TEMPASSURED
CONTROL KNOB HAS BEEN TURNED TO OVEN MODE .
WHEN SWITCHING FROM OVEN MODE TO BBQ MODE.
TO LIGHT BURNERS #2 AND #3, YOU MUST PUSH IN AND TURN CONTROL KNOBS
COUNTERCLOCKWISE TO THE #10 SETTING MAX. POSITION AND HOLD FOR 5
SECONDS TO ALLOW THE THERMOCOUPLE TIME TO HEAT UP.

14 Operation
ATTENTION 4BURNER MODEL ONLY:
IN OVEN MODE: BURNERS #2 AND #3 ARE NOT OPERATIONAL. BURNERS MUST BE LEFT IN THE "0" "OFF" POSITION.
IN BBQ MODE ONLY: WHEN LIGHTING BURNERS #2 AND #3, YOU MUST HOLD FOR 5 SECONDS TO PREVENT THE BURNER FLAME
FROM EXTINGUISHING.
Lighting with a match or barbecue lighter
1. Open the lid.
2. ALL control knobs must be set to “0” / “OFF”.
3. Gas supply must be “Closed.”
4. SLOWLY, open the LP cylinder valve counterclockwise. Wait 15 seconds for pressure to stabilize.
5. To match-light, follow the order outlined in the diagram below. Begin with burner #1. Push in and turn the control knob
counterclockwise to #10 setting / ( ) max. position.
6. Position a barbecue lighter or a match, inserted into the match holder, through the lighting hole on the left and right side of the burner
box. Verify that the burner is lit (see image A1 and A2).
7. Repeat steps 5 and 6 to light remaining burners.
8. OVEN MODE ONLY: Push in and turn the TempASSURED Technology™ control knob counterclockwise from BBQ Mode to the
desired oven temperature: 225°F to 450°F (107.2°C to 232.2°C).
1st 2nd
2 Burner
1st 4th3rd 2nd
4 Burner
Operation
A1 A2

15
paderno.com | 1-800-263-9768
Operation
Lighting the side burner (If applicable)
1. Open the lid.
2. ALL control knobs must be set to “0” / “OFF.”
3. Gas supply must be “Closed.”
4. SLOWLY, open the LP cylinder valve counterclockwise. Wait 15 seconds for pressure to stabilize.
5. Push in and turn the side burner control knob to the #10 setting / ( ) max. position.
6. Press the electronic ignition button. If the burner does not light, turn the control knob to the “0” / “OFF” position and wait ive minutes
to allow the gas to clear before attempting to light again or match-light.
C
Shutdown procedure − BBQ Mode or Oven Mode
Before shutting down, you may perform a quick burn-o of excess grease and brush away any build-up with a grill brush.
1. Push in and turn the TempASSURED Technology™ control clockwise to BBQ MODE to shut down (see image A).
2. Push in and turn each control knob clockwise to “0”/ “OFF” position (see image B).
3. Turn the LP cylinder shut-o valve clockwise to close (see image C).
Any control knobs left in the on position could cause issues with performance and start-up. See Regulator Flow Limiting
Device on page 9.
4. Let the barbecue cool before covering it with a barbecue cover for storage.
A
0 0
B
Operation

16
Prevention
Prevention
Resolving ignition issues, quick check:
Press the ignition button located on the right side of the control panel or the right shelf fascia (see image A). You should hear a
continuous clicking sound when the button is pressed. If you hear no sound, 1) replace the battery (see image B), 2) check that all wires
are irmly pushed in (see image C).
TIP: WHEN CHECKING THE WIRES THERE ARE TWO COMMON TROUBLE SPOTS TO PAY ATTENTION TO:
1. The two lead wires connected to the ignition button and the electronic ignition module.
2. Check that all wires connected to the electronic ignition module are irmly pushed in.
A B
ATTENTION: ONCE LIT, CONFIRM THAT THE BURNER IS PROPERLY LIT AND THAT THE FLAME PATTERN IS AS DESIRED. IF THE
FLAME PATTERN IS OTHER THAN NORMAL, CONSULT THE TROUBLESHOOTING GUIDE FOR CORRECTIVE ACTION.
DO start by positioning a brand new battery in your
Electronic Ignition Module.
DO remove the battery from the Electronic Ignition
Module during storage periods.
DO recycle or dispose of batteries properly, as per the
requirements of your local municipality.
DO NOT submerge the Electronic Ignition Module
in water.
DO NOT leave the batteries where a child or pet
could play with or swallow them.
Battery care, use and disposal
Proper burner lame pattern
The burner lame pattern is the key indicator of proper or improper
function within the cook system. When the burners are performing
correctly you will see a speciic lame pattern. All burner ports should
be 2.5 cm/ 1” lame on “HIGH” with orange tips, light blue centre, with
a darker blue lame at the base of the burner port (see image D).
Refer to the troubleshooting section on pages 2627 if you experience
any of the following issues:
• Large, unruly or irregular orange burner lames.
• The smell of gas in conjunction with irregular lames.
• Low temperatures or uneven heat.
FOLLOW THE BURNER CLEANING PROCEDURE OUTLINED IN THE
MAINTENANCE SECTION PAGE 23 OF THIS MANUAL OR FOLLOW
THE REGULATOR FLOW LIMITING DEVICE RESET PAGE 9.
HIGH
LOW
D
BG Main electrode - 90 cm
EE Ground wire
BF Main electrode - 50 cm
DF Side burner electrode
DJ Ignition button
BG
BE
BE
BF
DJ
DE
EE DF
Small 3
4BURNER MODEL 2BURNER MODEL
Small 2
Large 2 Large 2
BE Main electrode - 50 cm
DE Ignition Button
C

17
paderno.com | 1-800-263-9768
Prevention
Prevention
Blocked burner venturi
Blockages in the burner venturi caused by spiders, insects and nests can cause a lashback ire.
A lashback ire occurs when a blockage in the venturi tubes caused by spiders, insects and nests blocks the low of gas, forcing it back
towards the control panel and control knob. The ignited gas, if not detected, can cause a ire to burn in this area. If you experience any of
the characteristics of a lashback ire. Close the LP Cylinder Shut-o immediately. Follow the Burner Cleaning Procedure outlined in
the maintenance section of this manual.
WARNING: NEVER USE FLOUR OR WATER TO TRY TO PUT OUT A GREASE FIRE.
ATTENTION: EXERCISE A DEGREE OF CAUTION WHEN USING THIS BARBECUE AND ADHERE TO ALL WARNINGS AND SAFETY
INFORMATION.
WARNING: AT FIRST SIGHT OF YELLOW, UNRULY FLAMES,
POORLY LIT BURNERS ACCOMPANIED BY THE SMELL OF
GAS, SHUT DOWN YOUR GRILL AND PERFORM BURNER
CLEANING MAINTENANCE, OUTLINED IN THE MAINTENANCE
SECTION OF THIS MANUAL PAGE 23.
Characteristics of a lashback ire
• A ire burning outside of the cookbox, usually visible behind or
under the control panel.
• Hot or melting control knobs.
• Large yellow, unruly lames accompanied by the smell of gas.
• Burners not lighting correctly or partially lighting.
Characteristics of a grease ire
• A ire burning inside the barbecue burner box that may become uncontrollable if not monitored.
• Usually accompanied by high lames, a lot of smoke and black soot.
• May cause charring on the interior of barbecue lid or lid side panels (inside and outside), may damage temperature gauge, or cause
brownish colouring on stainless steel lids and soot and ash build up on cooking grates.
Prevent grease ires by:
• Removing grease build-up on key parts such as heat tents, cooking grates and burner box.
• Frequently cleaning the grease collection tray and grease cup.
• Always reduce cooking temperature to the #5 setting or #1 setting, following PREHEAT.
• Burning o build-up on the cooking grates and heat plates after each use.
Heat, fuel and oxygen are all required for a ire to burn. Baking soda is the most eective agent for extinguishing a ire.
Baking soda, much like salt will quickly cut the oxygen to the ire, smothering the lame. Keeping a couple of boxes of baking soda
and/or a ire extinguisher in close proximity to your barbecue is highly recommended.
Must-know tips for ire safety

18 Start Grilling
Vida by PADERNO’s patent-pending cooking system, TempASSURED Technology™,
brings together traditional grilling, with the precision control of an oven. TempASSURED
Technology™ allows you to set and maintain a speciic temperature using Oven Mode
or enjoy traditional grilling in BBQ mode. This versatile, dual mode design allows you to
bring your favorite indoor oven recipes outdoors, perfect for grilling, baking, roasting and
searing your favorite recipes.
To manually control grill temperatures, set the TempASSURED Technology™ control knob
to BBQ Mode. The grill and all burners will function normally.
When the TempASSURED Technology™ control knob is in Oven Mode and set to one
of the preset temperatures between 225°F to 450°F (107.2°C to 232.2°C), ONLY the
TempASSURED Technology™ control knob will control temperature and burner operation.
Adjustments to the main burner control knobs will not have any eect. For manual control,
you must switch back to BBQ Mode.
Preheating in Oven Mode
Much like your barbecue and indoor oven, preheating is required to ready the grill for
cooking.
• Do not preheat on high temperatures. Your Vida by PADERNO™ barbecue is equipped
with porcelain cast iron cooking grates that excel at retaining heat. Preheating on
higher temperatures will require an extended period of time for the cooking grates to
cool down and reach the target temperature.
• Always preheat at the target temperature for 1015 minutes before positioning food on
the cooking grates. See Direct Cooking and Indirect Cooking for more information.
• In cold and windy conditions, longer preheat times may be required. Ensure your
barbecue is positioned away from direct wind and other elements.
Temperature maintenance
For stable cooking temperatures and heat retention inside your grill, it is always recommended to keep your grill lid closed
during cooking.
Use the EasyCHECK window and lid mounted temperature gauge, when possible, to check progress.
If you are using any toppers, roast pans or baskets during cooking, remember to turn half way through the cook to ensure even cooking
and to avoid the eects of hot spots or inconsistent temperatures.
FOR THE BEST RESULTS, ALWAYS USE A MEAT PROBE TO TRACK INTERNAL TEMPERATURES FOR DONENESS. GET FAMILIAR WITH THE SAFE INTERNAL
TEMPERATURE CHART ON PAGE 19.
Cooking times & temperatures
Not one gas grill is like the other. That includes the Vida TempASSURED Technology™ cook system. Finding the correct mix of food, time
and temperature will take some experimenting. The key is to monitor your food closely and make small adjustments as you are tracking
progress. Using a meat probe throughout the cook will ensure the correct doneness.
Using rubs and sauces
Always apply dry rubs to meat in advance of cooking and let it sit, covered at room temperature for a minimum of 20 minutes. Dry rubs
contribute to the delicious, bold lavours and crunchy “bark” or crust that builds up during low and slow cooking.
Always apply sauces towards the end of the cook to create a caramelized crust. Applying sauce too early can cause the sauce to burn or
dry out leaving a bitter burnt char on the surface.
Start grilling
ATTENTION: ENSURE LIGHTING BURNER CONTROL KNOBS ARE SET TO THE #10
SETTING MAX. POSITION IN OVEN MODE , FOR OPTIMAL PERFORMANCE.

19
paderno.com | 1-800-263-9768
Start grilling
Start Grilling
Grilling guide - Temperature tips
WARNING: TO ENSURE THAT IT IS SAFE TO EAT, FOOD MUST BE COOKED TO THE MINIMUM INTERNAL TEMPERATURES LISTED IN
THE TABLE ABOVE.
AAFC* SAFE MINIMUM INTERNAL TEMPERATURES
Fish 145° F (63° C)
Pork 160° F (71° C)
Egg Dishes 160° F (71° C)
Steaks and Roasts of Beef, Veal or Lamb 145° F (63° C)
Ground Beef, Veal or Lamb 160° F (71° C)
Whole Poultry (Turkey, Chicken, Duck etc.) 165° F (74° C)
Ground or Pieces Poultry (Chicken Breast etc.) 165° F (74° C)
* Agriculture and Agri-Food Canada
WARNING
FOOD MUST BE COOKED TO THE
MINIMUM INTERNAL TEMPERATURES LISTED IN THE TABLE BELOW.
Food preparation
• Avoid cross-contamination when preparing food. Always use separate plates and utensils for the handling of raw food. Never place
raw food and cooked food on the same plate and never place cooked food on a plate that was used for handling raw food. Always
carefully wash all plates and utensils used to handle raw food before using them to handle cooked food.
• Sanitize counters, equipment and utensils after handling raw meat, seafood or poultry.
• Always wash all vegetables, seafood and poultry before cooking.
• Always leave uncooked foods in the refrigerator until you are ready to start cooking.
• Always marinate meat in the refrigerator. Always dispose of the excess marinade and never reuse it.
• Trim excess fat from meats and slit the remaining fat at two-inch increments to avoid lare-ups and curling.
• Meats must be adequately thawed before placing onto the grills cook surface.

20
B
Indirect cooking - Oven Mode ( ).
Indirect cooking is a zone created adjacent to the heat source, not directly over the heat, to cook food gently for longer periods of
time. Indirect heat is done with the lid closed to trap heat inside the grill. You can add lavours by introducing a smoker box with
lavoured wood chips or a smoke generator loaded with lavoured pellets. This method is ideal for cooking large cuts of meat,
like whole chicken, roast, ribs or cedar plank ish. It’s also the ideal cooking method for barbecue, where low ’n slow cooking is
required to turn tough cuts of meat like pork shoulder, ribs, brisket into tender bites (see image B).
Start Grilling
4BURNER MODEL2BURNER MODEL
Direct cooking - BBQ Mode ( ).
This is the most popular cooking method and involves cooking food directly over a lit burner with direct heat. Food cooked using
this method will include steaks, burgers, pork chops and vegetables (see image A). Searing hot cooking grates and vaporized
grease drippings will create sear-marks that impart a range of smoky, earthy and sweet lavours.
Direct & indirect cooking
NOTE: TOO MUCH GREASE CAN CAUSE FLAREUPS, THAT CAN LEAVE A LAYER OF BLACK CARBON ON THE EXTERIOR OF YOUR
FOOD AND CAUSE OVERWHELMING FLAVOURS.
NOTE: TO ACHIEVE TEMPERATURES LOWER THAN 225 °F 107.2°C IN OVEN MODE, SET THE FARRIGHT BURNER TO THE #10
SETTING MAX. POSITION AND TURN ALL REMAINING BURNER CONTROL KNOBS TO THE “0” “OFF” POSITION. ADJUST YOUR
BARBECUE TO SHIELD FROM WIND.
A4BURNER MODEL2BURNER MODEL
Start grilling
High High
Burner 1 Burner 1 Burner 3Burner 2 Burner 2 Burner 4
Medium Medium
Burner 1 Burner 1 Burner 3
Burner 2
O O
Burner 2 Burner 4
ON
OFF OFF
ON
COMBINATION COOKING WITH DIRECT AND INDIRECT COOKING.
Most food will beneit from a quick sear over direct heat for grill marks and caramelization, before being moved to indirect heat,
with the lid closed, at lower temperatures for longer periods, until safe internal temperatures are achieved. This method is ideal
for thick steaks, pork chops, bone-in chicken pieces and other thicker cuts of beef.
Other manuals for VIDA Essence Series
1
Table of contents
Other Paderno Grill manuals
Popular Grill manuals by other brands

recteq
recteq Backyard Beast RT-1000 Assembly manual

Outdoor Solutions
Outdoor Solutions CBC22043HB manual

Mayer Barbecue
Mayer Barbecue Zunda Gasgrill MGG-1401-B pro Assembly instruction

Wolf
Wolf Vulcan VCCB25 Installation & operation manual

Anetsberger Brothers
Anetsberger Brothers GCL 18x36 Use and operation

Traeger
Traeger TFB29PLBE owner's manual