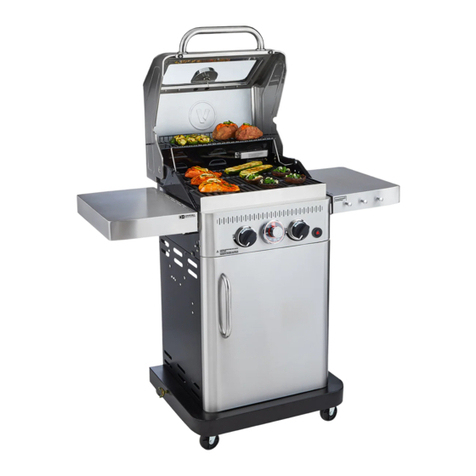
Paderno vida 820-0083 User manual

User Manual
Model
SKU
19000969A0
TM

2
Safety Warnings ......................................................
Safety
Package Parts List ................................................... 6
Assembly Instructions ............................................
Storage Instructions ...............................................
Gas Connection ......................................................
Leak Testing ............................................................ 18
Lighting Instructions .............................................. 19
Operating Instructions ........................................... 20
Care and Maintenance ........................................... 21
Troubleshooting ...................................................... 22
Assembly
Setup
Use and Maintenance
Limited Warranty .....................................................
Service ....................................................................
Exploded View ........................................................ 25
Parts List .................................................................. 26
Warranty
TM

1. The installation must conform with local codes or, in the absence of local codes, with the National Fuel Gas
applicable.
2. This portable grill is for outdoor use only. The grill should be operated in a well-ventilated space. NEVER
operate in an enclosed space, garage or building. Your grill is not intended to be installed in or on
5. NEVER attempt to attach this grill to the self-contained LP gas system of a camper trailer or motor home.
6.
children operate or play near your portable grill and keep pets away. Failure to follow these instructions
7.
remove the 1 lb cylinder.
8. Carefully follow instructions in this manual for proper assembly and leak testing of your grill.
9.
before using the grill further.
10. Appliance area should be kept clear and free from combustible materials, gasoline, bottled gas in any form
11. NEVER try to light the grill in an enclosed environment. Buildup of gases is very dangerous and could cause
an explosion.
12. Keep any electrical cord or fuel supply hose away from any heated surfaces.
3

4
accident or injury.
This appliance will be hot during and after use. Use insulated oven mitts or gloves for protection from
at all times.
assemble or safely operate the appliance.
This appliance is not intended for commercial use or rental.
The cylinder must be disconnected when the appliance is not in use.
When cooking, the appliance must be on a level, stable, noncombustible surface in an area clear of
Sometimes spiders and other small insects climb into the burner tube. The spiders spin webs, build
nests and lay eggs. The webs or nests can be very small, but they are very strong and can block the
or after a period of one month of not being used.
The items in the fuel system are designed for operation with this grill. They must not be replaced with
any other brand. See parts list for replacement items.
performance intended by the manufacturer. Substitution of regulator for any other device is
dangerous and could
result in serious injury.
The gas cylinder may be stored outside in a well-ventilated area out of the reach of children when
the grill is not in use.
TM

The LP gas cylinder shall be used only outdoors in a well-ventilated space and not in a building,
garage, or any other enclosed area. The portable grill may be stored indoors if the LP gas
connection directly to the gas regulator supplied with this appliance. Care should be taken
when threading the cylinder to the regulator to engage threads correctly to achieve the proper
and intended connection. When disconnecting or connecting the gas cylinder, be careful that
the regulator does not strike the grill, the ground, or any other surfaces. Replace the protective
when connecting or disconnecting the cylinder to the regulator assembly, contact your local
gas supplier for assistance.
When re-connecting the LP gas cylinder to the regulator, be sure to hand-tighten until snug.
This connection should be inspected for damage and leak tested after each re-connection.
until all connections have been checked and do not leak.
5
Failure to follow these instructions could cause the propane tank to overheat and vent
propane which could ignite, causing serious personal injuries or property damage,

6
11
9
3
2
8
4
1
TM

7
1
2
1
2

8
3
4
2
3
TM

9
4
7

10
8
5
6
7
8
TM

11
9
11

12
11
12
10
9
TM

13
13
1 2 3
Cylinder must be angled
upward for proper vapor
withdrawal.

14
1
2
1
3
1
2
TM

15
4
3

Commission.
Ensure that the black plastic grommets on the LP cylinder valve are in place and that the hose
does not come into contact with the grill.
To connect the L.P. gas supply cylinder, please follow the steps below:
1.
2. Make sure the cylinder valve has the proper type-1 external male thread connections per
ANSI Z21.81.
Inspect valve connections, port, and regulator assembly. Look for any damage or debris.
Remove any debris. Inspect hose for damage. Never attempt to use damaged or obstructed
5. When connecting the regulator assembly to the valve, use your hand to tighten the nut
6. Open the cylinder valve fully by turning the valve counter-clockwise. Apply the soap
solution with a clean brush to all gas connections. See below. If growing bubbles appear in
the solution the connections are not properly sealed.
7.
8. If you have a gas connection leak you cannot repair, turn gas OFF at supply tank, disconnect
Also apply soapy solution to the tank seams. If growing bubbles appear, shut tank OFF and
16
TM

1.
2.
tank valve by turning the cylinder tank
counter-clockwise.
17
a.
b.
c.
may occur.

Although all gas connections on the grill are leak tested at the factory prior to shipment, a complete gas
leak test check must be performed at the installation site due to possible mishandling in shipment, or
excessive pressure unknowingly being applied to the unit. Periodically check the whole system for leaks
following the procedures listed below. If the smell of gas is detected at anytime you should immediately
check the entire system for leaks.
Make sure that all packing material is removed from the grill including tie-down straps.
least 80% full.
2. Check all connections from the L.P. gas regulator and supply valve up to and including the
where a leak is present.
Only parts recommended by the manufacturer should be used on the grill. Substitution will void the
checked.
Flames should be blue and stable with no yellow tips, excessive noise or lifting. If any of these
conditions exist, check to see if the air shutter or burner ports are blocked by dirt, debris, spider webs,
use. It is handy to keep a spray bottle of soapy
18
TM

Inspect the gas supply hose prior to turning the gas on. If there is evidence of cuts, wear,
is present. Only the pressure regulator and hose assembly supplied with the unit should be used.
Never substitute regulators and hose assembly for those supplied with the grill. If a replacement
is necessary, contact the manufacturer for proper replacement. The replacement must be that
keep your face and body as far from the grill as possible when lighting.
1. Open the lid.
repeat lighting instructions from step 2.
If the ignition does not spark, the grill can be lit with a match using
the following instructions.
supply.
wait 5 minutes and then repeat lighting instructions from step 2.
and then repeat lighting instructions.
- Place dust cap on cylinder valve outlet when the cylinder is not in use. Only install the type
of dust cap on the cylinder valve outlet that is provided with the cylinder valve. Other
types of caps or plugs may result in leakage of propane.
- If the appliance is stored indoors the cylinder must be disconnected and removed from
the appliance. Cylinders must be stored outdoors in a well-ventilated area out of the reach
of children.
- Keep a spray bottle of soapy water near the gas supply valve and check the connections
before each use.
Always keep your face and body as far away from the burners as possible when lighting.
19

It is recommended to preheat the grill for at least 5 minutes with the lid closed before
beginning to cook. Afterwards, adjust burner knob as necessary depending on the food and
the cooking style.
Wood chips or wood pellets may be added into the smoker box, located in front of the grill.
Simply grab by the handle to pull it out. Add as much wood as desired, while ensuring the
smoker box cover can still be easily placed on top of the box in order to prevent it from
jamming when inserted. Afterwards, place back into the grill. It is recommended that the
wood be sprayed or dampened with water in order to prolong the smoke duration.
20
are toxic to breathe or eat.
TM
Table of contents
Languages:
Other Paderno Grill manuals
Popular Grill manuals by other brands

Coleman
Coleman 9921A Series Instructions for use

Nexgrill
Nexgrill 720-0744 Assembly & operating instructions

Even Embers
Even Embers GAS3400AS owner's manual

Galaxy
Galaxy 177P60S user manual

Xtreme Power
Xtreme Power 95539 Owner's manual and safety instructions

APW Wyott
APW Wyott HOTROD HR-45 Specifications