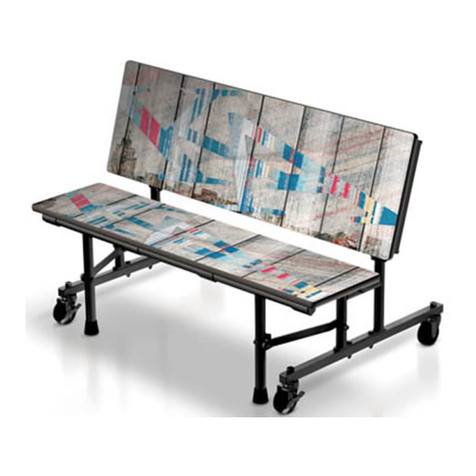
PalmerHamilton Nomad Re-Load Mobile Table with Charging... Quick start guide

1Re-Load Instructions RevD Toll Free: 800-788-1028 • www.NomadFlexibleFurniture.com
READTHIS ENTIRE MANUAL BEFORE OPERATINGTHISTABLE.
FAILURETO DO SO COULD RESULT IN SERIOUS INJURY,
DAMAGETOTHE CHARGING DEVICES ANDTHETABLE.
WARNING
Operational Manual
12V DC Power Source
Mobile Table with Charging Station for “Re-Loading” Mobile Devices

2Re-Load Instructions RevD Toll Free: 800-788-1028 • www.NomadFlexibleFurniture.com
CONTAINS SEALED NON-SPILLABLE LEAD-ACID BATTERY.
MUST BE HANDLED AND DISPOSED OF PROPERLY.
WARNING
SECTION PAGE
1. Re-Load Parts Schematic 4
2. Safety Instructions 5
3. Personal Precautions 6
4. Charging the Re-Load Battery Pack 7
5. Using your Re-Load 8
6. Discharging of Battery 9
7. Removing Internal Battery 9
8. Table Base 10
9. Work Surface & Charging Hub 10
10. Storage 11
11. Troubleshooting 12
12. Limited Warranty 13
Contact Information/ Product Repair 13
Table of Contents

3Re-Load Instructions RevD Toll Free: 800-788-1028 • www.NomadFlexibleFurniture.com
SAVE THESE INSTRUCTIONS-- Charge the internal battery in Re-Load immediately after
receiving the table. You should charge the Re-Load battery monthly when not in use. This
manual will show you how to use the Re-Load safely and properly. Please read and follow
these instructions and precautions carefully, as this manual contains important safety and
operating instructions. For any questions, contact Palmer Hamilton (See page 13)
The following “signal” words indicate the level of hazard in certain situations.
DANGER — Indicates an immediate hazardous situation. This will result in serious injury or
death of operator or bystanders.
WARNING — Indicates a potentially hazardous situation. This could result in serious injury
or death of operator or bystanders.
CAUTION — Indicates a potentially hazardous situation. This could result in moderate or
minor injury of operator or bystanders.
IMPORTANT — Indicates a critical operational characteristic situation. This could result in
damage to the Re-Load, operators or property damage.
Important: Read and save this safety and
instruction manual
PURSUANTTO CALIFORNIA PROPOSITION 65,THIS
PRODUCT CONTAINS CHEMICALS KNOWNTOTHE STATE OF
CALIFORNIATO CAUSE CANCER AND BIRTH DEFECTS OR
OTHER REPRODUCTIVE HARM.
WARNING

4Re-Load Instructions RevD Toll Free: 800-788-1028 • www.NomadFlexibleFurniture.com
ITEM # PART# PART DESCRIPTION
01 391729 Charging hub
02 Not shown Wire harness “A”
03 PU-BATTERY-1 12v RE-LOAD battery pack
04 PU-CHARGER-1 12V RE-LOAD charger
05 Varies per table size 30" Squircle, worksurface
06 Varies per table size Upper welded assembly/ battery compartment
07 Varies per table size Table X-base
08 391743 Table release mechanism
09 41139 Key push lock
10 41144 2.5" twin wheel locking caster
1. Parts schematic

5Re-Load Instructions RevD Toll Free: 800-788-1028 • www.NomadFlexibleFurniture.com
2. Important safety instructions
2.1 Only use connections from Palmer Hamilton. Use of any other brand of connections
other than by Palmer Hamilton may result in a risk of fire, electric shock, injury to person or
property, and void of warranty.
2.2 DO NOT allow the internal battery of the Re-Load table to freeze. DO NOT charge or
jump start a frozen battery.
2.3 DO NOT insert foreign objects into charger connector, battery connector or charging
hub. This will damage the connectors and cause personal injury.
2.4 DO NOT OPERATE Re-Load table if it has received a sharp blow, has been dropped or
otherwise damaged (Contact Palmer Hamilton’s Warranty/Service Dept)
2.5 DO NOT fix any part of the Re-Load table without consulting the Warranty/Service Dept
at Palmer Hamilton. Any attempt could result in electric shock, personal injury, and risk of fire
or void of warranty.
2.6 Keep the Re-Load table dry and free from excessive moisture.
2.7 Prevent exposure to the Re-Load table from extreme cold/hot temperature areas.
Extreme Temps would be 10° F and lower or in excess of 100° F.
FIRE RISK OR ELECTRIC SHOCK RISK
DANGER

6Re-Load Instructions RevD Toll Free: 800-788-1028 • www.NomadFlexibleFurniture.com
3. Personal precautions
3.1 Never smoke or allow a spark or flame within five feet of the Re-Load battery.
3.2 To reduce the risk of shock, first unplug the charger from the wall outlet then disconnect
all connections on the interior of the battery compartment.
3.3 Remove personal items such as rings, bracelets, necklaces and watches when working
with a lead-acid battery. A lead-acid battery can produce a short-circuit high enough to weld a
ring, bracelet, etc. to the metal, causing severe burns.
3.4 DO NOT OPERATE the Re-Load table with damaged wires. Unplug the table and
contact Palmer Hamilton’s Warranty/Service Dept for repair and further instructions.
3.5 If the sealed battery is punctured, wear complete eye and body protection. Wear safety
goggles and protective clothing when handling the battery.
3.6 If battery acid contacts your skin or clothing, immediately wash the area with soap and
water. If acid enters your eye, immediately flood eye with cold running water for at least 10
minutes and seek medical attention promptly.
WEAR SAFETY GOGGLES AND GLOVES
CAUTION

7Re-Load Instructions RevD Toll Free: 800-788-1028 • www.NomadFlexibleFurniture.com
IMPORTANT: CHARGE THE INTERNAL BATTERY IMMEDIATELY AFTER RECEIVING YOUR
RE-LOAD TABLE. IF NOT IN USE, CHARGE MONTHLY TO MAINTAIN THE FULL BATTERY
LIFE. *SELF-CHARGING RE-LOAD TABLES (SC) WILL INCLUDE A CHARGER IN THE BATTERY
COMPARTMENT. *STANDARD RE-LOAD TABLE (DC) DOES NOT INCLUDE A CHARGER.
PH RECOMMENDS A BATTERY CHARGING CART TO BE PURCHASED WITH DC RELOADS
TABLES. A SEPARATE CHARGER IS AVAILABLE FOR PURCHASE FROM PH.
THE INSTRUCTIONS BELOW ARE FOR THE SELF-CHARGING (SC) OR A SEPARATE
CHARGER.
4.1 When it is time to charge the battery the Hub LED should be RED or no color at all.
RED LED indicates battery has little power remaining. No LED’s lit means that battery has
reached shut off point and will no longer charge devices.
4.2 Gain access to the battery compartment by unlocking the handle with the key provided.
(Figure A, page 4, #08)
4.3 Pull back on the handle to release worksurface and tilt vertical.
4.4 Gently pull wire connections “A” & “C” apart, if applicable.
4.5 Locate and connect the “B” wire connector (Charger) to the “C” wire connector (Battery)-
see below Figure B.
4.6 Align the connectors and gently push together.
4.7 Locate and plug the 2-pronged plug into a standard 120V wall outlet to begin the charging.
4.8 The charger will scan the battery to check capacity level and then commence charging.
The GREEN LED light on the charger indicates the charging status.
4.9 Once all the GREEN LED lights are lit solid, the battery is fully charged. It is safe to
leave charger connected to the battery as it will go into a trickle mode or only when needed to
maintain the battery at 100%.
4.10 Leave worksurface open vertical
while charging. If not possible, carefully
route the charger cord so that it is not
pinched when closing top. Weave the
cord thru the corner area of the battery
compartment, and gently lower the
worksurface down until latched.
4.11 When charging is complete, unplug
cord from the wall outlet, unplug the
charger/battery connection by gently
pulling the “B” wire connector and “C”
wire connector apart. DO NOT damage
the wire connection by pulling directly on
the wires, pull only on the connectors’
plastic housing.
4. Charging the Re-Load table battery pack
A
B
C
Figure B A=Wire A B= Wire B C=Wire C

8Re-Load Instructions RevD Toll Free: 800-788-1028 • www.NomadFlexibleFurniture.com
5. Using your Re-Load
“RELOAD” YOUR MOBILE DEVICES — ASSUMING NO OTHER
CONNECTIONS ARE MADE
5.1 Align “A” wire connector with “C” wire connector
5.2 Gently push connection together.
5.3 Charging Hub should be lit BLUE (If the LED is RED more charging may be needed).
5.4 Slowly close the worksurface down making sure all wires are kept inside battery
compartment and not in the way of getting pinched. (Figure A, page 4 #06)
5.5 Push in lock to lock handle. Remove key. Your Re-Load is now ready for use.
NOTE: The Re-Load table will charge many devices including cell phones, tablets, cameras,
audio speakers and more. Charging times will vary depending on the mobile device and
how many other devices are being charged at that time. Do not charge mobile devices with
the Re-Load table that cannot accept a charge or are damaged. A 7.5A blade fuse is used
to assist circuitry protection. The Re-Load table Charging Station is only for charging mobile
devices. It will not transfer data.

9Re-Load Instructions RevD Toll Free: 800-788-1028 • www.NomadFlexibleFurniture.com
6. Discharging of battery
6.1 As mobile devices get “Reloaded” from the charging hub, the battery will begin to
slowly discharge.
6.2 When the BLUE LED is lit, this means the internal battery power status is in the range
from 100% to 10%.
6.3 When the RED LED is lit the battery power status is below 10% and needs to be
charged. (The Re-Load hub will continue to “Reload” while LED is RED).
6.4 When there is NO colored LED lit, this means the circuit has shut-off and the internal
battery needs immediate charging of the battery. The Re-Load hub will not charge devices in
this status.
6.5 Please refer to above instructions for charging battery during use, instruction 4.9.
NOTE: While NO colored LED’s are lit, the battery retains a minimal power level. This
protects the battery from a deep discharge. Batteries that go into a deep discharge state
have a shortened life cycle. A safe battery shut-off is integrated into the circuitry of Re-
Load. This allows the Re-Load battery a longer and safer life cycle. Under normal working
conditions and proper maintenance, the battery should last 3+ years.
7. Removing internal battery
Over duration of using the ReLoad table it might be necessary to remove the internal battery.
Please follow below instructions for easy removal.
7.1 Gain access to the battery compartment by unlocking the handle with the key provided.
(Figure A, page 4, #08)
7.2 Pull back on the handle to release worksurface and tilt vertical.
7.3 Locate internal battery in the compartment.
7.4 Make sure all wire connections have been released from each other.
7.5 Locate Velcro strap and loosen the strap.
7.6 Locate vinyl strap on battery, slide hand between strap and battery pull upward. Use
your other hand to lift battery and get firm hold on it. Battery weighs 13 lbs. so please DO
NOT DROP.
7.7 To place battery back into compartment, make sure Velcro strap is flipped back on each
side so the battery fits between.
7.8 Make sure all wires and wire connections are not under battery.
7.9 Tighten Velcro strap to hold battery back in place.
PLEASE RECYCLE OLD BATTERIES BY CONTACTING 1-800-BATTERY FOR LOCAL DROP-
OFF LOCATIONS OR PICKUP SERVICES.

10Re-Load Instructions RevD Toll Free: 800-788-1028 • www.NomadFlexibleFurniture.com
8. Table base
9. Work surface and charging hub
8.1 The Re-Load table base consists of two parts, Upper Welded Assembly and Lower Welded
Assembly (X-base).
8.2 The Lower Welded Assembly portion is held in place with machine screws and star
washer. Regularly inspect this connection. To do so; slowly tip table onto its side, exposing the
access hole on the bottom of the Lower Welded Assembly. Use a 1/2” socket with extension
to ensure the bolts are tight. DO NOT over-tighten or you could damage internal parts, snap
the bolt head off, and void warranty.
8.3 The Re-Load table comes standard with (4) 2.5” locking casters. To engage the lock on the
caster, push down gently on the caster lever with your foot. To disengage, push gently on the
upper caster lever. There is a slight movement in the caster lever while locking or unlocking.
9.1 The Re-Load worksurface is made of 1-1/8” thick particleboard, with .030 HPL and
balanced backer.
9.2 The Edge on the worksurface is a durable casted polyurethane.
9.3 Cleaning of the worksurface requires a solution similar to Fantastic or diluted Simple
Green. Spray onto a rag and then wipe down the top. DO NOT spray directly onto worksurface.
Moisture could get into the USB ports and cause a short circuit of the Charging Hub.
9.4 DO NOT use concentrated bleach on the polyurethane edge, as this may cause
discoloration.
9.5 The Charging Hub is made from highly durable ABS plastic.
9.6 To clean Charging Hub, spray onto a lint free cloth. Lightly dampen the cloth with cleaning
solution and wipe hub. DO NOT spray directly onto the Charging Hub.
Lock engaged Lock disengaged

11Re-Load Instructions RevD Toll Free: 800-788-1028 • www.NomadFlexibleFurniture.com
10. Storage
10.1 If the Re-Load table will be stored for a considerable amount of time, please charge the
internal battery fully.
10.2 All batteries are affected by temperature. The ideal storage temperature is 70°F. The
internal battery will gradually self-discharge (lose power) over time, especially in warm/cold
environments. To ensure satisfactory performance and avoid permanent damage, charge
the internal battery every month. Leaving the battery in a discharged state may result in
permanent battery damage.
10.3 Store in a dry environment.

12Re-Load Instructions RevD Toll Free: 800-788-1028 • www.NomadFlexibleFurniture.com
11. Troubleshooting
Problem Possible Causes Reason/Solution
My device won’t “Reload” Battery and Charging Hub may not
be connected correctly
Access battery compartment and
connect “B” and “C” wires together
Battery might be discharged and will
need to be charged
Access battery compartment and
attach battery to charger (4-5 hours
before ready)
Device charging cord could be
damaged Try another cord
Faulty USB port Check other USB ports, contact PH
BLUE LED won’t light up Battery and charging hub may not
connected correctly
Access battery compartment and
connect “A” and “C” wires together
Battery might be discharged and
needs to be charged
Access battery compartment and
attach battery to charger (4-5 hours
before ready)
7.5A Fuse has been blown Circuit pulled too much power/
Replace fuse, contact PH
Battery is defective Need new battery, contact PH
PCB defective Replace Charging hub, contact PH
Casters won’t lock Mechanical lock broken Replace caster, contact PH
Obstruction inside of caster Clean debris from the inside of the
caster
Worksurface release handle won’t
pull back
Lock is engaged Use key to unlock
Handle mechanism is bent Contact PH
Release handle lock won’t engage Handle did not fully engage into
battery compartment slot Push back into place
Loosen screws and make
adjustment
Charger is not charging Not plugged into wall outlet Plug 2-prong plug into 120V outlet
Power cord connections are loose/
not fully engaged
Check connections/ push to ensure
connection is engaged. (120V
power cord)
Not connected to battery
Access battery compartment
and connect “A” and “C” wires
together
Charger is defective Contact PH
For replacement parts or warranty concerns, please contact Palmer Hamilton Customer Service at 1-800-788-1028

13Re-Load Instructions RevD Toll Free: 800-788-1028 • www.NomadFlexibleFurniture.com
12. Limited Warranty
Limited Warranty
Palmer Hamilton, LLC, warrants this product will be free from defects in material and workmanship under normal
use for a period of one (1) year from the date of original purchase on the Charging Hub and Battery; and a period of
five (5) years on the table base and worksurface.
If this product should prove to be defective in materials or workmanship within the warranty period, Palmer Hamilton
will at its sole discretion repair or replace any defective part or parts.
Any replacement part provided will carry the initial warranty for the balance of the remaining warranty. It is only
applicable to the part it replaces. The following parts are considered normal wearing parts and are not under
warranty: casters, lock and table release mechanism.
For an evaluation of whether a defect is covered by this warranty exists, and to obtain warranty service, you must
take the product to the retailer or dealer where it was purchased. You can also deliver the complete product,
transportation prepaid, to a Palmer Hamilton authorized service center. Proof of purchase must be provided.
Warranty Exclusions
This warranty does not cover defects or damages caused by or resulting from accident, misuse, abuse, neglect (for
instance, neglecting the maintenance covered in this operational manual), improper maintenance, or normal wear
and tear. This warranty is valid only if all instructions contained in the operational manual are followed. This warranty
is VOIDED if repairs have been made or attempted by anyone other than Palmer Hamilton and its authorized
personnel. If alterations have been made to the product using parts that are not specified by or provided by Palmer
Hamilton, the warranty will be voided.
THE WARRANTY PROVIDED HEREIN IS IN LIEU OF ANY OTHER WARRANTY, EXPRESSED OR IMPLIED,
INCLUDING, WITHOUT LIMITATION, ANY IMPLIED WARRANTY OF MERCHANTABILITY OR FITNESS FOR A
PARTICULAR PURPOSE. PALMER HAMILTON OR ITS AFFILIATES SHALL NOT BE LIABLE FOR ANY SPECIAL
INCIDENTAL OR CONSEQUENTIAL DAMAGES FOR BREACH OF ANY EXPRESSED OR IMPLIED WARRANTY ON
THIS PRODUCT.
Some states do not allow limitation on how long an implied warranty lasts, or allow the exclusion or limitation of
incidental or consequential damages. The above limitations or exclusions may not apply to you. This warranty gives
you specific legal rights, and you may also have other rights which vary from state to state.
Product Repair
For any parts that may be experiencing malfunction or defect, please call Palmer Hamilton Customer Service at 800-
788-1028. Palmer Hamilton will determine at its sole discretion if repair or replacement is applicable. You will need
a return merchandise authorization (RMA) number is required for returning the product to the factory. Please include
all your contact information (company name, address, contact name, phone number, email and original invoice) with
the return of the product. Once the product has been evaluated, you will be notified of the repair or replacement
cost and time frame. Returns should be sent to the following address:
Palmer Hamilton LLC
Freight Receiving
130 Getzen Street
Elkhorn, WI 53121
(800) 788-1028

143 S. Jackson Street
Elkhorn, WI 53121-1911
Toll Free: 800-788-1028
Local: 262-723-8200
Fax: 262-723-5180
www.NomadFlexibleFurniture.com
To see the complete family of Palmer Hamilton products please see www.palmerhamilton.com
Table of contents
Other PalmerHamilton Indoor Furnishing manuals