Auto Tracking Auto Operation Functions
When playback starts or the playback speed is changed
during playback, the VCR enters the Auto tracking mode.
At this time, the indication "DT" blinks on the multi-display
for a few seconds.
If noise still appears (picture and sound) :
Press the button during PLAYBACK until the best
picture is obtained.
Press the PLAY button for 2 SECONDS to return to the
Auto tracking mode.
! NOTE
The noise on the screen may not be completely removed
depending on the tape used, especially when the tape has
been recorded on another VCR.
1 Minute Skip
With this feature, you can skip over one minute’s worth of
commercials recorded on a tape.
Press the SKIP button during PLAYBACK.
The VCR will search forward 60 seconds, then resume
playback.
Press the PLAY button to resume playback.
Press the STOP/EJECT button to stop.
Zero Return
1. Press the RESET button during RECORDING or PLAY-
BACK to set the counter to 0:00:00 at a scene you wish
to watch again.
2. Press the SKIP button in the STOP mode.
The VCR will go into FF or REW mode until the counter
setting is 0:00:00
Full Auto Playback (With VCR power
OFF)
1. Insert a video cassette without the safety tab.
(See page 2)
2. The VCR is turned on and Playback of the tape starts.
3. The tape is rewound to the beginning when it reaches
the end.
4. The tape is ejected and the VCR is turned off.
Auto Playback (With VCR power ON)
1. Insert a video cassette without the safety tab.
(See page 2)
2. Playback of the tape starts.
3. The tape is rewound to the beginning when it reaches
the end. The VCR is not turned off.
! NOTE
The Auto Playback or Full Auto Playback mode is released
if one of the tape related buttons (FF, REW, PAUSE, STOP/
EJECT, PLAY or OPERATE) is pressed.
Auto Turn on
When a cassette tape with a safety tab is inserted with the
VCR turned off, the VCR will be automatically turned on.
Auto Rewind
When a tape reaches its end, (except during FF, OTR, In-
dex search / scan, and programmable timer recording), it
will automatically be rewound to its beginning and the unit
will switch to the stop mode.
Auto Power off (Select by MODE
screen, page 7)
If no action is executed for 10 minutes in the STOP mode
or for 10 minutes in the EJECT mode, the unit is automati-
cally turned off to save electricity.
Auto Repeat
During PLAYBACK, press the No. 1 key on the remote con-
trol, then Playback of the tape will be repeated from begin-
ning to end, and the repeat mark will be displayed on
OSD. To release from Auto Repeat mode, press the No. 1
key again.
5
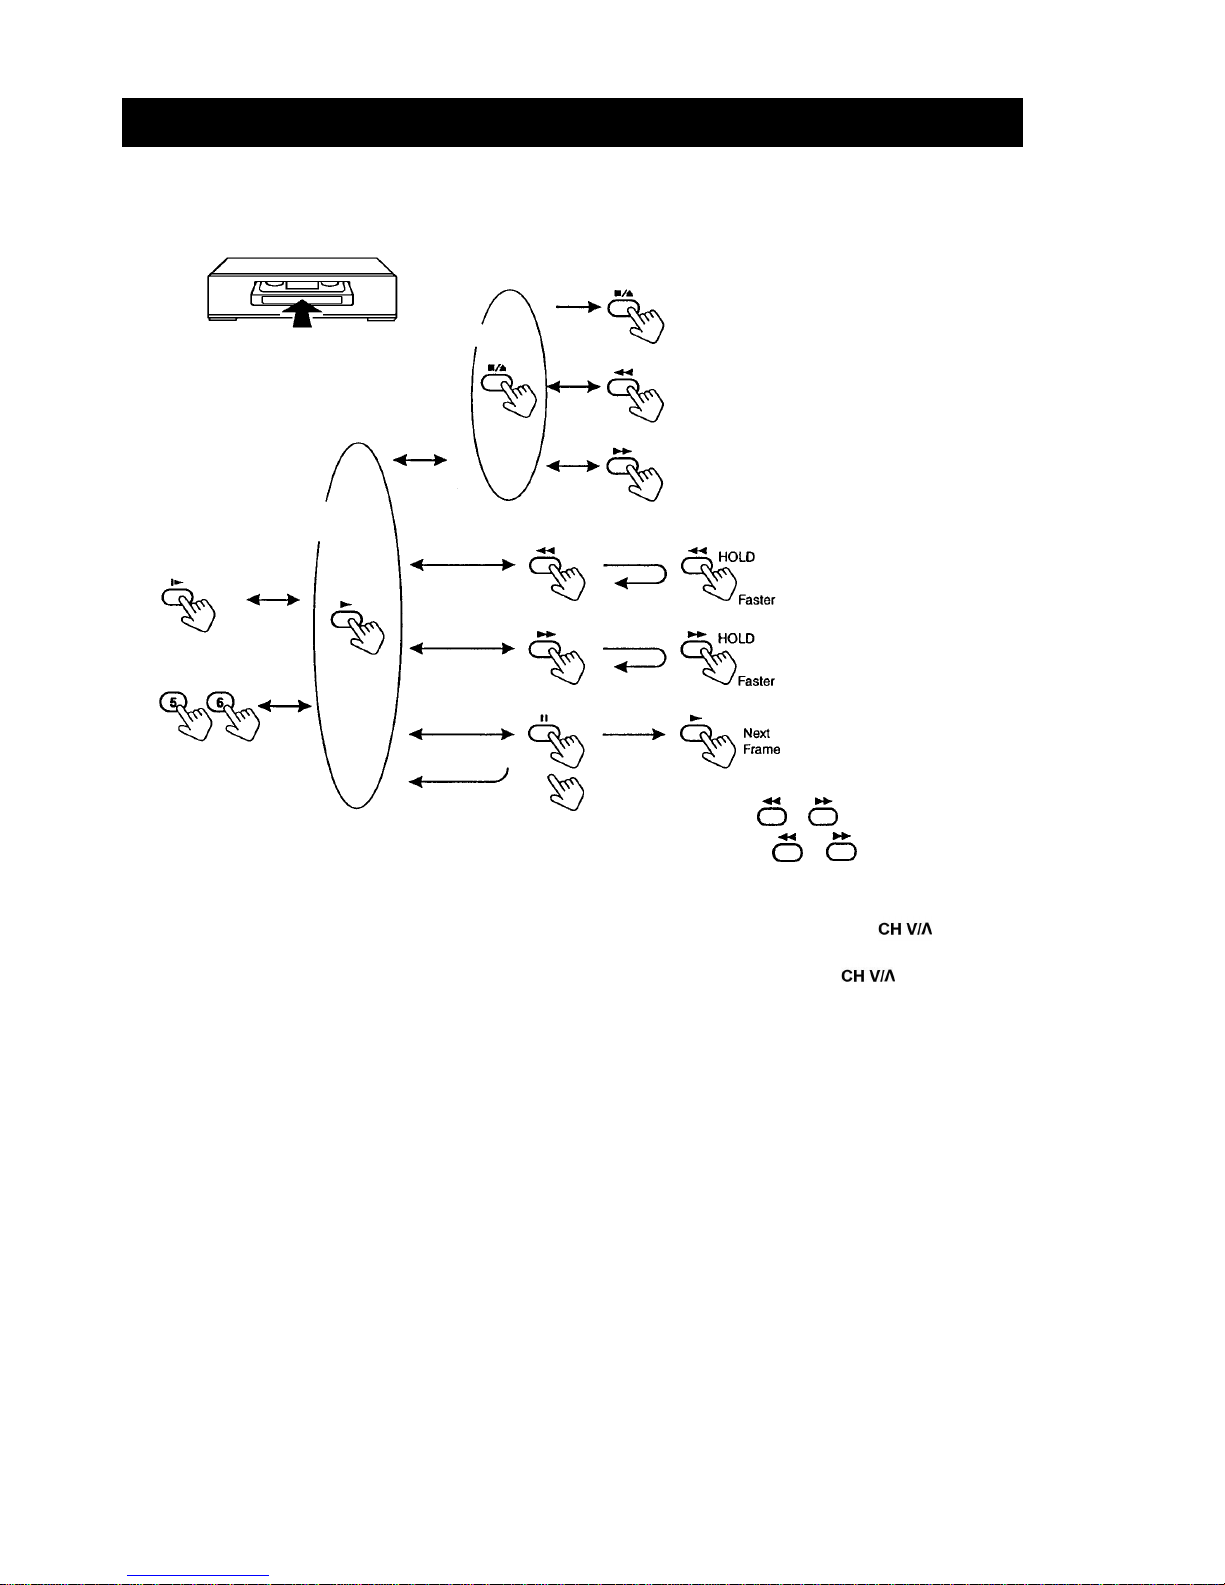
Manual tracking
Digital Tracking Control
.