manuals.online logo
Brands
  1. Home
  2. •
  3. Brands
  4. •
  5. Panasonic
  6. •
  7. LCD TV
  8. •
  9. Panasonic TX-32LX500M User manual

Panasonic TX-32LX500M User manual

ORDERNO. ITD0507041CE
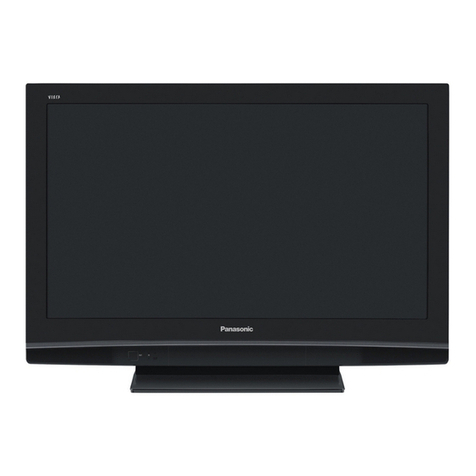
Wide LCD TV
TX-32LX500M / TX-32LX500A / TX-32LX500X / TX-26LX500M
/ TX-26LX500A / TX-26LX500X
LH41 Chassis
SPECIFICATIONS
Specifications
Power Source AC 110 - 240 V, 50 / 60 Hz
Power Consumption Averageuse : 137 W(0.8A) (TX-26LX500)
Averageuse : 168 W(1.0A) (TX-32LX500)
Standbycondition : 0.4W
LCD WideXGA(1,366 × 768 pixels)
16 : 9aspect ratioLCD panel
VisiblescreenSize 64.8cmV, 565 mm (W) × 318 mm (H) (TX-26LX500)
80.0cmV, 697 mm (W) × 392 mm (H) (TX-32LX500)
Sound
Speaker Woofer ( 80 mm) × 2pcs, Tweeter (16 mm × 73 mm) ×4pcs
AudioOutput 20 W(5W+ 5W, 5W+ 5W), 10%THD
Headphones M3(3.5mm) Jack × 1
Scanning format 480i(60Hz), 480p(60Hz), 576i(50Hz), 576p(50Hz), 720p(50Hz), 720p(60Hz), 1080i(50Hz),
1080i(60Hz)
PC signals XGAdisplay
VGA, SVGA, XGA
SXGA...... (compressed)
Horizontal scanning frequency31 - 69 kHz
Vertical scanning frequency59 - 86 Hz
1
Receiving Systems/ Band name
Receiving Channels Regular TV
VHFBAND 2-12 (PAL/ SECAM B, K1)
0-12 (PALB AUST.)
1-9(PALB N.Z.)
1-12 (PAL/ SECAM D)
1-12 (NTSC M Japan)
2-13 (NTSC M USA)
UHFBAND 21-69 (PALG, H, I / SECAM G, K, K1)
28-69 (PALB AUST.)
13-57 (PALD, K)
13-62 (NTSC M Japan)
14-69 (NTSC M USA)
CATV S1-S20 (OSCAR)
1-125 (USACATV)
C13-C49 (JAPAN)
S21-S41 (HYPER)
Z1-Z37 (CHINA)
5A, 9A(AUST.)
Aerial - Rear UHF/VHF
Operating Conditions Temperature : 5°C - 40 °C
Humidity: 5%- 90 %RH (non-condensing)
Connection Terminals
AV1/2-Rear VIDEO (RCAPinType) 1.0Vp-p(75 )
S VIDEO (MINI DIN 4-Pin) Y: 1.0Vp-p(75 ) C: 0.286Vp-p(75 )
AUDIO L-R (RCAPinType× 2) 0.5Vrms
AV3-Front
VIDEO (RCAPIN Type) 1.0Vp-p(75 )
S-VIDEO (Mini DIN 4-pin) Y: 1.0Vp-p(75 ) C: 0.286 Vp-p(75 )
AUDIO L-R (RCAPIN Type× 2) 0.5Vrms
AV4-Rear VIDEO (RCAPIN Type) 1.0Vp-p(75 )
AUDIO L-R (RCAPIN Type× 2) 0.5Vrms
Y 1.0Vp-p(including synchronization)
PB/CB, PR/CR±0.35 Vp-p
HDMI
PC TYPE AConnecter
HIGH-DENSITY D_SUB 15PIN
AUDIO L- R RCAPIN Type× 2
2
Cardslot SD CARD slot × 1, PC CARD slot × 1
MONITOR OUT VIDEO (RCAPIN Type) 1.0Vp-p(75 )
AUDIO L-R (RCAPIN Type× 2) 0.5Vrms
Dimensions( W× H × D )
Including TV Stand 724 mm × 549 mm × 300 mm (TX-26LX500)
857 mm × 624 mm × 300 mm (TX-32LX500)
TV Set Only 724 mm × 487 mm × 141 mm (TX-26LX500)
857 mm × 563 mm × 141 mm (TX-32LX500)
Weight 20.5kgNet (TX-26LX500)
22.5kgNet (TX-32LX500)
Note:
Design and Specificationsare subject tochangewithout notice. Weight and Dimensionsshownare approximate.
2005 Matsushita ElectricIndustrial Co., Ltd. All rights reserved.
Unauthorized copying and distribution isaviolation of law.
1. Safety Precautions
1.1. General Guidelines
1. When servicing, observe the original lead dress. Ifashort circuit
isfound, replace all parts which have been overheated or
damaged bythe short circuit.
2. After servicing, see to itthat all the protective devices such as
insulation barriers, insulation papers shields are properly
installed.
3. After servicing, make the following leakage current checks to
prevent the customer from being exposed to shock hazards.
1.1.1. Leakage Current ColdCheck
1. Unplug the AC cord and connect ajumper between the two
prongs on the plug.
2. Measure the resistance value, with an ohmmeter, between the
jumpered AC plug and each exposed metalliccabinet part on the
equipment such as screwheads, connectors, control shafts, etc.
When the exposed metallicpart has areturn path to the chassis,
3
the reading shouldbe between 1M and 5.2M .
When the exposed metal does not have areturn path to the
chassis, the reading must be .
Figure 1
1.1.2. Leakage Current Hot Check (See Figure 1.)
1. Plug the AC cord directlyinto the AC outlet. Donot use an
isolation transformer for thischeck.
2. Connect a1.5k , 10 watts resistor, inparallel with a0.15 F
capacitors, between each exposed metallicpart on the set and a
good earth ground such as awater pipe, as shownin Figure 1.
3. Use an AC voltmeter, with 1000 ohms/voltor more sensitivity, to
measure the potential across the resistor.
4. Check each exposed metallicpart, and measure the voltage at
each point.
5. Reverse the AC plug inthe AC outlet and repeat each of the above
measurements.
6. The potential at anypoint shouldnot exceed 0.75 volts RMS. A
leakage current tester (Simpson Model 229 or equivalent) maybe
used to make the hot checks, leakage current must not exceed 1/2
milliamp. Incase ameasurement isoutside of the limits specified,
there isapossibilityof ashock hazard, and the equipment should
be repaired and rechecked before itisreturned to the customer.
2. Prevention of Electro Static Discharge (ESD) to
Electrostatically Sensitive (ES) Devices
Some semiconductor(solidstate) devices canbe damagedeasilybystatic electricity. Such
components commonlyare calledElectrostaticallySensitive (ES) Devices. Examples of typical
ES devices are integratedcircuits and some field-effect transistors and semiconductor"chip"
components. The following techniques shouldbe usedtohelpreduce the incidence of
component damage causedbyelectrostatic discharge (ESD).
4
1. Immediatelybefore handling anysemiconductor component or
semiconductor-equipped assembly, drainoff anyESDon your
bodybytouching aknownearth ground. Alternatively, obtainand
wear acommerciallyavailabledischarging ESDwrist strap, which
shouldbe removed for potential shock reasons prior to applying
power to the unitunder test.
2. After removing an electrical assemblyequipped with ES devices,
place the assemblyon aconductive surface such as alminum foil,
to prevent electrostaticcharge buildup or exposure of the
assembly.
3. Use onlyagrounded-tipsoldering iron to solder or unsolder ES
devices.
4. Use onlyan anti-staticsolder removal device. Some solder
removal devices not classified as "anti-static(ESDprotected)"
can generate electrical charge sufficient to damage ES devices.
5. Donot use freon-propelled chemicals. These can generate
electrical charges sufficient to damage ES devices.
6. Donot remove areplacement ES device from its protective
package until immediatelybefore you are readyto install it. (Most
replacement ES devices are packaged with leads electrically
shorted together byconductive foam, alminum foil or comparable
conductive material).
7. Immediatelybefore removing the protective material from the
leads of areplacement ES device, touch the protective material to
the chassisor circuitassemblyinto which the device will be
installed.
Caution
Besure no power isapplied to the chassisor circuit, and observe
all other safetyprecautions.
8. Minimize bodilymotions when handling unpackaged replacement
ES devices. (Otherwise hamless motion such as the brushing
together of your clothes fabricor the lifting of your foot from a
carpeted floor can generate staticelectricity(ESD)sufficient to
damage an ES device).
5
3. Applicable signals
Note:
-Signalsother than above maynot be displayed properly.
-Applicableinput signal for PCisbasicallycompatibleto VESA
standard timing.
-PCsignal ismagnified or compressed for display, so that itmay
not be possibleto show fine detail with sufficient clarity.
-*: Based on SMPTE295M standard.
4. Self Check Function
4.1. SelfCheck
1. Self-Check isused to automaticallycheck the bus lines and
hexadecimal code of the TV set.
2. To get into the Self-Check mode press the Down( )button on
the customer controlsat the front of the set, at the same time
pressing the MENU button on the remote control, and the screen
6
will show :
3. Turn off the TV to reset JPEG Viewer mode after SELF-CHECK.
If the CCU ports have beencheckedand found tobe incorrect ornot locatedthen“--” will
appearinplace of “O.K.”.
Display Ref. No. Description P.C.B.
MEM IC1107 Memory DG-Board
GC4P IC4054 Global Core Processor DG-Board
GC4L IC4057 Global Core DG-Board
GC3FS IC4013 Global Core forSub DG-Board
HAD IC4012 OSD RGB A/D
Converter DG-Board
AVSW1 IC3005 AV SwitchVIDEO H-Board
AVSW2 IC2105 AV SwitchAUDIO H-Board
Tun1 TU3201 Tuner H-Board
DAC1 IC1106 DAC control 1 DG-Board
DAC2 IC1116 DAC control 2 DG-Board
DAC3 IC3006 DAC control 3 H-Board
MSP IC2106 StereoDecoder H-Board
SDM SD-Module MPEG4/PHOTO view,
SD recording SD-Module
HDMI IC5003 HDMI I/FReceiver DV-Board
ADV IC4005 A/D Converter DG-Board
4.2. Power LEDBlinking timing chart
1. Subject
Information of LEDFlashing timing chart.
2. Contents
7
When an abonormalityhas occurred the unit, the protection
circuitoperates and reset to the stand bymode. Atthistime, the
defective block can be identified bythe number of blinking of the
Power LEDon the front panel of the unit.
5. Chassis Board Layout
8
BoardName Function
AP-Board Regulator
DG-Board Global Core, A/D Converter, MCU
H-Board AV connector, TV Tuner, AV Switch
K-Board PowerSwitch
G-Board Front AV & HP connector, KeySwitch
PowerUnit DC PowerSupply
None service able.
PowerUnit shouldbe exchange forservice.
V-Board Remote Receiver, LED
DV-Board HDMI interface
GP-Board PC Cardslot, PC Cardinterface
GS-Board SD Cardslot, SD CardInterface
SD Module MPEG/JPEG interface
None service able.
SD Module shouldbe exchange forservice.
6. Before servicing
6.1. Kind and location of the flexiblecableand bridge cable
Ref No. Connectertype Pins Location Opposite Ref No.
G1 - 10pin G-Board V1
G4 - 30pin G-Board H4
G5 - 20pin G-Board H5
G10 - 4pin G-Board speakerbox L
G11 - 5pin G-Board speakerbox R
GP6 - 3pin GP-Board H6
GP10 Flexible type 50pin GP-Board SD Module
GS3 Flexible type 40pin GS-Board SD Module
GS8 - 7pin GS-Board H8
GS9 - 15pin GS-Board H9
AP1 Bridge Type 23pin AP-Board H1
AP2 - 7pin AP-Board P2 (CN101)
AP3 Bridge Type 11pin AP-Board P3 (CN201)
AP4 Bridge Type 22pin AP-Board DG4
AP5 Bridge Type 22pin AP-Board DG5
AP6 - 3pin AP-Board K6
AP10 - 2pin AP-Board AC cord
DG2 Flexible type 40pin DG-Board H2
DG3 Flexible type 40pin DG-Board H3
DG4 Bridge type 23pin DG-Board AP4
DG5 Bridge type 23pin DG-Board AP5
9
Ref No. Connectertype Pins Location Opposite Ref No.
DG6 - 8pin DG-Board CN3 (Inverter)
DG7 - 32pin DG-Board LCD Panel
DG8 - 7pin DG-Board LCD Panel
DG10 - 60pin DG-Board DV15
DV15 - 60pin DV-Board DG10
H1 Bridge type 23pin H-Board AP1
H2 Flexible type 40pin H-Board DG2
H3 Flexible type 40pin H-Board DG3
H4 - 30pin H-Board G4
H5 - 20pin H-Board G5
H6 - 3pin H-Board GP6
H8 - 7pin H-Board GS8
H9 - 15pin H-Board GS9
K6 - 3pin K-Board AP6
P1
(CN203) - 8pin P-Board CN5 (Inverter)
P2
(CN101) - 7pin P-Board AP2
P3
(CN201) Bridge Type 11pin P-Board AP3
P4
(CN202) - 8pin P-Board CN4 (Inverter)
V1 - 10pin V-Board G1
10
6.2. How to remove the connector
Bridge cable connector
Flexible cable connector
11
6.3. Wire dressing 1
1. Make the wire dressing as illustrated below.
12
6.4. Wire dressing 2
<Clamping>
Notes :
1. Connect everyconnector surely.
2. Manage wires not to touch anysharp edge of the metal parts.
3. Manage wires not to have too much tension.
4. For 32 inch model only.
13
7. Servicing method
7.1. Removing the stand ass’y
1. Laydownthe mainunitso that the rear cover faces upward.
2. Remove the cablecover.
3. Remove the fixing screws(4pcs).
4. Remove the stand ass’y.
7.2. Removing the rear cover
1. Remove the stand ass’y. (See 7.1.)
2. Remove the fixing screws(11pcs).
3. Remove the rear cover.
14
7.3. Removing the speaker box Land R
1. Remove the rear cover. (See 7.2.)
2. Release the speaker cables from the clampers on the speaker box
Land R, and disconnect the speaker relaycouplers (SPL and
SPR).
3. Remove the fixing screws(6pcs).
4. Remove the speaker box Land R.
7.4. Removing the rear AVbracket
1. Remove the rear cover (See 7.2.)and the speaker box Land R.
(See 7.3.)
2. Release the bushing of AC cord from the rear AVbracket and the
clamper on the rear metal frame, disconnect the coupler (AP10)
and remove the AC cord.
3. Remove the fixing screws(4pcs).
15
4. Remove the rear AVbracket.
7.5. Removing the rear metal frame
1. Remove the rear AVbracket. (See 7.4.)
2. Release the cables from the clampers on the rear metal frames.
3. Remove the fixing screws(4pcs).
4. Remove the rear metal frames (right and left).
7.6. Removing the P-Board
1. Remove the rear cover. (See 7.2.)
2. Disconnect the couplers P2 (CN101), P3 (CN201) P4 (CN202), and
P1 (CN203).
3. Remove the fixing screw (4pcs).
4. Remove the P-Board.
16
7.7. Removing the DG-Board
1. Remove the rear AVbracket (See 7.4.)and the rear metal frame.
(See 7.5.)
2. Disconnect the couplers (DG6, DG8and DG7), the flexiblecables
(DG2and DG3) and the bridge cables (DG4and DG5).
3. Remove the fixing screws(7pcs).
4. Remove the DG-Board with DV-Board.
7.8. Removing the DV-Board
1. Remove the DG-Board with DV-Board. (See 7.7.)
(See above figure initem 7.7.)
2. Remove afixing screw ( )(reverse side).
3. Disconnect the coupler (DV15-DG10) and remove the DV-Board.
17
7.9. Removing the AP-Board
1. Remove the rear AVbracket ass'y(See 7.4.)and the rear metal
frame. (See 7.5.)
2. Disconnect the couplers (AP2, AP6 and AP10 (AC Cord)) and the
bridge cables (H1(AP1) on the H-Board, P3/CN201 (AP3) on the P-
Board and DG4(AP4) and DG5(AP5) on the DG-Board.
3. Remove the fixing screws(7pcs).
4. Remove the AP-Board.
7.10. Removing the H-Board
1. Remove the rear AVbracket (See 7.4.)(and the rear metal frame).
(See 7.5.)
2. Disconnect the flexiblecables (H2and H3), the bridge cable(H1)
and the couplers (H4, H5, H6, H8and H9).
3. Remove the fixing screws(4pcs).
4. Remove the H-Board.
18
7.11. Removing G-Board bracket (G-Board and GP-Board)
1. Remove the rear AVbracket (See 7.4.)and the rear metal frames.
(See 7.5.)
2. Remove the fixing screws(2pcs ) and pull out the rear AVbracket
slightly.
3. Disconnect the flexiblecable(GP10) and the couplers (G1, G4, G5,
G10, G11 and GP6).
4. Remove ascrew on the DG-Board and release the earth lug from
the DG-Board.
5. Release the cables from the cableholders of the G-Board bracket.
6. Remove the G-Board bracket with the G-Board and GP-Board.
7.12. Removing the G-Board and GP-Board
1. Remove the G-Board bracket. (See 7.11.)
<Removing the G-Board>
2. Push the hooks (7 points) to release the G-Board from the G-
Board bracket.
3. Remove the G-Board.
19
<Removing the GP-Board>
4. Remove the screws(2pcs ) and push the hooks (2 points ).
5. Remove the GP-Board.
7.13. Removing the GS-Board bracket.
1. Remove the screws(3pcs ) (See figure initem 7.11.)
2. Remove the GS-Board bracket.
3. Remove the couplers (GS9 and GS10) and aflexiblecable(GS3).
4. Remove the screws(2pcs ).
5. Remove the GS-Board
20

Other manuals for TX-32LX500M

1

This manual suits for next models

5

Other Panasonic LCD TV manuals

Panasonic Viera TC-L32E5 User manual

Panasonic

Panasonic Viera TC-L32E5 User manual

Panasonic CTL1400 - 14" LCD MONITOR User manual

Panasonic

Panasonic CTL1400 - 14" LCD MONITOR User manual

Panasonic Viera TC-L42D2 Quick start guide

Panasonic

Panasonic Viera TC-L42D2 Quick start guide

Panasonic TX-22LT2 User manual

Panasonic

Panasonic TX-22LT2 User manual

Panasonic TXL37V20B User manual

Panasonic

Panasonic TXL37V20B User manual

Panasonic tx-l55wt65b Assembly instructions

Panasonic

Panasonic tx-l55wt65b Assembly instructions

Panasonic VIERA TX-L32S10B User manual

Panasonic

Panasonic VIERA TX-L32S10B User manual

Panasonic Viera TH-L32C5M User manual

Panasonic

Panasonic Viera TH-L32C5M User manual

Panasonic TX-26LXD50 User manual

Panasonic

Panasonic TX-26LXD50 User manual

Panasonic Viera TX-L32E30B User manual

Panasonic

Panasonic Viera TX-L32E30B User manual

Panasonic Viera TC-L42E3 User manual

Panasonic

Panasonic Viera TC-L42E3 User manual

Panasonic Viera TX-32A400B User manual

Panasonic

Panasonic Viera TX-32A400B User manual

Panasonic Viera TX-L32U3B User manual

Panasonic

Panasonic Viera TX-L32U3B User manual

Panasonic TC-50AS660C User manual

Panasonic

Panasonic TC-50AS660C User manual

Panasonic TH-L37V10Z Viera User manual

Panasonic

Panasonic TH-L37V10Z Viera User manual

Panasonic TX-32LED7F User manual

Panasonic

Panasonic TX-32LED7F User manual

Panasonic Viera TX-26LE8A User manual

Panasonic

Panasonic Viera TX-26LE8A User manual

Panasonic Viera TC-P50GT50 User manual

Panasonic

Panasonic Viera TC-P50GT50 User manual

Panasonic VIERA TX-37LZD81AZ User manual

Panasonic

Panasonic VIERA TX-37LZD81AZ User manual

Panasonic TX-23LX50M User manual

Panasonic

Panasonic TX-23LX50M User manual

Panasonic TH-L37D25A Viera User manual

Panasonic

Panasonic TH-L37D25A Viera User manual

Panasonic TC-L55DT60 Instruction Manual

Panasonic

Panasonic TC-L55DT60 Instruction Manual

Panasonic TX-22LT3F User manual

Panasonic

Panasonic TX-22LT3F User manual

Panasonic TH-L32X10A User manual

Panasonic

Panasonic TH-L32X10A User manual

Popular LCD TV manuals by other brands

iLO CIWL3706 owner's manual

iLO

iLO CIWL3706 owner's manual

Medion MEDION LIFE X14330 quick start guide

Medion

Medion MEDION LIFE X14330 quick start guide

AOC L22W631 Service manual

AOC

AOC L22W631 Service manual

Curtis LCD3213 user manual

Curtis

Curtis LCD3213 user manual

PDi PDI-P14T2S user manual

PDi

PDi PDI-P14T2S user manual

Toshiba WL56 Series Service manual

Toshiba

Toshiba WL56 Series Service manual

JVC LT-46Z70BU instructions

JVC

JVC LT-46Z70BU instructions

Insignia NS-L55X-10A user guide

Insignia

Insignia NS-L55X-10A user guide

HANNspree JT02-37E1 quick start guide

HANNspree

HANNspree JT02-37E1 quick start guide

Audiovox FPE3705 - 37" LCD TV operating manual

Audiovox

Audiovox FPE3705 - 37" LCD TV operating manual

Dynex DX-15E220A12 user guide

Dynex

Dynex DX-15E220A12 user guide

Hisense LHD24K26AMN Service manual

Hisense

Hisense LHD24K26AMN Service manual

Philips 20HF5335D/12 user manual

Philips

Philips 20HF5335D/12 user manual

LG 22LD350 Service manual

LG

LG 22LD350 Service manual

RCA L15D20 Service manual

RCA

RCA L15D20 Service manual

Philips 42PF9967D Specifications

Philips

Philips 42PF9967D Specifications

Sony KDL-26P3000 operating instructions

Sony

Sony KDL-26P3000 operating instructions

Currys Essentials C16LDVB11 instruction manual

Currys Essentials

Currys Essentials C16LDVB11 instruction manual

manuals.online logo
manuals.online logoBrands
  • About & Mission
  • Contact us
  • Privacy Policy
  • Terms and Conditions

Copyright 2025 Manuals.Online. All Rights Reserved.