manuals.online logo
Brands
  1. Home
  2. •
  3. Brands
  4. •
  5. Panasonic
  6. •
  7. Music Mixer
  8. •
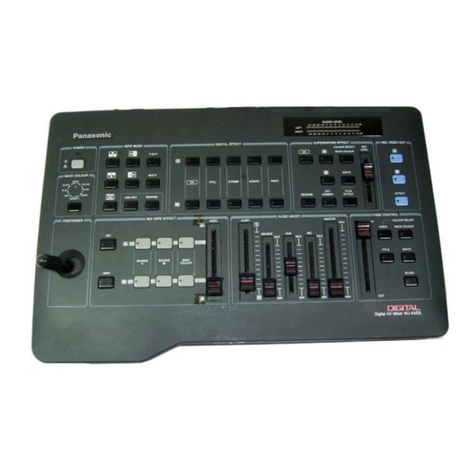
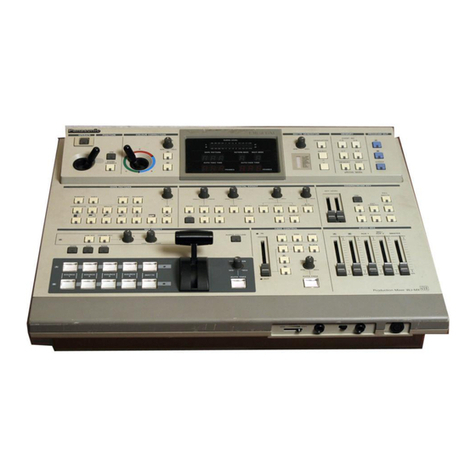
  9. Panasonic WJ-AVE55 User manual

Panasonic WJ-AVE55 User manual

rT
d
rating
ructions
Digital
AV
Mixer
____WJ-AVE55
-
CAUTION:
Before
attempting
to
connect
or
operate
this
product,
please
read
the
label
on
the
bottom.
RISK
OF
ELECTRIC
SHOCK
DO
NOT
OPEN
CAUTION:
TO
REDUCE
THE
RISK
OF
ELECTRIC
SHOCK,
DO
NOT
REMOVE
COVER
(OR
BACK).
NO
USER
SER-
VICEABLE
PARTS
INSIDE.
REFER
SERVICING
TO
QUALIFIED
SERVICE
PER-
SONNEL.
The
lightning
flash
with
arrowhead
sym-
bol,
within
an
equilateral
triangle,
is
intended
to
alert
the
user
to
the
pres-
ence
of
uninsulated
“dangerous
voltage"
within
the
product's
enclosure
that
may
be
of
sufficient
magnitude
to
constitute
a
SA
1965
risk
of
electric
shock
to
persons.
The
exclamation
point
within
an
equilat-
eral
triangle
is
intended
to
alert
the
user
to
the
presence
of
important
operating
and
maintenance
(servicing)
instructions
in
the
literature
accompanying
the
appli-
ance.
SA
1966
attr
tesco
r--------
ro
-----------
o
For
U.S.A
-
Warning:
This
equipment
generates
and
uses
radio
frequency
ener-
gy
and
if
not
installed
and
used
properly,
i.e.,
in
strict
accordance
with
the
instruction
manual,
may
cause
harmtul
interference
to
radio
communications.
It
has
been
tested
and
found
to
comply
with
the
limits
for
a
Class
A
computing
device
pursuant
to
Subpart
J
of
Part
15
of
FCC
Rules,
which
are
designed
to
provide
reasonable
protection
agaínst
such
interference
when
operated
in
a
commercial
environment.
RR
eee
ee
ed
1
I I I
1
)
!
l
|
|
|
l
1
1 | 1
| I I |
l
1
|
I I
I \ )
t
l l
| |
l
|
i I 1 I I I
l
|
| I
|
1
'
1 i
1
i
(
1 1
1
I 1
L
The
serial
number
of
this
product
may
be
found
on
the
bot-
tom
of
the
unit.
You
should
note
the
serial
number
of
this
unit
in
the
space
provided
and
retain
this
book
as
a
permanent
record
of
your
purchase
to
aid
identification
in
the
event
of
theft.
Model
No.
Serial
No.
WARNING:
TO
PREVENT
FIRE
OR
SHOCK
HAZARD,
DO
NOT
EXPOSE
THIS
APPLIANCE
TO
RAIN
OR
MOISTURE.
Quick
Start
CONNECTION
Precaution:
When
supplying
the
composite
video
signal
and
S-video
signal
simultaneously,
the
S-video
signal
has
a
priority.
Output
Monitor
Preview
Monitor
Power
On
Precaution:
Be
sure
to
connect
the
Power
Cord
firmly
between
the
AC
IN
of
the
rear
panel
of
this
unit
and
local
AC
Outlet.
e
Press
the
Power
Switch
on
the
side
panel
to
the
ON
position.
Initial
Mode
Video
Source
Selection
Press
the
desired
button
for
A-bus
video
source.
Press
the
desired
button
for
B-bus
video
source.
The
LED's
on
the
operation
panel
light
up
as
shown
and
the
unit
is
now
in
initial
mode
for
operation.
ie
Y
T
FFER
nao
naon?»
ee
ees
a
a
a
Ce
ee
a
ee
ee)
Ce
i
as
e
Press
WIPE
button.
The
wipe
patterns
are
displayed
on
the
preview
monitor.
„ii
A
Na
paaa.
Nee
Aa
a
|.
gal
ld
te
HOP)
Hna
BANE:
aba).
Ex.:
MOSAIC
effect
to
the
B-bus
.
Press
EFFECT
button.
The
EFFECT
menu
is
displayed
on
the
preview
monitor.
OC.
LEVEL:
“ecc
ro»
Carr
aL.
Digha
AY
Minas
aà
VEAS.
¿OFF
ON
OCHROMA
:OFF
ON
|
DC.
LEVEL:
aart
Press
the
Effect
Output
button
on
B-bus.
OSD
Buttons
ES
BEEE
EERE
lfafofafalyala!
T
va
:
a
Slide
the
Wipe/Mix
control
to
the
A-bus
position.
Press
the
Mix/Wipe
button.
The
LED
on
this
button
starts
to
blink.
Dear
Customer
We
would
like
to
take
this
opportunity
to
thank
you
for
Please
read
this
Operating
Instructions
carefully
and
purchasing
a
Panasonic
Digital
AV
Mixer.
keep
it
for
later
reference,
in
case
you
want
to
see
something
in
the
future.
~
CONTENTS
CCK
ST
EEA
E
E
A
A
T
S
1
BEEE
CHISEOHTIGN
a
a
pa
ead
A
A
Mage
es
re
5
AIEA
e
in
DN
E
E
A
E
6
Main
Features
a
Aia
n
a
AE
a
E
de
ia
RA
EAEE
6
Pr
AA
E
A
A
RA
6
FUNCTIONS
sic
A
iD
ae
7
MAJOR
OPERATING
CONTROLS
AND
THEIR
FUNCTIONS
ncccccococcccnoconcnocconorinconorccroncnonnonoinononanionoss
11
SYSTEM
CONNECTION:
ui
SA
A
E
o
15
BASICOPERA
TION
G
aaa
a
A
RA
ainia
16
B
Input
Signal
Selection
............:
A
A
O
E
16
Bvid
MI
Lt
a
a
da
dad
ld
Eder
16
ON-SCREEN
DISPLAY
OPERATIONS
ass
a
A
Oi
17
MyVideo
WIDE
O
RS
AA
AA
ASA
17
$
Wipe
Description
oo...
eres
A
E
EREE
EEE
E
E
an
iaal
net
te
17
Wipe
Pattern
Setting:
atado
sin
a
Stu
19
è
Wipe
Direction
Setting.
-rinde
niei
aaaea
Eas
inae
nanan
AeA
O
aA
oia
Daaa
a
Taro
atann
20
è
Wipe
Edga
aia
O
a
A
Ta
21
Multiple
WIDE
<P
AA
O a
its
22
Special
Mode
iia
eS
ice
ARE
Tb
LIE
23
+
Special
Mode
Description:
ici
A
A
AON
iaia
teeta
23
E
Digital
Effect
...............
EE
EET
E
E
ET
aes
26
é
Strobe
Mode
Setting
rad
roin
EE
rara
lov
EAEAP
AS
aa
Aa
nae
Caan
AN
EE
RESES
DEEE
EEEE
ESEE
26
è
Mosaic
SQUAD
a
E
AA
EE
Gor
AAN
27
e
Paint
Setting
.......
A
E
A
E
AA,
27
o
Still
Setting.
a
ip
A
AA
tes
28
@
Nega
SSIES
sirena
A
td
29
©
Color
CörrectiOn
ASA
A
A
A
As
30
è$
Chroma
Level
ara
NS
LT
A
A
A
AA
30
E
Color
Setting
A
tis
E
E
OAR
dec
atte
PATE
A
E
ER EE
EEE
E
iE
31
@
Back
Color
Setting.
aia
a
anos
31
©
Border
Color
Setting
a
A
ADUTA
AEEA
EOE
VEENAS
32
$
Color-
Mode
SEMA:
narsos
erta
tatei
ina
ea
naaa
ERE
A
AOE
a
EAS
33
©
Title
Cölor
Seting
sario
aiiai
34
e
Title
Edge:
Setting
ui
ti
hth
sidan
AA
aa
eI
E
E
ended
hams
EENET
NNi
sa
35
s
Fadé-but
(in)
Setting.
-nuoi
Sp
A
E
EE
A
AA
A
EVENE
DR
35
Oh
PU
MN
Dd
E
EN
T
A
S
37
è
Aüdid
Follow
Setting
ra
AAA
BENENE
A
Kreatin
37
+
Audio
Level:-Setting
tai
a
aei
Ta
dea
sine
aay
AA
37
Te
(eo
o
ENEGUE
ainte
aeoe
ual
Soaks
cece
tates
Pit
e
EAAS
A
E
E
O
E
SAE
TEI
38
ADVANGED
OPERATIONS
c
enn
eeraa
a
e
a
arokoa
ang
aa
a
E
IA
AAS
aE
EEA
Ana
39
B
MANGES
Setting
isc
AAA
AN
39
B
Chroma
Level
Seting
id
id
40
E
Auto:
Take
Seting
csi
sri
e
aAA
A
EA
AEE
EEE
PA
EA
E
EE
GRE
i
41
M
Event
SENO
iaa
EE
A
sve
tans
A
E
Ap
aP
EEA
E
a
S
Aa
AA
41
Wh
POS
TN
STUN
¿a
A
ia
42
A
yore
eee
44
BEING.
(NUMBER
FUNCION
scsi
A
ad
ti
aa
44
E
REDON
serioaren
e
ea
aTa
atai
L
a
E
E
A
S
44
Basic
Wipe
Pattern/Number
Input
Table
sisi
raid
tin
leganes
45
Number
Input
Tal
ao
ica
45
GP
POMS
CLONE
RAUIOND:
Lanaja
50
SERIAL
Connector
(MO
MaiOn
Senna
tit
ai
can
ree
50
Important
Notes
on
Video
Input
Signal
ucraniana
O
pp
ee
51
GHOSE
AAA
RAT
EA
A
51
SPECIFICATIONS
trata
toa
eelgtaeg
AE
ER
52
Standard
ACCESSOIY
arta
ass
ioudes
ex)
Ee
rS
A
ese
a
NE
RARE
ESS
iaai
52
Optiónal
ACCES
SOI
a
a
a
aae
a
E
a
a
a
aa
aseistaa
52
Preface
Two
channel
digital
frame
synchronization
permits
special
effects
in
each
of
the
A/B
program
busses.
Four
sources
can
be
swiiched,
and
any
two
of
them
are
routed
to
the
program
busses.
The
A/B
program
busses
can
be
monitored
at
the
A/B
program
recording
output
can
be
selected
at
the
EFFECT
switch
in
the
PROGRAM
OUT
section.
There
is
an
external
Editing
Controller
Input
for
RS-232C
serial
controls.
Also,
a
GPI
input
is
featured.
This
means
the
WJ-AVE55
is
compatible
with
a
wide
variety
of
video
editing
devices
io
complementary
video
editing
system.
Main
Features
Digital
effect
-
Still,
Strobe,
Mosaic,
Paint,
Negative
Chroma
Key,
Luminance
Key
191
wipe
patterns
Back
color
Joystick
control
for
picture
position
and
color
cor-
rection
Fade
control
for
video
and
audio
Audio
mixing
External
video
titler
inputs
Four
audio/video
source
inputs
Precautions
The
WJ-AVE55
is
a
sensitive,
high
quality
and
should
be
handled
as
such.
Because
it
is
an
electric
shock
exists
if
it
is
used
carelessly.
DON’T
DO’S
e
Do
not
attempt
to
disassemble
the
unit.
in
order
to
prevent
electric
shock,
do
not
remove
screws
or
covers.
There
are
no
user-serviceable
parts
inside.
e
Do
not
abuse
the
unit.
Avoid
striking,
shaking
etc.
It
could
be
damaged
by
improper
handling
or
stor-
age.
+
Do
not
use
strong
or
abrasive
detergents
when
cleaning
the
unit
body.
e
Do
not
expose
the
unit
to
water
or
moisture,
and
do
not
operate
it
in
wet
or
humid
areas.
e
Do
not
use
the
unit
it
an
extreme
environment
of
high
temperature
or
high
humidity.
Refer
all
servicing
to
qualified
service
personnel.
Handle
the
unit
with
care.
Use
a
dry
cloth
to
clean
the
unit
when
dirty.
In
case
dirt
is
hard
to
remove,
use
a
mild
detergent
and
wipe
gently.
Take
immediate
action
if
ever
the
unit
should
become
wet.
Turn
the
power
off
and
refer
servic-
ing
to
qualified
service
personnel.
Moisture
can
damage
the
unit
and
also
create
the
danger
of
electric
shock.
Use
the
unit
at
ambient
temperature
from
0°C
to
40°C
(32°F
-
104°F)
and
humidity
below
90%.
|
FUNCTIONS
Video
Mix
The
two
video
signals
can
be
replaced
each
other
after
mixing.
Video
Wipe
A
process
in
which
one
image
is
electronically
“wiped”
*
Multi
mode
off
the
screen
and
replaced
by
another.
+
Wipe
Direction
mode
+.
Edge
mode
Digital
Effect
Refer
to
page
26.
The
following
is
a
detailed
description
of
the
function
of
DIGITAL
EFFECT
section
which
generates
digital
special
effects
for
the
A-bus
and
B-bus
source
video
signais.
The
selected
effect(s)
can
be
added
to
either
the
A-bus
or
B-bus
at
one
time.
E
Strobe
E
Still
E
Chroma
Alters
a
video
signal
to
affect
the
colors.
E
Chroma
Level
Selects
the
desired
chroma
level.
-8-
Color
Setting
Refer
to
page
31.
Audio
Mix
Refer
to
page
37.
This
function
allows
color
adjustment
of
a
selected
Mix
the
audio
source
between
the
selected
two
sources
input
source,
as
well
as
compensation
for
excessive
via
the
Mix/Wipe
Control
according
to
the
ratio
of
color.
sources.
Fade
In/Fade
Out
Refer
to
page
35.
Refer
to
page
39.
The
video
title
and
audio
fades
together
or
in
any
Replacement
of
portions
of
one
picture
with
another,
combination
is
available.
based
on
brightness.
To
white
Chroma
Key
Refer
to
page
40.
The
process
of
overlaying
one
video
signal
over
another
by
replacing
a
range
of
colors
with
the
second
signal.
l
|
Auto
Take/Fade
Refer
to
page
41.
Instead
of
the
slide
controlled
Mix
and
Wipe
using
the
Mix/Wipe
Control,
automatic
Mix
and
Wipe
operation
can
be
performed
using
the
Auto
Take
function.
Refer
to
page
44,
Refer
to
page
41.
Up
to
four
preset
functions
can
be
memorized
and
re-
called.
-10-
MAJOR
OPERATING
CONTROLS
AND
THEIR
FUNCTIONS
@
Side
View
(1)
Power
Switch
(POWER
ON/OFF)
E
POWER
Section
(2)
Power
Indicator
@
TRANSITION
SELECT
Section
WIPE/MIX
LUMKEY
CHROMAKEY
SET
(3)
Wipe
/
Mix
Selection
Button
(WIPE/MIX)
(5)
Chroma
Key
Button
Used
to
select
either
the
Wipe
or
Mix
Effect.
Used
to
replace
certain
color
of
one
picture
with
a
Lighting:
|
shows
the
Wipe
selection
second
picture.
Blinking:
shows
the
Mix
selection
(6)
Set
Button
(4)
Luminance
Key
Button
.-
Used
to
select
the
position
for
the
chroma
key
Used
to
replace
certain
luminance
of
one
picture
function.
with
a
second
picture.
Ea
E
ON
SCREEN
DISPLAY
SETTING
Section
ON
SCREEN
DISPLAY
SETTING
Coseas
7
WIPE
EFFECT
coL.
(7)
Wipe
Button
(WIPE)
(10)
Fade
Button
(FADE)
Used
to
display
the
Wipe
menu
on
the
preview
Used
to
display
the
Fade
Setting
menu
on
the
pre-
monitor.
view
monitor.
(8)
Effect
Button
(EFFECT)
(11)
Audio
Button
(AUDIO)
Used
to
display
the
Effect
Setting
menu
on
the
Used
to
display
the
Audio
Setting
menu
on
the
preview
monitor,
preview
monitor.
(9)
Color
Button
(COL.)
Used
to
select
the
color
for
the
back
screen
or
wipe
edge.
E
POSITION/COL.
CORRECT
Section
POSTION
TOL
CORRECT
(12)
Select
Button
(SELECT)
(14)
Scene
Grabber
Indicator
(SCENE.
GRA.)
Used
to
select
the
POSITION,
SCENE
GRABBER
or
COL
CORRECT.
(15)
Color
Correct
Indicator
(COL
CORRECT)
Notes
:
1.
Scene
Grabber
is
available
in
[1]
pattern,
(16)
Joystick
Control
2.
When
selecting
the
CHROMA
ON
mode
and
This
joystick
Control
has
two
functions
-
setting
the
press
the
desired
Effect
Output
Button,
color
position
of
the
specified
wipe
pattern
,
moving
the
correction
is
available.
cursor
for
setting
the
chroma
key
and
correcting
the
Color
A-bus
/
B-bus.
(13)
Position
Indicator
(POSITION)
>
-12-
E
SOURCE
SELECT
Section
(17)
A-bus
Selection
Buttons
(A)
SOURCE
1:
Used
to
select
Source
1
Audio/Video
Signals
(35)(36137)
supplied
to
the
rear
panel.
SOURCE
2:
Used
to
select
Source
2
Audio/Video
Signals
(38)(39)(40)
supplied
to
the
rear
panel.
f
SOURCE
3:
Used
to
select
Source
3
Audio/Video
Signals
(41)(42)(43)
supplied
to
the
rear
panel.
SOURCE
4:
Used
to
setect
Source
4
Audio/Video
Signals
(44)(45)(46)
supplied
to
the
rear
panel.
BACK
COL:
Used
to
select
the
Back
Color.
(18)
B-bus
Selection
Buttons
Same
selection
can
be
available
as
mentioned
in
the
A-bus
Selection
buttons
(17).
(19)
Effect
Out
Buttons
(EFFECT)
Used
to
supply
the
effect
signal
to
the
preview
and
Rec
Out
connectors.
M
MODE
SETTING
Section
(25)
Event
Memory
Button
(EVENT
MEMORY)
Used
to
memorize
the
present
status.
(26)
Call
Button
(CALL)
Used
to
recall
the
memorized
status.
(27)
Number
Button
(No.)
(28)
Up
Button
(29)
Left
Button
(30)
Down
Button
(31)
Right
Button
(32)
SELECT/UNDO
Button
(33)
Enter
Button
(
4
)
(20)
Still
Out
Buttons
(STILL)
An
instant
still
or
frozen
image
can
be
obtained
by
pressing
this
button,
(21)
Mix/Wipe
Control
(MIX
WIPE
EFFECT)
Mix
and
wipe
can
be
performed
by
operating
this
control.
(22)
Time
Control
(TIME)
For
adjusting
the
transition
time
of
Auto
Fade
Function
and
Auto
Take
Function.
(23)
Auto
Fade
Button
(AUTO
FADE)
Automatic
fade
can
be
executed
according
to
the
time
set
by
TIME
Contro!,
(24)
Auto
Take
Button
(AUTO
TAKE)
Automatic
wipe
or
mix
can
be
executed
according
to
the
time
set
by
TIME
Control
(22).
E
Front
Panel
(34)
Titler
Connector
(TITLE)
B
Rear
Panel
—
"|
—
E
q€-IE
—
—_
a
¡A
LA)
A A
(35)
Source
1
Audio
Input
Jack
(SOURCE
1
AUDIO)
(36)
Source
1
S-video
Input
Connector
(Y/C)
(37)
Source
1
Composite
Video
Signal
Input
Jack
(38)
Source
2
Audio
Input
Jack
(SOURCE
2
AUDIO)
(39)
Source
2
S-video
Input
Connector
(Y/C)
(40)
Source
2
Composite
Video
Signal
Input
Jack
(41)
Source
3
Audio
Input
Jack
(SOURCE
3
AUDIO)
(42)
Source
3
S-video
Input
Connector
(Y/C)
(43)
Source
3
Composite
Video
Signal
Input
Jack
(44)
Source
4
Audio
Input
Jack
(SOURCE
4
AUDIO)
(45)
Source
4
S-video
Input
Connector
(Y/C)
-14-
(46)
Source
4
Composite
Video
Signal
Input
Jack
(47)
Recording
Out
Audio
Output
Jack
(REC
OUT
AUDIO)
(48)
Recording
Out
S-video
Output
Connector
(REC
OUT
Y/C)
(49)
Recording
Out
Composite
Video
Signal
Output
Jack
(50)
GPI
Connector
(GPI)
Refer
to
the
qualified
service
personel
or
system
-
installers
for
this
connection.
(51)
Preview
Output
Connector
Connect
to
video
input
connector
of
the
preview
monitor.
(52)
Serial
Connector
(SERIAL)
Refer
to
the
qualified
service
personel
or
system
Insiallers
for
this
connection.
(53)
Power
Socket
(AC
IN)
Connect
the
Power
Cord
(provided)
to
this
socket.
SYSTEM
CONNECTION
ee
ww
wale
ea
(I
weno
ee
le
Output
Monitor
Preview
Monitor
@
Composite
(RCA-style)
video
and
audio
@)
S-video
(Y/C)
BASIC
OPERATIONS
Press
the
Power
Switch
on
the
side
panel
to
the
ON
position.
The
LED's
on
the
operation
panel
light
up
as
shown
and
the
unit
is
now
in
initial
mode
for
operation.
E
Input
Signal
Selection
1
.
Slide
the
Mix/Wipe
Control
to
the
A-bus
posi-
Blinking
tion.
2.
Press
any
of
the
SOURCE
1,
SOURCE
2,
SOURCE
3,
SOURCE
4
and
BACK
COL.
but-
tons.
You
will
see
each
picture
on
the
screen.
3.
Press
BACK
COL.
button.
The
LED
on
the
other
button,
which
was
selected
last
time,
starts
blinking.
As
for
the
Back
Color
Selection,
see
to
“Back
Color
Setting”
on
page
31.
The
same
procedures
apply
to
the
B-bus.
E
Video
Mix
1
»
Press
WIPE/MIX
button.
3.
Press
one
of
the
B-bus
selection
buttons.
2.
Press
one
of
the
A-bus
Selection
buttons.
4.
Operate
the
Mix/Wipe
Control.
X3:
Back
color
selection
is
not
possible.
X1:
This
pattern
should
be
controlled
with
Auto
Take
Button
only.
X2:
Desolve
operation
—
®
D
©
£
2]
3
D
co
9
®
O
©
£
2)
J
Q
<
E
e
—
t-
®
D
c
oe
£L
O
—
N
O
o
oS
E
uJaned
edi
aIseg
waned
ƏdıM
dS
Y
Z
O
x
or
m
o
O
a
al
a
”
O
=
T T
or
O
cd
z
O
w
ES
=
O
D
2
>
ES
O
Wipe
Description
3:
Back
color
selection
is
not
possible.
3:
This
pattern
should
be
controlled
with
Auto
Take
Button
only.
312:
Desolve
operation
—
w
D
cu
£
u)
pa]
=
oO
o
—
D
o
[q]
£
wy
a
Q
<
z
©
=
£
Q
o
Cc
©
<=
g
un
w
o
Oo
£
Wipe
Pattern
uJayeg
edi
jeloads
-18-

Other manuals for WJ-AVE55

1

Other Panasonic Music Mixer manuals

Panasonic Ramsa WR-S4412 User manual

Panasonic

Panasonic Ramsa WR-S4412 User manual

Panasonic KX-T7740E User manual

Panasonic

Panasonic KX-T7740E User manual

Panasonic WU-SX01 User manual

Panasonic

Panasonic WU-SX01 User manual

Panasonic WU-SX06 User manual

Panasonic

Panasonic WU-SX06 User manual

Panasonic KX-T7640 User manual

Panasonic

Panasonic KX-T7640 User manual

Panasonic WRDA7A - DIGITAL AUDIO MIXER User manual

Panasonic

Panasonic WRDA7A - DIGITAL AUDIO MIXER User manual

Panasonic Ramsa WR-S4412 User manual

Panasonic

Panasonic Ramsa WR-S4412 User manual

Panasonic KX-T7740 User manual

Panasonic

Panasonic KX-T7740 User manual

Panasonic WJMX50A - DIGITAL MIXER User manual

Panasonic

Panasonic WJMX50A - DIGITAL MIXER User manual

Panasonic WR-XS3 User manual

Panasonic

Panasonic WR-XS3 User manual

Panasonic Ramsa WR-DA7 mkII User guide

Panasonic

Panasonic Ramsa WR-DA7 mkII User guide

Panasonic WJMX1200AK - WORK STATION MAIN User manual

Panasonic

Panasonic WJMX1200AK - WORK STATION MAIN User manual

Panasonic AG-HMX100 User manual

Panasonic

Panasonic AG-HMX100 User manual

Panasonic FZ-1 User manual

Panasonic

Panasonic FZ-1 User manual

Panasonic AG-HMX100 User manual

Panasonic

Panasonic AG-HMX100 User manual

Panasonic Ramsa WR-DA7 mkII User manual

Panasonic

Panasonic Ramsa WR-DA7 mkII User manual

Panasonic AG-HMX100E User manual

Panasonic

Panasonic AG-HMX100E User manual

Panasonic SHMX1200 - MIXER User manual

Panasonic

Panasonic SHMX1200 - MIXER User manual

Panasonic RAMSA WR-S208 User manual

Panasonic

Panasonic RAMSA WR-S208 User manual

Panasonic Ramsa WR-DA7 mkII User manual

Panasonic

Panasonic Ramsa WR-DA7 mkII User manual

Panasonic SH-MZ1200PP User manual

Panasonic

Panasonic SH-MZ1200PP User manual

Panasonic WRM10 - RAMSA CONSOLES User manual

Panasonic

Panasonic WRM10 - RAMSA CONSOLES User manual

Panasonic Ramsa WR-DA7 mkII User manual

Panasonic

Panasonic Ramsa WR-DA7 mkII User manual

Panasonic WJ-AVE5 User manual

Panasonic

Panasonic WJ-AVE5 User manual
Popular Music Mixer manuals by other brands

Harman SoundCraft MONITOR 2 user guide

Harman

Harman SoundCraft MONITOR 2 user guide

Rane SM 82S Operator's manual

Rane

Rane SM 82S Operator's manual

Fostex FM-3 owner's manual

Fostex

Fostex FM-3 owner's manual

Waves SSL 4000 E Specification sheet

Waves

Waves SSL 4000 E Specification sheet

Stanton Professional Performance Mixer SK FIVE owner's manual

Stanton

Stanton Professional Performance Mixer SK FIVE owner's manual

SoundCraft SPIRIT LIVE 42 user guide

SoundCraft

SoundCraft SPIRIT LIVE 42 user guide

Denon DN-508MXA quick start guide

Denon

Denon DN-508MXA quick start guide

Roland V-02HD owner's manual

Roland

Roland V-02HD owner's manual

Ecler eSAM603 user manual

Ecler

Ecler eSAM603 user manual

Mackie HUI reference guide

Mackie

Mackie HUI reference guide

Phonic POWERPOD 740 DELUXE user manual

Phonic

Phonic POWERPOD 740 DELUXE user manual

Midas PRO2 Setup guide

Midas

Midas PRO2 Setup guide

SoundCraft GIGRAC 1000st user guide

SoundCraft

SoundCraft GIGRAC 1000st user guide

IMG STAGE LINE MMX-206 instruction manual

IMG STAGE LINE

IMG STAGE LINE MMX-206 instruction manual

Rolls MX34c LiveMix Quick start operation guide

Rolls

Rolls MX34c LiveMix Quick start operation guide

Cosmotronic Cosmix manual

Cosmotronic

Cosmotronic Cosmix manual

Denon DN-X1500S - DJ Mixer operating instructions

Denon

Denon DN-X1500S - DJ Mixer operating instructions

JK Audio RemoteMix 3.5 user guide

JK Audio

JK Audio RemoteMix 3.5 user guide

manuals.online logo
manuals.online logoBrands
  • About & Mission
  • Contact us
  • Privacy Policy
  • Terms and Conditions

Copyright 2025 Manuals.Online. All Rights Reserved.