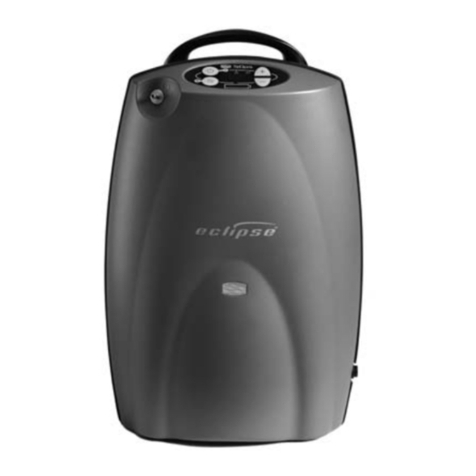
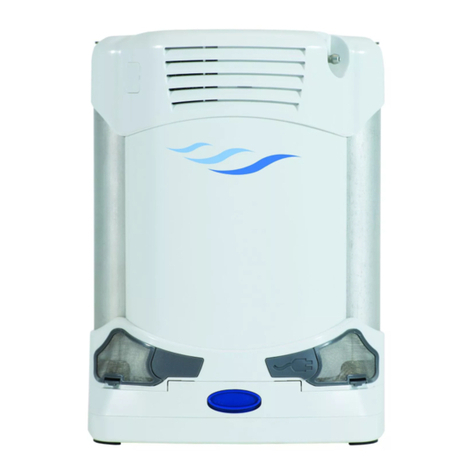
Panasonic SimplyGo User manual

1083703
1069062 R2
JH 12/22/11 SimplyGo USER MANUAL

Table of ConTenTs
Introduction ��������������������������������������������������������������������������������������������������������������������������������1
Intended Use������������������������������������������������������������������������������������������������������������������������1
Contraindications���������������������������������������������������������������������������������������������������������������1
Device and Accessories Description����������������������������������������������������������������������������1
SimplyGo System ��������������������������������������������������������������������������������������������������������������2
Warnings and Cautions����������������������������������������������������������������������������������������������������3
Symbol Key���������������������������������������������������������������������������������������������������������������������������6
How to Contact Philips Respironics�����������������������������������������������������������������������������6
Getting Started���������������������������������������������������������������������������������������������������������������������������7
Battery Duration Times ����������������������������������������������������������������������������������������������������7
System Overview����������������������������������������������������������������������������������������������������������������8
Inserting and Removing the Batteries��������������������������������������������������������������������� 10
Charging the Battery with the AC Power Supply�������������������������������������������������12
Operating the SimplyGo Device��������������������������������������������������������������������������������������� 13
Power Options������������������������������������������������������������������������������������������������������������������ 13
Device Warm-Up Breathing����������������������������������������������������������������������������������������� 14
Operating Modes ������������������������������������������������������������������������������������������������������������ 14
Operating the SimplyGo Device and Changing Device Settings�������������������16
Alarm Indicators and Screen Symbols���������������������������������������������������������������������������� 19
Troubleshooting��������������������������������������������������������������������������������������������������������������������� 25
Caring for your Battery��������������������������������������������������������������������������������������������������������� 26
Battery Storage ���������������������������������������������������������������������������������������������������������������� 26
Connecting the Humidier ������������������������������������������������������������������������������������������������ 27
Caring for your SimplyGo System ������������������������������������������������������������������������������������ 28
Cleaning the Device and Rechargeable Battery���������������������������������������������������28
Cleaning the Accessories���������������������������������������������������������������������������������������������� 29
Device Storage ����������������������������������������������������������������������������������������������������������������� 29
Device Disposal���������������������������������������������������������������������������������������������������������������� 29
SimplyGo Portable Oxygen Concentrator Mobility��������������������������������������������������� 30
SimplyGo Carrying Case������������������������������������������������������������������������������������������������30
SimplyGo Accessory Bag ���������������������������������������������������������������������������������������������� 31
SimplyGo Mobile Cart���������������������������������������������������������������������������������������������������� 31
Traveling With Your System ����������������������������������������������������������������������������������������������� 31
By Motor Vehicle�������������������������������������������������������������������������������������������������������������� 32
By Bus or Train������������������������������������������������������������������������������������������������������������������ 32
On Arrival���������������������������������������������������������������������������������������������������������������������������� 32
Specications��������������������������������������������������������������������������������������������������������������������������� 33
Standards Compliance �������������������������������������������������������������������������������������������������� 35
Classication ��������������������������������������������������������������������������������������������������������������������� 35
EMC Information��������������������������������������������������������������������������������������������������������������������� 36
Limited Warranty�������������������������������������������������������������������������������������������������������������������� 38
© 2011 Koninklijke Philips Electronics N�V� All rights reserved.

1
SimplyGo User Manual
Introduction
Intended Use
The Philips Respironics SimplyGo Portable Oxygen Concentrator is for
prescription use by patients requiring high concentrations of oxygen on a
supplemental basis� It is small, portable, and is capable of continuous use in
the home, institutional, and travel /mobile environments�
Contraindications
• Thisdeviceisnotintendedtobelife-sustainingorlife-supporting.
• Thisdeviceisnotintendedfornewbornandinfantuse.
Device and Accessories Description
The SimplyGo Portable Oxygen Concentrator, its features, and its accessories
are described in detail in this manual� Read and understand it completely
before operating the device�
This manual applies to the following accessories:
• ACPowerSupply
• ACPowerCord
• DCPowerSupply
• RechargeableLithiumIonBattery
• CarryingCase
• AccessoryBag
• MobileCart
• Humidier
This manual does not apply to the following accessory items sold separately:
• StandardSingleLumenNasalCannula
• SimplyGoSmartBatteryCharger/Recalibrator

2
SimplyGo User Manual
SimplyGo System
The device comes with the following items� If any are missing, contact your
equipment provider�
• SimplyGoDeviceinCarryingCase
with Shoulder Strap
• ThisUserManual
• RechargeableBattery
• ACPowerSupplyandCord
• DCPowerSupply
• AccessoryBag
• MobileCart

3
SimplyGo User Manual
Warnings and Cautions
Warnings
A warning represents the possibility of harm to the operator or patient�
• Theoperatorshouldreadandunderstandthisentiremanualbefore
using the device�
• Thedeviceisnotintendedforlifesupport.Wheretheprescribing
health care professional has determined that an interruption in the
supply of oxygen, for any reason, may have serious consequences
to the user, an alternate source of oxygen should be available for
immediate use�
• Geriatricoranyotherpatientunabletocommunicatediscomfort,or
hear or see the alarms while using this device, may require additional
monitoring�
• Oxygensupportscombustion.Oxygenshouldnotbeusedwhile
smoking or in the presence of an open ame�
• Donotusethedeviceinthepresenceofaammableanaesthetic
mixture in combination with oxygen or air, or in the presence of
nitrous oxide�
• Donotuseoilorgreaseontheconcentratororitscomponentsas
these substances, when combined with oxygen, can greatly increase
the potential for a re hazard and personal injury�
• Ifyounoticeanyofthefollowing,discontinueuseandcontactyour
home care provider:
- unexplained changes in the performance of this device
- unusual or harsh sounds
- dropped or mishandled device or the power supply
- water spilled into the enclosure
- broken enclosure
• UseonlywithPhilipsRespironicsSimplyGoACpowersupply.
• UseonlywithPhilipsRespironicsSimplyGobatteries.
• UseonlyapprovedSimplyGoaccessories.

4
SimplyGo User Manual
• RepairsandadjustmentsmustbeperformedbyPhilipsRespironics
authorized service personnel only� Unauthorized service could cause
injury, invalidate the warranty, or result in costly damage�
• Periodicallyinspectelectricalcords,cables,andthepowersupplyfor
damage or signs of wear� Discontinue use and replace if damaged�
• Toavoidelectricshock,unplugthedeviceandremovethebatteries
before cleaning the bag� DO NOT immerse the device in any uids�
• Yourhomecareproviderisresponsibleforperformingappropriate
preventive maintenance at the intervals recommended by Philips
Respironics�
• Forproperoperation,yourdevicerequiresunobstructedventilation.
Always make sure any openings in the case are not obstructed by
items which may impede ventilation� Do not place the device in a
small closed space (such as a closet)� The device should not be used
adjacenttoorstackedwithotherequipment.Formoreinformation,
contact your home care provider�
• Donotuseanextensioncord.
• Deviceoperationaboveoroutsideofthevoltage,breathrate,
temperature, humidity and/or altitude values specied may decrease
oxygen concentration levels�
• Neverdroporinsertanyobjectintoanyopening.
• Beawarethattheelectricalcordand/ortubingcouldpresenta
tripping or strangulation hazard�
• UseonlypowercordssuppliedbyPhilipsRespironicsforthisdevice.
Use of power cords not supplied by Philips Respironics may cause
overheating or damage to the device and may result in increased
emissions or decreased immunity of the equipment or system�
• Donotoperatewithoutthebatteryinstalledandworking.Ifprimary
power is lost with no battery in place, the device will stop operating
without warning the user� If the device must be operated without the
battery, the user should be aware that there is no backup power and
no warning if primary power is lost�
• MedicalElectricalEquipmentneedsspecialprecautionsregarding
EMC and needs to be installed and put into service according to the
EMC information provided in this manual�
• Placethedeviceinalocationsoastoavoidpollutantsandfumes.
Warnings (continued)

5
SimplyGo User Manual
• PortableandMobileRFCommunicationsEquipmentcanaect
Medical Electrical Equipment� See the EMC section of this manual
fordistancestoobservebetweenRFGeneratorsandtheSimplyGo
device to avoid interference�
Cautions
A caution represents the possibility of damage to the equipment�
• Donotimmersethedeviceorallowanyliquidtoentertheenclosure.
• Whenthedeviceisusedinanautomobile,disconnectitfromthe
DCautoadapteroutletwhentheautomobileisturnedo.Donot
operate the device in a non-running vehicle for an extended period
of time, as this may deplete the vehicle’s battery and prevent the
vehicle from starting� Do not allow the device to be connected to the
auto adapter outlet while starting the automobile normally or while
you are starting the automobile with battery recharging cables� Wait
until the automobile starts before connecting the device to the DC
power outlet� Secure the device securely when used in any moving
vehicle� (The same cautions apply if using the DC adapter outlet on a
boat or recreational vehicle�)
• Turnothedevicebeforeremovingthebattery.Thedeviceshould
not be operated without the batteries installed� If the device is
operated without the batteries installed, the standard shut-down
routine will not be implemented when the power is disconnected
priortoturningotheunit.Thiscanresultindamagetothedevice.
• Onlyusethesuppliedhandleandshoulderstraptocarryyourdevice.
With every use, verify that the case, shoulder strap and handle are in
good condition�
Note: Additional warnings, cautions, and notes are located throughout the
manual�

6
SimplyGo User Manual
Symbol Key
Consult
accompanying
instructions
for use
REF Model number
No smoking SN Serial number
No oil or grease TypeBFAppliedPart
Keep away from open
ames
+Rechargeable Battery
Do not disassemble
Drip proof equipment
Class II (Double
Insulated)
Separate collection
for electrical and
electronic equipment
per EC Directive
2002/96/EC�
DC power ~AC Power
Note: Also see the section on alarm indicators and screen symbols�
How to Contact Philips Respironics
To have your device serviced, contact your home care provider� If you need
to contact Philips Respironics directly, call the Customer Service
department at 1-724-387-4000 or +49 8152 93060� You can also use one of the
following addresses:

7
SimplyGo User Manual
Getting Started
Attach the shoulder strap to the carrying case�
Before using the SimplyGo device for the rst time, the SimplyGo battery
requires an initial uninterrupted charging time of 4 hours minimum� This can
be accomplished by installing the battery and using the AC Power Cord, as
described in the following pages�
Note: Philips Respironics does not recommend using DC power for this initial
charging�
Caution: Use only Philips Respironics batteries in your SimplyGo device�
Using other batteries could damage the device and will void the
warranty� Remove the battery if the SimplyGo will not be used for an
extended period of time�
Battery Duration Times
SimplyGo’s battery times vary depending on which operating mode (Pulse or
ContinuousFlow)isbeingusedandwhichsettingisselectedintheoperating
mode� SimplyGo is designed to allow easy access to the battery so that it is
easy to swap out and utilize extra batteries (sold separately) as needed� Extra
batteries t easily into the zippered pouch of the carrying case or in the handy
accessories bag� Additionally, extra batteries can be charged in the external
battery charger (sold separately) or in the SimplyGo device (see the “Charging
the Battery with the AC Power Supply” section), allowing maximum exibility
to meet your specic battery needs�
The following table shows the approximate battery durations for Pulse ow
settingsat20BPMandContinuousFlowsettingswhenthebatteryisfully
charged� Your times may vary based on your activity level, the condition of the
batteries, and the age of your SimplyGo device�
Pulse Dose seTTing ConTinuous flow seTTing
1 2 3 4 5 6 0�5 1 2
13�7
hours
3�5
hours
3�1
hours
2�7
hours
2�3
hours
1�9
hours
3�1
hours
2�3
hours
�7
hours
27�4
hours
7
hours
6�2
hours
5�4
hours
4�6
hours
3�8
hours
6�2
hours
4�6
hours
1�4
hour
311�1
hours
10�5
hours
9�3
hours
8�1
hours
6�9
hours
5�7
hours
9�3
hours
6�9
hours
2�1
hours
414�8
hours
14
hours
12�4
hours
10�8
hours
9�2
hours
7�6
hours
12�4
hours
9�2
hours
2�8
hours

8
SimplyGo User Manual
System Overview
Begin by becoming familiar with your SimplyGo device�
Item Description Function
1 Control Panel Control switches and LCD display
2 Carrying Handle Hand grip area for lifting and transporting
the device
3 Patient Cannula
Connector
Oxygen output and connection point for
patient cannula
4 Power Input
Connector
Connection point for Philips Respironics-
provided external power supplies: AC line
voltage, vehicle DC
5Air Exhaust Vent Air outlet for enclosure ventilation fan
6Air Intake Vent Air inlet for enclosure ventilation fan
7 Battery Rechargeable lithium-ion battery with
integrated handle used to remove and install
battery pack
8 Data Port Input-Output data communication with the
device�
Caution: For use by authorized service
personnel only.
1
2
34
5
6
7
8

9
SimplyGo User Manual
Control Panel
Item Description Function
1Power TurnsthedeviceOnandO
2 Alarm Silence Turnstheaudiblealarmo
3 Mode Selects one of the three possible operating
states of the device
4 Display Screen Shows information about the operating
status of the device
5 Plus (+)/Minus (–) + Increases the displayed setting; – Decreases
the displayed setting
6 Patient Cannula
Connector
Oxygen output and connection point for
patient cannula
Run Time Screen Description
Item Symbol Description Function
1 Operating Mode Fordetaileddescriptions,referto
the “Alarm Indicator and Screen
Symbols” section�
2 Battery Status
3 Setting
4 Breath Indicator
5 External Power Status
6 Audible Alarm Status
7Alarm Type

10
SimplyGo User Manual
Inserting and Removing the Batteries
Your SimplyGo device comes with one rechargeable lithium ion battery� To
insert it correctly, follow these steps�
1� Place your device in a well ventilated location and make sure it is
turnedo.
Note: The SimplyGo device is shipped from the factory with the battery
removed�
Caution: OnlyremovethebatterywhentheSimplyGoisturnedo.
Never remove the battery while the device is
operating�
2� To remove the battery, insert your ngers into
the opening in the battery handle� Steadily pull
upward on the handle until the battery is released
from the enclosure� Continue to lift the battery
until it is entirely removed from the battery
compartment� If the device has been operating,
the surfaces may be warm to the touch� This is
normal�
3� Check the battery gauge (shown below)� To do so, press the white
button (shown below) on the battery and watch how many LEDs
light up� If the batteries are low, you can recharge them� See the
Charging the Battery with AC Power Supply section�
No. of LEDs Battery Charge
4 LEDs Light: 75% to 100% full
3 LEDs Light: 50% to 75% full
2 LEDs Light: 25% to 50% full
1 LED Lights: 10% to 25% full
1 LED Blinks
3 Times:
Battery is less than
10% full and
needs to be
recharged

11
SimplyGo User Manual
4� To insert the battery, insert your
ngers into the opening in the
battery handle and grip the
handle between your ngers and
thumb� Position the battery over
the battery compartment in the
top, rear corner of the SimplyGo
enclosure with your ngers
pointing toward the handle� The
battery compartment is shaped
so that there is only one way the
battery can be inserted and this
will align the battery correctly�
Lower the battery into its compartment until the handle contacts
theequipmentenclosure.Firmlypushonthebatteryhandleuntilit
snaps into place in the enclosure top�
5� After the battery is inserted, check to make sure the battery handle is
level with or slightly below the top of the plastic case�
6� Momentarily depress the
Power key, and the following
should occur:
· The LCD and the 5 Key
backlights turn ON
· The screen shown here
displays on the LCD
If you do not see the battery symbol or the device does not turn On,
the battery is not installed correctly� Re-insert the battery and make
sure it snaps in place�

12
SimplyGo User Manual
Charging the Battery with the AC Power Supply
Important: The rst time you charge the battery, be sure to charge it fully� Do
not use the DC power cord to do so; instead use AC power�
Note: The battery will begin charging whenever you connect the device to an
AC outlet, even if you’re using it�
To charge the battery using the AC Power Cord provided with your system,
follow these steps�
1� Connect the AC Power Supply’s output cable to the SimplyGo power
input connector�
2� Connect the AC Power Cord’s connector into the AC power supply�
3� Connect the AC Power Cord’s plug into an AC outlet installed to meet
national or regional electrical code�
Note: As soon as you connect the device to an energized AC power source,
the light on the AC Power Supply lights up and the cooling fan turns on�
This is normal� The fan will run the entire time it is charging to keep the
battery cool�
4� When charging is complete (this takes four hours or less), disconnect
the AC Power Supply and store it with the AC Power Cord for future
use�
Note:Replacementandsparebatteriesareavailableseparately.For
information, contact your home care provider�
Note: An optional SimplyGo Smart Battery Charger/Recalibrator (sold
separately)isavailableforyoursystem.Formoreinformation,contact
your home care provider�
Indicates Charging
Indicates Battery Level

13
SimplyGo User Manual
Operating the SimplyGo Device
Power Options
Warning: Do not use the device without the battery installed and operating�
• Torunthedeviceonbatterypower,makesurethebatteryisproperly
inserted and suciently charged� (The battery should be fully
charged the rst time you use it�)
• To run the device using AC power, rst make sure you have a
battery installed� Then, follow these steps:
1� Connect the output cable of the AC Power Supply to the
SimplyGo power input connector�
2� Connect the AC Power Cord’s connector into the AC power
supply�
3� Connect the AC Power Cord’s plug into an AC outlet installed to
meet national or regional electrical code�
Note: The AC Power Supply is equipped with a green light, which illuminates
when it is connected to an energized AC power source�
• To run the device using DC power from an automobile or other
motorized vehicle, make sure the battery is installed� Start the vehicle
and connect one end of the DC Power Cord to the device’s power
inlet and the other end into the vehicle’s DC electrical outlet�
• To run the device using only the battery, insert the battery into
the battery compartment, check the charge level, and charge before
use if required� The charge level on your batteries can be checked by
following the instructions in the Inserting and Removing the Battery
section of this manual� If a battery requires charging, this can be
done as described in the Charging the Battery with the AC Power
Supply section� When the battery has adequate charge for your
intended use, turn the device on by pressing the Power button twice
as described in the Operating the SimplyGo Device and Changing
Device Settings sections.

14
SimplyGo User Manual
Device Warm-Up Breathing
When you turn on your SimplyGo device, it will sense if you are breathing
from it� If you are not yet breathing through the cannula, SimplyGo will begin
to pulse automatically about once every ve seconds� The only purpose of
this “device warm-up breathing” is to help the device warm up faster� As soon
as you begin breathing through the cannula, the device will begin delivering
pulses based on your breathing� Device warm-up breathing occurs only when
you rst turn on the device� You may begin breathing from the SimplyGo at
any time� If the device does not sense a breath after two minutes, a No Breath
alarm will sound�
Operating Modes
This section describes additional operating screens on the SimplyGo device�
1. Pulse Mode Screen
When the device is in the Pulse operating mode, it detects when the user
begins to take a breath and then delivers a pulsed volume of oxygen
determined by the setting number, during inhalation� If no breath is de-
tected for a period of time, the system automatically delivers the pulsed
volume of oxygen determined by the setting number at a fixed rate of
12 breaths per minute� If no breath is detected for 2 minutes, the device
signals an alarm and shuts down after 30 minutes�

15
SimplyGo User Manual
2. Continuous Flow Mode Screen
InContinuousFlowoperatingmode,aconstantflowofoxygenissup-
plied based on the setting number (in liters per minute):
• .5LPM
• 1LPM
• 1.5LPM
• 2.0LPM
3. Sleep Mode Screen
The Sleep operating mode is similar to the Pulse Mode� The device
detects when the user begins to take a breath using a more sensitive
detection level� The SimplyGo then delivers a pulsed volume of oxygen
determined by the setting number� During inhalation, a low amplitude
and longer pulse duration is used to make sleeping more comfortable� If
no breath is detected for a period of time, the system automatically deliv-
ers a continuous flow of oxygen at a rate consistent with the last used
ContinuousFlowModesetting.
Selecting the Operating Modes
You can use the Mode button (M) to select the device operating mode�
To select your operating mode:
1� Press the Mode button�
Note: If the device is operating and the screen is dark, the rst press turns on
the screen backlight� In this case, press the button a second time to
select the mode�

16
SimplyGo User Manual
2� Continue pressing the Mode button to scroll through the Pulse, Continu-
ousFlow,orSleepmodes.
3� When your desired mode appears in the display, stop pressing the button
and wait� The display will return to the run time screen of the mode you
selected, and the device will operate in this mode�
Operating the SimplyGo Device and Changing
Device Settings
You can change all device settings using the buttons on the control panel�
This includes starting the device, stopping it,
silencing an alarm, and changing oxygen ow�
To start your SimplyGo device, follow these steps�
1� Connect a nasal cannula to the patient
cannula connector on top of the device,
as shown� Ensure that the cannula is
routed to prevent it from being pinched
or kinked to avoid a disruption of oxygen ow�
Note: A standard single lumen nasal cannula and tubing (not supplied)
should be used to deliver oxygen from the SimplyGo device� The device
works with cannula tubing up to 30 ft� (9m)�
2� To start the device, press the Power button� After the rst press, the
display screen and the 5 button backlights turn on and you will see
a screen similar to the one shown below, left� If the battery capacity
is 1/2 full and the battery is being charged, the screen will appear as
shown at right�
Note: The symbols and alarms shown on these screens are discussed in detail
in the Alarm Indicators and Display Symbols section�

17
SimplyGo User Manual
3� Press the Power button a second time to place the device in
operating mode� This second press helps prevent unwanted starts
or inadvertent changes in oxygen ow� The Introductory screen
momentarily appears, shown at left below, followed by the nal
operating mode screen, shown at right�
Every time it starts up, the device starts producing oxygen to meet
the specied setting� It may take up to ten minutes to reach the
specied purity levels for the setting� It is safe to begin breathing
from the SimplyGo device immediately� Breathing from the device
will cause it to reach oxygen purity levels faster than ten minutes�
The dot in the lower right corner of the LCD display is the pulse
symbol� It appears whenever you take a breath and the device
delivers a pulse of oxygen�
Note: When it is turned on, the device will automatically start at the ow rate
settingusedwhenthedevicewaslastturnedo.Asaprecaution,each
time you start the device, verify the ow setting�
4� To set the device’s ow setting, press either the + or – button�
To increase the ow setting, press the + button� To decrease the ow
setting, press the – button�
The device can be set to 1, 1�5, 2, 2�5, 3, 3�5, 4, 4�5, 5, 5�5, and 6 in
Pulse or Sleep Mode� It can be set to �5, 1, 1�5, and 2 in Continuous
FlowMode.
Warning: It is very important to set your device to your prescribed level of
oxygen ow� Do not increase or decrease your ow rate from your
prescribed level until you rst consult with your physician�
Table of contents
Popular Oxygen Equipment manuals by other brands

C-Aire
C-Aire FreeStyle Quick reference guide

Halma
Halma Crowcon CellarSafe Installation and operating instructions

DeVilbiss
DeVilbiss drive 1025 Series Instruction guide

Ozotech
Ozotech Power Prep Phoenix Operation & maintenance manual

Dräger Medical
Dräger Medical EvitaXL Repair instructions

Invacare
Invacare Platinum IRC5LXAW Operator's manual